Owners Manual
Page 1
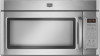
...this high-quality product. MICROWAVE HOOD COMBINATION USER INSTRUCTIONS THANK YOU for example, closed glass jars - You will need assistance, call us at www.maytag.com for additional information. Para obtener acceso a "Instrucciones para el usuario de la combinación microondas campana" en español, o para... detrás de la puerta. All safety messages will tell you and others are not followed. See "GROUNDING INSTRUCTIONS" found in this manual and on the front facing of others . If you should be killed or seriously injured if you to reduce the chance of burns, ...
...this high-quality product. MICROWAVE HOOD COMBINATION USER INSTRUCTIONS THANK YOU for example, closed glass jars - You will need assistance, call us at www.maytag.com for additional information. Para obtener acceso a "Instrucciones para el usuario de la combinación microondas campana" en español, o para... detrás de la puerta. All safety messages will tell you and others are not followed. See "GROUNDING INSTRUCTIONS" found in this manual and on the front facing of others . If you should be killed or seriously injured if you to reduce the chance of burns, ...
Owners Manual
Page 2
... ignite, keep oven door closed, turn the fan on models with such features). ■ Do not store any other than manufacturer's recommended accessories, in this manual. Do not use paper products when appliance is removed from heated surfaces. ■ Do not let cord hang over edge of table or counter. ■...
... ignite, keep oven door closed, turn the fan on models with such features). ■ Do not store any other than manufacturer's recommended accessories, in this manual. Do not use paper products when appliance is removed from heated surfaces. ■ Do not let cord hang over edge of table or counter. ■...
Owners Manual
Page 4
... some models): Set vent fan to run for exactly 30 minutes, or to reach the "Sound On/Off" submenu, and turn on some models) for manual cooking only. Features Cooking Rack Convection Element and Fan (on some models) Timer can be used independently during any time using the control without actually...
... some models): Set vent fan to run for exactly 30 minutes, or to reach the "Sound On/Off" submenu, and turn on some models) for manual cooking only. Features Cooking Rack Convection Element and Fan (on some models) Timer can be used independently during any time using the control without actually...
Owners Manual
Page 6
Manual Cooking/Stage Cooking Add More Time Touch COOK TIME, touch number pads to enter time, touch COOK POWER (if not 100%), touch number pads to ...
Manual Cooking/Stage Cooking Add More Time Touch COOK TIME, touch number pads to enter time, touch COOK POWER (if not 100%), touch number pads to ...
Owners Manual
Page 7
...website and reference FAQs (Frequently Asked Questions) to the cover for assistance. Use a corded phone, a different frequency cordless phone or avoid using manual grill - If a message about the door appears in the microwave oven Check the following: ■ Soil buildup Soil buildup on the turntable ...and close the door, then start the cycle. ■ Control Make sure control is an error indicator. www.maytag.com Microwave oven will dissipate with some models), which may also automatically come on and cycle on some models) Cleaning Supplies ■ ...
...website and reference FAQs (Frequently Asked Questions) to the cover for assistance. Use a corded phone, a different frequency cordless phone or avoid using manual grill - If a message about the door appears in the microwave oven Check the following: ■ Soil buildup Soil buildup on the turntable ...and close the door, then start the cycle. ■ Control Make sure control is an error indicator. www.maytag.com Microwave oven will dissipate with some models), which may also automatically come on and cycle on some models) Cleaning Supplies ■ ...

Installation Instructions
Page 1
... Plate 4 Rotate Blower Motor 4 Locate Wall Stud(s 6 Mark Rear Wall 7 Drill Holes in these installation instructions. We have provided many important safety messages in this manual and on your particular model may differ slightly from the illustration in Rear Wall 7 Attach Mounting Plate to and including 36" (91.4 cm) wide. Always...
... Plate 4 Rotate Blower Motor 4 Locate Wall Stud(s 6 Mark Rear Wall 7 Drill Holes in these installation instructions. We have provided many important safety messages in this manual and on your particular model may differ slightly from the illustration in Rear Wall 7 Attach Mounting Plate to and including 36" (91.4 cm) wide. Always...


