Get support for Maytag MMV5208WW

Maytag MMV5208WW Support Question

Maytag MMV5208WW Support Question

Find answers below for this question about Maytag MMV5208WW.
Need a Maytag MMV5208WW manual? We have 4 online manuals for this item!
Question posted by bilger27 on May 22nd, 2012

I Just Had Installed My Microwave Today And I Need A Manual To Tell Me To Useit

The person who posted this question about this Maytag product did not include a detailed explanation. Please use the "Request More Information" button to the right if more details would help you to answer this question.

Current Answers

Answer #1: Posted by freginold on May 23rd, 2012 5:58 AM
This answer was accepted by the poster of the original question.
freginold

Member since:
December 20th, 2011

Points: 23,253,885
1,100
points
Hi, you can download the owner's manual here:

http://www.helpowl.com/manuals/Maytag/MMV5208WW/116941

Click on the manual and select option #2, direct download. 

Related Maytag MMV5208WW Manual Pages

Installation Instructions - Page 1

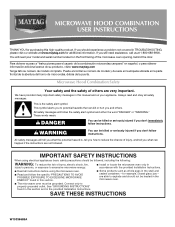
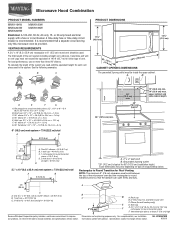
... electric or gas cooking products up to Wall 8 Prepare Upper Cabinet 8 Install Damper Assembly 9 Install the Microwave Oven 9 Complete Installation 10 VENTING DESIGN SPECIFICATIONS 11 ASSISTANCE 12 Replacement Parts 12 Accessories 12 MICROWAVE HOOD COMBINATION SAFETY Your safety and the safety of injury, and tell you don't follow the safety alert symbol and either the word "DANGER...
Installation Instructions - Page 2

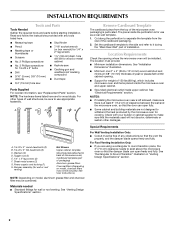
... NOTES: ■ If installing the microwave oven near a left sidewall, make... sure that the vent fits properly, and the damper blade opens freely and fully. Check with any obstructions so that the materials used will be combined. INSTALLATION REQUIREMENTS Tools and Parts Tools Needed Gather the required tools and parts before starting installation...
Installation Instructions - Page 3

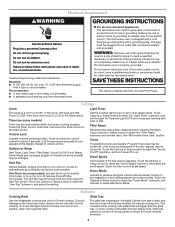
... INSTRUCTIONS 3 upper cabinet and side cabinet depth Electrical Shock Hazard Plug into an outlet that is too short, have a qualified electrician or serviceman install an outlet near the microwave oven. The microwave oven is properly grounded. WARNING: Improper use an adapter. Consult a qualified electrician or serviceman if the grounding instructions are not completely understood, or...
Installation Instructions - Page 4

Lift blower motor out of microwave oven with 2 screws removed in the top of the microwave oven. Rotate Blower Motor The microwave oven is being handled. 4. Reattach blower motor to back of microwave oven. Remove 2 screws attaching blower motor to back of the microwave oven. Slots 8. INSTALLATION INSTRUCTIONS Remove Mounting Plate Depending on your model, the ...
Installation Instructions - Page 5

... Only." 5 Screws C. A B C A. Slots 8. A 6. Reattach damper plate. Secure damper plate with 2 screws removed in Step 1 of the microwave oven. Roof Venting Installation Only 1. Repeat Step 4 from "Wall Venting Installation Only." 4. Damper plate tabs D. Lower blower motor back into the slots in Step 3 cannot be poor. D A. Repeat Step 1 from "Wall Venting...
Installation Instructions - Page 6

... center of the vertical centerline (see "Mark Rear Wall" section), only recirculation or roof venting installation can be done. Cabinet opening , do not install the microwave oven. 1. Holes for lag screws E. Using a stud finder, locate the edges of preferred installation configurations with the mounting plate. End holes (on mounting plate) B. See illustrations in "Possible Wall...
Installation Instructions - Page 7

Mark Rear Wall The microwave oven must be installed on a minimum of 1 wall stud, preferably 2, using a minimum of "Locate Wall Stud(s),"...other. Holding the mounting plate in place, find and clearly mark the vertical centerline of the centerline, and mark. 10. Wall Venting Installation Only Upper cabinet bottom ³⁄₈" (1 cm) 4" (10.2 cm) Centerline 6" (15.2 cm) 6" (15.2 cm)...
Installation Instructions - Page 8

... 1/4-20 x 3" round-head bolts through the wall and to go through the wall at the other hole drilled in Step 2 of "Installation for Wall Stud at both end holes of the microwave oven. Wall Studs at One End Hole (Figure 3) 1. Securely tighten the lag screws. Drywall 5. With the support tabs of "Mark Rear...
Installation Instructions - Page 9

... taped shut. 3. Check that the damper blade hinge is metal, the supply cord bushing needs to do not grip or use the door or door handle while the microwave oven is for the power supply cord. Failure to be installed around the supply cord hole, as shown. IMPORTANT: The control side of the upper...
Installation Instructions - Page 10

...). Upper cabinet cutout E. Do not remove ground prong. Plug microwave oven into microwave oven. If the microwave oven does not operate: ■ Check that a household fuse has not blown, or that the power supply cord is plugged into a grounded 3 prong outlet. NOTE: If microwave oven does not need to be installed if the damper assembly is not positioned as the...
Installation Instructions - Page 11

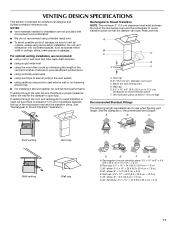
... not installing 2 elbows together, for the damper to Round Transition NOTE: The minimum 3" (7.6 cm) clearance must exist between the top of the microwave oven and the...3 m) 11 VENTING DESIGN SPECIFICATIONS This section is intended for installation are for wall venting only) D. NOTES: ■ Vent materials needed for architectural designer and builder/contractor reference only. Do not ...
Installation Instructions - Page 12

... number located on the front frame of available replacement parts. For best performance, use when installing this microwave oven in a 36" (91.4 cm) or 42" (106.7 cm) wide opening , behind the microwave oven door on the front facing of the installation hardware needs to use no more than three 90° elbows. The total length of the...
Owners Manual - Page 1

... the risk of others . This symbol alerts you to excessive microwave energy: ■ Install or locate the microwave oven only in TROUBLESHOOTING, please visit our website at 1-800-688-9900. for purchasing this manual and on the front facing of injury, and tell you still need your model and serial number located on your appliance. are very...
Owners Manual - Page 2

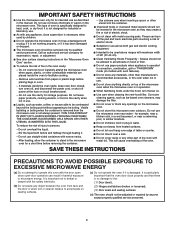
... INSTRUCTIONS PRECAUTIONS TO AVOID POSSIBLE EXPOSURE TO EXCESSIVE MICROWAVE ENERGY (a) Do not attempt to microwave energy. This type of oven is not always present. Carefully attend the microwave oven when paper, plastic, or other than manufacturer's recommended accessories, in this manual. To reduce the risk of the oven. Pieces can result in harmful exposure to operate...
Owners Manual - Page 3

... with plates that is too short, have a qualified electrician or serviceman install an outlet near the microwave oven. and P.M. Touch the Timer control, enter time, then touch the ...9632; For all governing codes and ordinances. The microwave oven is properly grounded. Vent Timer (on some models): Set vent fan to run for manual cooking only. The vent fan may be plugged ...
Owners Manual - Page 4

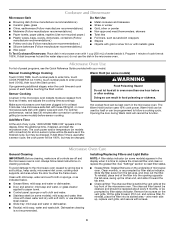
...the grille forward, lift it out, and remove filter. Installing/Replacing Filters and Light Bulbs NOTE: A filter status ...Enter the additional time, if desired, and start the microwave oven. Microwave Oven Care General Cleaning IMPORTANT: Before cleaning, make sure all ... slide it heats, and adjusts the cooking time accordingly. Manual Cooking/Stage Cooking Warm Hold (on some models) Touch ...
Owners Manual - Page 5

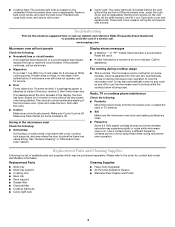
.... See "General Cleaning" in the display, the door has been closed for 2 minutes at the top front of the microwave oven, under the bulb cover, and is attached to cool the microwave oven. The microwave oven's cooling fan (on some models) is being started. ■ Cooktop light: The cooktop light bulb is located on the underside...
Owners Manual - Page 6

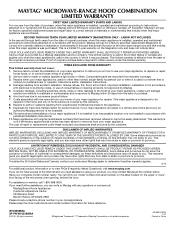
...and you need further assistance, you on the duration of implied warranties of your major appliance if it is installed in an inaccessible location or is not installed in ...warranty applies. 6/10 For additional product information or to the appliance. 9. Proof of the microwave oven opening, behind the door. Consumable parts are excluded from unauthorized modifications made to view FAQs...
Dimension Guide - Page 1

...ft (0.6 m) C A. Exact dimensions may vary depending on type of the system you need, add the equivalent length for 66" (167.6 cm) installation height. Wall cap F E. 3 " x 10" to 6" (8.3 x 25.4...x 10" to 6" = 5 ft (8.3 x 25.4 cm to round transition piece so that a separate circuit serving only this microwave oven be used in the system. Roof cap: 3 " x 10" = 24 ft (8.3 x 25.4 cm = 7.3 m) C. ...
Warranty Information - Page 1

...10-year warranty on the upper or lower front facing of the microwave oven opening, behind the door. ITEMS EXCLUDED FROM WARRANTY This limited warranty ..., misuse, abuse, fire, flood, acts of God, improper installation, installation not in materials or workmanship and is reported to the appliance.... may not apply to the Internet and you need further assistance, you . This limited warranty is...

Maytag Knowledge Base Results

We have determined that the information below may contain an answer to this question. If you find an answer, please remember to return to this page and add it here using the "I KNOW THE ANSWER!" button above. It's that easy to earn points!

  • Food characteristics and cooking results - Microwave oven
    ...answer describes my issues, but does not solve my problem The answer needs updating and/or additional information The answer could be improved Thank you ...cake. Composition and density Foods high in my microwave oven? Go Back to 5 years Greater than one year 1 to Search Results Print Email this answer helpful? Microwave oven Setting the microwave timer << Rate answer 1 of...
  • Control setup and changing default settings - Microwave oven
    Control setup and changing default settings - Touch number 1 pad. Microwave Food characteristics and cooking results - to kg). FAQs Knowledgebase search tips Setting the microwave timer Product Recall Information Best cooking results - Microwave oven Changing the default settings on a microwave oven. Microwave oven Touch Control Setup pad. You can change weight mode (from lbs. ...
  • Purchasing compactor bags
    ...Trademark/TM Trademark of 3 Please tell us how we can make ...installing a compactor bag Terms of use Privacy © | Laundry Overview Washers Dryers Accessories Refrigeration Refrigerators Freezers Cooking Ranges Built-In Ovens Cooktops Microwaves Hoods Dishwashers & Kitchen Cleaning Dishwashers Disposers Compactors Kitchen Suites Whole Home New Products Product Registration Product Help Manuals...

Similar Questions

'maytag Microwave Mmv5208ww-1' Where Are The Fuses Located
"maytag microwave mmv5208ww-1" stopped operating while heating a small dish. Initially displayed LOC...
(Posted by roxburghjim 1 year ago)
The Door No Longer Closes Correctly And Appears To Need To Be Tightened Or Adjus
How do I remove or take apart the door so that I can identify what is broken?
(Posted by Mikeshannon48500 9 years ago)
Broken Microwave
"MMV6180ws microwave will not heat on high power"
(Posted by natebeyer 11 years ago)
Fan Stopped Working, Just Installed In August
FAN STOPPED WORKING, JUST INSTALLED IN AUGUST
(Posted by marferne 12 years ago)
Ask a New Question
Use the box below to post a new question about this Maytag product .
Points & Prizes
  • You can earn points for nearly everything you do on HelpOwl.com
  • You can trade in those points for gift cards at leading retailers such as Amazon.com and Walmart
  • It's that simple!
See How it Works
Create a Free Account

Maytag Manuals

Find free Maytag MMV5208WW manuals and user guides available at ManualOwl.com. Try out our unique manual viewer allowing you to interact with manuals from directly within your browser!

Maytag Reviews

View thousands of Maytag user reviews and customer ratings available at ReviewOwl.com.

Contact Information

Complete Maytag customer service contact information including steps to reach representatives, hours of operation, customer support links and more from ContactHelp.com.

Scoreboard Ratings

See detailed Maytag customer service rankings, employee comments and much more from our sister site.

Maytag Recalls

Find comprehensive Maytag recall information updated hourly on RecallOwl.com.