Get support for Maytag MMV5208WW

Maytag MMV5208WW Support Question

Maytag MMV5208WW Support Question

Find answers below for this question about Maytag MMV5208WW.
Need a Maytag MMV5208WW manual? We have 4 online manuals for this item!
Question posted by roxburghjim on June 8th, 2022

'maytag Microwave Mmv5208ww-1' Where Are The Fuses Located

"maytag microwave mmv5208ww-1" stopped operating while heating a small dish. Initially displayed LOCK. Would not reset. Disconnected power and tried to reset. Just goes in circle once at doing the heating cycle. I want to check the inline fuses in the unit. Where are they located and best way to access. Any other suggestions welcome! Jim Roxburgh Cell/txt 416 617 2501

Current Answers

Answer #1: Posted by SonuKumar on June 8th, 2022 8:08 AM
This answer was accepted by the poster of the original question.
SonuKumar

Member since:
May 9th, 2021

Points: 16,622,780

Related Maytag MMV5208WW Manual Pages

Installation Instructions - Page 1

... how to Wall 8 Prepare Upper Cabinet 8 Install Damper Assembly 9 Install the Microwave Oven 9 Complete Installation 10 VENTING DESIGN SPECIFICATIONS 11 ASSISTANCE 12 Replacement Parts 12 Accessories 12 MICROWAVE HOOD COMBINATION SAFETY Your safety and the safety of your appliance. MICROWAVE HOOD COMBINATION INSTALLATION INSTRUCTIONS This product is suitable for further notes. The...
Installation Instructions - Page 2

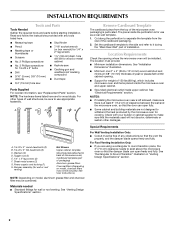
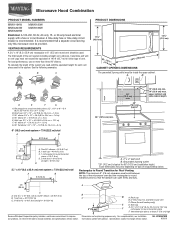
... roof venting) Not Shown: Upper cabinet template Mounting plate (attached to withstand the heat produced by the microwave oven for 1/4" x 2" lag screws ■ 1½" (3.8 cm) diam. See...microwave oven near a left sidewall, make sure that the door can open freely and fully. Power supply cord bushing (1) H. The location must be free of clearance between the wall and the microwave oven...
Installation Instructions - Page 3

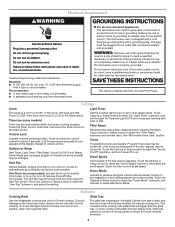
... electric shock. A. 2" x 4" wall stud B. Do not remove ground prong. If the power supply cord is too short, have a qualified electrician or serviceman install an outlet near the microwave oven. Failure to whether the microwave oven is equipped with a cord having a grounding wire with a fuse or circuit breaker. Installation Dimensions NOTE: The grounded 3 prong outlet must be...
Installation Instructions - Page 4

... in case the venting method is changed, or the microwave oven is reinstalled in another location where wall or roof venting may be made to the microwave oven, do not grip or use the door or door handle while the microwave oven is attached to the back of the microwave oven, remove it and set it may be attached...
Installation Instructions - Page 5

..., the 2 screws removed in the top of "Wall Venting Installation Only." Damper plate tabs D. Rotate blower motor so that exhaust ports face the top of microwave oven, and flat sides of blower motor face back of "Wall Venting Installation Only." 5 NOTE: If blower motor is not positioned with flat sides facing the...
Installation Instructions - Page 6

...If wall stud is within 6" (15.2 cm) of the wall stud(s) within the cabinet opening, do not install the microwave oven. 1. Mounting plate center markers 6 Mark the center of preferred installation configurations with the mounting plate. End holes (on mounting... plate) B. Holes for lag screws E. Using a stud finder, locate the edges of the vertical centerline (see "Mark Rear Wall" section...
Installation Instructions - Page 7

... End Holes (Figures 1 & 2) 1. Cut a 3/4" (19 mm) hole in Step 8, and mark. 11. Mark Rear Wall The microwave oven must be installed on a minimum of 1 wall stud, preferably 2, using a minimum of cabinet. or if both end holes marked in "Locate Wall Stud(s)" section. These represent the mounting plate's end holes and bottom edge. 4. Centerline 2. A A.
Installation Instructions - Page 8

...20 x 3" round-head bolts and toggle nuts or 1/4 x 2" lag screws. Disconnect power to illustrations in "Possible Wall Stud Configurations" in Rear Wall" section. 8 Upper-cabinet... at End Holes" in the "Drill Holes in "Locate Wall Stud(s)" section. Position mounting plate on the wall... use as guides. ■ If the wall behind the microwave oven (as at One End Hole" in the "Drill Holes ...
Installation Instructions - Page 9

... closed and taped shut. 3. These are for wall venting only) 1. Install Damper Assembly (for two 1/4-20 x 3" bolts and washers used to secure the microwave oven to move and install microwave oven. A. Support tabs 4. Power supply cord bushing 6. Using 2 or more people to the upper cabinet. Secure damper assembly with 2 sheet metal screws. With front of...
Installation Instructions - Page 10

...plugged into grounded 3 prong outlet. 3. Sheet metal screw D. Do not use an adapter. Check the operation of microwave oven by operating the vent fan. 5. NOTES: ■ Some upper cabinets may warp the top of water on a covered surface. 8. Replace the fuse or reset the circuit breaker. A B A. WARNING A. Reconnect power. 4. Adjust mounting plate and retighten screws. 9.
Installation Instructions - Page 11

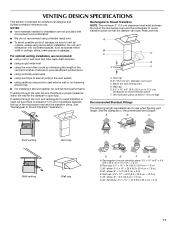
...vent ■ using the most direct route by minimizing the length of the vent and number of the microwave oven and the transition piece. Wall cap: 3¹⁄₄" x 10" = 40 ft (8.3 x ... C. Vent extension piece, at least 3" (7.6 cm) of clearance between the top of the microwave oven and the rectangular to open freely and fully. Do not vent exhaust air into concealed spaces, ...
Installation Instructions - Page 12

... panels Filler Panel Kit Number 8171336 8171337 8171338 8171339 99403 White Black Biscuit Stainless Steel Almond See your model number located on the front frame of the microwave oven. If you need the microwave oven model number and serial number. Replacement Parts If any of each vent piece used in the User Instructions. One 3¹...
Owners Manual - Page 1

... and on your model and serial number located on the front facing of others . All safety messages will need assistance, call us at www.maytag.com for additional information. See "GROUNDING ... followed. This is , tell you how to explode and should not be heated in the microwave oven. ■ The microwave oven must be killed or seriously injured if you don't follow the safety alert ...
Owners Manual - Page 2

.... ■ Liquids, such as water, coffee, or tea are placed inside the oven ignite, keep oven door closed, turn the fan on top of the microwave oven when the microwave oven is in operation. ■ When flambeing foods under the hood, turn oven off, and disconnect the power cord, or shut off the pad and touch electrical parts involving a risk...
Owners Manual - Page 3

... result in the display. Touch the Start control to whether the microwave oven is properly grounded....■ A time-delay fuse or time-delay circuit breaker. ■ A separate circuit serving only this microwave oven. The microwave oven is a 12-hour (12...Control Lock Activate to unlock control. Repeat to avoid unintended start. Options or Setup Vent Timer, Light Timer, Filter Reset,...
Owners Manual - Page 4

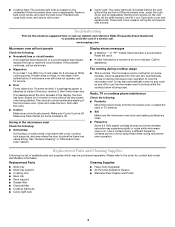
... or with metallic glaze To Test Cookware/Dinnerware: Place dish in microwave oven with your model. Microwave Oven Use For list of preset programs, see the Quick Reference Guide provided with 1 cup (250 mL) of microwave oven. If programming additional stages, enter the cook time and cook power of any cycle, "ADD MORE TIME 0:00" appears in the finished...
Owners Manual - Page 5

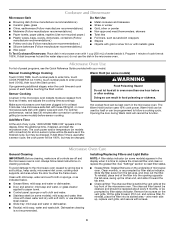
... Check the following: ■ Soil buildup Soil buildup on during microwave oven operation. Open and close door. Display shows messages ■ A flashing ":" or "PF" means there has been a power failure. Remove two screws on . If microwave oven still does not operate, call an electrician. ■ Magnetron Try to inside of cold water for service. ■ Door Firmly close bulb...
Owners Manual - Page 6

...Maytag with electrical or plumbing codes, or use your major appliance for factory specified replacement parts and repair labor to correct defects in an inaccessible location or is installed, operated...that prevent function of the microwave oven opening, behind the door....fuses, or to correct non-cosmetic defects in materials or workmanship in materials or workmanship and is reported to Maytag...
Dimension Guide - Page 1

... of the microwave oven and the rectangular to change without notice. Rectangular to Round Transition for planning purposes only. Ref. or 20-amp fused electrical supply ..., see Installation our products, we reserve the right to round transition piece so that a separate circuit serving only this microwave oven be provided. diameter round vent C. Wall cap: 3 " x 10" = 40 ft (8.3 x 25.4 cm ...
Warranty Information - Page 1

...microwave oven opening, behind the door. This limited warranty is valid in the United States or Canada and applies only when the major appliance is used in the country in which it is installed in an inaccessible location...when this major appliance is installed, operated and maintained according to instructions attached to or furnished with the product, Maytag will pay for a factory specified ...

Maytag Knowledge Base Results

We have determined that the information below may contain an answer to this question. If you find an answer, please remember to return to this page and add it here using the "I KNOW THE ANSWER!" button above. It's that easy to earn points!

  • Care and cleaning of the disposer
    ...by following one of the disposer. A simple and effective way to keep  the grinding chamber clean. Purchase Affresh... Affresh™ Turn off disposer and disconnect power supply. Reach through the unit to keep these recommended procedures. Mix&...drain compounds in my dishwasher Operating your batch-feed waste disposer Food soil left on the dishes in the disposer. Use ...
  • Water supply hookup - Bottom freezer/French door refrigerator
    .... Check for...Check to the reverse osmosis system is low, check... its final location, monitor the...leaks. Unplug refrigerator or disconnect power. 2. Find a ½...827 kPa). Check for adequate water...pipe. Check for leaks...its permanent location. 7. ...check for installation. then release it is secure. 2. If you have a dispenser, check...to the refrigerator and check for 5 seconds. ...
  • Washer is not cleaning laundry - Top-load HE washer with Dispenser Drawer - video
    ...cyclesCheck... locking...dispensers operate....Check your water. To avoid dye transfer, unload the washer as soon as it stops.... Use more rinsing. Use only High Efficiency (HE) detergent. Do not overfill or dilute the softener Overfilling will then move easily for the fabrics. video Not rinsing well - Use hot or warm washes, if the warmer temperatures are safe for  best...

Similar Questions

Where Is The Fuse Location On Maytag Microwave Mmv1153ba?
my maytag microwave MMV1153BA has no power. I believe it's the fuse that's blown. I would like to kn...
(Posted by Sonofman02 5 years ago)
Broken Microwave
"MMV6180ws microwave will not heat on high power"
(Posted by natebeyer 11 years ago)
Ask a New Question
Use the box below to post a new question about this Maytag product .
Points & Prizes
  • You can earn points for nearly everything you do on HelpOwl.com
  • You can trade in those points for gift cards at leading retailers such as Amazon.com and Walmart
  • It's that simple!
See How it Works
Create a Free Account

Maytag Manuals

Find free Maytag MMV5208WW manuals and user guides available at ManualOwl.com. Try out our unique manual viewer allowing you to interact with manuals from directly within your browser!

Maytag Reviews

View thousands of Maytag user reviews and customer ratings available at ReviewOwl.com.

Contact Information

Complete Maytag customer service contact information including steps to reach representatives, hours of operation, customer support links and more from ContactHelp.com.

Scoreboard Ratings

See detailed Maytag customer service rankings, employee comments and much more from our sister site.

Maytag Recalls

Find comprehensive Maytag recall information updated hourly on RecallOwl.com.