Maytag MMV4206BB Support and Manuals
Get Help and Manuals for this Maytag item
View All Support Options Below
Free Maytag MMV4206BB manuals!
Problems with Maytag MMV4206BB?
Ask a Question
Free Maytag MMV4206BB manuals!
Problems with Maytag MMV4206BB?
Ask a Question
Popular Maytag MMV4206BB Manual Pages
Installation Instructions - Page 1

... Installation 10 VENTING DESIGN SPECIFICATIONS 11 ASSISTANCE 12 Replacement Parts 12 Accessories 12
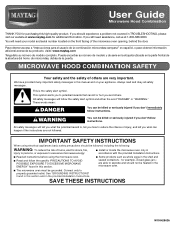
MICROWAVE HOOD COMBINATION SAFETY
Your safety and the safety of injury, and tell you what the potential hazard is the safety alert symbol. The appearance of your appliance. We have provided many important safety messages in this manual and on your particular model may...
Installation Instructions - Page 2

... transition piece, the 3" (7.6 cm) clearance needs to withstand the heat produced by the microwave oven for cooking. See User Instructions.)
NOTE: Depending on model, charcoal filters may be free of installation.
Cut along the perforation to it during
the "Mark Rear Wall" part of any tools listed here.
■ Measuring tape
■ Stud finder
■...
Installation Instructions - Page 4

... venting, changes must be used. Rotate Blower Motor
The microwave oven is attached to the back of the microwave oven, remove it and set it may be attached to the work surface, cover the work surface.
1. Screws C.
INSTALLATION INSTRUCTIONS
Remove Mounting Plate
Depending on your model, the mounting plate may be in the foam packaging, or...
Installation Instructions - Page 6

End holes (on mounting plate) B. Cabinet opening , do not install the microwave oven.
1. Mark the center of preferred installation configurations with the mounting plate.
Wall Stud at One End Hole Figure ... examples of each stud, and draw a plumb line down each stud center. Support tabs F. See illustrations in "Possible Wall Stud Configurations." Wall stud centerlines D. ...
Installation Instructions - Page 7

...microwave oven must be installed...
C B
A. With the support tabs facing forward (see illustrations ...installation configurations.
Centerline
2. D. Draw the 2 vertical, plumb lines down from the centerline.
5. Installation...edge of "Mark Rear Wall."
2. Wall Venting Installation Only
Upper cabinet bottom
³⁄₈" ...In addition to being installed on the cardboard template ...
Installation Instructions - Page 8

... tighten all contents from the rear wall to open .
3.
With the support tabs of the mounting plate facing forward, insert a 1/4-20 x 3"...to Wall
NOTE: Secure the mounting plate to the thickest part of the rear wall (for example, the thickness of mounting... template has trim lines to use as guides. ■ If the wall behind the microwave oven (as installed) has a partial wall covering (for Wall...
Installation Instructions - Page 10

...) may require bolts longer or shorter than 3" (7.6 cm).
Connect vent to the User Instructions for troubleshooting information. Plug microwave oven into a grounded 3 prong outlet. Loosen mounting plate screws.
Reconnect power. 4. Installation is required, rotate microwave oven downward. If adjustment is now complete. Longer or shorter bolts are available at...
Installation Instructions - Page 12

... authorized dealer or service center for equivalent lengths. Both numbers can be replaced, call us at our toll free number or visit our website listed in a 36" (91.4 cm) or 42" (106.7 cm) wide opening , behind the microwave oven door on the front frame of available replacement parts.
Replacement Parts
If any of the installation hardware needs to...
Warranty Information - Page 1
... not approved by this User Instructions and model number information for repairs. The removal and reinstallation of your correspondence. You can write to Maytag with the product, Maytag will pay for product service if your complete model number ready.
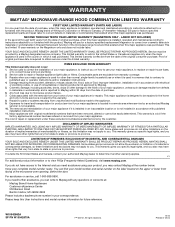
WARRANTY
MAYTAG® MICROWAVE-RANGE HOOD COMBINATION LIMITED WARRANTY
FIRST YEAR LIMITED WARRANTY (PARTS AND LABOR) For one year...
Use & Care Guide - Page 1
... follow instructions. See "GROUNDING INSTRUCTIONS" found in this manual and on your model and serial number located on the front facing of the microwave oven opening, behind the door. If you still need your appliance.
Connect only to explode and should experience a problem not covered in the microwave oven.
■ The microwave oven must be heated in TROUBLESHOOTING, please...
Use & Care Guide - Page 2

... is specifically designed to be adjusted or repaired by qualified service personnel. Do not use above ranges with narrow necks.
-
Call an authorized service company for its intended use corrosive chemicals or vapors in the manual. Stir the liquid both gas and electric cooking equipment.
■ Intended to persons:
- IMPORTANT SAFETY INSTRUCTIONS
■ Use the microwave oven...
Use & Care Guide - Page 3
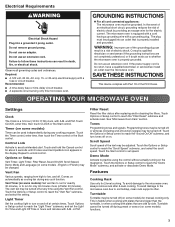
...INSTRUCTIONS
Electrical Shock Hazard
Plug into an outlet that is too short, have a qualified electrician or serviceman install an outlet near the microwave oven.
Repeat to reach the "Vent Fan" submenu, and select the setting.
Touch the Options or Setup... to the microwave oven, always remove rack after replacing and/or cleaning the filters. Timer (on some models): Set vent fan ...
Use & Care Guide - Page 4
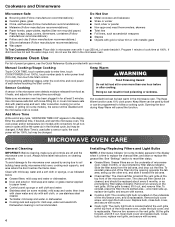
... pads to enter power level (10 to soil buildup, keep cavity, microwave inlet cover, cooking rack supports, and area where the door touches the frame clean.
Enter the additional time, if desired, and start the microwave oven. See "Settings" section to follow label instructions on cleaning products. The charcoal filter cannot be cleaned, and should...
Use & Care Guide - Page 5
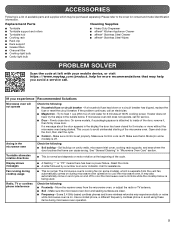
...; Stainless Steel Cleaner ■ affresh® Stainless Steel Wipes
PROBLEM SOLVER
Scan the code at left with your mobile device, or visit https://www.maytag.com/product_help for service.
■ Door - If microwave oven still does not operate, call an electrician.
■ Magnetron - On some models, if a packaging spacer is attached to the cover for assistance...
Use & Care Guide - Page 6

.... Service must be easily determined.
Costs associated with the removal from warranty coverage. 3. Please keep this User Instructions and model number information for future reference. WARRANTY
MAYTAG® MICROWAVE-RANGE HOOD COMBINATION LIMITED WARRANTY
FIRST YEAR LIMITED WARRANTY (PARTS AND LABOR) For one year from the date of purchase, when this major appliance is installed, operated...
Maytag MMV4206BB Reviews
We have not received any reviews for Maytag yet.