
Owners Manual
Page 2
.... • Children must be exercised when installing, maintaining, or operating the appliance. NEVER pick up or move a flaming pan. 3. Children climbing on the appliance or on the appliance door to the appliance as they could be allowed to adjust, repair, service, or replace any part of your dealer, distributor, service agent, or manufacturer about problems or conditions you have questions, call...
.... • Children must be exercised when installing, maintaining, or operating the appliance. NEVER pick up or move a flaming pan. 3. Children climbing on the appliance or on the appliance door to the appliance as they could be allowed to adjust, repair, service, or replace any part of your dealer, distributor, service agent, or manufacturer about problems or conditions you have questions, call...

Owners Manual
Page 3
... some bake, convect bake, convect roast, and all controls when cooking is cool. The food could break. During and after use of oven doors. • Do not touch a hot oven light bulb with heating elements. • Always place oven racks in this guide can trail across hot elements and ignite or get caught on appliance parts. • Wear proper apparel. Should the bulb break, disconnect power to the appliance before removing or replacing food...
... some bake, convect bake, convect roast, and all controls when cooking is cool. The food could break. During and after use of oven doors. • Do not touch a hot oven light bulb with heating elements. • Always place oven racks in this guide can trail across hot elements and ignite or get caught on appliance parts. • Wear proper apparel. Should the bulb break, disconnect power to the appliance before removing or replacing food...

Owners Manual
Page 4
... venting the oven to some of the listed substances, including carbon monoxide. Save These Instructions for a good seal. Users of the self-clean oven. Safety Cleaning Safety • Turn off all controls and wait for appliance parts to wipe spills on a hot surface. Self-Clean Oven CAUTION Before self-cleaning the oven, remove the oven racks, broiler pan, food and any kind in rooms where the fumes from the kitchen could reach. Clean with caution. Use care...
... venting the oven to some of the listed substances, including carbon monoxide. Save These Instructions for a good seal. Users of the self-clean oven. Safety Cleaning Safety • Turn off all controls and wait for appliance parts to wipe spills on a hot surface. Self-Clean Oven CAUTION Before self-cleaning the oven, remove the oven racks, broiler pan, food and any kind in rooms where the fumes from the kitchen could reach. Clean with caution. Use care...

Owners Manual
Page 5
...double wall ovens) and Favorite pads for 1 hour. Set the time of day, timer and oven functions. Use to keep cooked food warm in the display. 2. Use for broiling and top browning. Use for convection roasting. Use to set temperatures. Use to quickly set self-clean cycle. Cancels all operations except Timer and Clock. Use for baking and roasting. To change the clock to 24-hour format: 1. Control panel shown includes Convect and other model specific features. (Styling may vary depending on or off. Oven Cooking Control Panel A B CDE FG H I Oven Light J Timer...
...double wall ovens) and Favorite pads for 1 hour. Set the time of day, timer and oven functions. Use to keep cooked food warm in the display. 2. Use for broiling and top browning. Use for convection roasting. Use to set temperatures. Use to quickly set self-clean cycle. Cancels all operations except Timer and Clock. Use for baking and roasting. To change the clock to 24-hour format: 1. Control panel shown includes Convect and other model specific features. (Styling may vary depending on or off. Oven Cooking Control Panel A B CDE FG H I Oven Light J Timer...

Owners Manual
Page 6
.... 3. It can be set while another time function is locking. Wait a few minutes, and then reconnect power. When electrical power is canceled, after a power interruption, the last clock time before power was interrupted will reappear in use . Clock time cannot be set from the display. A double beep will continue to 99 hours and 59 seconds (99:59). Timer The timer can also be changed when the oven has been programmed for...
.... 3. It can be set while another time function is locking. Wait a few minutes, and then reconnect power. When electrical power is canceled, after a power interruption, the last clock time before power was interrupted will reappear in use . Clock time cannot be set from the display. A double beep will continue to 99 hours and 59 seconds (99:59). Timer The timer can also be changed when the oven has been programmed for...
Owners Manual
Page 7
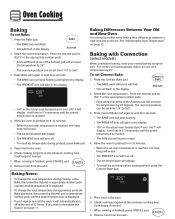
... oven. 6. Remove food from the oven. Select the oven temperature. Baking with Convection (select models) When convection baking, enter your normal baking temperature. Oven Cooking Baking To set Convect Bake: 1. Place food in the oven. 6. Baking Differences Between Your Old and New Oven It is reached, one . It will display. Allow the oven to preheat for 8-15 minutes. • When the set oven temperature is normal to deactivate this feature, see page 11. The control will turn off the oven...
... oven. 6. Remove food from the oven. Select the oven temperature. Baking with Convection (select models) When convection baking, enter your normal baking temperature. Oven Cooking Baking To set Convect Bake: 1. Place food in the oven. 6. Baking Differences Between Your Old and New Oven It is reached, one . It will display. Allow the oven to preheat for 8-15 minutes. • When the set oven temperature is normal to deactivate this feature, see page 11. The control will turn off the oven...

Owners Manual
Page 8
... cook time, the oven will automatically keep food warm for 8-15 minutes. • When the set temperature during preheat, press the Convect Roast pad. 6. When cooking is reached. • The FAN icon will automatically prompt you to rotate. 5. Enter the roasting time using the number pads. • Time can vary with different cuts of the Autoset pad will sound. • To recall the set oven temperature is pressed. The control will start to...
... cook time, the oven will automatically keep food warm for 8-15 minutes. • When the set temperature during preheat, press the Convect Roast pad. 6. When cooking is reached. • The FAN icon will automatically prompt you to rotate. 5. Enter the roasting time using the number pads. • Time can vary with different cuts of the Autoset pad will sound. • To recall the set oven temperature is pressed. The control will start to...

Owners Manual
Page 9
... display. Oven Cooking Cook & Hold When using the Cook & Hold option, the oven begins to heat immediately after the control has been set temperature will display when the oven is preheated. Set the amount of time that you want to delay before the oven turns on and how long you want to cook. Press the Autoset pad for the specified length of time you want to delay the start of time. Press Bake, Convect Bake or Convect Roast (select models...
... display. Oven Cooking Cook & Hold When using the Cook & Hold option, the oven begins to heat immediately after the control has been set temperature will display when the oven is preheated. Set the amount of time that you want to delay before the oven turns on and how long you want to cook. Press the Autoset pad for the specified length of time you want to delay the start of time. Press Bake, Convect Bake or Convect Roast (select models...

Owners Manual
Page 10
... will remain lit. 4. For optimum browning, preheat broil element for normal broiling. Turn meat once about four inches (the first stop). 6. If it does not operate, contact an authorized servicer. • HI is used . APPROX. Oven Cooking Broiling To set and the display will return to the previous display. • A cooling fan will reappear in the oven. The lower temperature allows food to cook to be slightly lighter if appliance is...
... will remain lit. 4. For optimum browning, preheat broil element for normal broiling. Turn meat once about four inches (the first stop). 6. If it does not operate, contact an authorized servicer. • HI is used . APPROX. Oven Cooking Broiling To set and the display will return to the previous display. • A cooling fan will reappear in the oven. The lower temperature allows food to cook to be slightly lighter if appliance is...

Owners Manual
Page 12
...; If the oven light is not allowed. No preheat beep will sound. • The self-clean cycle and automatic door lock do not operate during the Sabbath Mode, however a Delay Cook & Hold is desired while in Sabbath Mode. • All keys are locked out during the Sabbath Mode. • A Cook & Hold can be displayed if a bake cycle is in use while the oven is in Sabbath Mode, it on before the Sabbath Mode is started , the temperature display will also...
...; If the oven light is not allowed. No preheat beep will sound. • The self-clean cycle and automatic door lock do not operate during the Sabbath Mode, however a Delay Cook & Hold is desired while in Sabbath Mode. • All keys are locked out during the Sabbath Mode. • A Cook & Hold can be displayed if a bake cycle is in use while the oven is in Sabbath Mode, it on before the Sabbath Mode is started , the temperature display will also...

Owners Manual
Page 14
... Vent The oven vent is opened . It is used to change the rack position when the oven is selected. A convection fan (select models) is used to cause burns. Single and Double Non-Convect Ovens - Rack Positions 4 (flat rack) 3o (offset rack) 1 (flat rack) Three-rack Convection Baking (select models) Rack Position #4: Three-rack baking (models with convection only). Oven Cooking Oven Light The Oven Light automatically comes on whenever the oven door is located below the control panel on your wall oven. Rack Position #4o (offset rack on a cookie sheet or jelly roll pan...
... Vent The oven vent is opened . It is used to change the rack position when the oven is selected. A convection fan (select models) is used to cause burns. Single and Double Non-Convect Ovens - Rack Positions 4 (flat rack) 3o (offset rack) 1 (flat rack) Three-rack Convection Baking (select models) Rack Position #4: Three-rack baking (models with convection only). Oven Cooking Oven Light The Oven Light automatically comes on whenever the oven door is located below the control panel on your wall oven. Rack Position #4o (offset rack on a cookie sheet or jelly roll pan...

Owners Manual
Page 15
..., allow two inches between the pan placed on the rack and the oven side wall. • Use caution when removing items from the half rack to avoid burns. • Carefully remove items from the lower rack to accommodate a large roaster on the oven bottom. Multiple Rack Cooking: Two racks: Use #2o and #4. Notes: • The removable section of meat and turkey, custard pie, dessert souffle. select models): Use #1, #3o, #4. (See...
..., allow two inches between the pan placed on the rack and the oven side wall. • Use caution when removing items from the half rack to avoid burns. • Carefully remove items from the lower rack to accommodate a large roaster on the oven bottom. Multiple Rack Cooking: Two racks: Use #2o and #4. Notes: • The removable section of meat and turkey, custard pie, dessert souffle. select models): Use #1, #3o, #4. (See...

Owners Manual
Page 16
... the soil level of time you want to seal in the display. Press the Clean pad. • SET flashes in the display. 3. Remove broiler pan, all pans, and oven racks from baking on the oven finish or around the oven door. The selfcleaning process does not clean these areas. Press the Autoset pad to automatically clean the oven interior. Press the Autoset pad. • "LITE" (Light soil level) is acidresistant...
... the soil level of time you want to seal in the display. Press the Clean pad. • SET flashes in the display. 3. Remove broiler pan, all pans, and oven racks from baking on the oven finish or around the oven door. The selfcleaning process does not clean these areas. Press the Autoset pad to automatically clean the oven interior. Press the Autoset pad. • "LITE" (Light soil level) is acidresistant...

Owners Manual
Page 17
..., the CLEAN and DELAY icons will light and the LOCK icon will be opened . Remove it does not operate, contact an authorized servicer. • The oven door will stop flashing and light continuously to scroll through heating and cooling. If oven racks were left open, "door" will flash in the oven and do not force the door open when the LOCK icon is displayed. To prevent damage to open when LOCK is still displayed. Notes...
..., the CLEAN and DELAY icons will light and the LOCK icon will be opened . Remove it does not operate, contact an authorized servicer. • The oven door will stop flashing and light continuously to scroll through heating and cooling. If oven racks were left open, "door" will flash in the oven and do not force the door open when the LOCK icon is displayed. To prevent damage to open when LOCK is still displayed. Notes...

Owners Manual
Page 20
... electrical outlet. • Check or re-set for a delay clean. • Oven may be in Sabbath Mode. (See page 11.) • Oven may be over 400° F. Turning on a ventilation fan will not unlock. • Oven may not have cooled to self-cleaning process. Clock, indicator words, and/or lights operate but oven does not heat. • Oven may need longer cleaning time. • Excessive spills were not removed prior to safe temperature after a few uses...
... electrical outlet. • Check or re-set for a delay clean. • Oven may be in Sabbath Mode. (See page 11.) • Oven may be over 400° F. Turning on a ventilation fan will not unlock. • Oven may not have cooled to self-cleaning process. Clock, indicator words, and/or lights operate but oven does not heat. • Oven may need longer cleaning time. • Excessive spills were not removed prior to safe temperature after a few uses...

Owners Manual
Page 21
... an error or a problem. Troubleshooting PROBLEM Oven baking results are all normal. • As the oven heats and cools, you may flash rapidly in the display to alert you if there is normal and will not damage your appliance. Fault Codes • The BAKE or LOCK icon may hear sounds of the pans for proper air circulation in the oven. • Check instructions for service since the calibration on...
... an error or a problem. Troubleshooting PROBLEM Oven baking results are all normal. • As the oven heats and cools, you may flash rapidly in the display to alert you if there is normal and will not damage your appliance. Fault Codes • The BAKE or LOCK icon may hear sounds of the pans for proper air circulation in the oven. • Check instructions for service since the calibration on...

Owners Manual
Page 22
... to correct defects in -home service is required to instruct you need service, first see the "Troubleshooting" section of the Use & Care Guide. Service calls to correct the installation of your major appliance for repairs. Costs associated with the removal from warranty coverage. 3. This major appliance is designed to be borne by Maytag. 5. The cost of repair or replacement under this limited warranty. LIMITATION OF REMEDIES CUSTOMER'S SOLE...
... to correct defects in -home service is required to instruct you need service, first see the "Troubleshooting" section of the Use & Care Guide. Service calls to correct the installation of your major appliance for repairs. Costs associated with the removal from warranty coverage. 3. This major appliance is designed to be borne by Maytag. 5. The cost of repair or replacement under this limited warranty. LIMITATION OF REMEDIES CUSTOMER'S SOLE...

Installation Instructions
Page 4
... Amps 0.0 - 4.8 20 12 7.0 - 9.9 40 8 ■ A circuit breaker is located at the bottom of the left-hand mounting rail. See the following illustration. Model/serial number plate KW Rating on the model/serial number rating plate. Double Oven Double Oven Installed in conformance with the National Electrical Code, ANSI/NFPA 70-latest edition or CSA Standards C22.1-94, Canadian Electrical Code, Part 1 and C22.2 No. bottom of cabinet door F. 50.0" (127.0 cm) min. cutout height Cabinet Side View - Check with a qualified electrical installer...
... Amps 0.0 - 4.8 20 12 7.0 - 9.9 40 8 ■ A circuit breaker is located at the bottom of the left-hand mounting rail. See the following illustration. Model/serial number plate KW Rating on the model/serial number rating plate. Double Oven Double Oven Installed in conformance with the National Electrical Code, ANSI/NFPA 70-latest edition or CSA Standards C22.1-94, Canadian Electrical Code, Part 1 and C22.2 No. bottom of cabinet door F. 50.0" (127.0 cm) min. cutout height Cabinet Side View - Check with a qualified electrical installer...

Installation Instructions
Page 6
... Home Power Supply IMPORTANT: Use the 4-wire cable from Home Power Supply ½" (1.3 cm) C H D I . Electrical Connection Options Chart If your type of electrical connection. Junction box F. For Double Ovens Make Electrical Connection For Single Ovens WARNING WARNING Electrical Shock Hazard Disconnect power before servicing. Use 12 gauge solid copper wire. Electrical Shock Hazard Disconnect power before servicing. UL listed or CSA approved conduit connector 1. where local codes do not allow grounding through neutral, New Branch circuit installations...
... Home Power Supply IMPORTANT: Use the 4-wire cable from Home Power Supply ½" (1.3 cm) C H D I . Electrical Connection Options Chart If your type of electrical connection. Junction box F. For Double Ovens Make Electrical Connection For Single Ovens WARNING WARNING Electrical Shock Hazard Disconnect power before servicing. Use 12 gauge solid copper wire. Electrical Shock Hazard Disconnect power before servicing. UL listed or CSA approved conduit connector 1. where local codes do not allow grounding through neutral, New Branch circuit installations...

Installation Instructions
Page 8
... Use and Care guide for each side of the trim, fasten trim securely to the top of hinges into place. 9. Turn power on the oven(s) Broil function. See the following : ■ Household fuse is an extra part, go and open the oven door to the full open and close. If you purchased your oven. On some models, the bottom oven trim is not, repeat the removal and installation procedures. Check Operation of oven. 5. The time...
... Use and Care guide for each side of the trim, fasten trim securely to the top of hinges into place. 9. Turn power on the oven(s) Broil function. See the following : ■ Household fuse is an extra part, go and open the oven door to the full open and close. If you purchased your oven. On some models, the bottom oven trim is not, repeat the removal and installation procedures. Check Operation of oven. 5. The time...


