Owners Manual
Page 1
1.8 INCH DUAL ALARM CLOCK with Bluetooth® Wireless Technology OWNER'S MANUAL PLEASE READ BEFORE OPERATING THIS EQUIPMENT. MODEL: MR41806BT Size: 148.5(W) x 210(H)mm (A5)
1.8 INCH DUAL ALARM CLOCK with Bluetooth® Wireless Technology OWNER'S MANUAL PLEASE READ BEFORE OPERATING THIS EQUIPMENT. MODEL: MR41806BT Size: 148.5(W) x 210(H)mm (A5)
Owners Manual
Page 6
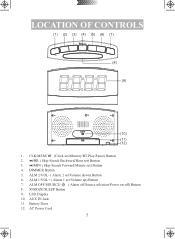
LED Display 10. DIMMER Button 5. ALM 2/VOL- ( Alarm 2 set /Volume up) Button 7. ALM OFF/SOURCE/ ( Alarm off/Source selection/Power on-off) Button 8. ALM 1/VOL+ ( Alarm 1 set /Volume down) Button 6. Battery Door 12. CLK/MEM/ (Clock set/Memory/BT Play-Pause) Button 2. /HR ( Skip-Search Backward/Hour set) Button 3. /MIN ( Skip-Search Forward/Minute set) Button 4. AC Power Cord 5 AUX IN Jack 11. SNOOZE/SLEEP Button 9. LOCATION OF CONTROLS (1) (2) (3) (4) (5) (6) (7) (8) (9) (10) (11) (12) 1.
LED Display 10. DIMMER Button 5. ALM 2/VOL- ( Alarm 2 set /Volume up) Button 7. ALM OFF/SOURCE/ ( Alarm off/Source selection/Power on-off) Button 8. ALM 1/VOL+ ( Alarm 1 set /Volume down) Button 6. Battery Door 12. CLK/MEM/ (Clock set/Memory/BT Play-Pause) Button 2. /HR ( Skip-Search Backward/Hour set) Button 3. /MIN ( Skip-Search Forward/Minute set) Button 4. AC Power Cord 5 AUX IN Jack 11. SNOOZE/SLEEP Button 9. LOCATION OF CONTROLS (1) (2) (3) (4) (5) (6) (7) (8) (9) (10) (11) (12) 1.

Owners Manual
Page 7
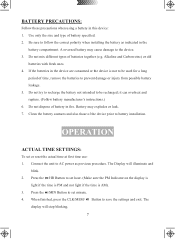
... length. POWER SOURCE Unwind the AC power cord and extend it to the polarity diagram inside the battery compartment. (Alkaline batteries are recommended.) Replace the battery door. 6 This polarized AC plug will only fit in a polarized AC outlet. Insert the AC plug into any convenient 120V 60Hz household outlet as follows: Open the battery door on the Clock Display) with...
... length. POWER SOURCE Unwind the AC power cord and extend it to the polarity diagram inside the battery compartment. (Alkaline batteries are recommended.) Replace the battery door. 6 This polarized AC plug will only fit in a polarized AC outlet. Insert the AC plug into any convenient 120V 60Hz household outlet as follows: Open the battery door on the Clock Display) with...
Owners Manual
Page 8
... precautions when using a battery in fire. Use only the size and type of batteries together (e.g. If the batteries in the battery compartment. The display will illuminate and blink. 2. OPERATION ACTUAL TIME SETTINGS: To set hour. (Make sure the PM Indicator on the display is light if the time is PM and not light if the time is not to set or reset the actual time at first time use: 1. Press the /HR Button to...
... precautions when using a battery in fire. Use only the size and type of batteries together (e.g. If the batteries in the battery compartment. The display will illuminate and blink. 2. OPERATION ACTUAL TIME SETTINGS: To set hour. (Make sure the PM Indicator on the display is light if the time is PM and not light if the time is not to set or reset the actual time at first time use: 1. Press the /HR Button to...
Owners Manual
Page 9
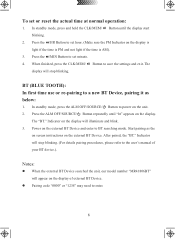
... user's manual of external BT Device. Pairing code "0000" or "1234" may need to power on the display is light if the time is PM and not light if the time is AM). 3. BT (BLUE TOOTH): In first time use or re-pairing to save the settings and exit. The "BT." Notes: When the external BT Device searched the unit, our model number "MR41806BT" will stop blinking...
... user's manual of external BT Device. Pairing code "0000" or "1234" may need to power on the display is light if the time is PM and not light if the time is AM). 3. BT (BLUE TOOTH): In first time use or re-pairing to save the settings and exit. The "BT." Notes: When the external BT Device searched the unit, our model number "MR41806BT" will stop blinking...
Owners Manual
Page 10
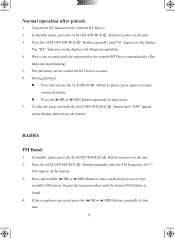
.../ Button to power on the BT function of the external BT Device. 2. To shut off, press and hold the /HR or /MIN Button to the external BT Device automatically. (The Indicator stop blinking). 5. Press and hold the ALM OFF/SOURCE/ Button until "OFF" appear on the display. RADIO: FM Band: 1. Press the ALM OFF/SOURCE/ Button repeatedly until the unit paired to auto...
.../ Button to power on the BT function of the external BT Device. 2. To shut off, press and hold the /HR or /MIN Button to the external BT Device automatically. (The Indicator stop blinking). 5. Press and hold the ALM OFF/SOURCE/ Button until "OFF" appear on the display. RADIO: FM Band: 1. Press the ALM OFF/SOURCE/ Button repeatedly until the unit paired to auto...
Owners Manual
Page 11
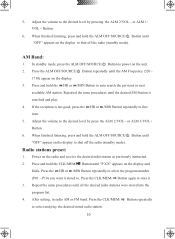
Radio stations preset: 1. Power on the unit. 2. Press the /HR or /MIN Button repeatedly to auto search the pervious or next available AM station. After setting, in radio AM or FM band. or ALM 1/ VOL + Button. 6. When finished listening, press and hold the ALM OFF/SOURCE/ Button until "OFF" appears on the display and blink. Press and hold the CLK/MEM/ Button until all the...
Radio stations preset: 1. Power on the unit. 2. Press the /HR or /MIN Button repeatedly to auto search the pervious or next available AM station. After setting, in radio AM or FM band. or ALM 1/ VOL + Button. 6. When finished listening, press and hold the ALM OFF/SOURCE/ Button until "OFF" appears on the display and blink. Press and hold the CLK/MEM/ Button until all the...
Owners Manual
Page 12
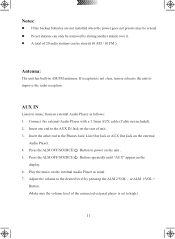
... reception is set to improve the radio reception. Play the music on the display. 6. Press the ALM OFF/SOURCE/ Button repeatedly until "AUX" appear on the external Audio Player as follows: 1. Adjust the volume to the Phones Jack; Antenna: The unit has built-in AM/FM antennas. Insert one end to power on the unit . 5. Notes: If the backup batteries are not installed when the power goes out presets may be erased. Preset stations...
... reception is set to improve the radio reception. Play the music on the display. 6. Press the ALM OFF/SOURCE/ Button repeatedly until "AUX" appear on the external Audio Player as follows: 1. Adjust the volume to the Phones Jack; Antenna: The unit has built-in AM/FM antennas. Insert one end to power on the unit . 5. Notes: If the backup batteries are not installed when the power goes out presets may be erased. Preset stations...
Owners Manual
Page 13
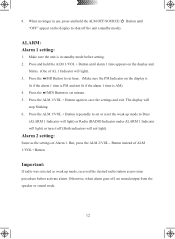
... (standby mode). When no sound output from the speaker or sound weak. 12 ALARM: Alarm 1 setting: 1. Make sure the unit is AM). 4. Press the /MIN Button to set hour. (Make sure the PM Indicator on the display is lit if the alarm 1 time is PM and not lit if the alarm 1 time is in use, press and hold the ALM 1/VOL + Button until "OFF" appear on the display and blinks...
... (standby mode). When no sound output from the speaker or sound weak. 12 ALARM: Alarm 1 setting: 1. Make sure the unit is AM). 4. Press the /MIN Button to set hour. (Make sure the PM Indicator on the display is lit if the alarm 1 time is PM and not lit if the alarm 1 time is in use, press and hold the ALM 1/VOL + Button until "OFF" appear on the display and blinks...
Owners Manual
Page 14
... the sleep timer before the time is up, press theSNOOZE/SLEEP Button repeatedly until "OFF" appear on automatically nine (9) minutes later. After pressing the button the alarm will stop blinking and the alarm will reset for next day). This feature can be temporarily turned off manually by pressing the SNOOZE/SLEEP Button. Press the ALM 1/VOL + and/or ALM 2/VOL - Press the SNOOZE/SLEEP Button repeatedly to set the sleep timer to set the brightness level of the display...
... the sleep timer before the time is up, press theSNOOZE/SLEEP Button repeatedly until "OFF" appear on automatically nine (9) minutes later. After pressing the button the alarm will stop blinking and the alarm will reset for next day). This feature can be temporarily turned off manually by pressing the SNOOZE/SLEEP Button. Press the ALM 1/VOL + and/or ALM 2/VOL - Press the SNOOZE/SLEEP Button repeatedly to set the sleep timer to set the brightness level of the display...
Owners Manual
Page 15
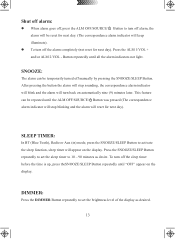
... the unit as BT not functioning the unit. TROUBLE SHOOTING GUIDE Symptom Power No power Radio Possible Cause Solution Plug from the Place the BT Device close to the distortion unit. Noise or sound The location not good for radio distorted on radio reception. Turn or relocation the unit. Increase Volume level by press the ALM 1/VOL + Button. Retune the radio station. unit. 14 AC 120V...
... the unit as BT not functioning the unit. TROUBLE SHOOTING GUIDE Symptom Power No power Radio Possible Cause Solution Plug from the Place the BT Device close to the distortion unit. Noise or sound The location not good for radio distorted on radio reception. Turn or relocation the unit. Increase Volume level by press the ALM 1/VOL + Button. Retune the radio station. unit. 14 AC 120V...
Owners Manual
Page 16
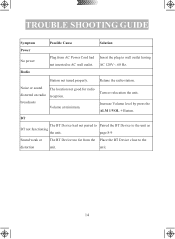
GENERAL SPECIFICATIONS Power Source: Clock back up: Audio Power: Impendence of Speakers: Radio Band Coverage: BT Version: BT Effective Range: AC 120V~, 60 Hz, 5W DC 3V, 2 x AAA size batteries; Not included 1 Watts 8 Ohm; 2W AM 520 - 1710 kHz FM 87.5 - 108 MHz 2.0 32 feet in open area 1 x User's Manual ACCESSORY SPECIFICATIONS ARE SUBJECT TO CHANGE WITHOUT NOTICE 15
GENERAL SPECIFICATIONS Power Source: Clock back up: Audio Power: Impendence of Speakers: Radio Band Coverage: BT Version: BT Effective Range: AC 120V~, 60 Hz, 5W DC 3V, 2 x AAA size batteries; Not included 1 Watts 8 Ohm; 2W AM 520 - 1710 kHz FM 87.5 - 108 MHz 2.0 32 feet in open area 1 x User's Manual ACCESSORY SPECIFICATIONS ARE SUBJECT TO CHANGE WITHOUT NOTICE 15
Owners Manual
Page 17
... adjustments as outlined in the original packing material with all accessories if applicable, a copy of 180 days from state to state. This warranty gives specific legal rights. Therefore, these restrictions may vary from date of purchase. MAGNAVOX and SMART. or, pack the unit in the Owner's Manual which may not apply to the product not used under normal use of...
... adjustments as outlined in the original packing material with all accessories if applicable, a copy of 180 days from state to state. This warranty gives specific legal rights. Therefore, these restrictions may vary from date of purchase. MAGNAVOX and SMART. or, pack the unit in the Owner's Manual which may not apply to the product not used under normal use of...


