
User manual, English (US)
Page 3
... in accordance with dry cloth. 7. G Remove batteries when the unit is not used , use caution when moving the cart/apparatus combination to dripping or splashing. 17.Do not place any heat sources such as marked on the apparatus (e.g. AC Polarized Plug A polarized plug has two blades with the apparatus.When a cart...
... in accordance with dry cloth. 7. G Remove batteries when the unit is not used , use caution when moving the cart/apparatus combination to dripping or splashing. 17.Do not place any heat sources such as marked on the apparatus (e.g. AC Polarized Plug A polarized plug has two blades with the apparatus.When a cart...

User manual, English (US)
Page 8
... the Remote Control to operate the Player 16 Step 2: Setting up the TV 16-18 Setting up Progressive Scan feature (for Progressive Scan TV only 17 To deactivate Progressive manually .......... 18 Selecting the colour system that corresponds to your TV 18 Step 3: Setting language preference 19 Setting the OSD Language 19... (Kodak) Picture CD ..... 24 General Operation 24 Playback selection 24 Repeat 24 Fast Forward/Reverse (MP3 24 8 01-37 MDV460_US3 8 16/06/05, 9:45 AM MDV460/17_1
... the Remote Control to operate the Player 16 Step 2: Setting up the TV 16-18 Setting up Progressive Scan feature (for Progressive Scan TV only 17 To deactivate Progressive manually .......... 18 Selecting the colour system that corresponds to your TV 18 Step 3: Setting language preference 19 Setting the OSD Language 19... (Kodak) Picture CD ..... 24 General Operation 24 Playback selection 24 Repeat 24 Fast Forward/Reverse (MP3 24 8 01-37 MDV460_US3 8 16/06/05, 9:45 AM MDV460/17_1

User manual, English (US)
Page 11
... sound of this DVD Player through your TV, use the audio cables (white/red) to connect AUDIO OUT (L/ R) jacks of the DVD Player to page 17 for detailed Progressive Scan set up. 01-37 MDV460_US3 11 11 16/06/05, 9:45 AMMDV460/17_1 IMPORTANT! - English Connecting TV COMPONENT VIDEO IN S-VIDEO...
... sound of this DVD Player through your TV, use the audio cables (white/red) to connect AUDIO OUT (L/ R) jacks of the DVD Player to page 17 for detailed Progressive Scan set up. 01-37 MDV460_US3 11 11 16/06/05, 9:45 AMMDV460/17_1 IMPORTANT! - English Connecting TV COMPONENT VIDEO IN S-VIDEO...

User manual, English (US)
Page 17
... nearly double the number of lines, progressive scan offers higher picture resolution and quality. Video Setup Page - - To remove the menu, press SYSTEM MENU. 17 01-37 MDV460_US3 17 16/06/05, 9:45 AMMDV460/17_1 ACTIVATING PROGRESSIVE SCAN: 1. CONNECT USING YPBPR (GBR) VIDEO CABLE. 3. CONFIRM AGAIN TO USE PROGRESSIVE SCAN. IMPORTANT! English...
... nearly double the number of lines, progressive scan offers higher picture resolution and quality. Video Setup Page - - To remove the menu, press SYSTEM MENU. 17 01-37 MDV460_US3 17 16/06/05, 9:45 AMMDV460/17_1 ACTIVATING PROGRESSIVE SCAN: 1. CONNECT USING YPBPR (GBR) VIDEO CABLE. 3. CONFIRM AGAIN TO USE PROGRESSIVE SCAN. IMPORTANT! English...
User manual, English (US)
Page 28
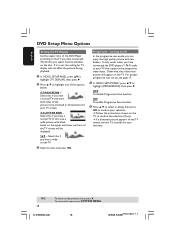
... the progressive video input. In this if you have a widescreen TV. 3 Select an item and press OK. For proper progressive scan set up, see page 17. 1 In 'VIDEO SETUP PAGE', press 3 4 to the previous menu, press 1. To remove the menu, press SYSTEM MENU. 01-37 MDV460_US3 28 16/06/05, 9:...46 AM MDV460/17_1 ON To enable Progressive Scan function. 2 Press 3 4 to select a setting, then press OK to confirm your TV screen. 4:3 LETTER BOX - Select this if ...
... the progressive video input. In this if you have a widescreen TV. 3 Select an item and press OK. For proper progressive scan set up, see page 17. 1 In 'VIDEO SETUP PAGE', press 3 4 to the previous menu, press 1. To remove the menu, press SYSTEM MENU. 01-37 MDV460_US3 28 16/06/05, 9:...46 AM MDV460/17_1 ON To enable Progressive Scan function. 2 Press 3 4 to select a setting, then press OK to confirm your TV screen. 4:3 LETTER BOX - Select this if ...


