
User manual, English (US)
Page 3
Do not use caution when moving the cart/apparatus combination to dripping or splashing. 17.Do not place any ventilation openings. Do not install near water. 6. If the provided plug does not fit into the apparatus, the apparatus has been ...
Do not use caution when moving the cart/apparatus combination to dripping or splashing. 17.Do not place any ventilation openings. Do not install near water. 6. If the provided plug does not fit into the apparatus, the apparatus has been ...

User manual, English (US)
Page 8
... the Remote Control to operate the Player 16 Step 2: Setting up the TV 16-18 Setting up Progressive Scan feature (for Progressive Scan TV only 17 To deactivate Progressive manually .......... 18 Selecting the colour system that corresponds to your TV 18 Step 3: Setting language preference 19 Setting the OSD Language 19... (Kodak) Picture CD ..... 24 General Operation 24 Playback selection 24 Repeat 24 Fast Forward/Reverse (MP3 24 8 01-37 MDV460_US3 8 16/06/05, 9:45 AM MDV460/17_1
... the Remote Control to operate the Player 16 Step 2: Setting up the TV 16-18 Setting up Progressive Scan feature (for Progressive Scan TV only 17 To deactivate Progressive manually .......... 18 Selecting the colour system that corresponds to your TV 18 Step 3: Setting language preference 19 Setting the OSD Language 19... (Kodak) Picture CD ..... 24 General Operation 24 Playback selection 24 Repeat 24 Fast Forward/Reverse (MP3 24 8 01-37 MDV460_US3 8 16/06/05, 9:45 AM MDV460/17_1

User manual, English (US)
Page 11
... on the TV (cable not supplied). 2 To hear the sound of this DVD Player through your TV, use the audio cables (white/red) to page 17 for detailed Progressive Scan set up. 01-37 MDV460_US3 11 11 16/06/05, 9:45 AMMDV460/17_1 You only need to make one video connection...
... on the TV (cable not supplied). 2 To hear the sound of this DVD Player through your TV, use the audio cables (white/red) to page 17 for detailed Progressive Scan set up. 01-37 MDV460_US3 11 11 16/06/05, 9:45 AMMDV460/17_1 You only need to make one video connection...

User manual, English (US)
Page 17
... manual.) 3 Press POWER on the remote control to select {VIDEO SETUP PAGE}. ACTIVATING PROGRESSIVE SCAN: 1. Video Setup Page - - To remove the menu, press SYSTEM MENU. 17 01-37 MDV460_US3 17 16/06/05, 9:45 AMMDV460/17_1
... manual.) 3 Press POWER on the remote control to select {VIDEO SETUP PAGE}. ACTIVATING PROGRESSIVE SCAN: 1. Video Setup Page - - To remove the menu, press SYSTEM MENU. 17 01-37 MDV460_US3 17 16/06/05, 9:45 AMMDV460/17_1
User manual, English (US)
Page 28
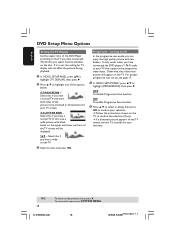
For proper progressive scan set up, see page 17. 1 In 'VIDEO SETUP PAGE', press 3 4 to the previous menu, press 1. ON To enable Progressive Scan function. 2 Press 3 4 to select a setting, then press OK to confirm ... any). ➜ If a distorted picture appears on the TV. To remove the menu, press SYSTEM MENU. 01-37 MDV460_US3 28 16/06/05, 9:46 AM MDV460/17_1 Otherwise, the a distorted picture will be available on /off In the progressive scan mode, you select must be displayed. 16:9 - Progressive - English DVD Setup...
For proper progressive scan set up, see page 17. 1 In 'VIDEO SETUP PAGE', press 3 4 to the previous menu, press 1. ON To enable Progressive Scan function. 2 Press 3 4 to select a setting, then press OK to confirm ... any). ➜ If a distorted picture appears on the TV. To remove the menu, press SYSTEM MENU. 01-37 MDV460_US3 28 16/06/05, 9:46 AM MDV460/17_1 Otherwise, the a distorted picture will be available on /off In the progressive scan mode, you select must be displayed. 16:9 - Progressive - English DVD Setup...


