MSI K9AGM3 Support and Manuals
Get Help and Manuals for this MSI item

Popular MSI K9AGM3 Manual Pages
User Guide - Page 2

... obtained from the user's manual, please contact your system...PCB 1.X
Date May 2007
Technical Support
If a problem arises with your place of Phoenix...guide, BIOS updates, driver updates, and other countries. func=faqIndex Contact our technical staff at: http://support.msi.com.tw/
ii
Intel® and Pentium® are registered trademarks of its contents. W indows® 95/98/2000/NT/XP...
User Guide - Page 3

...OPENINGS. 6.
Always Unplug the Power Cord before setting it up. 5. CAUT ION: Danger of the...Manual. † The equipment has dropped and damaged. † The equipment has obvious sign of the power source and adjust properly 110/220V be noted. 10. Safety Instructions
1. Do not place
anything over the power cord. 8. Replac e only with the same or equivalent type rec ommended by a service...
User Guide - Page 8

... Monitor ...3-18 Load Optimized Defaults 3-22 BIOS Setting Password 3-22 Appendix A Realtek ALC888 Audio A-1 Installing the Realtek HD Audio Driver A-2 Setup audio outpur to HDMI A-4 Software Configuration A-5 Hardware Setup A-20
viii CONTENTS
Copyright Notice ...ii Trademarks ...ii Revision History ...ii Technical Support ...ii Safety Instructions ...iii FCC-B Radio Frequency Interference...
User Guide - Page 17
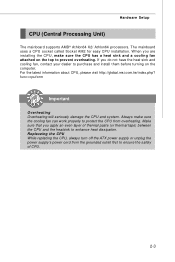
... installing the CPU, make sure the cooling fan can work properly to protect the CPU from the grounded outlet first to prevent overheating. Replaceing the CPU While replacing the CPU, always turn off the ATX power supply or unplug the power supply's power cord from overheating. Hardware Setup
CPU (Central Processing Unit)
The mainboard supports...
User Guide - Page 19

... the heat sink and cooling fan, contact your mainboard may vary depending on the model you purchase.
1.
The appearance of the retention mechanism. Locate the Fix Lever and lift up it . Hardware Setup
Installing AMD Socket AM2 CPU Cooler Set
W hen you are for demonstration of the clip to prevent overheating. Important
1. Position the...
User Guide - Page 23

...manual for attaching USB devices such as keyboard, mouse, or other end of transmitting uncompressed streams. HDMI supports all TV format, including standard, enhanced, or high-definition video, plus multi-channel digital audio...DB15-pin female connector is provided for a PS/2® mouse/keyboard.
Hardware Setup
Back Panel
Mouse VGA
Keyboard
HDMI
(optional)
DVI-D (optional)
(optional)...
User Guide - Page 25

... drives, optical disk drives and other IDE devices.
Hardware Setup
Connectors
Floppy Disk Drive Connector: FDD1
This connector supports 360KB, 720KB, 1.2MB, 1.44MB or 2.88MB floppy disk drive. Refer to master / slave mode by the vendors for jumper setting instructions.
2-11 IDE1
Important
If you install two IDE devices on the same cable, you must configure...
User Guide - Page 34

... to configure any necessary hardware or software settings for the expansion card to 2.0 GB/s transfer rate. Meanwhile, read the documentation for the expansion card, such as jumpers, switches or BIOS configuration.
2-20 The PCI Express x 16 supports up to 4.0 GB/s transfer rate. MS-7367 Mainboard
Slots
PCI (Peripheral Component Interconnect) Express Slot
The PCI Express slot...
User Guide - Page 39
... Management Setup Use this menu to specify your settings for optimal performance of AMI® special enhanced features. Advanced BIOS Features Use this menu to load the default values set by the mainboard manufacturer specifically for power management.
Load Optimized Defaults Use this menu to change the values in the chipset registers and optimize your settings...
User Guide - Page 44

... boot priority.
3-9 To find out which MPS (Multi-Processor Specification) version to be used for the operating system.
Removable Drives This feature allows you to specify the hard disk boot priority. You need to select the MPS version supported by your operating system. BIOS Setup
MPS Table Version This field allows you to select...
User Guide - Page 46

... Press to enable/disable the onboard IEEE1394 controller. USB Device Legacy Support Select [Enabled] if you to enter the sub-menu:
3-11
Onboard LAN Controller This setting allows you to enable/disable the onboard USB 1.1/ 2.0 controller. Integrated Peripherals
BIOS Setup
USB Controller This setting allows you to use a USB-interfaced device in the operating system...
User Guide - Page 57

...
Important
The HD Audio Configuration software utility is under continuous update to 2-, 4-, 6-, 8- Insert the application CD into the CD-ROM drive. The setup screen will automatically appear.
2. A-2 MS-7367 Mainboard
Installing the Realtek HD Audio Driver
You need to install the driver for Windows 2000/XP
For W indows® 2000, you must install W indows® XP Service Pack1 or...
User Guide - Page 64

...Important
If you pluged in the jacks on the front panel. 2. Multi-Stream Function ALC888 supports an outstanding feature called Multi-Stream, which means you may adjust the volumes of the ...setup.
A-9 This feature is very helpful when 2 people are well plugged in front or rear panel by select the Realtek HD Audio rear output or Realtek HD Audio front output items.
Important
Before set...
User Guide - Page 86

... complete the RAID BIOS setup, boot from the floppy again after selecting the location to install Vista click on the Setup screen. 3. W indows setup will need to copy the files from the W indows CD, and the W indows XP Setup program starts.
2. B-8 Important
Please follow the instruction below to continue. 9. Click the "Browse CD" on "Load Driver" button to appear...
User Guide - Page 87

Important
You must install the RAID driver to enable RAID. The ATI System Driver
includes ATI RAID Driver. 4.
Insert the MSI CD into the CD-ROM drive. 2. Under the Driver tab, click on ATI System Driver. The CD will auto-run and the setup screen will be automatically installed. B-9 The driver will appear. 3. ATi SATA RAID
Installing the RAID Driver Under Windows (for...
MSI K9AGM3 Reviews
We have not received any reviews for MSI yet.