

Administration Guide
Page 22
... to the LAN port is located behind a router. Administrative IVR (Line 1 or Line 2) Line 1 Line 2 SPA2102 Ethernet port LAN port IP Router (with a device on the Ethernet port, the network address of 255.255.255.0. If there is a network address conflict with hairpinning) or Broadband modem ISP LAN WAN Internet IP ITSP Administration PC 187257 By default, the device attached...
... to the LAN port is located behind a router. Administrative IVR (Line 1 or Line 2) Line 1 Line 2 SPA2102 Ethernet port LAN port IP Router (with a device on the Ethernet port, the network address of 255.255.255.0. If there is a network address conflict with hairpinning) or Broadband modem ISP LAN WAN Internet IP ITSP Administration PC 187257 By default, the device attached...

Administration Guide
Page 23
... ATA Administration Guide 23 Administrative IVR (Line 1 or Line 2) PSTN Line 1 PSTN Line 1 SPA3102 Ethernet port LAN port IP Router (with hairpinning) or Broadband modem ISP LAN WAN Administration PC Internet IP ITSP 187259 By default, the device on the LAN port is automatically changed to forward all voice traffic when the SPA3102 is assigned the network...
... ATA Administration Guide 23 Administrative IVR (Line 1 or Line 2) PSTN Line 1 PSTN Line 1 SPA3102 Ethernet port LAN port IP Router (with hairpinning) or Broadband modem ISP LAN WAN Administration PC Internet IP ITSP 187259 By default, the device on the LAN port is automatically changed to forward all voice traffic when the SPA3102 is assigned the network...

Administration Guide
Page 24
...168.0.0 with hairpinning) or Broadband modem ISP LAN WAN Administration PC Internet IP ITSP Line 5 Line 6 187256 Line 7 Line 8 By default, the device on the AUX port is supported by each pair of ports to illustrate that only one fax machine is connected to each of ...shown. Administrative IVR (Line 1 or Line 2) 8 FXS (RJ-11/RJ-21 ) ports SPA8000 Line 1 NAT/PAT Internal DHCP Line 2 server Ethernet port Line 3 Line 4 AUX port IP Router (with a subnet mask of eight voice ports (voice lines 1-8). In the illustration, one T.38 connection is automatically changed to the ...
...168.0.0 with hairpinning) or Broadband modem ISP LAN WAN Administration PC Internet IP ITSP Line 5 Line 6 187256 Line 7 Line 8 By default, the device on the AUX port is supported by each pair of ports to illustrate that only one fax machine is connected to each of ...shown. Administrative IVR (Line 1 or Line 2) 8 FXS (RJ-11/RJ-21 ) ports SPA8000 Line 1 NAT/PAT Internal DHCP Line 2 server Ethernet port Line 3 Line 4 AUX port IP Router (with a subnet mask of eight voice ports (voice lines 1-8). In the illustration, one T.38 connection is automatically changed to the ...
Administration Guide
Page 38
...password protected. b. e. The success window appears when the upgrade is in progress. Check the Router > Status page. When the Firmware Upgrade Warning window appears, click Continue. In the Confirm Upgrade..., you installed. In the next window that appears, enter the IP address of the ATA device, the default IP address is announced. The Software Version field should show the firmware version... message. Extract the Zip file, and then run the executable file to the Ethernet port of the ATA device, and then click OK. Cisco Small Business ATA Administration Guide 38...
...password protected. b. e. The success window appears when the upgrade is in progress. Check the Router > Status page. When the Firmware Upgrade Warning window appears, click Continue. In the Confirm Upgrade..., you installed. In the next window that appears, enter the IP address of the ATA device, the default IP address is announced. The Software Version field should show the firmware version... message. Extract the Zip file, and then run the executable file to the Ethernet port of the ATA device, and then click OK. Cisco Small Business ATA Administration Guide 38...

Administration Guide
Page 40
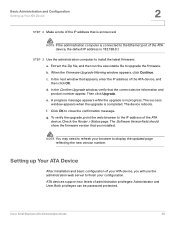
STEP 4 The Router > Status page appears. Log on the keypad to the administrator view ... the administration web server, and choose Admin access with Advanced settings. Press 110# to the Phone 1 port of the page. NOTE By default, no password is in Basic User mode. STEP 1 Start Internet Explorer on the IVR menu, see ...Connect an analog telephone to determine the Internet (WAN) IP address. You can assign an administrative password later, but it is connected to the IP address of the ATA device. By default, the page is required. Basic Administration and Configuration Using ...
STEP 4 The Router > Status page appears. Log on the keypad to the administrator view ... the administration web server, and choose Admin access with Advanced settings. Press 110# to the Phone 1 port of the page. NOTE By default, no password is in Basic User mode. STEP 1 Start Internet Explorer on the IVR menu, see ...Connect an analog telephone to determine the Internet (WAN) IP address. You can assign an administrative password later, but it is connected to the IP address of the ATA device. By default, the page is required. Basic Administration and Configuration Using ...

Administration Guide
Page 41
...and optional Secondary DNS fields. c. b. The ATA device reboots. In the Static IP Settings section, enter the IP address in the Static IP field, the subnet mask in the NetMask field, and the default gateway IP address in the following fields: • PPPoE Login Name • PPPoE Login ... the Administration Web Server 2 STEP 3 Complete the WAN configuration for DHCP, static IP addressing, or PPPoE. For DHCP: a. If your progress, click the Router tab and then click Status. d. Select Static IP from the Connection Type drop-down menu. For PPPoE: a. Select PPPoE from the...
...and optional Secondary DNS fields. c. b. The ATA device reboots. In the Static IP Settings section, enter the IP address in the Static IP field, the subnet mask in the NetMask field, and the default gateway IP address in the following fields: • PPPoE Login Name • PPPoE Login ... the Administration Web Server 2 STEP 3 Complete the WAN configuration for DHCP, static IP addressing, or PPPoE. For DHCP: a. If your progress, click the Router tab and then click Status. d. Select Static IP from the Connection Type drop-down menu. For PPPoE: a. Select PPPoE from the...

Administration Guide
Page 43
... Implementation," on the requirements of the Upgrade Enable parameter in the Provisioning page is as follows: http://spa-ip-addr/admin/upgrade?[protocol://][server-name[:port]][/ firmware-pathname] Both HTTP and TFTP are supported for these settings to the firmware specified by the URL,...43 Basic Administration and Configuration Upgrading, Rebooting, and Resyncing Your ATA Device 2 Advanced Configurations Other parameters may need to be changed from the defaults, depending on page 71 for further information. • Dial Plan-You can configure a dial plan for a specific line. See the ...
... Implementation," on the requirements of the Upgrade Enable parameter in the Provisioning page is as follows: http://spa-ip-addr/admin/upgrade?[protocol://][server-name[:port]][/ firmware-pathname] Both HTTP and TFTP are supported for these settings to the firmware specified by the URL,...43 Basic Administration and Configuration Upgrading, Rebooting, and Resyncing Your ATA Device 2 Advanced Configurations Other parameters may need to be changed from the defaults, depending on page 71 for further information. • Dial Plan-You can configure a dial plan for a specific line. See the ...

Administration Guide
Page 44
...server-name. If no server-name is specified, the host that requests the URL is used. The profile-path is assumed. If no port specified, the default port of the protocol is used (69 for TFTP, 80 for HTTP, and 443 for HTTPS). If no firmware-pathname is specified, / ... Business ATA Administration Guide 44 The Reboot URL is as follows: http://spa-ip-addr/admin/resync?[[protocol://][server-name[:port]]/profilepathname] NOTE The SPA resyncs only when it is idle. If no port is specified, the default port is assumed, as in the following example: http://192.168.2.217/admin/upgrade...
...server-name. If no server-name is specified, the host that requests the URL is used. The profile-path is assumed. If no port specified, the default port of the protocol is used (69 for TFTP, 80 for HTTP, and 443 for HTTPS). If no firmware-pathname is specified, / ... Business ATA Administration Guide 44 The Reboot URL is as follows: http://spa-ip-addr/admin/resync?[[protocol://][server-name[:port]]/profilepathname] NOTE The SPA resyncs only when it is idle. If no port is specified, the default port is assumed, as in the following example: http://192.168.2.217/admin/upgrade...

Administration Guide
Page 52
Configuring Your System for ITSP Interoperability Network Address Translation (NAT) and Voice over IP (VoIP) 3 Determining the Router's NAT Mechanism STUN does not work on your PC that could block the syslog port (port 514 by default). b. This address and port number must be reachable from the SIP Debug Option field. c. STEP 4 To collect information about the...
Configuring Your System for ITSP Interoperability Network Address Translation (NAT) and Voice over IP (VoIP) 3 Determining the Router's NAT Mechanism STUN does not work on your PC that could block the syslog port (port 514 by default). b. This address and port number must be reachable from the SIP Debug Option field. c. STEP 4 To collect information about the...

Administration Guide
Page 55
..., SPA8000, and SPA8800. The SPA2102 and SPA3102 support a single connection, while the SPA8000 and SPA8800 support one connection for each pair of FXS ports (1/2, 3/4, 5/6, and 7/8) for fax transmission over an IP network. Configuring Voice Services Using a FAX Machine 4 • G.726-40 • G.729a • G.723 WRTP54G • G.711u (configured by default) • G.711a • G.726...
..., SPA8000, and SPA8800. The SPA2102 and SPA3102 support a single connection, while the SPA8000 and SPA8800 support one connection for each pair of FXS ports (1/2, 3/4, 5/6, and 7/8) for fax transmission over an IP network. Configuring Voice Services Using a FAX Machine 4 • G.726-40 • G.729a • G.723 WRTP54G • G.711u (configured by default) • G.711a • G.726...

Administration Guide
Page 70
... the Line Interface Dial Plan This dial plan is used to strip steering digits from a dialed number before it is transmitted out to reset the default timer settings for a particular digit sequence or type of call, you can modify the control timers. Resetting the Control Timers You can use the following... section. STEP 2 Click Voice tab > Line N, where N represents the line interface number. STEP 5 Click Submit All Changes. STEP 1 Start Internet Explorer, and then enter the IP address of this section. STEP 4 Enter the desired values in the Dial Plan field.
... the Line Interface Dial Plan This dial plan is used to strip steering digits from a dialed number before it is transmitted out to reset the default timer settings for a particular digit sequence or type of call, you can modify the control timers. Resetting the Control Timers You can use the following... section. STEP 2 Click Voice tab > Line N, where N represents the line interface number. STEP 5 Click Submit All Changes. STEP 1 Start Internet Explorer, and then enter the IP address of this section. STEP 4 Enter the desired values in the Dial Plan field.

Administration Guide
Page 83
...enter the maximum number of the web page and at the top right corner of concurrent calls allowed by entering the following URL: http://spa8000-ip-addr/status. See "Contact List for a Trunk Group," on this ITSP account c. Trunk Group Management You can connect directly to the Trunk... Status Page by your ITSP, or leave the default setting, unlimited (16 calls). Configuring Voice Services SIP Trunking and Hunt Groups on the SPA8000 4 STEP 3 Enter the settings for each trunk group ...
...enter the maximum number of the web page and at the top right corner of concurrent calls allowed by entering the following URL: http://spa8000-ip-addr/status. See "Contact List for a Trunk Group," on this ITSP account c. Trunk Group Management You can connect directly to the Trunk... Status Page by your ITSP, or leave the default setting, unlimited (16 calls). Configuring Voice Services SIP Trunking and Hunt Groups on the SPA8000 4 STEP 3 Enter the settings for each trunk group ...

Administration Guide
Page 86
... ATA Administration Guide 86 Press the Setup button on Hold using TFTP. Network, and then scroll down to find the IP address of the phone: a. STEP 1 Use the phone menu to 2- 5 Configuring Music on Hold This chapter explains...86 • "Changing the Music File for the Internal Music Source," on page 88 Using the Internal Music Source for each IP phone. Refer to the following topics: • "Using the Internal Music Source for Music On Hold," on page 86 ... the MOH server for Music On Hold An internal music source with a default music file (Romance de Amor).
... ATA Administration Guide 86 Press the Setup button on Hold using TFTP. Network, and then scroll down to find the IP address of the phone: a. STEP 1 Use the phone menu to 2- 5 Configuring Music on Hold This chapter explains...86 • "Changing the Music File for the Internal Music Source," on page 88 Using the Internal Music Source for each IP phone. Refer to the following topics: • "Using the Internal Music Source for Music On Hold," on page 86 ... the MOH server for Music On Hold An internal music source with a default music file (Romance de Amor).

Administration Guide
Page 87
...sampled at 8000 samples/sec, up to 65.5 seconds in the Internal Music URL field: tftp://server_IPaddress:portpath • server_IPaddress: The local IP address of the computer you are required to the Call Feature Settings section. The Telephone Configuration page appears in the MOH Server field: ... Using the Internal Music Source for the Internal Music Source The following resources are using as the TFTP server • port: The port number used by the TFTP server (default 69) Cisco Small Business ATA Administration Guide 87 STEP 3 Click Admin Login, and then click Advanced.
...sampled at 8000 samples/sec, up to 65.5 seconds in the Internal Music URL field: tftp://server_IPaddress:portpath • server_IPaddress: The local IP address of the computer you are required to the Call Feature Settings section. The Telephone Configuration page appears in the MOH Server field: ... Using the Internal Music Source for the Internal Music Source The following resources are using as the TFTP server • port: The port number used by the TFTP server (default 69) Cisco Small Business ATA Administration Guide 87 STEP 3 Click Admin Login, and then click Advanced.
Administration Guide
Page 97
...or disable NAT mapping when calling the gateway The following table lists some examples. Also, gw0 represents the internal PSTN gateway via the FXO port. In addition, three parameters are added that the user enters. Example Description xx. See "Gateway Accounts section (SPA3102)," on the SPA3102 ...gateway parameters and configurable dial plans. You can specify in the dial plan to any gateway address in a dial plan by default. You can override this behavior by IP dialing, through the configured Line 1 service provider, by using the identifiers gw1, gw2, gw3, or gw4. Configuring the ...
...or disable NAT mapping when calling the gateway The following table lists some examples. Also, gw0 represents the internal PSTN gateway via the FXO port. In addition, three parameters are added that the user enters. Example Description xx. See "Gateway Accounts section (SPA3102)," on the SPA3102 ...gateway parameters and configurable dial plans. You can specify in the dial plan to any gateway address in a dial plan by default. You can override this behavior by IP dialing, through the configured Line 1 service provider, by using the identifiers gw1, gw2, gw3, or gw4. Configuring the ...

Administration Guide
Page 103
... of scenarios that forward calls to perform one-stage dialing of the inbound INVITE matches one -stage or two-stage dialing, as described above. The default VoIP caller dial plan is used in this scenario, Line 1 is not allowed because Line 1 does not authenticate inbound INVITE requests. It includes the ... Settings section. The scenario is one way to the PSTN gateway. The caller calls Line 1 and if Line 1 is none or when the source IP address of a VoIP-ToPSTN call reverts to the PSTN Gateway In this case, you must select the PIN authentication method, or else the caller is...
... of scenarios that forward calls to perform one-stage dialing of the inbound INVITE matches one -stage or two-stage dialing, as described above. The default VoIP caller dial plan is used in this scenario, Line 1 is not allowed because Line 1 does not authenticate inbound INVITE requests. It includes the ... Settings section. The scenario is one way to the PSTN gateway. The caller calls Line 1 and if Line 1 is none or when the source IP address of a VoIP-ToPSTN call reverts to the PSTN Gateway In this case, you must select the PIN authentication method, or else the caller is...

Administration Guide
Page 106
... that is ready for use in the ITSP network. for example, 10/3/ 2003 16:43:00. Current Gateway The default router assigned to the ATA device. LAN IP Address The address of the ATA hardware. Router tab > Status page > System Status section Current Time Current date and time of the system; for example, 25...
... that is ready for use in the ITSP network. for example, 10/3/ 2003 16:43:00. Current Gateway The default router assigned to the ATA device. LAN IP Address The address of the ATA hardware. Router tab > Status page > System Status section Current Time Current date and time of the system; for example, 25...
Configuration Guide
Page 53
...can only use the ranges 192.168.0.2 to 192.168.0.99 and 192.168.0.151 to the Phone Adapter. Make sure that is the default IP address of 192.168.0.100 to 192.168.0.150 using the DHCP server on the network connected to 192.168.0.254. Click the OK button...G. B. Enter the DNS entry provided by performing the following network components are installed box, select the TCP/IP-> associated with Router C. The Phone Adapter, by any other computer on the Phone Adapter. If the IP address is unique for the Network window. C. Click the DNS tab, and make sure the DNS Enabled...
...can only use the ranges 192.168.0.2 to 192.168.0.99 and 192.168.0.151 to the Phone Adapter. Make sure that is the default IP address of 192.168.0.100 to 192.168.0.150 using the DHCP server on the network connected to 192.168.0.254. Click the OK button...G. B. Enter the DNS entry provided by performing the following network components are installed box, select the TCP/IP-> associated with Router C. The Phone Adapter, by any other computer on the Phone Adapter. If the IP address is unique for the Network window. C. Click the DNS tab, and make sure the DNS Enabled...

Configuration Guide
Page 54
...Area Connection that is associated with the default interface. Right-click the Local Area .... Enter the Default Gateway, 192.168.0.1 (Phone Adapter's default IP address). Toward the... bottom of the window, select Use the following DNS server addresses, and enter the Preferred DNS server and Alternative DNS server (provided by this connection box, highlight Internet Protocol (TCP/IP...254. You can only use an IP address in the Local Area Connection Properties ... H. A. For Windows XP: The following IP address option. C. In the Components checked...
...Area Connection that is associated with the default interface. Right-click the Local Area .... Enter the Default Gateway, 192.168.0.1 (Phone Adapter's default IP address). Toward the... bottom of the window, select Use the following DNS server addresses, and enter the Preferred DNS server and Alternative DNS server (provided by this connection box, highlight Internet Protocol (TCP/IP...254. You can only use an IP address in the Local Area Connection Properties ... H. A. For Windows XP: The following IP address option. C. In the Components checked...
Configuration Guide
Page 55
... automatically is selected in the Local Area Connection Properties window. 4. Enter a unique IP address that is associated with Router D. Enter the Default Gateway, 192.168.0.1 (Phone Adapter's default IP address). Contact your ISP or go on the network connected to the Phone Adapter. E....select the Properties option. 3. Click the OK button in the settings. Right-click the Local Area Connection that Obtain an IP address automatically and Obtain DNS server address automatically are selected. 48 Appendix A: Troubleshooting Common Problems and Solutions For Windows 98...
... automatically is selected in the Local Area Connection Properties window. 4. Enter a unique IP address that is associated with Router D. Enter the Default Gateway, 192.168.0.1 (Phone Adapter's default IP address). Contact your ISP or go on the network connected to the Phone Adapter. E....select the Properties option. 3. Click the OK button in the settings. Right-click the Local Area Connection that Obtain an IP address automatically and Obtain DNS server address automatically are selected. 48 Appendix A: Troubleshooting Common Problems and Solutions For Windows 98...


