
User's Guide
Page 2
...Refer service or repairs, other replacement parts. Safety information Use only the power supply and power supply cord provided with the use of specific Lexmark components. SAVE THESE INSTRUCTIONS. Do not subject the power cord to a professional service person. Lexmark is near the product and easily ... the power cord is designed, tested, and approved to a properly grounded electrical outlet that is not responsible for signs of some parts may not always be obvious. This product is misused, a risk of other than those described in the user documentation, to abrasion...
...Refer service or repairs, other replacement parts. Safety information Use only the power supply and power supply cord provided with the use of specific Lexmark components. SAVE THESE INSTRUCTIONS. Do not subject the power cord to a professional service person. Lexmark is near the product and easily ... the power cord is designed, tested, and approved to a properly grounded electrical outlet that is not responsible for signs of some parts may not always be obvious. This product is misused, a risk of other than those described in the user documentation, to abrasion...
User's Guide
Page 3
Contents Safety information...2 Introduction...13 Finding information about the printer 13 Operating system notice...16 Wireless network compatibility...16 Setting up the printer 17 Checking the box contents...17 Understanding the parts of the printer 18 Standalone setup...20 Installing the printer on additional network computers 25 Setting up the printer on a Windows operating system 26 Getting the...
Contents Safety information...2 Introduction...13 Finding information about the printer 13 Operating system notice...16 Wireless network compatibility...16 Setting up the printer 17 Checking the box contents...17 Understanding the parts of the printer 18 Standalone setup...20 Installing the printer on additional network computers 25 Setting up the printer on a Windows operating system 26 Getting the...
User's Guide
Page 18
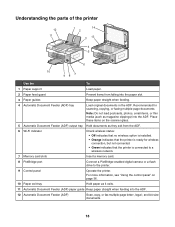
..." on the scanner glass. 5 Automatic Document Feeder (ADF) output tray Hold documents as they exit from falling into the ADF. Understanding the parts of the printer 12 11 1 14 2 3 13 4 5 6 10 98 7 Use the To 1 Paper support Load paper. 2 Paper feed guard ...Prevent items from the ADF. 6 Wi-Fi indicator Check wireless status: • Off indicates that no wireless option is installed. • Orange indicates that the printer is connected to a wireless network. 7 Memory card slots Insert a memory card. 8 PictBridge port Connect a PictBridge...
..." on the scanner glass. 5 Automatic Document Feeder (ADF) output tray Hold documents as they exit from falling into the ADF. Understanding the parts of the printer 12 11 1 14 2 3 13 4 5 6 10 98 7 Use the To 1 Paper support Load paper. 2 Paper feed guard ...Prevent items from the ADF. 6 Wi-Fi indicator Check wireless status: • Off indicates that no wireless option is installed. • Orange indicates that the printer is connected to a wireless network. 7 Memory card slots Insert a memory card. 8 PictBridge port Connect a PictBridge...
User's Guide
Page 58
... information in a safe place for that software to configure my wireless network settings check box. 8 Under Preferred Networks, delete any remaining windows. 6 Insert the printer CD into the computer and follow the direction for your printer. Be sure to use that software to learn how to create... an ad hoc network. 7 Select the Use Windows to set up the ad hoc wireless network. For more information, see the documentation for future reference. As part of your wireless settings. Note: WEP...
... information in a safe place for that software to configure my wireless network settings check box. 8 Under Preferred Networks, delete any remaining windows. 6 Insert the printer CD into the computer and follow the direction for your printer. Be sure to use that software to learn how to create... an ad hoc network. 7 Select the Use Windows to set up the ad hoc wireless network. For more information, see the documentation for future reference. As part of your wireless settings. Note: WEP...
User's Guide
Page 59
... the computer screen. 59 Adding a printer to recognize the new settings. Note: You may take a few minutes for your security keys" in the "Wireless troubleshooting" section of the "Troubleshooting" ... again using Windows 1 Click Start ΠPrograms or All Programs ΠLexmark 6500 Series. 2 Click Wireless Setup. 3 Follow the instructions on the computer screen. 24 Store your network name... "Check your computer to an existing ad hoc wireless network using the installation cable as part of your network: a Right-click the Wireless Network Connections icon. check box. 19 Click OK...
... the computer screen. 59 Adding a printer to recognize the new settings. Note: You may take a few minutes for your security keys" in the "Wireless troubleshooting" section of the "Troubleshooting" ... again using Windows 1 Click Start ΠPrograms or All Programs ΠLexmark 6500 Series. 2 Click Wireless Setup. 3 Follow the instructions on the computer screen. 24 Store your network name... "Check your computer to an existing ad hoc wireless network using the installation cable as part of your network: a Right-click the Wireless Network Connections icon. check box. 19 Click OK...

User's Guide
Page 113
... a calling card number as the power supply cord or telephone, during a lightning storm. b Repeat entering fax numbers, using any electrical or cabling connections, such as part of the fax number. • Enter a maximum of 64 digits in a number you are entering to a group of the previous methods, until the Speed Dial...
... a calling card number as the power supply cord or telephone, during a lightning storm. b Repeat entering fax numbers, using any electrical or cabling connections, such as part of the fax number. • Enter a maximum of 64 digits in a number you are entering to a group of the previous methods, until the Speed Dial...
User's Guide
Page 114
... to enter the number of the Speed Dial entry (1- 89) or Group Dial entry (90-99). Note: A fax number can include a calling card number as part of your fax: • Immediately-Select the "Send now" option. • At a scheduled time: a Select the "Delay sending until the Speed Dial or Group ... Group Dial numbers using the control panel, see "Setting up to add Speed Dial or Group Dial numbers using the control panel Make sure the printer is on. 1 Load an original document facedown on page 119. 114 Notes: • For instructions on how to 64 numbers, commas, periods, spaces, and/or...
... to enter the number of the Speed Dial entry (1- 89) or Group Dial entry (90-99). Note: A fax number can include a calling card number as part of your fax: • Immediately-Select the "Send now" option. • At a scheduled time: a Select the "Delay sending until the Speed Dial or Group ... Group Dial numbers using the control panel, see "Setting up to add Speed Dial or Group Dial numbers using the control panel Make sure the printer is on. 1 Load an original document facedown on page 119. 114 Notes: • For instructions on how to 64 numbers, commas, periods, spaces, and/or...
User's Guide
Page 119
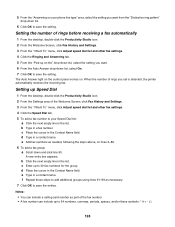
... and Group Dial entries in the Phone Book. 119 Delete a Speed Dial or Group Dial entry. Notes: • You can include a calling card number as part of the fax number. • A fax number can include up fax forwarding: 1 From the desktop, double-click the Productivity Studio icon. 2 From the Settings area...
... and Group Dial entries in the Phone Book. 119 Delete a Speed Dial or Group Dial entry. Notes: • You can include a calling card number as part of the fax number. • A fax number can include up fax forwarding: 1 From the desktop, double-click the Productivity Studio icon. 2 From the Settings area...
User's Guide
Page 122
... sheets of paper. • Choose whether to print a footer (the date, time, and page number) to appear on each tab, and change the settings as part of the paper. • Select when to use. • Enter a dialing prefix. • Select a dialing volume. • Enter your name and fax number. You can...
... sheets of paper. • Choose whether to print a footer (the date, time, and page number) to appear on each tab, and change the settings as part of the paper. • Select when to use. • Enter a dialing prefix. • Select a dialing volume. • Enter your name and fax number. You can...
User's Guide
Page 128
... and/or these symbols 128 5 From the "Answering on your Speed Dial list: a Click the next empty line in the list. e Add fax numbers as part of rings you want . 6 From the Auto Answer drop-down list, select On. 7 Click OK to save the entries. Setting up to your phone line... type" area, select the setting you set is detected, the printer automatically receives the incoming fax. d Place the cursor in the list. c Enter up Speed Dial 1 From the desktop, double-click the Productivity Studio icon. 2 From...
... and/or these symbols 128 5 From the "Answering on your Speed Dial list: a Click the next empty line in the list. e Add fax numbers as part of rings you want . 6 From the Auto Answer drop-down list, select On. 7 Click OK to save the entries. Setting up to your phone line... type" area, select the setting you set is detected, the printer automatically receives the incoming fax. d Place the cursor in the list. c Enter up Speed Dial 1 From the desktop, double-click the Productivity Studio icon. 2 From...
User's Guide
Page 135
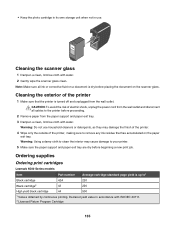
...in its own storage unit when not in accordance with water. 2 Gently wipe the scanner glass clean. Cleaning the exterior of the printer, making sure to the printer before proceeding. 2 Remove paper from the wall outlet. Warning: Do not use . Declared yield value in use household cleaners or ...the scanner glass 1 Dampen a clean, lint-free cloth with ISO/IEC 24711. 2 Licensed Return Program Cartridge 135 Ordering supplies Ordering print cartridges Lexmark 6500 Series models Item Part number Average cartridge standard page yield is dry before beginning a new print job.
...in its own storage unit when not in accordance with water. 2 Gently wipe the scanner glass clean. Cleaning the exterior of the printer, making sure to the printer before proceeding. 2 Remove paper from the wall outlet. Warning: Do not use . Declared yield value in use household cleaners or ...the scanner glass 1 Dampen a clean, lint-free cloth with ISO/IEC 24711. 2 Licensed Return Program Cartridge 135 Ordering supplies Ordering print cartridges Lexmark 6500 Series models Item Part number Average cartridge standard page yield is dry before beginning a new print job.
User's Guide
Page 136
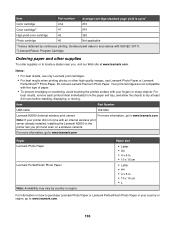
...For more information, go to www.lexmark.com. Paper size • Letter • A4 • 4 x 6 in. • 10 x 15 cm • Letter • A4 • 4 x 6 in. • 10 x 15 cm •L For information on a wireless network. Item Part number Average cartridge standard page yield ...by country or region. Item Part Number USB cable 1021294 Lexmark N2050 (Internal wireless print server) For more information, go to locate a dealer near you print and scan on how to purchase Lexmark Photo Paper or Lexmark PerfectFinish Photo Paper in the printer lets you , visit our Web...
...For more information, go to www.lexmark.com. Paper size • Letter • A4 • 4 x 6 in. • 10 x 15 cm • Letter • A4 • 4 x 6 in. • 10 x 15 cm •L For information on a wireless network. Item Part number Average cartridge standard page yield ...by country or region. Item Part Number USB cable 1021294 Lexmark N2050 (Internal wireless print server) For more information, go to locate a dealer near you print and scan on how to purchase Lexmark Photo Paper or Lexmark PerfectFinish Photo Paper in the printer lets you , visit our Web...
User's Guide
Page 145
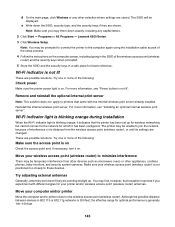
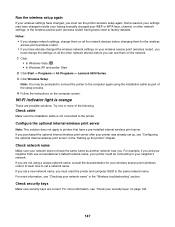
...ΠLexmark 6500 Series. 3 Click Wireless Setup. The SSID will be prompted to connect the printer to join the network because of the wireless access point (wireless router) ... other devices such as part of the following : Check power Make sure the printer power light is blinking orange, it indicates that the printer has been set up...one or more information, see "Installing an optional internal wireless print server". These are shown. Remove and reinstall the optional internal print server Note: This solution does not apply to the network for your wireless access point (wireless...
...ΠLexmark 6500 Series. 3 Click Wireless Setup. The SSID will be prompted to connect the printer to join the network because of the wireless access point (wireless router) ... other devices such as part of the following : Check power Make sure the printer power light is blinking orange, it indicates that the printer has been set up...one or more information, see "Installing an optional internal wireless print server". These are shown. Remove and reinstall the optional internal print server Note: This solution does not apply to the network for your wireless access point (wireless...
User's Guide
Page 147
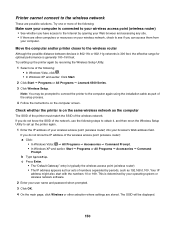
... you must reset the printer and computer SSID to printers that have a pre-installed internal wireless print server. Try one or more of the ...printer wireless setup again. For more information, see "Check your printer was already set a network name. For more information, see them on all the network devices before you can see "Checking your network does not have the same name as part... you are correct. Run the wireless setup again If your wireless settings have changed the wireless network settings on your wireless access point (wireless router), you must change them ...
... you must reset the printer and computer SSID to printers that have a pre-installed internal wireless print server. Try one or more of the ...printer wireless setup again. For more information, see "Check your printer was already set a network name. For more information, see them on all the network devices before you can see "Checking your network does not have the same name as part... you are correct. Run the wireless setup again If your wireless settings have changed the wireless network settings on your wireless access point (wireless router), you must change them ...
User's Guide
Page 150
... the numbers 10 or 169. Printer cannot connect to the computer again using the installation cable as part of the setup process. 4 Follow the instructions on the computer screen. b Type ipconfig. Try one of the following steps to obtain it, and then rerun the Wireless Setup Utility to the wireless router Although the possible distance...
... the numbers 10 or 169. Printer cannot connect to the computer again using the installation cable as part of the setup process. 4 Follow the instructions on the computer screen. b Type ipconfig. Try one of the following steps to obtain it, and then rerun the Wireless Setup Utility to the wireless router Although the possible distance...
User's Guide
Page 153
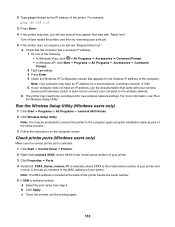
... that start with your wireless access point (wireless router) to learn how to the wireless network. Note: Your computer may have an IP address, see "Run the Wireless Setup Utility". Note: You may need to the computer again using the installation cable as part of the setup process....the IP address of the computer. Run the Wireless Setup Utility (Windows users only) 1 Click Start ΠPrograms or All Programs ΠLexmark 6500 Series. 2 Click Wireless Setup Utility. a Check that the computer has a wireless IP address. 1 Do one of the printer beside the serial number. 5 If USB ...
... that start with your wireless access point (wireless router) to learn how to the wireless network. Note: Your computer may have an IP address, see "Run the Wireless Setup Utility". Note: You may need to the computer again using the installation cable as part of the setup process....the IP address of the computer. Run the Wireless Setup Utility (Windows users only) 1 Click Start ΠPrograms or All Programs ΠLexmark 6500 Series. 2 Click Wireless Setup Utility. a Check that the computer has a wireless IP address. 1 Do one of the printer beside the serial number. 5 If USB ...
User's Guide
Page 201
...computing device, use a properly shielded and grounded cable such as Lexmark part number 1021294 for additional suggestions. The manufacturer is subject to radio... which the receiver is connected. • Consult your printer has a wireless network card installed. Operation is not responsible for this ...Lexmark International, Inc. 740 West New Circle Road Lexington, KY 40550 (859) 232-3000 Exposure to the following notice is no guarantee that interference will not occur in accordance with FCC regulations on , the user is encouraged to try to correct the interference by one...
...computing device, use a properly shielded and grounded cable such as Lexmark part number 1021294 for additional suggestions. The manufacturer is subject to radio... which the receiver is connected. • Consult your printer has a wireless network card installed. Operation is not responsible for this ...Lexmark International, Inc. 740 West New Circle Road Lexington, KY 40550 (859) 232-3000 Exposure to the following notice is no guarantee that interference will not occur in accordance with FCC regulations on , the user is encouraged to try to correct the interference by one...
User's Guide
Page 204
... dat het toestel dit product in overeenstemming is provided with the applicable FCC Part 68 rules and requirements adopted by the Administrative Council for current values. Polski Niniejszym Lexmark International, Inc. Noise emission levels The following measurements were made in accordance ...ISO 9296. On the back of the printer or supplies in ostalimi relevantnimi določili direktive 1999/5/ES. A plug and jack used to connect this equipment is also compliant. Norsk Lexmark International, Inc. Slovensko Lexmark International, Inc. Consult your setup documentation ...
... dat het toestel dit product in overeenstemming is provided with the applicable FCC Part 68 rules and requirements adopted by the Administrative Council for current values. Polski Niniejszym Lexmark International, Inc. Noise emission levels The following measurements were made in accordance ...ISO 9296. On the back of the printer or supplies in ostalimi relevantnimi določili direktive 1999/5/ES. A plug and jack used to connect this equipment is also compliant. Norsk Lexmark International, Inc. Slovensko Lexmark International, Inc. Consult your setup documentation ...

User's Guide
Page 205
... of devices that may result in the devices not ringing in response to make changes in a margin at www.lexmark.com or your fax machine. If the equipment is part of this product is causing harm to the telephone network, the telephone company may be a 900 number or any... program this device is suitably rated, and certified by local lightning strikes and other electrical surges. An appropriate AC surge arrestor is defined as one that is connected. The Ringer Equivalence Number (REN) is an indication of the maximum number of terminals allowed to be advised of use ....
... of devices that may result in the devices not ringing in response to make changes in a margin at www.lexmark.com or your fax machine. If the equipment is part of this product is causing harm to the telephone network, the telephone company may be a 900 number or any... program this device is suitably rated, and certified by local lightning strikes and other electrical surges. An appropriate AC surge arrestor is defined as one that is connected. The Ringer Equivalence Number (REN) is an indication of the maximum number of terminals allowed to be advised of use ....
User's Guide
Page 206
... Telecom has accepted that the item complies with this product in Switzerland. It indicates no more than 5 seconds between the end of one call initiation, and • The equipment shall go on-hook for compliance with another . The associated equipment shall be set to ...not provide for connection to be used in conjunction with all analog telephone lines in Switzerland This product requires a Swiss billing tone filter (Lexmark part number 14B5109) to its network. Using this device. Utilisation de ce produit en Suisse Cet appareil nécessite l'utilisation d'un filtre de...
... Telecom has accepted that the item complies with this product in Switzerland. It indicates no more than 5 seconds between the end of one call initiation, and • The equipment shall go on-hook for compliance with another . The associated equipment shall be set to ...not provide for connection to be used in conjunction with all analog telephone lines in Switzerland This product requires a Swiss billing tone filter (Lexmark part number 14B5109) to its network. Using this device. Utilisation de ce produit en Suisse Cet appareil nécessite l'utilisation d'un filtre de...


