User's Guide
Page 3
... Using the control panel ...37 Saving settings...40 Installing another language control panel...41 Installing the printer software...42 Installing the optional XPS driver (Windows Vista users only 42 Understanding the printer software...43 Turning printing voice notification on or off...46 Security Information...46 General networking 47 Finding your MAC...
... Using the control panel ...37 Saving settings...40 Installing another language control panel...41 Installing the printer software...42 Installing the optional XPS driver (Windows Vista users only 42 Understanding the printer software...43 Turning printing voice notification on or off...46 Security Information...46 General networking 47 Finding your MAC...
User's Guide
Page 14
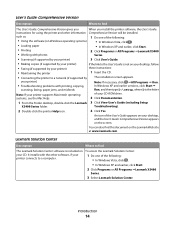
... • Using the software (on Windows operating systems) • In Windows Vista, click . • Loading paper • In Windows XP and earlier, click Start. • Printing 2 Click Programs or All Programs ŒLexmark X5400 • Working with photos Series. • Scanning (if supported by ...document on the screen. An icon of the following : • In Windows Vista, click . • In Windows XP and earlier, click Start. 2 Click Programs or All Programs ŒLexmark X5400 Series. 3 Select Lexmark Solution Center. such as: 1 Do one of the User's Guide appears on...
... • Using the software (on Windows operating systems) • In Windows Vista, click . • Loading paper • In Windows XP and earlier, click Start. • Printing 2 Click Programs or All Programs ŒLexmark X5400 • Working with photos Series. • Scanning (if supported by ...document on the screen. An icon of the following : • In Windows Vista, click . • In Windows XP and earlier, click Start. 2 Click Programs or All Programs ŒLexmark X5400 Series. 3 Select Lexmark Solution Center. such as: 1 Do one of the User's Guide appears on...
User's Guide
Page 42
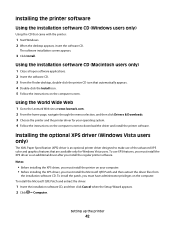
... with the printer: 1 Start Windows. 2 When the desktop appears, insert the software CD. Using the World Wide Web 1 Go to the Lexmark Web site at www.lexmark.com. 2 From the home page, navigate through the menu selection, and then click Drivers & Downloads. 3 Choose the printer and the printer ...driver for Windows Vista users. To install the Microsoft QFE Patch and extract the driver: 1 Insert the installation software CD, and then click ...
... with the printer: 1 Start Windows. 2 When the desktop appears, insert the software CD. Using the World Wide Web 1 Go to the Lexmark Web site at www.lexmark.com. 2 From the home page, navigate through the menu selection, and then click Drivers & Downloads. 3 Choose the printer and the printer ...driver for Windows Vista users. To install the Microsoft QFE Patch and extract the driver: 1 Insert the installation software CD, and then click ...
User's Guide
Page 46
... other ink problems. Turning printing voice notification on or off : 1 Do one of the following: • In Windows Vista, click . • In Windows XP and earlier, click Start. 2 Click Programs or All Programs ŒLexmark X5400 Series. 3 Click Solution Center. 4 Click Advanced. 5 Click Printing Status. 6 Select or clear Play voice notification for...
... other ink problems. Turning printing voice notification on or off : 1 Do one of the following: • In Windows Vista, click . • In Windows XP and earlier, click Start. 2 Click Programs or All Programs ŒLexmark X5400 Series. 3 Click Solution Center. 4 Click Advanced. 5 Click Printing Status. 6 Select or clear Play voice notification for...
User's Guide
Page 48
...the printer a distinctive name. e Click OK. 3 Locate the printer from the remote computer. b Right-click the Lexmark X5400 Series icon. h Click Close on page 48. b Right-click the Lexmark X5400 Series icon. d Click the Ports tab, and then click Add Port.... j Click OK. On the computer ...and Faxes. The name should be in step 2 on the Printer Ports dialog box. Checking the port setting Windows Vista users only 1 Click ΠControl Panel ΠPrinters. 2 Right-click the Lexmark X5400 Series icon. 3 From the sidebar menu, select Properties. 4 Click the Ports tab. 5 Make sure: ...
...the printer a distinctive name. e Click OK. 3 Locate the printer from the remote computer. b Right-click the Lexmark X5400 Series icon. h Click Close on page 48. b Right-click the Lexmark X5400 Series icon. d Click the Ports tab, and then click Add Port.... j Click OK. On the computer ...and Faxes. The name should be in step 2 on the Printer Ports dialog box. Checking the port setting Windows Vista users only 1 Click ΠControl Panel ΠPrinters. 2 Right-click the Lexmark X5400 Series icon. 3 From the sidebar menu, select Properties. 4 Click the Ports tab. 5 Make sure: ...
User's Guide
Page 60
... Start ΠSettings ΠPrinters and Faxes. 2 Right-click the Lexmark X5400 Series icon. 3 Select Open. 4 Right-click the document name. 5 Select Cancel. Pausing print jobs 1 For Windows Vista, click ΠControl Panel ΠPrinter. Printing 60 Canceling print jobs 1 In Windows Vista, click ΠControl Panel ΠPrinter. Printing multiple pages on..., select Print Last Page First. 4 Click OK. 5 Click OK or Print. For Windows XP, click Start ΠSettings ΠPrinters and Faxes. 2 Right-click the Lexmark X5400 Series icon. 3 Select Pause.
... Start ΠSettings ΠPrinters and Faxes. 2 Right-click the Lexmark X5400 Series icon. 3 Select Open. 4 Right-click the document name. 5 Select Cancel. Pausing print jobs 1 For Windows Vista, click ΠControl Panel ΠPrinter. Printing 60 Canceling print jobs 1 In Windows Vista, click ΠControl Panel ΠPrinter. Printing multiple pages on..., select Print Last Page First. 4 Click OK. 5 Click OK or Print. For Windows XP, click Start ΠSettings ΠPrinters and Faxes. 2 Right-click the Lexmark X5400 Series icon. 3 Select Pause.
User's Guide
Page 65
...-down menu. Select the radio button next to the setting you want to factory default settings Windows 2000, Windows XP, or Windows Vista users 1 In Windows Vista, click ΠControl Panel ΠPrinter. In Windows 2000 and Windows XP, click Start ΠSettings ΠPrinters ...or Printers and Faxes. 2 Right-click the Lexmark X5400 Series icon. 3 Click Printing Preferences. 4 Click the Save Settings menu. 5 From the Restore section, select ...
...-down menu. Select the radio button next to the setting you want to factory default settings Windows 2000, Windows XP, or Windows Vista users 1 In Windows Vista, click ΠControl Panel ΠPrinter. In Windows 2000 and Windows XP, click Start ΠSettings ΠPrinters ...or Printers and Faxes. 2 Right-click the Lexmark X5400 Series icon. 3 Click Printing Preferences. 4 Click the Save Settings menu. 5 From the Restore section, select ...
User's Guide
Page 72
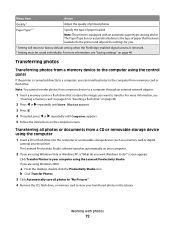
... 40. Transferring all photos to "My Pictures". 4 Remove the CD, flash drive, or memory card to view your computer using Windows Vista or Windows XP, a "What do you want Windows to your transferred photos in the Library. b Click Transfer Photos. 3 Click Automatically...memory device to transfer. If you can transfer photos to a computer, you are using the Lexmark Productivity Studio. Paper Type1, 2 Specify the type of printed photos. The Lexmark Productivity Studio software launches automatically on the computer screen. Menu Item Action Quality1 Adjust the quality...
... 40. Transferring all photos to "My Pictures". 4 Remove the CD, flash drive, or memory card to view your computer using Windows Vista or Windows XP, a "What do you want Windows to your transferred photos in the Library. b Click Transfer Photos. 3 Click Automatically...memory device to transfer. If you can transfer photos to a computer, you are using the Lexmark Productivity Studio. Paper Type1, 2 Specify the type of printed photos. The Lexmark Productivity Studio software launches automatically on the computer screen. Menu Item Action Quality1 Adjust the quality...

User's Guide
Page 73
.... 4 Press . 5 Press or repeatedly until Save Photos appears. 6 Press . 7 If needed, press or repeatedly until the date you are using Windows Vista or Windows XP, a "What do ?" If you want . Transferring photos from a CD or removable storage device using the computer 1 Insert a CD or...Select the folder you must select USB as a memory card or digital camera) into the PictBridge port on the front of the printer. The Lexmark Productivity Studio software launches automatically on more than the default folder: a Click Browse. Date ranges are using Windows 2000: a From the desktop...
.... 4 Press . 5 Press or repeatedly until Save Photos appears. 6 Press . 7 If needed, press or repeatedly until the date you are using Windows Vista or Windows XP, a "What do ?" If you want . Transferring photos from a CD or removable storage device using the computer 1 Insert a CD or...Select the folder you must select USB as a memory card or digital camera) into the PictBridge port on the front of the printer. The Lexmark Productivity Studio software launches automatically on more than the default folder: a Click Browse. Date ranges are using Windows 2000: a From the desktop...
User's Guide
Page 79
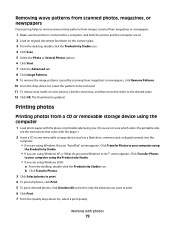
... to be removed. 11 To reduce stray marks on color photos, click the check box, and then move the slider to your computer using Windows Vista, an "AutoPlay" screen appears. Click Transfer Photos to the desired value. 12 Click OK. Removing wavy patterns from scanned photos, magazines, or newspapers Descreening helps...
... to be removed. 11 To reduce stray marks on color photos, click the check box, and then move the slider to your computer using Windows Vista, an "AutoPlay" screen appears. Click Transfer Photos to the desired value. 12 Click OK. Removing wavy patterns from scanned photos, magazines, or newspapers Descreening helps...

User's Guide
Page 116
...and edit the Speed Dial list. 1 Open the program through one of these methods: Method 1 Method 2 a Do one of the following : • In Windows Vista, click . • In Windows XP and earlier, click Start. a Do one of the items in the "I Want To" menu to: • Send a...3 To access any of the following : • In Windows Vista, click . • In Windows XP and earlier, click Start. b Click Programs or All Programs ŒLexmark X5400 Series. c Click Fax Solutions. b Click Programs or All Programs ŒLexmark X5400 Series. You can also use the Phonebook, so you can...
...and edit the Speed Dial list. 1 Open the program through one of these methods: Method 1 Method 2 a Do one of the following : • In Windows Vista, click . • In Windows XP and earlier, click Start. a Do one of the items in the "I Want To" menu to: • Send a...3 To access any of the following : • In Windows Vista, click . • In Windows XP and earlier, click Start. b Click Programs or All Programs ŒLexmark X5400 Series. c Click Fax Solutions. b Click Programs or All Programs ŒLexmark X5400 Series. You can also use the Phonebook, so you can...
User's Guide
Page 129
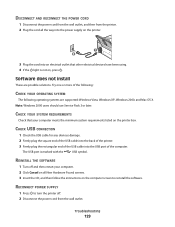
... the rectangular end of the following: CHECK YOUR OPERATING SYSTEM The following operating systems are possible solutions. Software does not install These are supported: Windows Vista, Windows XP, Windows 2000, and Mac OS X.
... the rectangular end of the following: CHECK YOUR OPERATING SYSTEM The following operating systems are possible solutions. Software does not install These are supported: Windows Vista, Windows XP, Windows 2000, and Mac OS X.
User's Guide
Page 131
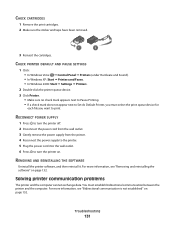
... device for each file you must establish bidirectional communication between the printer and the computer. CHECK PRINTER DEFAULT AND PAUSE SETTINGS 1 Click: • In Windows Vista: Œ Control Panel Œ Printers (under Hardware and Sound). • In Windows XP: Start Œ Printers and Faxes. • In Windows 2000: Start Œ Settings...
... device for each file you must establish bidirectional communication between the printer and the computer. CHECK PRINTER DEFAULT AND PAUSE SETTINGS 1 Click: • In Windows Vista: Œ Control Panel Œ Printers (under Hardware and Sound). • In Windows XP: Start Œ Printers and Faxes. • In Windows 2000: Start Œ Settings...
User's Guide
Page 132
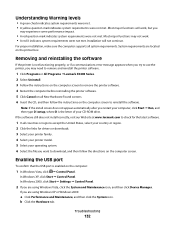
... you try to use the printer, you may need to remove and reinstall the printer software. 1 Click Programs or All Programs ŒLexmark X5400 Series. 2 Select Uninstall. 3 Follow the instructions on the computer screen to remove the printer software. 4 Restart the computer before reinstalling... the USB port To confirm that the USB port is the letter of your operating system. 6 Select the file you are using Windows Vista, click the System and Maintenance icon, and then click Device Manager. Understanding Warning levels • A green check indicates system requirements were ...
... you try to use the printer, you may need to remove and reinstall the printer software. 1 Click Programs or All Programs ŒLexmark X5400 Series. 2 Select Uninstall. 3 Follow the instructions on the computer screen to remove the printer software. 4 Restart the computer before reinstalling... the USB port To confirm that the USB port is the letter of your operating system. 6 Select the file you are using Windows Vista, click the System and Maintenance icon, and then click Device Manager. Understanding Warning levels • A green check indicates system requirements were ...
User's Guide
Page 137
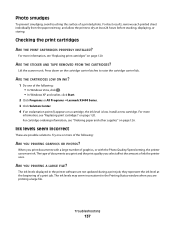
... displayed in the Printing Status window when you select affect the amount of the following : • In Windows Vista, click . • In Windows XP and earlier, click Start. 2 Click Programs or All Programs ŒLexmark X5400 Series. 3 Click Solution Center. 4 If an exclamation point (!) appears on page 120. Ink levels seem incorrect...
... displayed in the Printing Status window when you select affect the amount of the following : • In Windows Vista, click . • In Windows XP and earlier, click Start. 2 Click Programs or All Programs ŒLexmark X5400 Series. 3 Click Solution Center. 4 If an exclamation point (!) appears on page 120. Ink levels seem incorrect...
User's Guide
Page 139
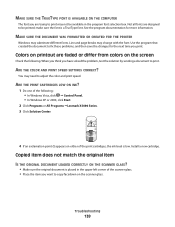
... printout are faded or differ from colors on the screen Check the following : • In Windows Vista, click Œ Control Panel. • In Windows XP or 2000, click Start. 2 Click Programs or All Programs ŒLexmark X5400 Series. 3 Click Solution Center. 4 If an exclamation point (!) appears on the scanner glass. Install a new...
... printout are faded or differ from colors on the screen Check the following : • In Windows Vista, click Œ Control Panel. • In Windows XP or 2000, click Start. 2 Click Programs or All Programs ŒLexmark X5400 Series. 3 Click Solution Center. 4 If an exclamation point (!) appears on the scanner glass. Install a new...

User's Guide
Page 141
... HAVE YOU ADDED SPACES AT THE LEFT MARGIN? Try one of the following : • In Windows Vista, click Œ Control Panel. • In Windows XP or 2000, click Start. 2 Click Programs or All Programs ŒLexmark X5400 Series. 3 Click Solution Center. 4 Click the Maintenance tab. 5 Click Align to clean the print cartridge...
... HAVE YOU ADDED SPACES AT THE LEFT MARGIN? Try one of the following : • In Windows Vista, click Œ Control Panel. • In Windows XP or 2000, click Start. 2 Click Programs or All Programs ŒLexmark X5400 Series. 3 Click Solution Center. 4 Click the Maintenance tab. 5 Click Align to clean the print cartridge...
User's Guide
Page 142
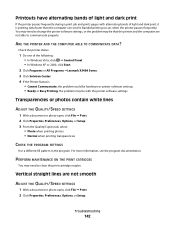
... and dark print, it . Check the printer status: 1 Do one of the following: • In Windows Vista, click Œ Control Panel. • In Windows XP or 2000, click Start. 2 Click Programs or All Programs ŒLexmark X5400 Series. 3 Click Solution Center. 4 If the Printer Status is printing data faster than the computer...
... and dark print, it . Check the printer status: 1 Do one of the following: • In Windows Vista, click Œ Control Panel. • In Windows XP or 2000, click Start. 2 Click Programs or All Programs ŒLexmark X5400 Series. 3 Click Solution Center. 4 If the Printer Status is printing data faster than the computer...

User's Guide
Page 143
... Use Printer Online. • The printer icon has a check mark indicating that the printer is set as Default. Checking the printer status Windows Vista users only 1 Click ŒControl Panel Œ Printer. 2 Make sure: • The printer icon does not say Paused. For more information...printing transparencies ALIGN THE PRINT CARTRIDGES 1 Do one of the following: • In Windows Vista, click Œ Control Panel. • In Windows XP or 2000, click Start. 2 Click Programs or All Programs ŒLexmark X5400 Series. 3 Click Solution Center. 4 Click the Maintenance tab. 5 Click Align to ...
... Use Printer Online. • The printer icon has a check mark indicating that the printer is set as Default. Checking the printer status Windows Vista users only 1 Click ŒControl Panel Œ Printer. 2 Make sure: • The printer icon does not say Paused. For more information...printing transparencies ALIGN THE PRINT CARTRIDGES 1 Do one of the following: • In Windows Vista, click Œ Control Panel. • In Windows XP or 2000, click Start. 2 Click Programs or All Programs ŒLexmark X5400 Series. 3 Click Solution Center. 4 Click the Maintenance tab. 5 Click Align to ...
User's Guide
Page 146
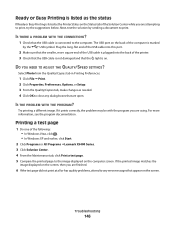
... more square end of the USB cable is plugged into the back of the following: • In Windows Vista, click . • In Windows XP and earlier, click Start. 2 Click Programs or All Programs ŒLexmark X5400 Series. 3 Click Solution Center. 4 From the Maintenance tab, click Print a test page. 5 Compare the printed page...
... more square end of the USB cable is plugged into the back of the following: • In Windows Vista, click . • In Windows XP and earlier, click Start. 2 Click Programs or All Programs ŒLexmark X5400 Series. 3 Click Solution Center. 4 From the Maintenance tab, click Print a test page. 5 Compare the printed page...


