
User's Guide
Page 3
... 36 Loading transparencies...37 Loading iron-on transfers...37 Loading custom-size paper...37 Loading banner paper...37 Loading original documents into the Automatic Document Feeder (ADF 38 3
... 36 Loading transparencies...37 Loading iron-on transfers...37 Loading custom-size paper...37 Loading banner paper...37 Loading original documents into the Automatic Document Feeder (ADF 38 3
User's Guide
Page 14
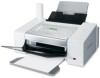
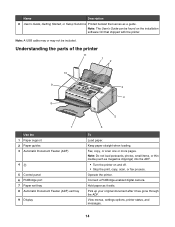
... document after it exits. Understanding the parts of the printer 11 1 2 10 9 3 4 8 5 7 Use the 1 Paper support 2 Paper guides 3 Automatic Document Feeder (ADF) 4 5 Control panel 6 PictBridge port 7 Paper exit tray 8 Automatic Document Feeder (ADF) exit tray 9 Display 6 To Load paper. View menus, settings options, printer status, and messages. 14 Note: The User's Guide...
... document after it exits. Understanding the parts of the printer 11 1 2 10 9 3 4 8 5 7 Use the 1 Paper support 2 Paper guides 3 Automatic Document Feeder (ADF) 4 5 Control panel 6 PictBridge port 7 Paper exit tray 8 Automatic Document Feeder (ADF) exit tray 9 Display 6 To Load paper. View menus, settings options, printer status, and messages. 14 Note: The User's Guide...
User's Guide
Page 15
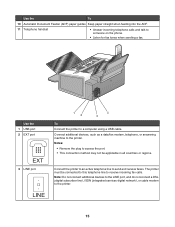
... to access the port. • This connection method may not be connected to this telephone line to the printer. Use the To 10 Automatic Document Feeder (ADF) paper guides Keep paper straight when feeding into the ADF. 11 Telephone handset • Answer incoming telephone calls and talk to send and receive...
... to access the port. • This connection method may not be connected to this telephone line to the printer. Use the To 10 Automatic Document Feeder (ADF) paper guides Keep paper straight when feeding into the ADF. 11 Telephone handset • Answer incoming telephone calls and talk to send and receive...

User's Guide
Page 38
... the center of the paper support. • The paper guides rest against the edges of the paper. Automatic Document Feeder (ADF) paper capacity Load up to 30 sheets of an original document into the Automatic Document Feeder (ADF) for scanning, copying, and faxing. 1 Load an original document facedown into the Automatic Document...
... the center of the paper support. • The paper guides rest against the edges of the paper. Automatic Document Feeder (ADF) paper capacity Load up to 30 sheets of an original document into the Automatic Document Feeder (ADF) for scanning, copying, and faxing. 1 Load an original document facedown into the Automatic Document...
User's Guide
Page 41
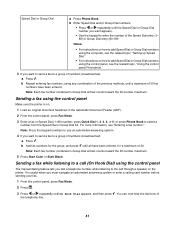
... Start Black. press Quick Dial 1, 2, 3, 4, or 5; b Add fax numbers for a maximum of numbers (broadcast fax): a Press . Note: Each fax number contained in the Automatic Document Feeder (ADF). 2 From the control panel, press Fax Mode. 3 Enter a fax or Speed Dial (1-89) number; Sending a fax using the control panel, see "Entering a fax number...
... Start Black. press Quick Dial 1, 2, 3, 4, or 5; b Add fax numbers for a maximum of numbers (broadcast fax): a Press . Note: Each fax number contained in the Automatic Document Feeder (ADF). 2 From the control panel, press Fax Mode. 3 Enter a fax or Speed Dial (1-89) number; Sending a fax using the control panel, see "Entering a fax number...

User's Guide
Page 42
For more information, see "Entering a fax number." For more information, see "Phone Line Busy." Note: Each fax number contained in the Automatic Document Feeder (ADF). 2 From the control panel, press Fax Mode. 3 Press . 4 Press or repeatedly until Delay Fax appears, and then press . 5 Press or repeatedly until Ringing and ...
For more information, see "Entering a fax number." For more information, see "Phone Line Busy." Note: Each fax number contained in the Automatic Document Feeder (ADF). 2 From the control panel, press Fax Mode. 3 Press . 4 Press or repeatedly until Delay Fax appears, and then press . 5 Press or repeatedly until Ringing and ...
User's Guide
Page 52
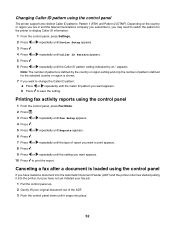
... appears. 3 Press . 4 Press or repeatedly until Caller ID Pattern appears. 5 Press . 6 Press or repeatedly until the setting you have loaded a document into the Automatic Document Feeder (ADF) and the printer roller has started pulling it snaps into place. 52 Depending on the country or region you live in and the telecommunications...
... appears. 3 Press . 4 Press or repeatedly until Caller ID Pattern appears. 5 Press . 6 Press or repeatedly until the setting you have loaded a document into the Automatic Document Feeder (ADF) and the printer roller has started pulling it snaps into place. 52 Depending on the country or region you live in and the telecommunications...
User's Guide
Page 53
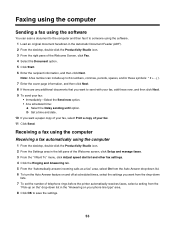
... the settings. 53 Faxing using the computer Sending a fax using the software You can include up on the" drop-down list in the Automatic Document Feeder (ADF). 2 From the desktop, double-click the Productivity Studio icon. 3 From the right pane of the Welcome Screen, click Fax. 4 Select the Document option. 5 Click...
... the settings. 53 Faxing using the computer Sending a fax using the software You can include up on the" drop-down list in the Automatic Document Feeder (ADF). 2 From the desktop, double-click the Productivity Studio icon. 3 From the right pane of the Welcome Screen, click Fax. 4 Select the Document option. 5 Click...

User's Guide
Page 73
... you want appears. 8 Press . 9 Press Start Color or Start Black. 73 Copying Making a copy 1 Load paper. 2 Load an original document facedown in the Automatic Document Feeder (ADF). 3 If necessary, press Copy Mode. 4 Press . 5 Press or repeatedly until Quality appears. 6 Press . 7 Press or repeatedly until the submenu item or the setting ...Start Black. the higher the dpi count, the higher the resolution and copy quality. 1 Load paper. 2 Load an original document facedown in the Automatic Document Feeder (ADF). 3 From the control panel, press Copy Mode. 4 Press Start Color or Start Black.
... you want appears. 8 Press . 9 Press Start Color or Start Black. 73 Copying Making a copy 1 Load paper. 2 Load an original document facedown in the Automatic Document Feeder (ADF). 3 If necessary, press Copy Mode. 4 Press . 5 Press or repeatedly until Quality appears. 6 Press . 7 Press or repeatedly until the submenu item or the setting ...Start Black. the higher the dpi count, the higher the resolution and copy quality. 1 Load paper. 2 Load an original document facedown in the Automatic Document Feeder (ADF). 3 From the control panel, press Copy Mode. 4 Press Start Color or Start Black.
User's Guide
Page 74
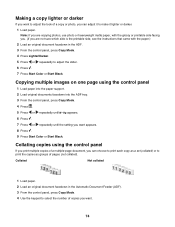
... not sure which side is the printable side, see the instructions that came with the paper.) 2 Load an original document facedown in the Automatic Document Feeder (ADF). 3 From the control panel, press Copy Mode. 4 Use the keypad to select the number of copies you want to adjust the look of a copy...
... not sure which side is the printable side, see the instructions that came with the paper.) 2 Load an original document facedown in the Automatic Document Feeder (ADF). 3 From the control panel, press Copy Mode. 4 Use the keypad to select the number of copies you want to adjust the look of a copy...

User's Guide
Page 75
... related topic on saving temporary and other settings, see the instructions that came with the paper.) 2 Load an original document facedown in the Automatic Document Feeder (ADF). 3 From the control panel, press Copy Mode. 4 Press . 5 Press or repeatedly until Resize appears. 6 Press . 7 Press or repeatedly until the setting you did not...
... related topic on saving temporary and other settings, see the instructions that came with the paper.) 2 Load an original document facedown in the Automatic Document Feeder (ADF). 3 From the control panel, press Copy Mode. 4 Press . 5 Press or repeatedly until Resize appears. 6 Press . 7 Press or repeatedly until the setting you did not...

User's Guide
Page 76
...* Specify the type of the ADF. 3 Push the control panel down until it into the printer, but you have loaded a document into the Automatic Document Feeder (ADF) and the printer roller has started pulling it snaps into place. 76 Canceling a copy after document is loaded If you have not yet initiated...
...* Specify the type of the ADF. 3 Push the control panel down until it into the printer, but you have loaded a document into the Automatic Document Feeder (ADF) and the printer roller has started pulling it snaps into place. 76 Canceling a copy after document is loaded If you have not yet initiated...
User's Guide
Page 77
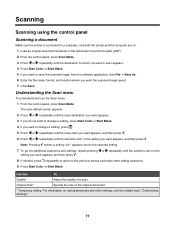
Use this To Quality* Adjust the quality of the original document. * Temporary setting. For information on . 1 Load an original document facedown in the Automatic Document Feeder (ADF). 2 From the control panel, press Scan Mode. 3 Press or repeatedly until the destination to which you want to scan appears. 4 Press Start Color or ...
Use this To Quality* Adjust the quality of the original document. * Temporary setting. For information on . 1 Load an original document facedown in the Automatic Document Feeder (ADF). 2 From the control panel, press Scan Mode. 3 Press or repeatedly until the destination to which you want to scan appears. 4 Press Start Color or ...
User's Guide
Page 78
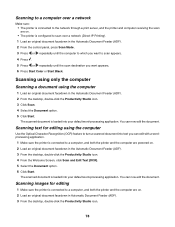
... into your default word-processing application. Scanning to a computer over a network (Direct IP Printing). 1 Load an original document facedown in the Automatic Document Feeder (ADF). 2 From the control panel, press Scan Mode. 3 Press or repeatedly until the computer to which you want to scan appears. 4 Press... is connected to a computer, and both the printer and the computer are powered on. 2 Load an original document facedown in the Automatic Document Feeder (ADF). 3 From the desktop, double-click the Productivity Studio icon. 4 From the Welcome Screen, click Scan and Edit Text (OCR). 5...
... into your default word-processing application. Scanning to a computer over a network (Direct IP Printing). 1 Load an original document facedown in the Automatic Document Feeder (ADF). 2 From the control panel, press Scan Mode. 3 Press or repeatedly until the computer to which you want to scan appears. 4 Press... is connected to a computer, and both the printer and the computer are powered on. 2 Load an original document facedown in the Automatic Document Feeder (ADF). 3 From the desktop, double-click the Productivity Studio icon. 4 From the Welcome Screen, click Scan and Edit Text (OCR). 5...

User's Guide
Page 80
.... • Click Select area to be scanned by selecting the check box. Click OK. 8 To rename the file, enter the name in the Automatic Document Feeder (ADF). 2 From the desktop, double-click the Productivity Studio icon. 3 Click Scan. 4 Select Photo or Several Photos. 5 Click Start. 6 From the Save or Edit screen...
.... • Click Select area to be scanned by selecting the check box. Click OK. 8 To rename the file, enter the name in the Automatic Document Feeder (ADF). 2 From the desktop, double-click the Productivity Studio icon. 3 Click Scan. 4 Select Photo or Several Photos. 5 Click Start. 6 From the Save or Edit screen...

User's Guide
Page 81
... facedown in the list of the screen, select the image size. 6 Click Create E-mail to an e-mail message. The thumbnail is displayed in Automatic Document Feeder (ADF). 2 From the desktop, double-click the Productivity Studio icon. 3 Click E-mail. 4 Select from the Photo, Several Photos, or Document options. 5 Click Start. 6 If you...
... facedown in the list of the screen, select the image size. 6 Click Create E-mail to an e-mail message. The thumbnail is displayed in Automatic Document Feeder (ADF). 2 From the desktop, double-click the Productivity Studio icon. 3 Click E-mail. 4 Select from the Photo, Several Photos, or Document options. 5 Click Start. 6 If you...

User's Guide
Page 82
Canceling a scan job • To cancel a scan job before your document is pulled down into the Automatic Document Feeder (ADF), press . • If you have loaded a document into the Automatic Document Feeder (ADF) and the printer roller has started pulling it into the printer, but you have not yet initiated your scan job: 1 Pull the control panel up. 2 Gently lift your original document out of the ADF. 3 Push the control panel down until it snaps into place. • To cancel a scan job started in Productivity Studio, click Scan, and then click Stop. 82
Canceling a scan job • To cancel a scan job before your document is pulled down into the Automatic Document Feeder (ADF), press . • If you have loaded a document into the Automatic Document Feeder (ADF) and the printer roller has started pulling it into the printer, but you have not yet initiated your scan job: 1 Pull the control panel up. 2 Gently lift your original document out of the ADF. 3 Push the control panel down until it snaps into place. • To cancel a scan job started in Productivity Studio, click Scan, and then click Stop. 82
User's Guide
Page 120
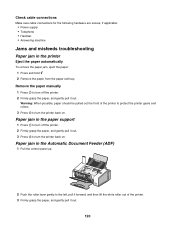
... hardware are secure, if applicable: • Power supply • Telephone • Handset • Answering machine Jams and misfeeds troubleshooting Paper jam in the Automatic Document Feeder (ADF) 1 Pull the control panel up. 2 Push the roller lever gently to turn the printer back on .
... hardware are secure, if applicable: • Power supply • Telephone • Handset • Answering machine Jams and misfeeds troubleshooting Paper jam in the Automatic Document Feeder (ADF) 1 Pull the control panel up. 2 Push the roller lever gently to turn the printer back on .

User's Guide
Page 126
... document or photo prints These are loading the correct type of media. Remove and reinstall the software It is loaded facedown in the Automatic Document Feeder (ADF) and centered between the ADF paper guides. Try one or more RAM. See "Loading paper" on page 99. 126 Checking the print cartridges Are...
... document or photo prints These are loading the correct type of media. Remove and reinstall the software It is loaded facedown in the Automatic Document Feeder (ADF) and centered between the ADF paper guides. Try one or more RAM. See "Loading paper" on page 99. 126 Checking the print cartridges Are...

User's Guide
Page 139
...not the correct printer. Change the scanning resolution to the computer is not able to exchange data. The name should be in the Automatic Document Feeder (ADF). Verify that the printer is listed with the computer The printer and computer are not able to communicate with the printer name. 10 Click... OK. The new port is plugged in the Automatic Document Feeder (ADF). 2 From the desktop, double-click the Productivity Studio icon. 3 From the left pane of the server name and the distinctive printer name...
...not the correct printer. Change the scanning resolution to the computer is not able to exchange data. The name should be in the Automatic Document Feeder (ADF). Verify that the printer is listed with the computer The printer and computer are not able to communicate with the printer name. 10 Click... OK. The new port is plugged in the Automatic Document Feeder (ADF). 2 From the desktop, double-click the Productivity Studio icon. 3 From the left pane of the server name and the distinctive printer name...


