User's Guide
Page 9
......136 Jams and misfeeds troubleshooting 136 How to clear and avoid paper jams ...136 Paper jam in the printer ...137 Paper jam in the paper support ...137 Paper or specialty media misfeeds...137 Printer does not feed paper, envelopes, or specialty media 138 Banner paper jams ...138 Paper continues to jam...
......136 Jams and misfeeds troubleshooting 136 How to clear and avoid paper jams ...136 Paper jam in the printer ...137 Paper jam in the paper support ...137 Paper or specialty media misfeeds...137 Printer does not feed paper, envelopes, or specialty media 138 Banner paper jams ...138 Paper continues to jam...
User's Guide
Page 10
... host 152 Problems reading the memory card ...152 Two-sided paper type error ...153 Two-sided printing is not supported on the current paper size 153 Two-sided printing is not supported on the current paper type 153 Error messages on the computer screen 153 Clearing error messages ...153 Left/Right Cartridge...
... host 152 Problems reading the memory card ...152 Two-sided paper type error ...153 Two-sided printing is not supported on the current paper size 153 Two-sided printing is not supported on the current paper type 153 Error messages on the computer screen 153 Clearing error messages ...153 Left/Right Cartridge...
User's Guide
Page 11
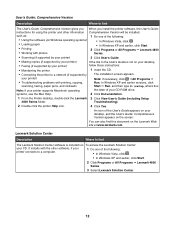
Note: If your printer supports Macintosh operating systems, see the Mac Help: 1 From the Finder desktop, double-click the Lexmark 4800 Series folder. 2 Double-click the printer Help icon. 11 Introduction Finding information about the printer Quick Setup sheet Description The Quick Setup ... hardware and software. User's Guide Description Where to find You can find this document in the printer box or on Windows operating Lexmark Web site at www.lexmark.com. Where to find The User's Guide gives you instructions for setting up You can find this document in the printer box...
Note: If your printer supports Macintosh operating systems, see the Mac Help: 1 From the Finder desktop, double-click the Lexmark 4800 Series folder. 2 Double-click the printer Help icon. 11 Introduction Finding information about the printer Quick Setup sheet Description The Quick Setup ... hardware and software. User's Guide Description Where to find You can find this document in the printer box or on Windows operating Lexmark Web site at www.lexmark.com. Where to find The User's Guide gives you instructions for setting up You can find this document in the printer box...
User's Guide
Page 12
... earlier, click Start. • Printing 2 Click Programs or All Programs Œ Lexmark 4800 • Working with photos Series. • Scanning (if supported by your printer) 3 Click User's Guide. • Making copies (if supported by The installation screen appears. Lexmark Solution Center Description Where to find The Lexmark Solution Center software is Note: If your printer...
... earlier, click Start. • Printing 2 Click Programs or All Programs Œ Lexmark 4800 • Working with photos Series. • Scanning (if supported by your printer) 3 Click User's Guide. • Making copies (if supported by The installation screen appears. Lexmark Solution Center Description Where to find The Lexmark Solution Center software is Note: If your printer...

User's Guide
Page 13
...6275 English Monday-Friday (8:00 AM- 11:00 PM ET) Saturday (Noon-6:00 PM ET) Telephone numbers and support hours vary by Lexmark International, Inc. Customer support Description Where to find (North America) Where to find (rest of world) Limited Warranty Information To view the... Warranty Information. 3 From the Statement of 12 months after the 1 Click CUSTOMER SUPPORT. Select a country or region, and then select the Customer Support link. Note: For additional information about contacting Lexmark, see the printed warranty that shipped with your printer. 6 Complete the form, ...
...6275 English Monday-Friday (8:00 AM- 11:00 PM ET) Saturday (Noon-6:00 PM ET) Telephone numbers and support hours vary by Lexmark International, Inc. Customer support Description Where to find (North America) Where to find (rest of world) Limited Warranty Information To view the... Warranty Information. 3 From the Statement of 12 months after the 1 Click CUSTOMER SUPPORT. Select a country or region, and then select the Customer Support link. Note: For additional information about contacting Lexmark, see the printed warranty that shipped with your printer. 6 Complete the form, ...
User's Guide
Page 16
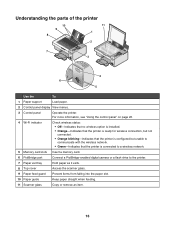
Understanding the parts of the printer 10 9 8 11 1 2 7 WI F I PRINTING 3 WI F I PRINTING 4 6 5 Use the To 1 Paper support Load paper. 2 Control panel display View menus. 3 Control panel Operate the printer. For more information, see "Using the control panel" on page 26. 4 Wi-Fi ...
Understanding the parts of the printer 10 9 8 11 1 2 7 WI F I PRINTING 3 WI F I PRINTING 4 6 5 Use the To 1 Paper support Load paper. 2 Control panel display View menus. 3 Control panel Operate the printer. For more information, see "Using the control panel" on page 26. 4 Wi-Fi ...
User's Guide
Page 19
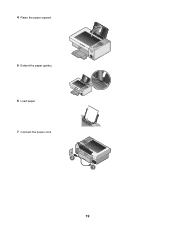
WI F I PRINTING WI F I PRINTING 7 Connect the power cord. 2 1 19 4 Raise the paper support. 5 Extend the paper guides. 6 Load paper.
WI F I PRINTING WI F I PRINTING 7 Connect the power cord. 2 1 19 4 Raise the paper support. 5 Extend the paper guides. 6 Load paper.

User's Guide
Page 36
... communication with your printer. 2 Click Start icon ΠControl Panel ΠPrinters. 3 Right-click your printer from each other, the more information, see your system support person for the other devices such as 192.168.0.100. 3 Press Enter. The IP address appears as four sets of printer software, the IP address...
... communication with your printer. 2 Click Start icon ΠControl Panel ΠPrinters. 3 Right-click your printer from each other, the more information, see your system support person for the other devices such as 192.168.0.100. 3 Press Enter. The IP address appears as four sets of printer software, the IP address...
User's Guide
Page 37
... this printer, and assign a name to your printer. 5 Follow the directions on the computer screen until installation is complete. Contact your system support person for more information. If the software detects a direct network attached printer, you want to enable to print to the shared printer. 2... or Windows XP users only: 1 For more information. Refresh Click Refresh to have direct network attached printers. Contact your system support person for more information, see the setup information that may have the Configuration Utility automatically search to find the name of the ...
... this printer, and assign a name to your printer. 5 Follow the directions on the computer screen until installation is complete. Contact your system support person for more information. If the software detects a direct network attached printer, you want to enable to print to the shared printer. 2... or Windows XP users only: 1 For more information. Refresh Click Refresh to have direct network attached printers. Contact your system support person for more information, see the setup information that may have the Configuration Utility automatically search to find the name of the ...
User's Guide
Page 41
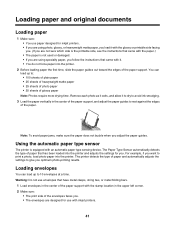
... can load up to rest against the edges of glossy paper Note: Photos require more drying time. The printer detects the type of the paper support. The Paper Type Sensor automatically detects the type of the envelopes faces you. • The envelopes are designed for use paper designed for you. ...Warning: Do not use envelopes that have metal clasps, string ties, or metal folding bars. 1 Load envelopes in the center of the paper support with the stamp location in the upper left corner. 2 Make sure: • The print side of paper that has been loaded into the printer. For...
... can load up to rest against the edges of glossy paper Note: Photos require more drying time. The printer detects the type of the paper support. The Paper Type Sensor automatically detects the type of the envelopes faces you. • The envelopes are designed for use paper designed for you. ...Warning: Do not use envelopes that have metal clasps, string ties, or metal folding bars. 1 Load envelopes in the center of the paper support with the stamp location in the upper left corner. 2 Make sure: • The print side of paper that has been loaded into the printer. For...
User's Guide
Page 42
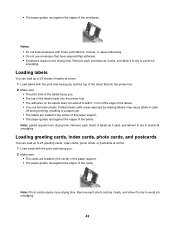
.... 2 Make sure: • The print side of the labels faces you . 2 Make sure: • The cards are loaded in the center of the paper support. • The paper guides rest against the edges of the labels. Loading greeting cards, index cards, photo cards, and postcards You can load up to...missing labels) may cause labels to peel off during printing, resulting in a paper jam. • The labels are loaded in the center of the paper support. • The paper guides rest against the edges of the cards. Note: Photo cards require more drying time. Remove each photo card as it exits...
.... 2 Make sure: • The print side of the labels faces you . 2 Make sure: • The cards are loaded in the center of the paper support. • The paper guides rest against the edges of the labels. Loading greeting cards, index cards, photo cards, and postcards You can load up to...missing labels) may cause labels to peel off during printing, resulting in a paper jam. • The labels are loaded in the center of the paper support. • The paper guides rest against the edges of the cards. Note: Photo cards require more drying time. Remove each photo card as it exits...
User's Guide
Page 43
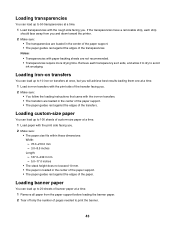
...transfer facing you. 2 Make sure: • You follow the loading instructions that came with paper backing sheets are loaded in the center of the paper support. • The paper guides rest against the edges of the transfers. Loading transparencies You can load up to 50 transparencies at a time. 1 Load ....0-432.0 mm - 5.0-17.0 inches • The stack height does not exceed 10 mm. • The paper is loaded in the center of the paper support. • The paper guides rest against the edges of the paper. Notes: • Transparencies with the iron-on transfers You can load up to 20...
...transfer facing you. 2 Make sure: • You follow the loading instructions that came with paper backing sheets are loaded in the center of the paper support. • The paper guides rest against the edges of the transfers. Loading transparencies You can load up to 50 transparencies at a time. 1 Load ....0-432.0 mm - 5.0-17.0 inches • The stack height does not exceed 10 mm. • The paper is loaded in the center of the paper support. • The paper guides rest against the edges of the paper. Notes: • Transparencies with the iron-on transfers You can load up to 20...
User's Guide
Page 44
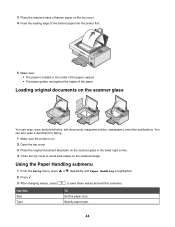
... sure: • The paper is on. 2 Open the top cover. 3 Place the original document facedown on the scanner glass in the center of the paper support. • The paper guides rest against the edges of the banner paper into the printer first. 3 Place the required stack of banner paper on the...
... sure: • The paper is on. 2 Open the top cover. 3 Place the original document facedown on the scanner glass in the center of the paper support. • The paper guides rest against the edges of the banner paper into the printer first. 3 Place the required stack of banner paper on the...
User's Guide
Page 48
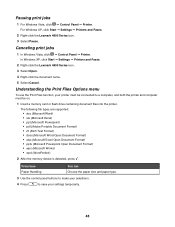
...; Control Panel Œ Printer. Understanding the Print Files Options menu To use the Print Files function, your settings temporarily. 48 The following file types are supported: • .doc (Microsoft Word) • .xls (Microsoft Excel) • .ppt (Microsoft Powerpoint) • .pdf (Adobe Portable Document Format) •...the memory device is detected, press . For Windows XP, click Start Œ Settings Œ Printers and Faxes. 2 Right-click the Lexmark 4800 Series icon. 3 Select Pause. In Windows XP, click Start Œ Settings Œ Printers and Faxes. 2 Right-click the...
...; Control Panel Œ Printer. Understanding the Print Files Options menu To use the Print Files function, your settings temporarily. 48 The following file types are supported: • .doc (Microsoft Word) • .xls (Microsoft Excel) • .ppt (Microsoft Powerpoint) • .pdf (Adobe Portable Document Format) •...the memory device is detected, press . For Windows XP, click Start Œ Settings Œ Printers and Faxes. 2 Right-click the Lexmark 4800 Series icon. 3 Select Pause. In Windows XP, click Start Œ Settings Œ Printers and Faxes. 2 Right-click the...
User's Guide
Page 49
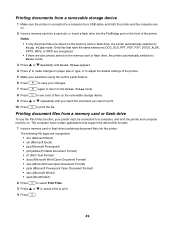
... switches to Photo mode. 3 Press or repeatedly until you reach the document you want to print. 10 Press to print. 4 Press . 49 Only files that support the desired file formats. 1 Insert a memory card or flash drive containing document files into the PictBridge port on the front of the printer. The following...
... switches to Photo mode. 3 Press or repeatedly until you reach the document you want to print. 10 Press to print. 4 Press . 49 Only files that support the desired file formats. 1 Insert a memory card or flash drive containing document files into the PictBridge port on the front of the printer. The following...

User's Guide
Page 56
...Set the volume of paper loaded. In Windows 2000 and Windows XP, click Start ΠSettings ΠPrinters or Printers and Faxes. 2 Right-click the Lexmark 4800 Series icon. 3 Click Printing Preferences. 4 Click the Save Settings menu. 5 From the Restore section, select Factory Settings (Defaults). 56 Using the Change... a certain time limit. Change the language shown on page 44. Change the country or region shown on the control panel to your system support person to block to prevent individual users on a network from the Save Settings drop-down menu. Set the printer to delete, and then ...
...Set the volume of paper loaded. In Windows 2000 and Windows XP, click Start ΠSettings ΠPrinters or Printers and Faxes. 2 Right-click the Lexmark 4800 Series icon. 3 Click Printing Preferences. 4 Click the Save Settings menu. 5 From the Restore section, select Factory Settings (Defaults). 56 Using the Change... a certain time limit. Change the language shown on page 44. Change the country or region shown on the control panel to your system support person to block to prevent individual users on a network from the Save Settings drop-down menu. Set the printer to delete, and then ...
User's Guide
Page 58
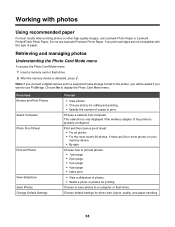
Note: If you connect a digital camera set to a supported mass storage format to the printer, you will be asked if you want to use Lexmark Premium Photo Paper. Choose to save photos to display the Photo Card Mode menu. This selection is only displayed if the wireless ...if there are not compatible with photos Using recommended paper For best results when printing photos or other high-quality images, use Lexmark Photo Paper or Lexmark PerfectFinish Photo Paper. From here Browse and Print Photos Select Computer Photo Proof Sheet Print All Photos View Slideshow Save Photos Change...
Note: If you connect a digital camera set to a supported mass storage format to the printer, you will be asked if you want to use Lexmark Premium Photo Paper. Choose to save photos to display the Photo Card Mode menu. This selection is only displayed if the wireless ...if there are not compatible with photos Using recommended paper For best results when printing photos or other high-quality images, use Lexmark Photo Paper or Lexmark PerfectFinish Photo Paper. From here Browse and Print Photos Select Computer Photo Proof Sheet Print All Photos View Slideshow Save Photos Change...

User's Guide
Page 62
... of the photo or photos to be printed. If the computer is connected directly to the printer through an external network adapter that does not support memory device connection. • The printer may require that you select a computer (and a PIN if required by that computer). 1 Insert a memory card or a flash drive...
... of the photo or photos to be printed. If the computer is connected directly to the printer through an external network adapter that does not support memory device connection. • The printer may require that you select a computer (and a PIN if required by that computer). 1 Insert a memory card or a flash drive...
User's Guide
Page 72
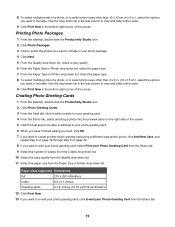
.../or photo, click Add New Card, and repeat step 3 on page 72 through step 6 on page 72. 8 If you want in the table. Paper sizes supported Dimensions A4 210 x 297 millimeters Letter 8.5 x 11 inches Greeting cards 4 x 8 inches (10.16 x 20.32 centimeters) 12 Click Print Now. 13 If you want to...
.../or photo, click Add New Card, and repeat step 3 on page 72 through step 6 on page 72. 8 If you want in the table. Paper sizes supported Dimensions A4 210 x 297 millimeters Letter 8.5 x 11 inches Greeting cards 4 x 8 inches (10.16 x 20.32 centimeters) 12 Click Print Now. 13 If you want to...
User's Guide
Page 75
... glossy or printable side facing you. (If you want to print. Note: To prevent smudging or scratching, avoid touching the printed surface with your camera supports DPOF, you can also modify the setting that came with the glossy or printable side facing you. (If you are not sure which photos to...
... glossy or printable side facing you. (If you want to print. Note: To prevent smudging or scratching, avoid touching the printed surface with your camera supports DPOF, you can also modify the setting that came with the glossy or printable side facing you. (If you are not sure which photos to...

