User's Guide
Page 6
...poor print quality 68 Received fax is blank...68 Jams and misfeeds troubleshooting 68 Paper jam in the printer...68 Paper jam in the paper support...68 Paper or specialty media misfeeds...69 Printer does not feed paper, envelopes, or specialty media 69 Banner paper jams...69 Memory card troubleshooting......71 Cartridge Error...71 Cartridge missing...72 Change paper or photo size setting 72 Clear the carrier jam...72 Clear the paper jam...72 Color ink low...72 Could not detect a proof sheet 72 Computer not connected...73 Insert camera/memory card...73 Invalid photo/paper size selection 73 ...
...poor print quality 68 Received fax is blank...68 Jams and misfeeds troubleshooting 68 Paper jam in the printer...68 Paper jam in the paper support...68 Paper or specialty media misfeeds...69 Printer does not feed paper, envelopes, or specialty media 69 Banner paper jams...69 Memory card troubleshooting......71 Cartridge Error...71 Cartridge missing...72 Change paper or photo size setting 72 Clear the carrier jam...72 Clear the paper jam...72 Color ink low...72 Could not detect a proof sheet 72 Computer not connected...73 Insert camera/memory card...73 Invalid photo/paper size selection 73 ...
User's Guide
Page 22
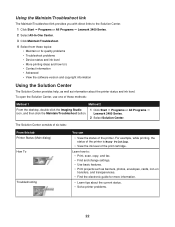
..., iron-on transfers, and transparencies. • Find the electronic guide for more information. • Learn tips about the printer status and ink level. Using the Maintain/Troubleshoot link The Maintain/Troubleshoot link provides you with direct links to the Solution Center. 1 Click Start...; Lexmark 3400 Series. 2 Select All-In-One Center. 3 Click Maintain/Troubleshoot. 4 Select from these methods: Method 1 Method 2 From the desktop, double-click the Imaging Studio icon, and then click the Maintain/Troubleshoot button. 1 Click Start Œ Programs or All Programs Œ Lexmark 3400...
..., iron-on transfers, and transparencies. • Find the electronic guide for more information. • Learn tips about the printer status and ink level. Using the Maintain/Troubleshoot link The Maintain/Troubleshoot link provides you with direct links to the Solution Center. 1 Click Start...; Lexmark 3400 Series. 2 Select All-In-One Center. 3 Click Maintain/Troubleshoot. 4 Select from these methods: Method 1 Method 2 From the desktop, double-click the Imaging Studio icon, and then click the Maintain/Troubleshoot button. 1 Click Start Œ Programs or All Programs Œ Lexmark 3400...
User's Guide
Page 23
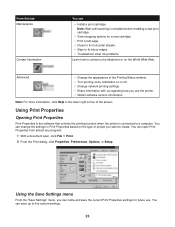
... settings for a new cartridge. • Print a test page. • Clean to fix horizontal streaks. • Align to fix blurry edges. • Troubleshoot other ink problems. Learn how to create. Using the Save Settings menu From the "Save Settings" menu, you use . You can name and save up to a computer... can • Install a print cartridge. Using Print Properties Opening Print Properties Print Properties is the software that controls the printing function when the printer is complete before installing a new print cartridge. • View shopping options for future use the...
... settings for a new cartridge. • Print a test page. • Clean to fix horizontal streaks. • Align to fix blurry edges. • Troubleshoot other ink problems. Learn how to create. Using the Save Settings menu From the "Save Settings" menu, you use . You can name and save up to a computer... can • Install a print cartridge. Using Print Properties Opening Print Properties Print Properties is the software that controls the printing function when the printer is complete before installing a new print cartridge. • View shopping options for future use the...
User's Guide
Page 27
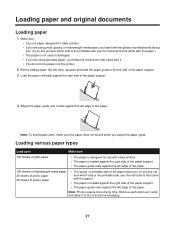
...against the left edge of the paper. Loading paper and original documents Loading paper 1 Make sure: • You use paper designed for use with inkjet printers. • The paper is loaded against the right side of the paper support. • The paper guide rests against the left edge of the paper...the printable side, see the instructions that came with it. • You do not force paper into the printer. 2 Before loading paper the first time, squeeze and slide the paper guide to avoid ink smudging. 27 Note: To avoid paper jams, make sure the paper does not buckle when you adjust the...
...against the left edge of the paper. Loading paper and original documents Loading paper 1 Make sure: • You use paper designed for use with inkjet printers. • The paper is loaded against the right side of the paper support. • The paper guide rests against the left edge of the paper...the printable side, see the instructions that came with it. • You do not force paper into the printer. 2 Before loading paper the first time, squeeze and slide the paper guide to avoid ink smudging. 27 Note: To avoid paper jams, make sure the paper does not buckle when you adjust the...

User's Guide
Page 28
...Warning: Do not use envelopes that have exposed flap adhesive. - Notes: - Remove each photo card as it exits, and allow it to dry to avoid ink smudging. • The print side of the envelopes faces you . • The cards are designed for use with holes, perforations, cutouts, or deep embossing... of the cards faces you . • The stamp location is in the upper left edge of the transfers. Do not load envelopes with inkjet printers. • The envelopes are loaded against the right side of the paper support. • The paper guide rests against the left corner. •...
...Warning: Do not use envelopes that have exposed flap adhesive. - Notes: - Remove each photo card as it exits, and allow it to dry to avoid ink smudging. • The print side of the envelopes faces you . • The cards are designed for use with holes, perforations, cutouts, or deep embossing... of the cards faces you . • The stamp location is in the upper left edge of the transfers. Do not load envelopes with inkjet printers. • The envelopes are loaded against the right side of the paper support. • The paper guide rests against the left corner. •...
User's Guide
Page 29
... side of the transparencies faces you. • If the transparencies have a removable strip, each transparency as it exits, and allow it to dry to avoid ink smudging. • The print side of the paper faces you. • The paper size fits within 1 mm of the edge of the label. •... more drying time. Note: Labels require more drying time. Remove each strip faces away from you . • The top of the labels feeds into the printer first. • The adhesive on the labels does not extend to within these dimensions: Width: - 76-216 mm - 3.0-8.5 inches Length: - 127-432 mm - 5.0-17.0...
... side of the transparencies faces you. • If the transparencies have a removable strip, each transparency as it exits, and allow it to dry to avoid ink smudging. • The print side of the paper faces you. • The paper size fits within 1 mm of the edge of the label. •... more drying time. Note: Labels require more drying time. Remove each strip faces away from you . • The top of the labels feeds into the printer first. • The adhesive on the labels does not extend to within these dimensions: Width: - 76-216 mm - 3.0-8.5 inches Length: - 127-432 mm - 5.0-17.0...
User's Guide
Page 56
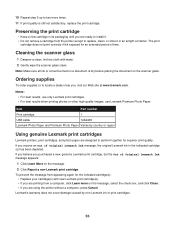
... printing photos or other high-quality images, use Lexmark Premium Photo Paper. Note: Make sure all ink or corrective fluid on a document is still not satisfactory, replace the print cartridge. Lexmark's warranty does not cover damage caused by country or region Using genuine Lexmark print cartridges Lexmark printers, print cartridges, and photo paper are printing from...
... printing photos or other high-quality images, use Lexmark Premium Photo Paper. Note: Make sure all ink or corrective fluid on a document is still not satisfactory, replace the print cartridge. Lexmark's warranty does not cover damage caused by country or region Using genuine Lexmark print cartridges Lexmark printers, print cartridges, and photo paper are printing from...
User's Guide
Page 60
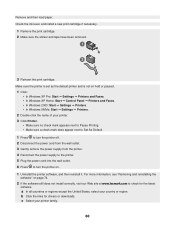
a In all countries or regions except the United States, select your printer family. 60 Check the ink level, and install a new print cartridge if necessary. 1 Remove the print cartridge. 2 Make sure the sticker and tape have been removed. 3 Reinsert the print cartridge. .... 3 Gently remove the power supply from the printer. 4 Reconnect the power supply to the printer. 5 Plug the power cord into the wall outlet. 6 Press to turn the printer on page 74. 2 If the software still does not install correctly, visit our Web site at www.lexmark.com to check for drivers or downloads. Remove...
a In all countries or regions except the United States, select your printer family. 60 Check the ink level, and install a new print cartridge if necessary. 1 Remove the print cartridge. 2 Make sure the sticker and tape have been removed. 3 Reinsert the print cartridge. .... 3 Gently remove the power supply from the printer. 4 Reconnect the power supply to the printer. 5 Plug the power cord into the wall outlet. 6 Press to turn the printer on page 74. 2 If the software still does not install correctly, visit our Web site at www.lexmark.com to check for drivers or downloads. Remove...

User's Guide
Page 62
... country or region. To avoid ink smudging when you want to download, and follow the directions on page 74. 2 If the software still does not install correctly, visit our Web site at www.lexmark.com to dry. a In all countries or regions except the United States, select your printer model. Poor text and...
... country or region. To avoid ink smudging when you want to download, and follow the directions on page 74. 2 If the software still does not install correctly, visit our Web site at www.lexmark.com to dry. a In all countries or regions except the United States, select your printer model. Poor text and...
User's Guide
Page 65
... reinstalling the software" on page 74. 2 If the software still does not install correctly, visit our Web site at www.lexmark.com to Set As Default. 1 Uninstall the printer software, and then reinstall it with a clean, lint-free cloth dampened with water. • Unexpected characters • White ...see "Error messages" on page 71. Check the ink level, and install a new print cartridge if necessary. If the scanner glass is displayed, see "Error messages" on hold or paused. 1 Click: • In Windows XP Pro: Start Œ Settings Œ Printers and Faxes. • In Windows XP Home: ...
... reinstalling the software" on page 74. 2 If the software still does not install correctly, visit our Web site at www.lexmark.com to Set As Default. 1 Uninstall the printer software, and then reinstall it with a clean, lint-free cloth dampened with water. • Unexpected characters • White ...see "Error messages" on page 71. Check the ink level, and install a new print cartridge if necessary. If the scanner glass is displayed, see "Error messages" on hold or paused. 1 Click: • In Windows XP Pro: Start Œ Settings Œ Printers and Faxes. • In Windows XP Home: ...
User's Guide
Page 68
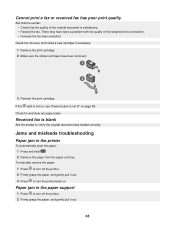
Check the ink level, and install a new cartridge if necessary. 1 Remove the print cartridge. 2 Make sure the sticker and tape have...Jams and misfeeds troubleshooting Paper jam in the paper support 1 Press to turn off the printer. 2 Firmly grasp the paper, and gently pull it out. 3 Press to turn off the printer. 2 Firmly grasp the paper, and gently pull it out. 68 Check for and .... Received fax is satisfactory. • Resend the fax. To manually remove the paper: 1 Press to turn the printer back on page 58. If the light is not on, see "Power button is not lit" on . Paper jam in the...
Check the ink level, and install a new cartridge if necessary. 1 Remove the print cartridge. 2 Make sure the sticker and tape have...Jams and misfeeds troubleshooting Paper jam in the paper support 1 Press to turn off the printer. 2 Firmly grasp the paper, and gently pull it out. 3 Press to turn off the printer. 2 Firmly grasp the paper, and gently pull it out. 68 Check for and .... Received fax is satisfactory. • Resend the fax. To manually remove the paper: 1 Press to turn the printer back on page 58. If the light is not on, see "Power button is not lit" on . Paper jam in the...
User's Guide
Page 72
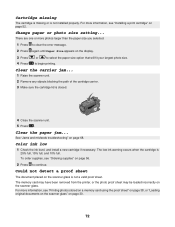
..." on page 38, or "Loading original documents on the scanner glass" on page 52. The memory card may have been removed from the printer, or the photo proof sheet may be loaded incorrectly on page 68. Change paper or photo size setting... There are one or more information,... see "Installing a print cartridge" on page 30. 72 Color ink low 1 Check the ink level, and install a new cartridge if necessary. For more information, see "Ordering supplies" on the display. 3 Press 4 Press or to begin ...
..." on page 38, or "Loading original documents on the scanner glass" on page 52. The memory card may have been removed from the printer, or the photo proof sheet may be loaded incorrectly on page 68. Change paper or photo size setting... There are one or more information,... see "Installing a print cartridge" on page 30. 72 Color ink low 1 Check the ink level, and install a new cartridge if necessary. For more information, see "Ordering supplies" on the display. 3 Press 4 Press or to begin ...
User's Guide
Page 83
...language appears on display 58 index cards loading 28 printing 32 information, finding 9 ink level, checking 22 insert camera/memory card error 73 inserting memory cards 36 PictBridge-enabled digital camera 37 installing print cartridge 52 printer software 74 invalid photo/paper size selection 73 iron-on transfers, loading 28 J... does not print 59 paper exit tray 14 paper guide 14 paper jam error 72 paper jam in paper support 68 paper jam in printer 68 paper or specialty media misfeeds 69 Paper Setup tab changing orientation 24 changing paper size 24 paper sizes, specifying 24 paper skewed error...
...language appears on display 58 index cards loading 28 printing 32 information, finding 9 ink level, checking 22 insert camera/memory card error 73 inserting memory cards 36 PictBridge-enabled digital camera 37 installing print cartridge 52 printer software 74 invalid photo/paper size selection 73 iron-on transfers, loading 28 J... does not print 59 paper exit tray 14 paper guide 14 paper jam error 72 paper jam in paper support 68 paper jam in printer 68 paper or specialty media misfeeds 69 Paper Setup tab changing orientation 24 changing paper size 24 paper sizes, specifying 24 paper skewed error...
User's Guide
Page 85
... alignment problem 71 carrier jam 72 cartridge error 71 cartridge missing 72 change paper or photo size setting 72 change paper size setting 74 color ink low 72 computer not connected 73 could not detect a proof sheet 72 insert camera/memory card 73 invalid photo/paper size selection 73 load paper... document or photo prints 64 poor quality at the edges of the page 63 poor text and graphic quality 62 print speed is slow 63 printer does not print or respond 64 troubleshooting, scan cannot scan to application 67 partial document or photo scans 67 poor scanned image quality 66 scan...
... alignment problem 71 carrier jam 72 cartridge error 71 cartridge missing 72 change paper or photo size setting 72 change paper size setting 74 color ink low 72 computer not connected 73 could not detect a proof sheet 72 insert camera/memory card 73 invalid photo/paper size selection 73 load paper... document or photo prints 64 poor quality at the edges of the page 63 poor text and graphic quality 62 print speed is slow 63 printer does not print or respond 64 troubleshooting, scan cannot scan to application 67 partial document or photo scans 67 poor scanned image quality 66 scan...


