User's Guide
Page 3
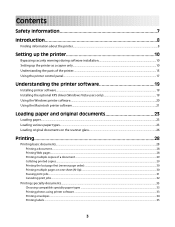
... Setting up the printer as a copier only...10 Understanding the parts of the printer...15 Using the printer control panel...17 Understanding the printer software 19 Installing printer software...19 Installing the optional XPS driver (Windows Vista users only 19 Using the Windows printer software...20 Using the Macintosh printer software...21 Loading paper and original documents 23 Loading paper...23 Loading various paper types...23 Loading original documents on the scanner glass 26 Printing 28 Printing basic documents...28 Printing a document...28 Printing Web pages...28 Printing multiple...
... Setting up the printer as a copier only...10 Understanding the parts of the printer...15 Using the printer control panel...17 Understanding the printer software 19 Installing printer software...19 Installing the optional XPS driver (Windows Vista users only 19 Using the Windows printer software...20 Using the Macintosh printer software...21 Loading paper and original documents 23 Loading paper...23 Loading various paper types...23 Loading original documents on the scanner glass 26 Printing 28 Printing basic documents...28 Printing a document...28 Printing Web pages...28 Printing multiple...
User's Guide
Page 4
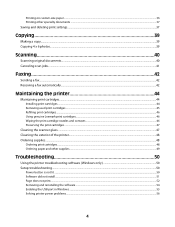
... print cartridges...46 Using genuine Lexmark print cartridges...46 Wiping the print cartridge nozzles and contacts ...46 Preserving the print cartridges ...47 Cleaning the scanner glass...47 Cleaning the exterior of the printer...48 Ordering supplies...48 Ordering print cartridges ...48 Ordering paper and other supplies...49 Troubleshooting 50 Using the printer troubleshooting software (Windows only 50 Setup troubleshooting...50 Power button is not lit ...50 Software did not install...51 Page does not print...52 Removing and reinstalling the software ...54 Enabling the USB port...
... print cartridges...46 Using genuine Lexmark print cartridges...46 Wiping the print cartridge nozzles and contacts ...46 Preserving the print cartridges ...47 Cleaning the scanner glass...47 Cleaning the exterior of the printer...48 Ordering supplies...48 Ordering print cartridges ...48 Ordering paper and other supplies...49 Troubleshooting 50 Using the printer troubleshooting software (Windows only 50 Setup troubleshooting...50 Power button is not lit ...50 Software did not install...51 Page does not print...52 Removing and reinstalling the software ...54 Enabling the USB port...
User's Guide
Page 8
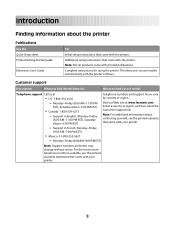
... Quick Setup sheet Printed Getting Started guide Electronic User's Guide For Initial setup instructions that came with the printer. Support in English: Monday-Friday (8:00 AM-11:00 PM EST), Saturday (Noon-6:00 PM EST) Telephone numbers and support hours vary by country or region. Introduction Finding information about contacting Lexmark, see the printed warranty statement that came with your printer. 8 The electronic version installs automatically with printed publications. Support...
... Quick Setup sheet Printed Getting Started guide Electronic User's Guide For Initial setup instructions that came with the printer. Support in English: Monday-Friday (8:00 AM-11:00 PM EST), Saturday (Noon-6:00 PM EST) Telephone numbers and support hours vary by country or region. Introduction Finding information about contacting Lexmark, see the printed warranty statement that came with your printer. 8 The electronic version installs automatically with printed publications. Support...
User's Guide
Page 10
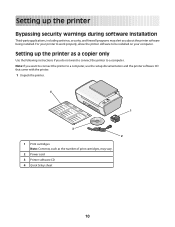
... printer to work properly, allow the printer software to a computer. Setting up the printer Bypassing security warnings during software installation Third-party applications, including antivirus, security, and firewall programs may vary. 2 Power cord 3 Printer software CD 4 Quick Setup sheet 10 Note: If you do not want to connect the printer to a computer, use the setup documentation and the printer software CD that came with the printer. 1 Unpack the printer. 4 1 2 1 3 3 2 1 Print cartridges Note: Contents, such as a copier only Use...
... printer to work properly, allow the printer software to a computer. Setting up the printer Bypassing security warnings during software installation Third-party applications, including antivirus, security, and firewall programs may vary. 2 Power cord 3 Printer software CD 4 Quick Setup sheet 10 Note: If you do not want to connect the printer to a computer, use the setup documentation and the printer software CD that came with the printer. 1 Unpack the printer. 4 1 2 1 3 3 2 1 Print cartridges Note: Contents, such as a copier only Use...
User's Guide
Page 16
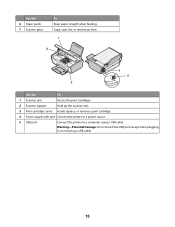
Use the 6 Paper guide 7 Scanner glass To Keep paper straight when feeding. Warning-Potential Damage: Do not touch the USB port except when plugging in or removing a USB cable. 16 Copy, scan, fax, or remove an item. 1 2 4 5 3 Use the To 1 Scanner unit Access the print cartridges. 2 Scanner support Hold up the scanner unit. 3 Print cartridge carrier Install, replace, or remove a print cartridge. 4 Power supply with port Connect the printer to a power source. 5 USB port Connect the printer to a computer using a USB cable.
Use the 6 Paper guide 7 Scanner glass To Keep paper straight when feeding. Warning-Potential Damage: Do not touch the USB port except when plugging in or removing a USB cable. 16 Copy, scan, fax, or remove an item. 1 2 4 5 3 Use the To 1 Scanner unit Access the print cartridges. 2 Scanner support Hold up the scanner unit. 3 Print cartridge carrier Install, replace, or remove a print cartridge. 4 Power supply with port Connect the printer to a power source. 5 USB port Connect the printer to a computer using a USB cable.

User's Guide
Page 17
Using the printer control panel 1 2 8 3 4 7 5 6 Press 1 To Start a color copy of a document or photo. 2 Start a black-and-white copy of a document or photo. 3 Start a 4 x 6-inch color photo copy. 4 Scan a document or photo to the computer. 5 Load or eject paper. 6 • Turn the printer on or off. • Cancel a print, copy, or scan job in progress. • Reset the printer. 7 Cancel a print, copy, or scan job in progress. 8 Set the number of copies. 17
Using the printer control panel 1 2 8 3 4 7 5 6 Press 1 To Start a color copy of a document or photo. 2 Start a black-and-white copy of a document or photo. 3 Start a 4 x 6-inch color photo copy. 4 Scan a document or photo to the computer. 5 Load or eject paper. 6 • Turn the printer on or off. • Cancel a print, copy, or scan job in progress. • Reset the printer. 7 Cancel a print, copy, or scan job in progress. 8 Set the number of copies. 17

User's Guide
Page 19
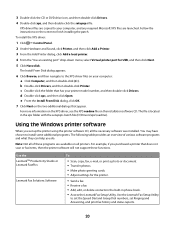
... the driver files from the installation software CD. Installing the optional XPS driver (Windows Vista users only) The XML Paper Specification (XPS) driver is an optional printer driver designed to download the driver and install the printer software. Using the World Wide Web 1 Go to the Lexmark Web site at www.lexmark.com. 2 From the home page, navigate through the menu selection, and then click Drivers & Downloads. 3 Choose the printer and the printer driver for Windows Vista users. Understanding the printer software Installing printer software Using Windows 1 Close all open software...
... the driver files from the installation software CD. Installing the optional XPS driver (Windows Vista users only) The XML Paper Specification (XPS) driver is an optional printer driver designed to download the driver and install the printer software. Using the World Wide Web 1 Go to the Lexmark Web site at www.lexmark.com. 2 From the home page, navigate through the menu selection, and then click Drivers & Downloads. 3 Choose the printer and the printer driver for Windows Vista users. Understanding the printer software Installing printer software Using Windows 1 Close all open software...
User's Guide
Page 20
... located in phone book. • Access the Lexmark Fax Setup Utility. For example, if you set Ringing and Answering, and print fax history and status reports. 20 d Double-click xps, and then click Open. XPS driver files are copied to finish installing the patch. Use the Lexmark Fax Setup Utility to install some additional programs. The following table provides an overview of these functions. You may have chosen to set the Speed Dial and Group Dial numbers, set up the printer using the printer software...
... located in phone book. • Access the Lexmark Fax Setup Utility. For example, if you set Ringing and Answering, and print fax history and status reports. 20 d Double-click xps, and then click Open. XPS driver files are copied to finish installing the patch. Use the Lexmark Fax Setup Utility to install some additional programs. The following table provides an overview of these functions. You may have chosen to set the Speed Dial and Group Dial numbers, set up the printer using the printer software...
User's Guide
Page 21
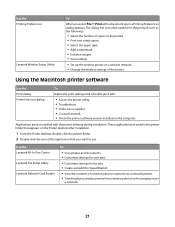
... a document open, a Printing Preferences dialog appears. Using the Macintosh printer software Use the To Print dialog Adjust the print settings and schedule print jobs. The dialog lets you select options for fax jobs. • Create and edit the Speed Dial list. • View the contents of a memory device inserted into a network printer. • Transfer photos and documents from a memory device to be printed. • Print two-sided copies. • Select the paper type. • Add a watermark. • Enhance images. • Save settings. • Set up the wireless printer on...
... a document open, a Printing Preferences dialog appears. Using the Macintosh printer software Use the To Print dialog Adjust the print settings and schedule print jobs. The dialog lets you select options for fax jobs. • Create and edit the Speed Dial list. • View the contents of a memory device inserted into a network printer. • Transfer photos and documents from a memory device to be printed. • Print two-sided copies. • Select the paper type. • Add a watermark. • Enhance images. • Save settings. • Set up the wireless printer on...
User's Guide
Page 28
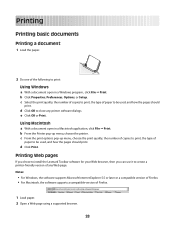
...printer software dialogs. c Select the print quality, the number of copies to print, the type of paper to be used , and how the pages should print. b Click Properties, Preferences, Options, or Setup. Using Macintosh a With a document open in a Macintosh application, click File ΠPrint. Printing Printing basic documents Printing a document 1 Load the paper. 2 Do one of the following to print: Using Windows a With a document open in a Windows program , click File ΠPrint. d Click OK to create a printer-friendly version of Firefox. 1 Load paper. 2 Open a Web page using...
...printer software dialogs. c Select the print quality, the number of copies to print, the type of paper to be used , and how the pages should print. b Click Properties, Preferences, Options, or Setup. Using Macintosh a With a document open in a Macintosh application, click File ΠPrint. Printing Printing basic documents Printing a document 1 Load the paper. 2 Do one of the following to print: Using Windows a With a document open in a Windows program , click File ΠPrint. d Click OK to create a printer-friendly version of Firefox. 1 Load paper. 2 Open a Web page using...
User's Guide
Page 33
... inkjet printers. It is best when used specifically for printing sturdier items, such as greeting cards. • Iron-On transfer-A type of inkjet printers. It is used with genuine Lexmark evercolor 2 ink, providing photos that are not sure which side is the printable side, then see the instructions that came with the glossy or printable side facing you. (If you are fade- Printing photos using printer software 1 Load photo paper with the paper.) 2 Do one that is installed...
... inkjet printers. It is best when used specifically for printing sturdier items, such as greeting cards. • Iron-On transfer-A type of inkjet printers. It is used with genuine Lexmark evercolor 2 ink, providing photos that are not sure which side is the printable side, then see the instructions that came with the glossy or printable side facing you. (If you are fade- Printing photos using printer software 1 Load photo paper with the paper.) 2 Do one that is installed...

User's Guide
Page 37
... Mac OS X drive where the printer software was released. 2 Double-click the application that you want to use . • To delete a setting, click Profiles Œ Delete Profiles. YYYY is not found on transfers, transparencies, and banners. Note: The first location contains Factory Default Settings, which cannot be changed or deleted. 6 Click Save. 7 Close all open , click File Œ Print. 2 Click Properties, Preferences, Options, or Setup. 3 Make adjustments to use . Notes: • To retrieve your print settings...
... Mac OS X drive where the printer software was released. 2 Double-click the application that you want to use . • To delete a setting, click Profiles Œ Delete Profiles. YYYY is not found on transfers, transparencies, and banners. Note: The first location contains Factory Default Settings, which cannot be changed or deleted. 6 Click Save. 7 Close all open , click File Œ Print. 2 Click Properties, Preferences, Options, or Setup. 3 Make adjustments to use . Notes: • To retrieve your print settings...
User's Guide
Page 42
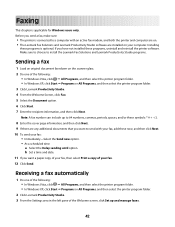
... printer program folder. • In Windows XP, click Start Œ Programs or All Programs, and then select the printer program folder. 3 Click Lexmark Productivity Studio. 4 From the Welcome Screen, click Fax. 5 Select the Document option. 6 Click Start. 7 Enter the recipient information, and then click Next. Installing these now, and then click Next. 10 To send your fax, add these programs is optional. Note: A fax number can include up and manage faxes. 42 Faxing This chapter is connected to send...
... printer program folder. • In Windows XP, click Start Œ Programs or All Programs, and then select the printer program folder. 3 Click Lexmark Productivity Studio. 4 From the Welcome Screen, click Fax. 5 Select the Document option. 6 Click Start. 7 Enter the recipient information, and then click Next. Installing these now, and then click Next. 10 To send your fax, add these programs is optional. Note: A fax number can include up and manage faxes. 42 Faxing This chapter is connected to send...
User's Guide
Page 48
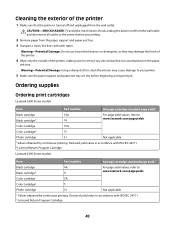
...: Using a damp cloth to the printer before beginning a new print job. Declared yield value in accordance with ISO/IEC 24711 2 Licensed Return Program Cartridge 48 CAUTION-SHOCK HAZARD: To avoid the risk of electric shock, unplug the power cord from the paper support and paper exit tray. 3 Dampen a clean, lint-free cloth with ISO/IEC 24711 2Licensed Return Program Cartridge Lexmark 2690 Series models Item Part number Average cartridge standard page yield 1 Black cartridge 4A Black...
...: Using a damp cloth to the printer before beginning a new print job. Declared yield value in accordance with ISO/IEC 24711 2 Licensed Return Program Cartridge 48 CAUTION-SHOCK HAZARD: To avoid the risk of electric shock, unplug the power cord from the paper support and paper exit tray. 3 Dampen a clean, lint-free cloth with ISO/IEC 24711 2Licensed Return Program Cartridge Lexmark 2690 Series models Item Part number Average cartridge standard page yield 1 Black cartridge 4A Black...
User's Guide
Page 51
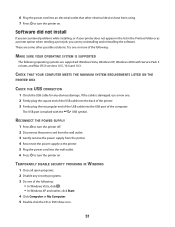
..., and Mac OS X versions 10.5, 10.4 and 10.3. Software did not install If you encountered problems while installing, or if your printer does not appear in the list in the Printers folder or as a printer option when sending a print job, you can try uninstalling and reinstalling the software. CHECK THAT YOUR COMPUTER MEETS THE MINIMUM SYSTEM REQUIREMENTS LISTED ON THE PRINTER BOX CHECK THE USB CONNECTION 1 Check the USB cable for any security programs. 3 Do one...
..., and Mac OS X versions 10.5, 10.4 and 10.3. Software did not install If you encountered problems while installing, or if your printer does not appear in the list in the Printers folder or as a printer option when sending a print job, you can try uninstalling and reinstalling the software. CHECK THAT YOUR COMPUTER MEETS THE MINIMUM SYSTEM REQUIREMENTS LISTED ON THE PRINTER BOX CHECK THE USB CONNECTION 1 Check the USB cable for any security programs. 3 Do one...
User's Guide
Page 52
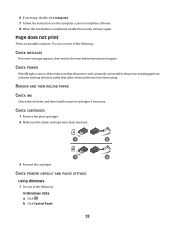
.... CHECK PRINTER DEFAULT AND PAUSE SETTINGS Using Windows 1 Do one or more of the following : CHECK MESSAGES If an error message appears, then resolve the error before trying to print again. CHECK POWER If the light is not on the computer screen to the printer and plugged into a known working electrical outlet that other electrical devices have been removed. 1 2 1 2 3 Reinsert the cartridges. b Click Control Panel. 52 REMOVE AND THEN RELOAD PAPER CHECK INK Check the ink levels, and then install new print cartridges if...
.... CHECK PRINTER DEFAULT AND PAUSE SETTINGS Using Windows 1 Do one or more of the following : CHECK MESSAGES If an error message appears, then resolve the error before trying to print again. CHECK POWER If the light is not on the computer screen to the printer and plugged into a known working electrical outlet that other electrical devices have been removed. 1 2 1 2 3 Reinsert the cartridges. b Click Control Panel. 52 REMOVE AND THEN RELOAD PAPER CHECK INK Check the ink levels, and then install new print cartridges if...
User's Guide
Page 54
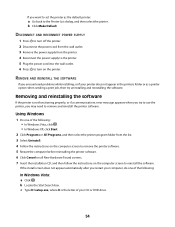
... install screen does not appear automatically after you encountered problems while installing, or if your CD or DVD drive. 54 REMOVE AND REINSTALL THE SOFTWARE If you restart your computer, do one of your printer does not appear in the printers folder or as a printer option when sending a print job, then try to use the printer, you want to set the printer as the default printer: a Go back to reinstall the software. b Click Make Default...
... install screen does not appear automatically after you encountered problems while installing, or if your CD or DVD drive. 54 REMOVE AND REINSTALL THE SOFTWARE If you restart your computer, do one of your printer does not appear in the printers folder or as a printer option when sending a print job, then try to use the printer, you want to set the printer as the default printer: a Go back to reinstall the software. b Click Make Default...
User's Guide
Page 65
... inter-operability, error correction, and security testing. If Lexmark does not remedy defective media as a consignment. You may not separate the components of the Software Program for use the original Software Program that constitutes software provided under public license by Lexmark as and to the extent expressly permitted to another end-user. The term "Use" means storing, loading, installing, executing, or displaying the Software Program. You may Use one computer...
... inter-operability, error correction, and security testing. If Lexmark does not remedy defective media as a consignment. You may not separate the components of the Software Program for use the original Software Program that constitutes software provided under public license by Lexmark as and to the extent expressly permitted to another end-user. The term "Use" means storing, loading, installing, executing, or displaying the Software Program. You may Use one computer...
User's Guide
Page 68
... 6 color copy button 39 B banner paper, loading 26 buttons, control panel 4 x 6 color copy 39 buttons, printer control panel 4 x 6 Copy 17 Black Copy 17 Cancel 17 Color Copy 17 Paper Feed 17 Power 17 Scan 17 Up arrow 17 C canceling print jobs 32 scan job 41 cards loading 25 cartridges, print installing 44 ordering 48 preserving 47 removing 45 using genuine Lexmark 46 wiping 46 cleaning exterior of the printer 48 copying 39 4 x 6 photos 39 custom-size paper, loading 25, 36 custom-size paper, printing 36 D document multiple copies, printing 29 documents loading on scanner glass 40 loading on the...
... 6 color copy button 39 B banner paper, loading 26 buttons, control panel 4 x 6 color copy 39 buttons, printer control panel 4 x 6 Copy 17 Black Copy 17 Cancel 17 Color Copy 17 Paper Feed 17 Power 17 Scan 17 Up arrow 17 C canceling print jobs 32 scan job 41 cards loading 25 cartridges, print installing 44 ordering 48 preserving 47 removing 45 using genuine Lexmark 46 wiping 46 cleaning exterior of the printer 48 copying 39 4 x 6 photos 39 custom-size paper, loading 25, 36 custom-size paper, printing 36 D document multiple copies, printing 29 documents loading on scanner glass 40 loading on the...
User's Guide
Page 69
... exit tray 15 paper guide 16 paper support 15 power supply port 16 print cartridge carrier 16 printer control panel 15 scanner glass 16 scanner support 16 scanner unit 16 top cover 15 USB port 16 photo cards, loading 25 photo paper, loading 23 photos copying 4 x 6 photos 39 loading on the scanner glass 26 printing photos using FastPics or Productivity Studio 33 postcards loading 25 power button is not lit 50 power supply port 16 print cartridge carrier 16 print cartridges installing 44 ordering 48 preserving 47 refilling 46 removing 45 using genuine Lexmark 46 wiping 46 print jobs, canceling...
... exit tray 15 paper guide 16 paper support 15 power supply port 16 print cartridge carrier 16 printer control panel 15 scanner glass 16 scanner support 16 scanner unit 16 top cover 15 USB port 16 photo cards, loading 25 photo paper, loading 23 photos copying 4 x 6 photos 39 loading on the scanner glass 26 printing photos using FastPics or Productivity Studio 33 postcards loading 25 power button is not lit 50 power supply port 16 print cartridge carrier 16 print cartridges installing 44 ordering 48 preserving 47 refilling 46 removing 45 using genuine Lexmark 46 wiping 46 print jobs, canceling...


