
User's Guide
Page 5
... done so, follow the steps on the scanner glass. Top cover Lift to place an item on the Setup Sheet to complete the hardware and software installation. Learning about each of the All-In-One Paper guide Slide next to paper to ensure proper feeding. Paper support Lift to load paper into...
... done so, follow the steps on the scanner glass. Top cover Lift to place an item on the Setup Sheet to complete the hardware and software installation. Learning about each of the All-In-One Paper guide Slide next to paper to ensure proper feeding. Paper support Lift to load paper into...
User's Guide
Page 23
... page 8. Is the Lexmark X1100 Series set as the default? To check, click Start Settings Printers. For help , refer to the computer and the All-In-One? Additional troubleshooting information is available in the left carrier? Are both ? Make sure you installed both the computer and All... help , refer to remove and then reinstall the software. Did you need to the setup documentation. Did you install the printer software correctly? Is the USB cable securely attached to the setup documentation. For help accessing the Lexmark Solution Center, see page 26. 19 Is the ...
... page 8. Is the Lexmark X1100 Series set as the default? To check, click Start Settings Printers. For help , refer to the computer and the All-In-One? Additional troubleshooting information is available in the left carrier? Are both ? Make sure you installed both the computer and All... help , refer to remove and then reinstall the software. Did you need to the setup documentation. Did you install the printer software correctly? Is the USB cable securely attached to the setup documentation. For help accessing the Lexmark Solution Center, see page 26. 19 Is the ...
User's Guide
Page 24
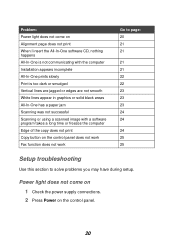
Power light does not come on Alignment page does not print When I insert the All-In-One software CD, nothing happens All-In-One is not communicating with the computer Installation appears incomplete All-In-One prints slowly Print is too dark or smudged Vertical lines are jagged or edges are ...not smooth White lines appear in graphics or solid black areas All-In-One has a paper jam Scanning was not successful Scanning or using a scanned image with a software ...
Power light does not come on Alignment page does not print When I insert the All-In-One software CD, nothing happens All-In-One is not communicating with the computer Installation appears incomplete All-In-One prints slowly Print is too dark or smudged Vertical lines are jagged or edges are ...not smooth White lines appear in graphics or solid black areas All-In-One has a paper jam Scanning was not successful Scanning or using a scanned image with a software ...

User's Guide
Page 25
... the power supply, and then press Power. For help , see page 26. Installation appears incomplete The software may not be installed properly. Make sure the black print cartridge is secure in the right carrier if you installed both ends of the USB cable. For help , refer to the setup documentation....Alignment page does not print 1 Make sure you loaded the paper correctly and did not force the paper into the All-In-One. For help installing print cartridges, refer to the setup documentation. 3 Restart the computer. For help , refer to access the My computer icon. 2 Click Properties...
... the power supply, and then press Power. For help , see page 26. Installation appears incomplete The software may not be installed properly. Make sure the black print cartridge is secure in the right carrier if you installed both ends of the USB cable. For help , refer to the setup documentation....Alignment page does not print 1 Make sure you loaded the paper correctly and did not force the paper into the All-In-One. For help installing print cartridges, refer to the setup documentation. 3 Restart the computer. For help , refer to access the My computer icon. 2 Click Properties...
User's Guide
Page 26
... Quick Print. Note: The Other Devices category displays only when unknown devices are present under the Other Devices category. 5 Insert the CD, and install the software again. Note: Photographs typically have a larger file size. Let the ink dry before handling. 2 Adjust the Quality/Speed setting in Print Properties... memory. 3 If you are using Windows 98 or Windows Me, click the Device Manager tab. If the memory resources are any Lexmark items unless they are present. If there are too low, you may be able to the setup documentation. Do not restart the computer.
... Quick Print. Note: The Other Devices category displays only when unknown devices are present under the Other Devices category. 5 Insert the CD, and install the software again. Note: Photographs typically have a larger file size. Let the ink dry before handling. 2 Adjust the Quality/Speed setting in Print Properties... memory. 3 If you are using Windows 98 or Windows Me, click the Device Manager tab. If the memory resources are any Lexmark items unless they are present. If there are too low, you may be able to the setup documentation. Do not restart the computer.

User's Guide
Page 28
Scanning resolution is properly oriented on page 21. To change the scanning resolution: 1 Open the Lexmark All-In-One Center. For help , see page 3. 2 From the Scan section, click See More Scan Settings. 3 Click Display Advanced Scan Settings. 4 From the Scan ...; Make sure the original is much lower. To apply the Fit-to -page feature. Scanning, copying, and faxing troubleshooting Scanning was not successful The software may not be installed properly. For help , see page 13. • Make sure the area you want to page from the corresponding drop-down menu. 4 Copy your...
Scanning resolution is properly oriented on page 21. To change the scanning resolution: 1 Open the Lexmark All-In-One Center. For help , see page 3. 2 From the Scan section, click See More Scan Settings. 3 Click Display Advanced Scan Settings. 4 From the Scan ...; Make sure the original is much lower. To apply the Fit-to -page feature. Scanning, copying, and faxing troubleshooting Scanning was not successful The software may not be installed properly. For help , see page 13. • Make sure the area you want to page from the corresponding drop-down menu. 4 Copy your...

User's Guide
Page 29
... button on the control panel does not work • Make sure the computer is connected to work. The software must be installed for the All-In-One to work. • Make sure you properly installed the software. Wait until the faxes in order for the copier to a phone line. The computer must be on...
... button on the control panel does not work • Make sure the computer is connected to work. The software must be installed for the All-In-One to work. • Make sure you properly installed the software. Wait until the faxes in order for the copier to a phone line. The computer must be on...

User's Guide
Page 30
... to install the software. Note: If Uninstall is not an option on the menu, see "All-In-One is not functioning properly or a communications error message displays when you try to use the All-In-One, you may need to remove and then reinstall the printer software. 1 From the desktop, click Start Programs Lexmark X1100...
... to install the software. Note: If Uninstall is not an option on the menu, see "All-In-One is not functioning properly or a communications error message displays when you try to use the All-In-One, you may need to remove and then reinstall the printer software. 1 From the desktop, click Start Programs Lexmark X1100...


