Setup Solutions
Page 8
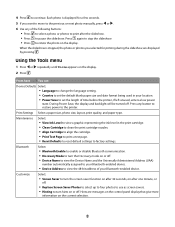
...8226; Print Test Page to print a test page. • Reset Defaults to reset default settings to pause the slideshow. 4 Press to the printer. Bluetooth Select: • Bluetooth Enable to enable or disable Bluetooth communication. • Discovery Mode to turn hints on after the slideshow. •... during the slideshow are messages on the control panel display that give more information on the display. 2 Press . Each photo is stopped, the photo or photos you want to move to the previous or next photo manually, press or . 6 Use any button to restore power to continue.
...8226; Print Test Page to print a test page. • Reset Defaults to reset default settings to pause the slideshow. 4 Press to the printer. Bluetooth Select: • Bluetooth Enable to enable or disable Bluetooth communication. • Discovery Mode to turn hints on after the slideshow. •... during the slideshow are messages on the control panel display that give more information on the display. 2 Press . Each photo is stopped, the photo or photos you want to move to the previous or next photo manually, press or . 6 Use any button to restore power to continue.
Getting Started
Page 15
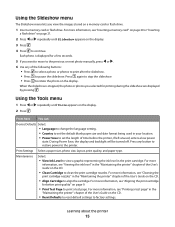
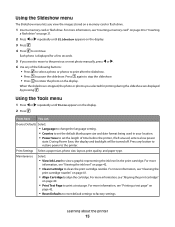
...until Slideshow appears on the display. 3 Press . 4 Press to continue. For more information, see "Viewing the ink level" in the "Maintaining the printer" chapter of the User's Guide on the CD. • Reset Defaults to reset default settings to clean the print cartridge nozzles. For more information, ...date format being used in the print cartridge. Using the Slideshow menu The Slideshow menu lets you want to move to the previous or next photo manually, press or . 6 Use any button to restore power to view a graphic representing the ink level in your location. • Power Save...
...until Slideshow appears on the display. 3 Press . 4 Press to continue. For more information, see "Viewing the ink level" in the "Maintaining the printer" chapter of the User's Guide on the CD. • Reset Defaults to reset default settings to clean the print cartridge nozzles. For more information, ...date format being used in the print cartridge. Using the Slideshow menu The Slideshow menu lets you want to move to the previous or next photo manually, press or . 6 Use any button to restore power to view a graphic representing the ink level in your location. • Power Save...

Getting Started
Page 22
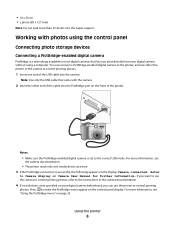
... If no selections were specified on your digital camera beforehand, you can connect a PictBridge-enabled digital camera to the printer, and use either the printer or the camera to control printing photos. 1 Insert one . 2 Wait for further information. For more than one media device, you will be necessary ...If you insert more information, see the camera documentation. • The printer reads only one media device at a time. Refer to Camera display or Camera User Manual for the printer to read the flash drive. You can use the printer to make the PictBridge menu appear on page 16.
... If no selections were specified on your digital camera beforehand, you can connect a PictBridge-enabled digital camera to the printer, and use either the printer or the camera to control printing photos. 1 Insert one . 2 Wait for further information. For more than one media device, you will be necessary ...If you insert more information, see the camera documentation. • The printer reads only one media device at a time. Refer to Camera display or Camera User Manual for the printer to read the flash drive. You can use the printer to make the PictBridge menu appear on page 16.
User's Guide
Page 15
... be turned off. For more information, see "Aligning the print cartridge" on page 42. • Clean Cartridge to the printer. Press any of time before the printer, if left unused, enters a low power state. When the slideshow is displayed for printing during the slideshow are displayed by... the ink level" on page 40. • Print Test Page to continue. Each photo is stopped, the photo or photos you selected for a few seconds. 5 If you want to move to the previous or next photo manually, press or . 6 Use any button to restore power to clean the print cartridge nozzles...
... be turned off. For more information, see "Aligning the print cartridge" on page 42. • Clean Cartridge to the printer. Press any of time before the printer, if left unused, enters a low power state. When the slideshow is displayed for printing during the slideshow are displayed by... the ink level" on page 40. • Print Test Page to continue. Each photo is stopped, the photo or photos you selected for a few seconds. 5 If you want to move to the previous or next photo manually, press or . 6 Use any button to restore power to clean the print cartridge nozzles...
User's Guide
Page 22
... you can connect a PictBridge-enabled digital camera to the printer, and use either the printer or the camera to control printing photos. 1 Insert one . 2 Wait for further information. Refer to Camera display or Camera User Manual for the printer to make the PictBridge menu appear on the front of ...the USB cable into the port. • The printer reads only one media device at a time. ...
... you can connect a PictBridge-enabled digital camera to the printer, and use either the printer or the camera to control printing photos. 1 Insert one . 2 Wait for further information. Refer to Camera display or Camera User Manual for the printer to make the PictBridge menu appear on the front of ...the USB cable into the port. • The printer reads only one media device at a time. ...
User's Guide
Page 6
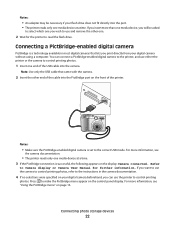
...the paper support. If you can connect a PictBridge-enabled digital camera to the printer, and use either the printer or the camera to control printing photos. You can use the camera to control printing photos, refer to the correct USB mode. For more than 25 sheets into the ...Connecting a PictBridge-enabled digital camera PictBridge is set to the instructions in most digital cameras that came with photos using a computer. Press to Camera display or Camera User Manual for further information. Refer to make the PictBridge menu appear on page 33. For more information, see "...
...the paper support. If you can connect a PictBridge-enabled digital camera to the printer, and use either the printer or the camera to control printing photos. You can use the camera to control printing photos, refer to the correct USB mode. For more than 25 sheets into the ...Connecting a PictBridge-enabled digital camera PictBridge is set to the instructions in most digital cameras that came with photos using a computer. Press to Camera display or Camera User Manual for further information. Refer to make the PictBridge menu appear on page 33. For more information, see "...
User's Guide
Page 31
..."Aligning the print cartridge" on page 43. • Align Cartridge to print a test page. Related topics: • "Viewing photos" on page 0 Using the Tools menu 1 Press or repeatedly until Tools appears on the display. Maintenance Select: • View Ink...printer. Understanding the printer 31 Press any of time before the printer, if left unused, enters a low power state. For more information, see "Printing a test page" on page 50. • Clean Cartridge to factory settings. Each photo is stopped, the photo or photos you want to move to the previous or next photo manually...
..."Aligning the print cartridge" on page 43. • Align Cartridge to print a test page. Related topics: • "Viewing photos" on page 0 Using the Tools menu 1 Press or repeatedly until Tools appears on the display. Maintenance Select: • View Ink...printer. Understanding the printer 31 Press any of time before the printer, if left unused, enters a low power state. For more information, see "Printing a test page" on page 50. • Clean Cartridge to factory settings. Each photo is stopped, the photo or photos you want to move to the previous or next photo manually...


