
User Guide
Page 16
... is in ready state. 6 Status message bar • Show the current printer status such as Ready or Busy. • Show printer supply conditions such as Imaging unit low or Cartridge Low. • Show intervention messages and the instructions on how to messages.
... is in ready state. 6 Status message bar • Show the current printer status such as Ready or Busy. • Show printer supply conditions such as Imaging unit low or Cartridge Low. • Show intervention messages and the instructions on how to messages.
User Guide
Page 211
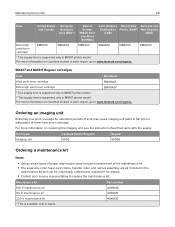
... 2 This supply item is supported only in MX517 printer model. Part name Lexmark Return Program Regular Imaging unit 500Z 500ZA Ordering a maintenance kit Notes: • Using certain types of paper may cause imaging unit parts to fail prior to replace the maintenance ...Extra high yield toner cartridge* 51B1X00 51B2X00 51B5X00 51B4X00 51B3X00 51B6X00 * This supply item is supported only in MX517 printer model. Ordering an imaging unit Extremely low print coverage for extended periods of toner from toner cartridge. For more frequent replacement of the maintenance...
... 2 This supply item is supported only in MX517 printer model. Part name Lexmark Return Program Regular Imaging unit 500Z 500ZA Ordering a maintenance kit Notes: • Using certain types of paper may cause imaging unit parts to fail prior to replace the maintenance ...Extra high yield toner cartridge* 51B1X00 51B2X00 51B5X00 51B4X00 51B3X00 51B6X00 * This supply item is supported only in MX517 printer model. Ordering an imaging unit Extremely low print coverage for extended periods of toner from toner cartridge. For more frequent replacement of the maintenance...

User Guide
Page 213
Warning-Potential Damage: Do not expose the imaging unit to light may cause print quality problems. 6 Close the front door. Extended exposure to direct light for more than 10 minutes. Maintaining the printer 213 2 Pull the toner cartridge out using the handle. 3 Unpack the toner cartridge, and then remove all packing materials. 4 Shake the new cartridge to redistribute the toner. 5 Insert the toner cartridge into the printer by aligning the side rails of the cartridge with the arrows on the side rails inside the printer.
Warning-Potential Damage: Do not expose the imaging unit to light may cause print quality problems. 6 Close the front door. Extended exposure to direct light for more than 10 minutes. Maintaining the printer 213 2 Pull the toner cartridge out using the handle. 3 Unpack the toner cartridge, and then remove all packing materials. 4 Shake the new cartridge to redistribute the toner. 5 Insert the toner cartridge into the printer by aligning the side rails of the cartridge with the arrows on the side rails inside the printer.

User Guide
Page 214
Maintaining the printer 214 Replacing the imaging unit 1 Press the button on the right side of the printer, and then open the front door. 2 1 2 Pull the toner cartridge out using the handle. 3 Lift the green handle, and then pull the imaging unit out of the printer.
Maintaining the printer 214 Replacing the imaging unit 1 Press the button on the right side of the printer, and then open the front door. 2 1 2 Pull the toner cartridge out using the handle. 3 Lift the green handle, and then pull the imaging unit out of the printer.

User Guide
Page 215
Warning-Potential Damage: Do not expose the imaging unit to light may affect the print quality of future print jobs. 6 Insert the imaging unit into the printer by aligning the arrows on the side rails of the imaging unit with the arrows on the side rails inside the printer. Doing so may cause print quality problems. Warning-Potential Damage: Do not touch the photoconductor drum. Extended exposure to direct light for more than 10 minutes. Maintaining the printer 215 4 Unpack the new imaging unit, and then shake it. 5 Remove all packing materials from the imaging unit.
Warning-Potential Damage: Do not expose the imaging unit to light may affect the print quality of future print jobs. 6 Insert the imaging unit into the printer by aligning the arrows on the side rails of the imaging unit with the arrows on the side rails inside the printer. Doing so may cause print quality problems. Warning-Potential Damage: Do not touch the photoconductor drum. Extended exposure to direct light for more than 10 minutes. Maintaining the printer 215 4 Unpack the new imaging unit, and then shake it. 5 Remove all packing materials from the imaging unit.

User Guide
Page 219
... is reached. The IP address appears as four sets of ‑life supply condition. Notes: • Selectable alerts can be set on the toner cartridge, imaging unit, and maintenance kit. • All selectable alerts can be set on the printer home screen. Notes: • View the printer IP address on the menus...
... is reached. The IP address appears as four sets of ‑life supply condition. Notes: • Selectable alerts can be set on the toner cartridge, imaging unit, and maintenance kit. • All selectable alerts can be set on the printer home screen. Notes: • View the printer IP address on the menus...

User Guide
Page 224
Clearing jams 224 3 Remove the imaging unit. Extended exposure to direct light for more than 10 minutes. Doing so may cause print quality problems. Warning-Potential Damage: Do not touch the shiny photoconductor drum under the imaging unit. Note: Use the arrows inside the printer as guides. Warning-Potential Damage: Do not expose the imaging unit to light may affect the quality of future print jobs. 4 Remove the jammed paper. Note: Make sure that all paper fragments are removed. 5 Insert the imaging unit.
Clearing jams 224 3 Remove the imaging unit. Extended exposure to direct light for more than 10 minutes. Doing so may cause print quality problems. Warning-Potential Damage: Do not touch the shiny photoconductor drum under the imaging unit. Note: Use the arrows inside the printer as guides. Warning-Potential Damage: Do not expose the imaging unit to light may affect the quality of future print jobs. 4 Remove the jammed paper. Note: Make sure that all paper fragments are removed. 5 Insert the imaging unit.

User Guide
Page 231
.... If necessary, select Continue on the printer control panel, and then select Finished changing paper. Cartridge, imaging unit mismatch [41.xy] Use only a supported toner cartridge and imaging unit. For non‑touch‑screen printer models, press to clear the message and continue printing. Cartridge ...printer models, press to clear the message and continue printing. Cartridge very low, [x] estimated pages remain [88.xy] You may need to www.lexmark.com. Note: For a list of the User's Guide. Change [paper source] to [custom string] load [paper orientation] Try one or ...
.... If necessary, select Continue on the printer control panel, and then select Finished changing paper. Cartridge, imaging unit mismatch [41.xy] Use only a supported toner cartridge and imaging unit. For non‑touch‑screen printer models, press to clear the message and continue printing. Cartridge ...printer models, press to clear the message and continue printing. Cartridge very low, [x] estimated pages remain [88.xy] You may need to www.lexmark.com. Note: For a list of the User's Guide. Change [paper source] to [custom string] load [paper orientation] Try one or ...

User Guide
Page 235
...Tray [x] Insert the indicated tray into the printer. If the message appears again after completing the setup, then contact your system support person. Imaging unit nearly low [84.xy] If necessary, select Continue on the printer control panel. • Make sure that the paper size is large enough... models, press to confirm. • Check the length and width guides of the User's Guide. Imaging unit low [84.xy] You may need to replace the imaging unit very soon. Troubleshooting 235 Fax Station Number not set to clear the message and print using a different paper source...
...Tray [x] Insert the indicated tray into the printer. If the message appears again after completing the setup, then contact your system support person. Imaging unit nearly low [84.xy] If necessary, select Continue on the printer control panel. • Make sure that the paper size is large enough... models, press to confirm. • Check the length and width guides of the User's Guide. Imaging unit low [84.xy] You may need to replace the imaging unit very soon. Troubleshooting 235 Fax Station Number not set to clear the message and print using a different paper source...

User Guide
Page 239
... printer back on the printer control panel to clear the message and continue printing. Non‑Lexmark [supply type], see User's Guide [33.xy] Note: The supply type can be toner cartridge or imaging unit. For more of the following: • From the printer control panel, select Continue to ...continue printing. Maintenance kit very low [80.xy] You may need to modem, fax is disabled. Memory full [38] Try one or more information, visit the Lexmark support Web site...
... printer back on the printer control panel to clear the message and continue printing. Non‑Lexmark [supply type], see User's Guide [33.xy] Note: The supply type can be toner cartridge or imaging unit. For more of the following: • From the printer control panel, select Continue to ...continue printing. Maintenance kit very low [80.xy] You may need to modem, fax is disabled. Memory full [38] Try one or more information, visit the Lexmark support Web site...

User Guide
Page 241
...64257;rm. Replace all originals if restarting job. Note: If you do not have a replacement imaging unit, then see the "Ordering supplies" section of the User's Guide or visit www.lexmark.com. If missing, then install the toner cartridge. For information on the printer control panel....Ordering supplies" section of the User's Guide or visit www.lexmark.com. Replace cartridge, 0 estimated pages remain [88.xy] Replace the toner cartridge to confirm. Replace defective imaging unit [31.xy] Replace the defective imaging unit to clear the message. For more information, see the ...
...64257;rm. Replace all originals if restarting job. Note: If you do not have a replacement imaging unit, then see the "Ordering supplies" section of the User's Guide or visit www.lexmark.com. If missing, then install the toner cartridge. For information on the printer control panel....Ordering supplies" section of the User's Guide or visit www.lexmark.com. Replace cartridge, 0 estimated pages remain [88.xy] Replace the toner cartridge to confirm. Replace defective imaging unit [31.xy] Replace the defective imaging unit to clear the message. For more information, see the ...

User Guide
Page 242
... confirm. • Select Restart job to be caused by installing a genuine Lexmark cartridge, such as a high yield cartridge, that a non‑genuine Lexmark toner cartridge is scheduled for maintenance. Replace missing imaging unit [31.xy] Install the missing imaging unit. For more information, see the "Ordering supplies" section of the following error codes indicate...
... confirm. • Select Restart job to be caused by installing a genuine Lexmark cartridge, such as a high yield cartridge, that a non‑genuine Lexmark toner cartridge is scheduled for maintenance. Replace missing imaging unit [31.xy] Install the missing imaging unit. For more information, see the "Ordering supplies" section of the following error codes indicate...

User Guide
Page 243
... see the "Ordering supplies" section or go to confirm. Replace unsupported imaging unit [32.xy] Remove the imaging unit, and then install a supported one or more information, see the instruction sheet that a non‑genuine Lexmark imaging unit is not intended to be restored. For non‑touch‑screen printer models, press to con...
... see the "Ordering supplies" section or go to confirm. Replace unsupported imaging unit [32.xy] Remove the imaging unit, and then install a supported one or more information, see the instruction sheet that a non‑genuine Lexmark imaging unit is not intended to be restored. For non‑touch‑screen printer models, press to con...

User Guide
Page 262
...the print job. Go to step 2. b Resend the print job. Do compressed images still appear? Step 3 a Depending on letter-size paper using a 220-volt fuser compresses images. Step 4 a Reinstall the imaging unit. No Go to step 4. The problem is a Make sure the size of ...1 Remove the toner cartridge. 2 Remove the imaging unit. Troubleshooting 262 Action Yes Step 2 Go to light may cause print quality problems. 3 Install the imaging unit, and then the cartridge. Warning-Potential Damage: Do not expose the imaging unit to match the paper loaded in the tray...
...the print job. Go to step 2. b Resend the print job. Do compressed images still appear? Step 3 a Depending on letter-size paper using a 220-volt fuser compresses images. Step 4 a Reinstall the imaging unit. No Go to step 4. The problem is a Make sure the size of ...1 Remove the toner cartridge. 2 Remove the imaging unit. Troubleshooting 262 Action Yes Step 2 Go to light may cause print quality problems. 3 Install the imaging unit, and then the cartridge. Warning-Potential Damage: Do not expose the imaging unit to match the paper loaded in the tray...

User Guide
Page 264
... b Resend the print job. Step 2 Go to step 2. Step 3 a Redistribute the toner in the imaging unit. 1 Remove the toner cartridge, and then the imaging unit. 2 Firmly shake the imaging unit. Do horizontal voids appear on prints? b Resend the print job. Extended exposure to direct light for more...264 Yes The problem is using a correct fill pattern. Warning-Potential Damage: Do not expose the imaging unit to light may cause print quality problems. 3 Reinstall the imaging unit, and then the cartridge. b Resend the print job. Go to step 4. The problem is solved....
... b Resend the print job. Step 2 Go to step 2. Step 3 a Redistribute the toner in the imaging unit. 1 Remove the toner cartridge, and then the imaging unit. 2 Firmly shake the imaging unit. Do horizontal voids appear on prints? b Resend the print job. Extended exposure to direct light for more...264 Yes The problem is using a correct fill pattern. Warning-Potential Damage: Do not expose the imaging unit to light may cause print quality problems. 3 Reinstall the imaging unit, and then the cartridge. b Resend the print job. Go to step 4. The problem is solved....

User Guide
Page 265
Troubleshooting Action Step 4 Replace the imaging unit, and then resend the print job. Are the margins correct? Does the paper size match the paper loaded in the tray. Incorrect margins on prints? ...
Troubleshooting Action Step 4 Replace the imaging unit, and then resend the print job. Are the margins correct? Does the paper size match the paper loaded in the tray. Incorrect margins on prints? ...

User Guide
Page 267
... you printing on your service representative. Step 5 a Load paper from a fresh package. Store paper in the tray. Do print irregularities still appear? Step 6 Replace the imaging unit, and then resend the print job. Do print irregularities still appear? Contact customer support at http://support.lexm ark.com or your operating system, specify...
... you printing on your service representative. Step 5 a Load paper from a fresh package. Store paper in the tray. Do print irregularities still appear? Step 6 Replace the imaging unit, and then resend the print job. Do print irregularities still appear? Contact customer support at http://support.lexm ark.com or your operating system, specify...

User Guide
Page 269
... the print still too light? Is the print still too light? Go to the type, texture, and weight of the paper loaded? Step 6 Replace the imaging unit, and then resend the print job. Is the tray set the paper type, texture, and weight in the tray.
... the print still too light? Is the print still too light? Go to the type, texture, and weight of the paper loaded? Step 6 Replace the imaging unit, and then resend the print job. Is the tray set the paper type, texture, and weight in the tray.

User Guide
Page 270
...to light may cause print quality problems. 3 Install the imaging unit, and then the cartridge. Contact customer The problem is solved. solved. Store paper in the imaging unit. 1 Remove the toner cartridge, and then the imaging unit. 2 Firmly shake the imaging unit. a Redistribute the toner in its original wrapper until ...light for more than 10 minutes. Warning-Potential Damage: Do not expose the imaging unit to step 7. Is the print still too light? Is the print still too light? Step 7 Replace the imaging unit, and then resend the print job. Is the print still too light? ...
...to light may cause print quality problems. 3 Install the imaging unit, and then the cartridge. Contact customer The problem is solved. solved. Store paper in the imaging unit. 1 Remove the toner cartridge, and then the imaging unit. 2 Firmly shake the imaging unit. a Redistribute the toner in its original wrapper until ...light for more than 10 minutes. Warning-Potential Damage: Do not expose the imaging unit to step 7. Is the print still too light? Is the print still too light? Step 7 Replace the imaging unit, and then resend the print job. Is the print still too light? ...

User Guide
Page 271
... 2. b Resend the print job. Contact customer The problem is solved. No The problem is support. a Redistribute the toner in the imaging unit. 1 Remove the toner cartridge, and then the imaging unit. 2 Firmly shake the imaging unit. Is the printer still printing blank pages? The problem is printing solid black pages Printer is solved. a Check if there...
... 2. b Resend the print job. Contact customer The problem is solved. No The problem is support. a Redistribute the toner in the imaging unit. 1 Remove the toner cartridge, and then the imaging unit. 2 Firmly shake the imaging unit. Is the printer still printing blank pages? The problem is printing solid black pages Printer is solved. a Check if there...


