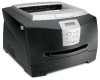
User's Guide
Page 3
...apparatus is designed, tested, and approved to the Lexmark copyrighted software in this equipment. Electronic emission notices Federal Communications Commission (FCC) compliance information statement The Lexmark E340, Machine Type 4511-600, and Lexmark E342n, Machine Type 4511-610, have been tested ...laser product conforming to a properly grounded electrical outlet that is certified as Lexmark part number 1329605 for parallel attach or 12A2405 for the Lexmark modified GNU licensed software, launch the drivers CD that shipped with the instructions, may cause harmful interference to this...
...apparatus is designed, tested, and approved to the Lexmark copyrighted software in this equipment. Electronic emission notices Federal Communications Commission (FCC) compliance information statement The Lexmark E340, Machine Type 4511-600, and Lexmark E342n, Machine Type 4511-610, have been tested ...laser product conforming to a properly grounded electrical outlet that is certified as Lexmark part number 1329605 for parallel attach or 12A2405 for the Lexmark modified GNU licensed software, launch the drivers CD that shipped with the instructions, may cause harmful interference to this...
User's Guide
Page 7
... Limited Warranty 5 Chapter 1: Printer overview 11 Chapter 2: Installing software for local printing 13 Before installing printer software 13 Windows ...13 Installing printer software using the drivers CD 13 Installing printer software through the Add Printer Wizard 13 Installing optional printer software 14 Macintosh ...14 Creating a queue in Print Center / Printer Setup...
... Limited Warranty 5 Chapter 1: Printer overview 11 Chapter 2: Installing software for local printing 13 Before installing printer software 13 Windows ...13 Installing printer software using the drivers CD 13 Installing printer software through the Add Printer Wizard 13 Installing optional printer software 14 Macintosh ...14 Creating a queue in Print Center / Printer Setup...
User's Guide
Page 13
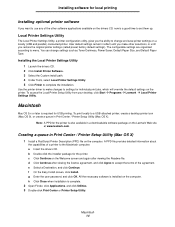
...software on most Windows operating systems. If the operating system is not supported by the CD, the Add Printer Wizard must be available on the drivers CD. You must use the Add Printer Wizard to the following operating systems using a USB or parallel cable. If the CD does not ...the printer software may be used to install a Local printer, then click Have Disk. 4 Specify the location of the printer software on the Lexmark Web site at www.lexmark.com. If the CD launches automatically, click Exit. 2 Launch the Add Printer Wizard. 3 When prompted, select to install software on the ...
...software on most Windows operating systems. If the operating system is not supported by the CD, the Add Printer Wizard must be available on the drivers CD. You must use the Add Printer Wizard to the following operating systems using a USB or parallel cable. If the CD does not ...the printer software may be used to install a Local printer, then click Have Disk. 4 Specify the location of the printer software on the Lexmark Web site at www.lexmark.com. If the CD launches automatically, click Exit. 2 Launch the Add Printer Wizard. 3 When prompted, select to install software on the ...
User's Guide
Page 14
... Select a Destination, and click Continue. h Click Close when installation is installed on the computer. Installing the Local Printer Settings Utility 1 Launch the drivers CD. 2 Click Install Printer Software. 3 Select the Custom install path. 4 Under Tools, select Local Printer Settings Utility. 5 Click Finish to ...settings remain in Print Center / Printer Setup Utility (Mac OS X) 1 Install a PostScript Printer Description (PPD) file on the Lexmark Web site at www.lexmark.com. Macintosh Mac OS 9.x or later is a good time to set them up. A PPD file provides detailed information about ...
... Select a Destination, and click Continue. h Click Close when installation is installed on the computer. Installing the Local Printer Settings Utility 1 Launch the drivers CD. 2 Click Install Printer Software. 3 Select the Custom install path. 4 Under Tools, select Local Printer Settings Utility. 5 Click Finish to ...settings remain in Print Center / Printer Setup Utility (Mac OS X) 1 Install a PostScript Printer Description (PPD) file on the Lexmark Web site at www.lexmark.com. Macintosh Mac OS 9.x or later is a good time to set them up. A PPD file provides detailed information about ...
User's Guide
Page 15
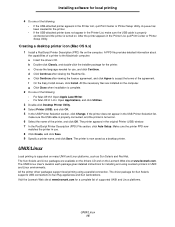
...terms of the printer, and click OK. All the necessary files are available on the drivers CD and on many UNIX and Linux platforms, such as a desktop printer. Visit the Lexmark Web site at www.lexmark.com. e Click Continue after viewing the Readme file. f On the Easy Install ...8226; If the USB-attached printer appears in the Printer List, quit Print Center or Printer Setup Utility. All the printer driver packages support local printing using Lexmark printers in UNIX and Linux environments. The printer appears in the Printer List, make sure the USB cable is properly connected...
...terms of the printer, and click OK. All the necessary files are available on the drivers CD and on many UNIX and Linux platforms, such as a desktop printer. Visit the Lexmark Web site at www.lexmark.com. e Click Continue after viewing the Readme file. f On the Easy Install ...8226; If the USB-attached printer appears in the Printer List, quit Print Center or Printer Setup Utility. All the printer driver packages support local printing using Lexmark printers in UNIX and Linux environments. The printer appears in the Printer List, make sure the USB cable is properly connected...

User's Guide
Page 16
...Shared printing 17 • Printer is connected to one of a network printer port. Installing software for direct printing 1 Launch the drivers CD. 2 Follow the instructions on each network computer. Select the Suggested path to accept the defaults. Select Custom to choose ...folder. 3 Print a test page to verify printer installation. 4 Repeat steps 1-4 on the computer attached to the printer. • During driver installation, the printer is created in use to configure the network printer: Printing configuration Direct IP printing • Printer is installed. 3 Installing...
...Shared printing 17 • Printer is connected to one of a network printer port. Installing software for direct printing 1 Launch the drivers CD. 2 Follow the instructions on each network computer. Select the Suggested path to accept the defaults. Select Custom to choose ...folder. 3 Print a test page to verify printer installation. 4 Repeat steps 1-4 on the computer attached to the printer. • During driver installation, the printer is created in use to configure the network printer: Printing configuration Direct IP printing • Printer is installed. 3 Installing...
User's Guide
Page 17
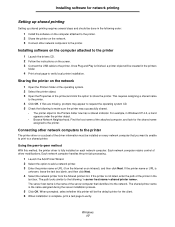
...software on the computer attached to the printer. 2 Share the printer on the network. 3 Connect other network computers to the printer The printer driver or a subset of the server computer that you want to enable to print to a shared printer. When prompted, select whether this method, the... processing. 1 Launch the Add Printer Wizard. 2 Select the option to the printer. Installing software on the computer attached to the printer 1 Launch the drivers CD. 2 Follow the instructions on the screen. 3 Connect the USB cable to add a network printer. 3 Enter the printer name or URL (if...
...software on the computer attached to the printer. 2 Share the printer on the network. 3 Connect other network computers to the printer The printer driver or a subset of the server computer that you want to enable to print to a shared printer. When prompted, select whether this method, the... processing. 1 Launch the Add Printer Wizard. 2 Select the option to the printer. Installing software on the computer attached to the printer 1 Launch the drivers CD. 2 Follow the instructions on the screen. 3 Connect the USB cable to add a network printer. 3 Enter the printer name or URL (if...

User's Guide
Page 18
This lets the other network computers return to the Lexmark Web site at www.lexmark.com for the latest information. The time this takes varies based ...have a MarkNet print server installed in some 64 bit environments. The computer attached to the printer handles driver modifications and print job processing for all print jobs including those routed from the computer attached to the ...Go to Verifying the IP settings on , and for the address under the "TCP/IP" heading on the drivers CD, now is copied from the computer attached to the printer across the network to the printer, double-click...
This lets the other network computers return to the Lexmark Web site at www.lexmark.com for the latest information. The time this takes varies based ...have a MarkNet print server installed in some 64 bit environments. The computer attached to the printer handles driver modifications and print job processing for all print jobs including those routed from the computer attached to the ...Go to Verifying the IP settings on , and for the address under the "TCP/IP" heading on the drivers CD, now is copied from the computer attached to the printer across the network to the printer, double-click...
User's Guide
Page 20
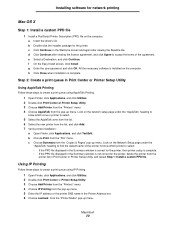
... Print Center or Printer Setup Utility. 3 Choose Add Printer from the "Printers" menu. 4 Choose IP Printing from the pop-up menu. a Insert the drivers CD. b Double-click the installer package for the printer. Look on the computer. b Choose Print from the "Printer Model" pop-up menu. Look on... Continue. c Choose Summary from the pop-up menu. 5 Enter the IP address or the printer DNS name in the Printer Address box. 6 Choose Lexmark from the "File" menu. d Click Continue after viewing the Readme file. Step 2: Create a print queue in Print Center or Printer Setup Utility Using...
... Print Center or Printer Setup Utility. 3 Choose Add Printer from the "Printers" menu. 4 Choose IP Printing from the pop-up menu. a Insert the drivers CD. b Double-click the installer package for the printer. Look on the computer. b Choose Print from the "Printer Model" pop-up menu. Look on... Continue. c Choose Summary from the pop-up menu. 5 Enter the IP address or the printer DNS name in the Printer Address box. 6 Choose Lexmark from the "File" menu. d Click Continue after viewing the Readme file. Step 2: Create a print queue in Print Center or Printer Setup Utility Using...
User's Guide
Page 21
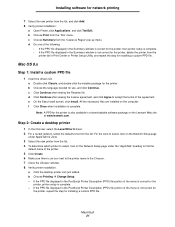
... menu. Mac OS 9.x Step 1: Install a custom PPD file 1 Insert the drivers CD. c Click Continue after viewing the license agreement, and click Agree to select, look on the Lexmark Web site at www.lexmark.com. For the zone to the printer name in the Summary window is complete.... desktop printer icon just added. d Click Continue after viewing the Readme file. Step 2: Create a desktop printer 1 In the Chooser, select the LaserWriter 8 driver. 2 For a routed network, select the default zone from the list, and click Add. 8 Verify printer installation: a Open Finder, click Applications, and...
... menu. Mac OS 9.x Step 1: Install a custom PPD file 1 Insert the drivers CD. c Click Continue after viewing the license agreement, and click Agree to select, look on the Lexmark Web site at www.lexmark.com. For the zone to the printer name in the Summary window is complete.... desktop printer icon just added. d Click Continue after viewing the Readme file. Step 2: Create a desktop printer 1 In the Chooser, select the LaserWriter 8 driver. 2 For a routed network, select the default zone from the list, and click Add. 8 Verify printer installation: a Open Finder, click Applications, and...
User's Guide
Page 22
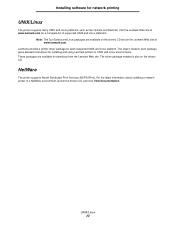
... Linux platforms, such as Sun Solaris and Red Hat. The User's Guide in each supported UNIX and Linux platform. The driver package needed is also on the Lexmark Web site at www.lexmark.com. NetWare The printer supports Novell Distributed Print Services (NDPS/iPrint). For the latest information about installing a network printer in...
... Linux platforms, such as Sun Solaris and Red Hat. The User's Guide in each supported UNIX and Linux platform. The driver package needed is also on the Lexmark Web site at www.lexmark.com. NetWare The printer supports Novell Distributed Print Services (NDPS/iPrint). For the latest information about installing a network printer in...
User's Guide
Page 38
... job: 1 From the computer software application, select File Æ Print. 2 Click Properties (or Options, Printer, or Setup, depending on the application) to view the printer driver settings. 3 Click the Paper tab. 4 Select Manual paper from your fingers can contact the paper guides. • Hold transparencies by the edges, and avoid touching...
... job: 1 From the computer software application, select File Æ Print. 2 Click Properties (or Options, Printer, or Setup, depending on the application) to view the printer driver settings. 3 Click the Paper tab. 4 Select Manual paper from your fingers can contact the paper guides. • Hold transparencies by the edges, and avoid touching...
User's Guide
Page 40
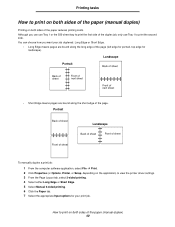
Although you want your print job. Printing tasks How to print the second side. How to view the printer driver settings. 3 From the Page Layout tab, select 2-sided printing. 4 Select either Long Edge or Short Edge. 5 Select Manual 2-sided printing. 6 Click the Paper tab. 7 Select ...
Although you want your print job. Printing tasks How to print the second side. How to view the printer driver settings. 3 From the Page Layout tab, select 2-sided printing. 4 Select either Long Edge or Short Edge. 5 Select Manual 2-sided printing. 6 Click the Paper tab. 7 Select ...
User's Guide
Page 42
The positioning depends on the application) to view the printer driver settings. 3 From the Page Layout tab, select the number of images and whether the images are printed on one page, and so on one page (N-...
The positioning depends on the application) to view the printer driver settings. 3 From the Page Layout tab, select the number of images and whether the images are printed on one page, and so on one page (N-...
User's Guide
Page 43
... Print fold mark. 7 Click OK twice. 8 Click OK on the Print window to send the job to specify how many pages to view the printer driver settings. 3 From the Page Layout tab, click More Page Layout Options. 4 Click Booklet. If you are printing a fairly large booklet, you might want to print...
... Print fold mark. 7 Click OK twice. 8 Click OK on the Print window to send the job to specify how many pages to view the printer driver settings. 3 From the Page Layout tab, click More Page Layout Options. 4 Click Booklet. If you are printing a fairly large booklet, you might want to print...

User's Guide
Page 44
... image. 1 From the computer software application, select File Æ Print. 2 Click Properties (or Options, Printer, or Setup, depending on the application) to view the printer driver settings. 3 From the Page Layout tab, click More Page Layout Options. 4 Click Poster. 5 Select the poster size you want by choosing the number of pages...
... image. 1 From the computer software application, select File Æ Print. 2 Click Properties (or Options, Printer, or Setup, depending on the application) to view the printer driver settings. 3 From the Page Layout tab, click More Page Layout Options. 4 Click Poster. 5 Select the poster size you want by choosing the number of pages...
User's Guide
Page 45
...manual feeder, first send the job to print, then load the letterhead when the printer displays the Load Manual Feeder message (see the printer driver Help. Using an overlay 1 From the computer software application, select File Æ Print. 2 Click Properties (or Options, Printer, or ...Setup, depending on the application) to view the printer driver settings. 3 Click the Other Options tab. 4 Click Overlay. 5 Select which pages receive the overlay. 6 Select the overlay to use. 7 Select ...
...manual feeder, first send the job to print, then load the letterhead when the printer displays the Load Manual Feeder message (see the printer driver Help. Using an overlay 1 From the computer software application, select File Æ Print. 2 Click Properties (or Options, Printer, or ...Setup, depending on the application) to view the printer driver settings. 3 Click the Other Options tab. 4 Click Overlay. 5 Select which pages receive the overlay. 6 Select the overlay to use. 7 Select ...

User's Guide
Page 46
How to place the watermark on top of or underneath the page image in the Watermark placement area. 8 Click OK. Printing tasks Using a watermark 1 From the computer software application, select File Æ Print. 2 Click Properties (or Options, Printer, or Setup, depending on the application) to view the printer driver settings. 3 Click the Other Options tab. 4 Click Watermark. 5 Select which pages receive the watermark. 6 Select the watermark to use. 7 Select whether to print using an overlay or a watermark 46
How to place the watermark on top of or underneath the page image in the Watermark placement area. 8 Click OK. Printing tasks Using a watermark 1 From the computer software application, select File Æ Print. 2 Click Properties (or Options, Printer, or Setup, depending on the application) to view the printer driver settings. 3 Click the Other Options tab. 4 Click Watermark. 5 Select which pages receive the watermark. 6 Select the watermark to use. 7 Select whether to print using an overlay or a watermark 46
User's Guide
Page 53
...Note: If you can add it manually. How to install options Recognizing installed options After the printer is turned on, the printer driver should automatically recognize an option you installed from the Available options list, and click Add. • Memory Card-Increase the printer memory... to your printer driver yet, follow the appropriate instructions under Software and network tasks. Recognizing installed options 53 After you have not installed your configuration: ...
...Note: If you can add it manually. How to install options Recognizing installed options After the printer is turned on, the printer driver should automatically recognize an option you installed from the Available options list, and click Add. • Memory Card-Increase the printer memory... to your printer driver yet, follow the appropriate instructions under Software and network tasks. Recognizing installed options 53 After you have not installed your configuration: ...

User's Guide
Page 54
... menus available from MarkVision makes that flashes when the printer is Off Understanding the operator panel 54 Settings you change from the application or printer driver apply only to printer settings from a software application override changes made from your printer. Using the operator panel The printer operator panel has a 2-...line by the Busy message. LCD Light See the menu map for a brief overview of your software application or printer driver. 7 Understanding the operator panel You can change most printer settings from the printer operator panel.
... menus available from MarkVision makes that flashes when the printer is Off Understanding the operator panel 54 Settings you change from the application or printer driver apply only to printer settings from a software application override changes made from your printer. Using the operator panel The printer operator panel has a 2-...line by the Busy message. LCD Light See the menu map for a brief overview of your software application or printer driver. 7 Understanding the operator panel You can change most printer settings from the printer operator panel.


