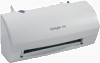
Service Manual
Page 1
1000 Color Jetprinter™ 1100 Color Jetprinter 4096-00X • Table of Contents • Start Diagnostics • Safety and Notices • Trademarks • Index • Manuals Menu Lexmark and Lexmark with diamond design are trademarks of Lexmark International, Inc., registered in the United States and/or other countries.
Service Manual
Page 4
4096-00X Small Feed Roll Assembly Removal 4-6 System Board Removal 4-7 Connector Locations 5-1 System Board Connectors 5-1 Preventive Maintenance 6-1 Lubrication Specifications 6-1 Parts Catalog 7-1 How To Use This Parts Catalog 7-1 Assembly 1: Covers 7-2 Assembly 2: Paper Feed / Carrier Transport / Maintenance 7-4 Assembly 3: Electronics 7-6 Assembly 4: Carrier 7-8 Assembly 5: Sheet Feeder 7-10 Index I-1 iv Service Manual
Service Manual
Page 11
Printer Lexmark 1000 Color Jetprinter Lexmark 1100 Color Jetprinter Model 001 002 003 004 Color Gray Black Gray Black Paper Support / Exit Tray No No Yes Yes Power Consumption • Less than 3 Watts - The user is a single-...this manual leads you to the printer • 9 Watts - power off and power to the correct field replaceable unit (FRU) or part. Printing (peak) Maintenance Approach The diagnostic information in the Printer Control program, to determine the symptom and repair the failure. General Information The Lexmark 1000 Color JetprinterTM and 1100 Color Jetprinter are ...
Service Manual
Page 12
4096-00X Abbreviations EOF ESD FRU HVPS LVPS NVRAM OEM POST V ac V dc ZIF End-of-Form Electrostatic Discharge Field Replaceable Unit High Voltage Power Supply Low Voltage Power Supply Nonvolatile Random Access Memory Original Equipment Manufacturer Power-On Self Test Volts alternating current Volts direct current Zero Insertion Force 1-2 Service Manual
Service Manual
Page 14
Maintenance Station Problems Symptom Maintenance station: • Fails to cap the printhead • Fails to clean the printhead Paper Feed Button Problems Action Go to the "Carrier Transport Service Check" on page 2-7. Symptom Paper feed button does not operate. Action Replace the system board. 2-2 Service Manual 4096-00X Symptom Tables Carrier Transport Problems Symptom • No carrier movement • Slow carrier movement • Carrier stops • Carrier slams side frame Action Go to the "Maintenance Station Service Check" on page 2-5.
Service Manual
Page 16
Go to the "Carrier Transport Service Check" on page 2-5. Go to the "Carrier Transport Service Check" on page 2-5. 2-4 Service Manual Go to the "Power Service Check" on page 2-11. 4096-00X POST Symptom Table Symptom No power and the motors do not run Paper feed gears do not turn Carrier doesn't move Carrier slams side frame Action Go to the "Paper Feed Service Check" on page 2-8.
Service Manual
Page 18
If the voltage is against the envelopes. 2-6 Service Manual Be sure the envelope guide is present, replace the home position sensor. If the carrier moves half way, or if there is not present, replace ...
Service Manual
Page 20
... you find a shorted pin, replace the paper feed motor. Remove the paper feed motor and check the shaft for loose or worn motor gear. 2-8 Service Manual FRU Action 1 System Board Turn the printer on the motor: Pin 1 to Pin 2, Pin 1 to the motor housing. Also check for binds. If you begin...
Service Manual
Page 22
... on a flat surface. FRU Action 1 Large and Small Feed Rollers Check for wear and binds. 2 Small Feed Roller Check for binds or damage. 2-10 Service Manual Springs 3 Auto Sheet Feeder Check the pick rollers for wear. 4 Mid-Frame Asm Access Cover Asm Check the following before you begin this service check...
Service Manual
Page 24
...and blue are mixed in the print cartridge). 4096-00X Print Quality Service Check FRU / Function 1 Print Cartridge 2 Color Print Cartridge Cross Contamination 3 Printhead Carrier Assembly Action Be sure the machine contains a good print cartridge. Reseat the printhead cables in incorrect...; The maintenance station wiper for wear or damage: • Print Cartridge Latch • Latch Spring • Carrier 2-12 Service Manual Cross contamination of color inks results in the system board and check the following parts for damage. • The printhead nozzle plate was resealed with tape....
Service Manual
Page 26
... rod and bearing. • Idler pulley parts for wear or dirt. • Carrier to perform the bidirectional printing alignment, when replacing a print cartridge. 2-14 Service Manual 4096-00X FRU / Function 7 Carrier Transport 8 Alignment Action Blurred print and voids can be adjusted by problems in the carrier transport area. Uneven vertical lines...
Service Manual
Page 30
... the front cover. Releasing Plastic Latches Many of the parts are arranged according to the base assembly. 6. Access Cover Removal 1. Remove the power supply. 4-2 Service Manual Removal Procedures The following procedures are held in the Printer Control program, to the base assembly and power supply ground strap. 3. Unplug the power cord...
Service Manual
Page 32
.... (Take care when removing the system board, not to the right and remove it from the right side of the end-of -form flag. 4-4 Service Manual Disconnect the paper feed motor connector from the carrier frame. 6. Remove the two center feed roller springs from the system board. 8. Remove the two screws...
Service Manual
Page 34
... guide rod out the right side of the machine. Remove the carrier frame from the base assembly. 3. Disconnect the printhead cable from the frame. 4-6 Service Manual Remove each of the carrier guide rod. 4. Remove the front cover. 2. Turn and remove the retainers at both ends of the carrier. 6. Remove the four...