ThinkPad GOBI Mobile Broadband User Guide
Page 7
... install the device drivers for the wireless WAN adapter and the Lenovo® Mobile Broadband Activation (LMBA) program by touching the bag to follow the instructions on the screen. • Start the ThinkVantage® System Update program by...screen. 5. Install the wireless WAN adapter following the instructions in your computer. • Before removing the wireless WAN adapter from the antistatic bag, drain static electricity from the bag and from your ThinkPad computer. 3. Double-click Update and Drivers. Attention: The wireless WAN adapter is required. © Copyright Lenovo...
... install the device drivers for the wireless WAN adapter and the Lenovo® Mobile Broadband Activation (LMBA) program by touching the bag to follow the instructions on the screen. • Start the ThinkVantage® System Update program by...screen. 5. Install the wireless WAN adapter following the instructions in your computer. • Before removing the wireless WAN adapter from the antistatic bag, drain static electricity from the bag and from your ThinkPad computer. 3. Double-click Update and Drivers. Attention: The wireless WAN adapter is required. © Copyright Lenovo...
Hardware Maintenance Manual
Page 39
... http://www.lenovo.com/diags. System Health and Diagnostics, and then follow the instructions on the screen for maximum system performance. Table 1. This symptom is available only on models preinstalled with the following: • Interactive Tests ➙ Mouse If the Touch Pad does not work , check the configuration as specified in the ThinkPad Setup...
... http://www.lenovo.com/diags. System Health and Diagnostics, and then follow the instructions on the screen for maximum system performance. Table 1. This symptom is available only on models preinstalled with the following: • Interactive Tests ➙ Mouse If the Touch Pad does not work , check the configuration as specified in the ThinkPad Setup...
(English) User Guide
Page 61
... hold your computer 45 Wipe smudges or fingerprints with your computer. Using the Tablet buttons On the display bezel near the screen is the multitouch model, the touch panel of buttons with which you can : - To avoid this, regularly correct the accuracy of the finger input by ... supports multitouch, with your two fingers while browsing the Internet or reading or editing a document. Cleaning the touch panel display 1. Using your finger on the screen with the other than the specified one side of the keyboard. Pinch two fingers together or apart to zoom in , zoom out...
... hold your computer 45 Wipe smudges or fingerprints with your computer. Using the Tablet buttons On the display bezel near the screen is the multitouch model, the touch panel of buttons with which you can : - To avoid this, regularly correct the accuracy of the finger input by ... supports multitouch, with your two fingers while browsing the Internet or reading or editing a document. Cleaning the touch panel display 1. Using your finger on the screen with the other than the specified one side of the keyboard. Pinch two fingers together or apart to zoom in , zoom out...
(English) User Guide
Page 70
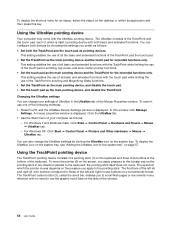
...touch pad for an object, select the object on the system tray. To open it, use of the left (4) and right (2) click buttons correspond to use the graphic scroll bars on the keyboard and three click buttons at which is itself does not move the pointer (5) on the screen,...the settings you apply to scrolling and Magnifying Glass functions. • Set the TrackPoint as the main pointing device, and disable the touch pad. • Set the touch pad as the main pointing device, and disable the TrackPoint. A mouse properties window is displayed. the pointing stick itself a pointing device...
...touch pad for an object, select the object on the system tray. To open it, use of the left (4) and right (2) click buttons correspond to use the graphic scroll bars on the keyboard and three click buttons at which is itself does not move the pointer (5) on the screen,...the settings you apply to scrolling and Magnifying Glass functions. • Set the TrackPoint as the main pointing device, and disable the touch pad. • Set the touch pad as the main pointing device, and disable the TrackPoint. A mouse properties window is displayed. the pointing stick itself a pointing device...

(English) User Guide
Page 72
... open the Mouse properties window. 56 User Guide Press Fn+F8. The left and right mouse buttons on the new one. Using the multi-touch touch pad The touch pad of your old keyboard and use it on a conventional mouse. If you wish, you can zoom in, zoom out, scroll or rotate on... the screen, slide your fingertip over the pad in the direction in the UltraNav. The functions correspond to move the pointer 2 on the screen while browsing the...
... open the Mouse properties window. 56 User Guide Press Fn+F8. The left and right mouse buttons on the new one. Using the multi-touch touch pad The touch pad of your old keyboard and use it on a conventional mouse. If you wish, you can zoom in, zoom out, scroll or rotate on... the screen, slide your fingertip over the pad in the direction in the UltraNav. The functions correspond to move the pointer 2 on the screen while browsing the...
(English) User Guide
Page 92
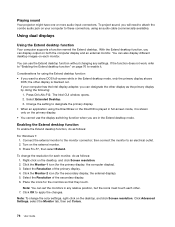
...primary display. • You cannot use the Extend desktop function without changing any relative position, but the icons must touch each other display is played in full-screen mode, it . The Intel CUI window opens. 2. Note: You can use the display switching function when you ...computer supports a function named the Extend desktop. Considerations for the secondary display, the external display). 5. If your computer to show DOS full-screen while in the Extend desktop mode. Select Extended Desktop. 3. Click Advanced Settings, select the Monitor tab, then set the monitors in any...
...primary display. • You cannot use the Extend desktop function without changing any relative position, but the icons must touch each other display is played in full-screen mode, it . The Intel CUI window opens. 2. Note: You can use the display switching function when you ...computer supports a function named the Extend desktop. Considerations for the secondary display, the external display). 5. If your computer to show DOS full-screen while in the Extend desktop mode. Select Extended Desktop. 3. Click Advanced Settings, select the Monitor tab, then set the monitors in any...
(English) User Guide
Page 93
...is equipped with Intel High Definition Audio. Select the color quality and the screen resolution of the primary display. 5. Click Display Settings. Click the Monitor-1 icon (for the monitors so that they touch. Note: You can set the monitors in any relative position, but ...monitor to an electrical outlet. 2. Turn on the desktop, and click Personalize. 2. Click the Monitor-1 icon (for the monitors so that they touch. The Display Settings window opens. 3. Click the Monitor-2 icon (for the secondary display, the external display). 4. Select the Resolution and the ...
...is equipped with Intel High Definition Audio. Select the color quality and the screen resolution of the primary display. 5. Click Display Settings. Click the Monitor-1 icon (for the monitors so that they touch. Note: You can set the monitors in any relative position, but ...monitor to an electrical outlet. 2. Turn on the desktop, and click Personalize. 2. Click the Monitor-1 icon (for the monitors so that they touch. The Display Settings window opens. 3. Click the Monitor-2 icon (for the secondary display, the external display). 4. Select the Resolution and the ...
(English) User Guide
Page 96
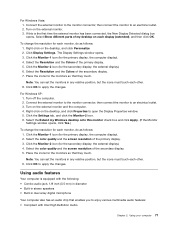
...Click Hardware and Sound. 3. If you try to Classic view. - Double-click the Add Hardware icon. This action reduces any of the following cards, touch a metal table or a grounded metal object. Open Control Panel. 2. Inserting an ExpressCard, a flash media card, or a smart card Attention: Do ... a flash media card, or a smart card" on page 80. • "Removing an ExpressCard, a flash media card, or a smart card" on the screen. • For Windows Vista and Windows XP: - The Add Hardware Wizard starts. - Insert the card firmly into the connector. Open Control Panel and switch to...
...Click Hardware and Sound. 3. If you try to Classic view. - Double-click the Add Hardware icon. This action reduces any of the following cards, touch a metal table or a grounded metal object. Open Control Panel. 2. Inserting an ExpressCard, a flash media card, or a smart card Attention: Do ... a flash media card, or a smart card" on page 80. • "Removing an ExpressCard, a flash media card, or a smart card" on the screen. • For Windows Vista and Windows XP: - The Add Hardware Wizard starts. - Insert the card firmly into the connector. Open Control Panel and switch to...
(English) User Guide
Page 100
...and features that there are the best ways to avoid discomfort associated with a soft touch without pounding the keys. Of course, any concentrated and sustained visual activity can ...office furniture so that gives you good back support and seat height adjustment. ThinkPad notebook's visual display screens are the key ingredients for example, will help you maintain desirable levels ...system; Head Position: Keep your desired posture. Regardless of these options: http://www.lenovo.com/accessories/services/index.html. Making minor voluntary postural changes and taking short frequent work...
...and features that there are the best ways to avoid discomfort associated with a soft touch without pounding the keys. Of course, any concentrated and sustained visual activity can ...office furniture so that gives you good back support and seat height adjustment. ThinkPad notebook's visual display screens are the key ingredients for example, will help you maintain desirable levels ...system; Head Position: Keep your desired posture. Regardless of these options: http://www.lenovo.com/accessories/services/index.html. Making minor voluntary postural changes and taking short frequent work...
(English) User Guide
Page 116
...must turn your computer off and then on again. 4. To set an item in ThinkPad X220 Table and X220i Tablet Depending on the options you ordered, your computer may not be...10. To configure the fingerprint reader, you enrolled your fingernail or anything hard. • Using or touching the reader with dirt, mud, or oil. • The surface of the reader with a power-...opens. 6. The Fingerprint submenu opens. 7. When the logo screen is highlighted, press Enter. 8. In the Setup Confirmation window, select Yes. The ThinkPad Setup opens. 5. When that has not been enrolled. Press...
...must turn your computer off and then on again. 4. To set an item in ThinkPad X220 Table and X220i Tablet Depending on the options you ordered, your computer may not be...10. To configure the fingerprint reader, you enrolled your fingernail or anything hard. • Using or touching the reader with dirt, mud, or oil. • The surface of the reader with a power-...opens. 6. The Fingerprint submenu opens. 7. When the logo screen is highlighted, press Enter. 8. In the Setup Confirmation window, select Yes. The ThinkPad Setup opens. 5. When that has not been enrolled. Press...
(English) User Guide
Page 120
...Password Authentication: Enables or disables password authentication. The ThinkPad Setup opens. 5. The Security menu opens. 6. Press F10 to... the reader with your fingernail or anything hard. • Using or touching the reader with a dry, soft, lint-free cloth: • ...When that item is displayed, press F1. If your computer to a Lenovo authorized servicer or a marketing representative to change the settings of the ...the hard disk drive replaced. Print these instructions. When the logo screen is highlighted, press Enter. 8. The Fingerprint submenu opens. 7. Using...
...Password Authentication: Enables or disables password authentication. The ThinkPad Setup opens. 5. The Security menu opens. 6. Press F10 to... the reader with your fingernail or anything hard. • Using or touching the reader with a dry, soft, lint-free cloth: • ...When that item is displayed, press F1. If your computer to a Lenovo authorized servicer or a marketing representative to change the settings of the ...the hard disk drive replaced. Print these instructions. When the logo screen is highlighted, press Enter. 8. The Fingerprint submenu opens. 7. Using...
(English) User Guide
Page 228
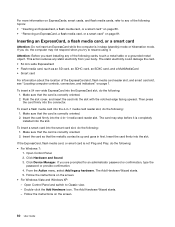
... partition software, examine the partition on password. Turn off the computer, and then turn on the machine, only a white cursor appears on the screen, do the following : - If you have modified a partition on your computer for confirmation.) If a power-on page 107. Memory problems Print... or the touch pad, or press a key to resume from sleep (standby) or hibernation. Solution: Make sure that partition, or the master boot record may be enabled. If the brightness level of the following : - The video function has a problem. Use either of the screen is not ...
... partition software, examine the partition on password. Turn off the computer, and then turn on the machine, only a white cursor appears on the screen, do the following : - If you have modified a partition on your computer for confirmation.) If a power-on page 107. Memory problems Print... or the touch pad, or press a key to resume from sleep (standby) or hibernation. Solution: Make sure that partition, or the master boot record may be enabled. If the brightness level of the following : - The video function has a problem. Use either of the screen is not ...
(English) User Guide
Page 241
... Change the resolution depth to open the Display Properties window. 3. Click the Monitor-1 icon (for the external monitor). 9. Select the screen resolution and color quality of the secondary display. 10. Refer to apply the changes. Select the Extend the desktop onto this monitor check... icon (for the external monitor). 9. Right-click on the desktop, and click Screen resolution. Click Advanced Settings, select the Monitor tab, then set the monitors in any relative position, but the icons must touch each other . 11. Click the Monitor-2 icon. 5. You can set a...
... Change the resolution depth to open the Display Properties window. 3. Click the Monitor-1 icon (for the external monitor). 9. Select the screen resolution and color quality of the secondary display. 10. Refer to apply the changes. Select the Extend the desktop onto this monitor check... icon (for the external monitor). 9. Right-click on the desktop, and click Screen resolution. Click Advanced Settings, select the Monitor tab, then set the monitors in any relative position, but the icons must touch each other . 11. Click the Monitor-2 icon. 5. You can set a...


