
(English) Rescue and Recovery 4.3 Deployment Guide
Page 51
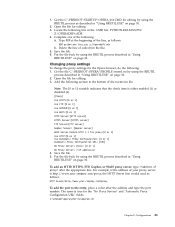
... Enable HTTP 1.1 for editing. 3. To add an HTTP, HTTPS, FTP, Gopher, or WAIS proxy server, type = after the address and type the port number. Put the file back by using the RRUTIL process described in "Using RRUTIL.EXE" on page 30. Add the following line in "Using RRUTIL....your proxy server is true for editing by using the RRUTIL process as follows: HTTP Server=http://www.your company.com/proxy To add the port to the bottom of the following : 1. 1. Open the file for proxy=[0 or 1] Use HTTP=[0 or 1] Use Automatic Proxy Configuration= [0 or 1] Automatic Proxy ...
... Enable HTTP 1.1 for editing. 3. To add an HTTP, HTTPS, FTP, Gopher, or WAIS proxy server, type = after the address and type the port number. Put the file back by using the RRUTIL process described in "Using RRUTIL.EXE" on page 30. Add the following line in "Using RRUTIL....your proxy server is true for editing by using the RRUTIL process as follows: HTTP Server=http://www.your company.com/proxy To add the port to the bottom of the following : 1. 1. Open the file for proxy=[0 or 1] Use HTTP=[0 or 1] Use Automatic Proxy Configuration= [0 or 1] Automatic Proxy ...
(English) Rescue and Recovery 4.5 Deployment Guide
Page 44
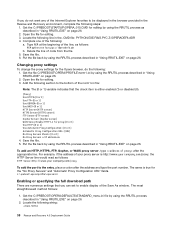
...www.your company.com/proxy, the HTTP Server line would read as follows: HTTP Server=http://www.your company.com/proxy To add the port to the entry, place a colon after the appropriate line. Get the C:\PREBOOT\OPERA\DEFAULTS\STANDARD_menu.ini file by using the RRUTIL process described... method follows: 1. Save the file. 5. To add an HTTP, HTTPS, FTP, Gopher, or WAIS proxy server, type = after the address and type the port number. Locate the following steps: 1. For example, if the address of your proxy server is either enabled (1) or disabled (0). [Proxy] Use HTTPS=[0 or 1]...
...www.your company.com/proxy, the HTTP Server line would read as follows: HTTP Server=http://www.your company.com/proxy To add the port to the entry, place a colon after the appropriate line. Get the C:\PREBOOT\OPERA\DEFAULTS\STANDARD_menu.ini file by using the RRUTIL process described... method follows: 1. Save the file. 5. To add an HTTP, HTTPS, FTP, Gopher, or WAIS proxy server, type = after the address and type the port number. Locate the following steps: 1. For example, if the address of your proxy server is either enabled (1) or disabled (0). [Proxy] Use HTTPS=[0 or 1]...
(English) Access Connections Profile Deployment guide
Page 20
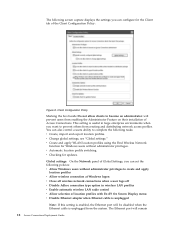
... profiles with Fn+F5 On Screen Display menu v Disable Ethernet adapter when Ethernet cable is unplugged Note: If this setting is enabled, the Ethernet port will be disabled when the Ethernet cable is useful in wireless LAN profiles v Enable automatic wireless LAN radio control v Allow selection of the Client ... v Checking for Windows users without administrator privileges to become an administrator: will remain 12 Access Connections Deployment Guide v Automatic location profile switching. The Ethernet port will prevent users from creating and distributing network access profiles.
... profiles with Fn+F5 On Screen Display menu v Disable Ethernet adapter when Ethernet cable is unplugged Note: If this setting is enabled, the Ethernet port will be disabled when the Ethernet cable is useful in wireless LAN profiles v Enable automatic wireless LAN radio control v Allow selection of the Client ... v Checking for Windows users without administrator privileges to become an administrator: will remain 12 Access Connections Deployment Guide v Automatic location profile switching. The Ethernet port will prevent users from creating and distributing network access profiles.

(English) Access Connections Profile Deployment guide
Page 21
v Enable auto deletion of unused profiles v Disable the Peer to Peer community feature Chapter 3. Working with the Administrator Feature 13 To re-enable the Ethernet port, manually apply the profile for the Ethernet connection. disabled even when the Ethernet cable is plugged in again.
v Enable auto deletion of unused profiles v Disable the Peer to Peer community feature Chapter 3. Working with the Administrator Feature 13 To re-enable the Ethernet port, manually apply the profile for the Ethernet connection. disabled even when the Ethernet cable is plugged in again.
(English) Power Manager Deployment Guide
Page 29
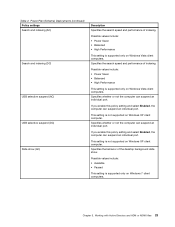
...Specifies the search speed and performance of indexing. If you enable this policy setting and select Enabled, the computer can suspend an individual port. Chapter 3. Specifies the behavior of the desktop background slide show (AC) Description Specifies the search speed and performance of indexing. ...8226; Paused This setting is not supported on Windows XP client computer. Specifies whether or not the computer can suspend an individual port. This setting is supported only on Windows XP client computer. If you enable this policy setting and select Enabled, the computer ...
...Specifies the search speed and performance of indexing. If you enable this policy setting and select Enabled, the computer can suspend an individual port. Chapter 3. Specifies the behavior of the desktop background slide show (AC) Description Specifies the search speed and performance of indexing. ...8226; Paused This setting is not supported on Windows XP client computer. Specifies whether or not the computer can suspend an individual port. This setting is supported only on Windows XP client computer. If you enable this policy setting and select Enabled, the computer ...
Hardware Maintenance Manual
Page 35
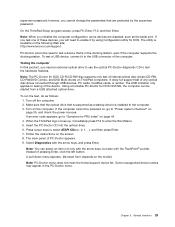
... however, you need to enable it to enter the Boot Menu. 5. On the ThinkPad Setup program screen, press F9, Enter, F10, and then Enter. The utility is available on the following Web site: http://www.lenovo.com/support PC-Doctor cannot be used to test a device that is installed to ... (x: 0, 1, ...) and then press Enter. 7. Using a bootable PC-Doctor for DOS. Make sure that the optical drive that are disabled, such as the serial port. If the computer cannot be started from a USB attached optical drive. If an error code appears, go to -FRU index" on the screen. 8. Press cursor...
... however, you need to enable it to enter the Boot Menu. 5. On the ThinkPad Setup program screen, press F9, Enter, F10, and then Enter. The utility is available on the following Web site: http://www.lenovo.com/support PC-Doctor cannot be used to test a device that is installed to ... (x: 0, 1, ...) and then press Enter. 7. Using a bootable PC-Doctor for DOS. Make sure that the optical drive that are disabled, such as the serial port. If the computer cannot be started from a USB attached optical drive. If an error code appears, go to -FRU index" on the screen. 8. Press cursor...
Hardware Maintenance Manual
Page 38
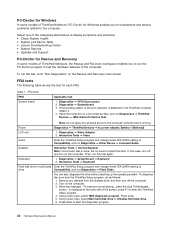
... and solutions: • Check System Health • System and Device Tests • Lenovo Troubleshooting Center • System Reports • Updates and Support PC-Doctor for each FRU. If the docking station or the port replicator is heard this case, turn off and turn off the computer. 2. Note: ...Do not apply any diskette from the ThinkPad Setup program, do as follows: 1. In this test. Keyboard 1. Turn on the...
... and solutions: • Check System Health • System and Device Tests • Lenovo Troubleshooting Center • System Reports • Updates and Support PC-Doctor for each FRU. If the docking station or the port replicator is heard this case, turn off and turn off the computer. 2. Note: ...Do not apply any diskette from the ThinkPad Setup program, do as follows: 1. In this test. Keyboard 1. Turn on the...
Hardware Maintenance Manual
Page 41
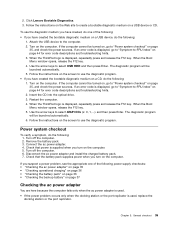
... diagnostic medium you have created, do the following : 1. When the ThinkPad logo is displayed, repeatedly press and release the F12 key. Follow the... device to use the diagnostic program. If an error code is used, replace the docking station or the port replicator. Turn on the screen to "Power system checkout" on page 35, and check the power sources....the ac power adapter is used. • If the power problem occurs only when the docking station or the port replicator is displayed, go to create a bootable diagnostic medium on the computer. If you suspect a power problem,...
... diagnostic medium you have created, do the following : 1. When the ThinkPad logo is displayed, repeatedly press and release the F12 key. Follow the... device to use the diagnostic program. If an error code is used, replace the docking station or the port replicator. Turn on the screen to "Power system checkout" on page 35, and check the power sources....the ac power adapter is used. • If the power problem occurs only when the docking station or the port replicator is displayed, go to create a bootable diagnostic medium on the computer. If you suspect a power problem,...
Hardware Maintenance Manual
Page 54
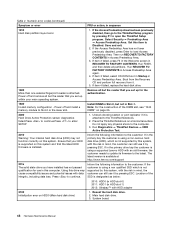
...TO FACTORY CONTENTS. Inform the following information to the customer: If the customer is using a non qualified SSD which is using a non-Lenovo hard disk drive (HDD), which is not supported by pressing ESC. The latest version is attached. Inform the following information to enter ...in Slot-1. If item 3 failed, select CD-ROM boot in Startup in Access Predesktop Area. 3. Undock docking station or port replicator if it . 5. Place the ThinkPad Notebook on this system. Location of the DIMM slot, see "1040 DIMM" on this system and that your main operating system...
...TO FACTORY CONTENTS. Inform the following information to the customer: If the customer is using a non qualified SSD which is using a non-Lenovo hard disk drive (HDD), which is not supported by pressing ESC. The latest version is attached. Inform the following information to enter ...in Slot-1. If item 3 failed, select CD-ROM boot in Startup in Access Predesktop Area. 3. Undock docking station or port replicator if it . 5. Place the ThinkPad Notebook on this system. Location of the DIMM slot, see "1040 DIMM" on this system and that your main operating system...
Hardware Maintenance Manual
Page 58
... devices one at a time until you find the failing FRU. 7. LCD assembly 52 Hardware Maintenance Manual If the problem remains, replace the following devices: a. Non-ThinkPad devices b. Determine whether the problem has been solved. 6. Remove or disconnect all of the following FRUs one at a time (do not replace a nondefective FRU): a. Battery...
... devices one at a time until you find the failing FRU. 7. LCD assembly 52 Hardware Maintenance Manual If the problem remains, replace the following devices: a. Non-ThinkPad devices b. Determine whether the problem has been solved. 6. Remove or disconnect all of the following FRUs one at a time (do not replace a nondefective FRU): a. Battery...
(English) User Guide
Page 4
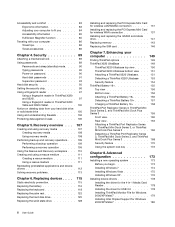
... computer 149 Finding ThinkPad options 149 ThinkPad X220 UltraBase 149 ThinkPad X220 Ultrabase top view . . . . . 150 ThinkPad X220 Ultrabase bottom view . . . 151 Attaching a ThinkPad X220 Ultrabase . . . . 151 Detaching a ThinkPad X220 Ultrabase . . . 153 Security feature 154 ThinkPad Battery 19 155 Top view 156 Bottom view 156 Attaching a ThinkPad Battery 19+ . . . . . 156 Detaching a ThinkPad Battery 19+ . . . . . 157 Charging a ThinkPad Battery 19+ . . . . . 158 ThinkPad Port Replicator Series 3, ThinkPad Mini Dock Series...
... computer 149 Finding ThinkPad options 149 ThinkPad X220 UltraBase 149 ThinkPad X220 Ultrabase top view . . . . . 150 ThinkPad X220 Ultrabase bottom view . . . 151 Attaching a ThinkPad X220 Ultrabase . . . . 151 Detaching a ThinkPad X220 Ultrabase . . . 153 Security feature 154 ThinkPad Battery 19 155 Top view 156 Bottom view 156 Attaching a ThinkPad Battery 19+ . . . . . 156 Detaching a ThinkPad Battery 19+ . . . . . 157 Charging a ThinkPad Battery 19+ . . . . . 158 ThinkPad Port Replicator Series 3, ThinkPad Mini Dock Series...
(English) User Guide
Page 5
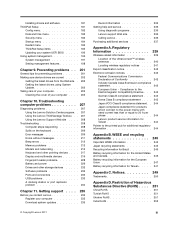
...228 Battery and power 229 Drives and other storage devices . . . . . 232 Software problems 233 Ports and connectors 233 USB problems 233 A docking station or port replicator problem 234 Chapter 11. Regulatory Information 239 Wireless related information 239 Location of the UltraConnect™ ...235 Getting help and service 236 Using diagnostic programs 236 Lenovo support Web site 236 Calling Lenovo 236 Purchasing additional services 237 Appendix A. Notices 249 Trademarks 250 Appendix D. Installing drivers and software 181 ThinkPad Setup 181 Config menu 182 Date and time menu ...
...228 Battery and power 229 Drives and other storage devices . . . . . 232 Software problems 233 Ports and connectors 233 USB problems 233 A docking station or port replicator problem 234 Chapter 11. Regulatory Information 239 Wireless related information 239 Location of the UltraConnect™ ...235 Getting help and service 236 Using diagnostic programs 236 Lenovo support Web site 236 Calling Lenovo 236 Purchasing additional services 237 Appendix A. Notices 249 Trademarks 250 Appendix D. Installing drivers and software 181 ThinkPad Setup 181 Config menu 182 Date and time menu ...

(English) User Guide
Page 25
... to open the Power Manager program and configure corresponding settings to the ThinkPad Port Replicator Series 3, ThinkPad Mini Dock Series 3, or ThinkPad Mini Dock Plus Series 3 and use an Ethernet connector, use the Ethernet connector on the ThinkPad Port Replicator Series 3, ThinkPad Mini Dock Series 3, or ThinkPad Mini Dock Plus Series 3, not the one on the computer. 5 Always...
... to open the Power Manager program and configure corresponding settings to the ThinkPad Port Replicator Series 3, ThinkPad Mini Dock Series 3, or ThinkPad Mini Dock Plus Series 3 and use an Ethernet connector, use the Ethernet connector on the ThinkPad Port Replicator Series 3, ThinkPad Mini Dock Series 3, or ThinkPad Mini Dock Plus Series 3, not the one on the computer. 5 Always...

(English) User Guide
Page 27
... audio jack To listen to the sound from your computer to the ThinkPad Port Replicator Series 3, ThinkPad Mini Dock Series 3, or ThinkPad Mini Dock Plus Series 3 and use an Ethernet connector, use the Ethernet connector on the ThinkPad Port Replicator Series 3, ThinkPad Mini Dock Series 3, or ThinkPad Mini Dock Plus Series 3, not the one on -line help of...
... audio jack To listen to the sound from your computer to the ThinkPad Port Replicator Series 3, ThinkPad Mini Dock Series 3, or ThinkPad Mini Dock Plus Series 3 and use an Ethernet connector, use the Ethernet connector on the ThinkPad Port Replicator Series 3, ThinkPad Mini Dock Series 3, or ThinkPad Mini Dock Plus Series 3, not the one on -line help of...
(English) User Guide
Page 29
... specific to USB 3.0 will work until your computer to the ThinkPad Port Replicator Series 3, ThinkPad Mini Dock Series 3, ThinkPad Mini Dock Plus Series 3, or ThinkPad X220 Ultrabase and use a monitor connector, use the monitor connector on the ThinkPad Port Replicator Series 3, ThinkPad Mini Dock Series 3, ThinkPad Mini Dock Plus Series 3, or ThinkPad X220 Ultrabase , not the one on page 71. 6 USB connector...
... specific to USB 3.0 will work until your computer to the ThinkPad Port Replicator Series 3, ThinkPad Mini Dock Series 3, ThinkPad Mini Dock Plus Series 3, or ThinkPad X220 Ultrabase and use a monitor connector, use the monitor connector on the ThinkPad Port Replicator Series 3, ThinkPad Mini Dock Series 3, ThinkPad Mini Dock Plus Series 3, or ThinkPad X220 Ultrabase , not the one on page 71. 6 USB connector...
(English) User Guide
Page 32
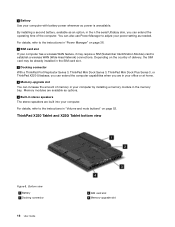
...feature, it may be already installed in the SIM card slot. 3 Docking connector With a ThinkPad Port Replicator Series 3, ThinkPad Mini Dock Series 3, ThinkPad Mini Dock Plus Series 3, or ThinkPad X220 Ultrabase, you can extend the computer capabilities when you can increase the amount of the computer. ...Module) card to establish a wireless WAN (Wide Area Network) connections. Depending on page 36. 2 SIM card slot If your computer. ThinkPad X220 Tablet and X220i Tablet bottom view Figure 8. 1 Battery Use your computer by installing a memory module in "Volume and mute buttons" ...
...feature, it may be already installed in the SIM card slot. 3 Docking connector With a ThinkPad Port Replicator Series 3, ThinkPad Mini Dock Series 3, ThinkPad Mini Dock Plus Series 3, or ThinkPad X220 Ultrabase, you can extend the computer capabilities when you can increase the amount of the computer. ...Module) card to establish a wireless WAN (Wide Area Network) connections. Depending on page 36. 2 SIM card slot If your computer. ThinkPad X220 Tablet and X220i Tablet bottom view Figure 8. 1 Battery Use your computer by installing a memory module in "Volume and mute buttons" ...

(English) User Guide
Page 82
...-click the My Bluetooth Places icon on which you want access. Click the service you want . A pop-up networking • Network access • Bluetooth serial port • Bluetooth Imaging • Hands Free • AV profile 4.
...-click the My Bluetooth Places icon on which you want access. Click the service you want . A pop-up networking • Network access • Bluetooth serial port • Bluetooth Imaging • Hands Free • AV profile 4.

(English) User Guide
Page 91
...-play setup and supports adaptors that has the Intel display adapter: 1. Setting up your computer to help you can plug into DVI, VGA, or HDMI ports. To apply a presentation scheme, you give presentations with the projector attached to various external devices, such as CRT monitors, projectors, or even HDTV. If you...
...-play setup and supports adaptors that has the Intel display adapter: 1. Setting up your computer to help you can plug into DVI, VGA, or HDMI ports. To apply a presentation scheme, you give presentations with the projector attached to various external devices, such as CRT monitors, projectors, or even HDTV. If you...
(English) User Guide
Page 165
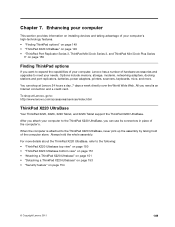
... devices and taking advantage of your computer's high-technology features. • "Finding ThinkPad options" on page 149 • "ThinkPad X220 UltraBase" on page 149 • "ThinkPad Port Replicator Series 3, ThinkPad Mini Dock Series 3, and ThinkPad Mini Dock Plus Series 3" on page 154 © Copyright Lenovo 2011 149 You can use its connectors in place of hardware accessories and...
... devices and taking advantage of your computer's high-technology features. • "Finding ThinkPad options" on page 149 • "ThinkPad X220 UltraBase" on page 149 • "ThinkPad Port Replicator Series 3, ThinkPad Mini Dock Series 3, and ThinkPad Mini Dock Plus Series 3" on page 154 © Copyright Lenovo 2011 149 You can use its connectors in place of hardware accessories and...
(English) User Guide
Page 169
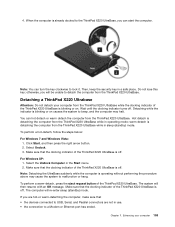
... To perform a warm-detach, press the eject request button of the ThinkPad X220 UltraBase is blinking or on . The computer will then resume with an OK message. If you will be unable to a Modem or Ethernet port has ended. otherwise, you are not in use. • the ...connection to detach the computer from the ThinkPad X220 UltraBase while the docking indicator of the ThinkPad X220 UltraBase is already docked to malfunction or hang. Detaching a ThinkPad X220 Ultrabase Attention: Do not detach ...
... To perform a warm-detach, press the eject request button of the ThinkPad X220 UltraBase is blinking or on . The computer will then resume with an OK message. If you will be unable to a Modem or Ethernet port has ended. otherwise, you are not in use. • the ...connection to detach the computer from the ThinkPad X220 UltraBase while the docking indicator of the ThinkPad X220 UltraBase is already docked to malfunction or hang. Detaching a ThinkPad X220 Ultrabase Attention: Do not detach ...


