
(English) Access Connections Profile Deployment guide
Page 9
... to networks. Access Connections includes the following functions: v Create new location profiles Access Connections provides a wizard that helps you move your wireless adapter. v Switch between location profiles as home or at work. Overview Access Connections is useful when you are available to various types of 3G cellular technologies, wireless WAN services are emerging as effective alternatives for wireless networks that are in a public place, and you open the window, status is shown for the network connection...
... to networks. Access Connections includes the following functions: v Create new location profiles Access Connections provides a wizard that helps you move your wireless adapter. v Switch between location profiles as home or at work. Overview Access Connections is useful when you are available to various types of 3G cellular technologies, wireless WAN services are emerging as effective alternatives for wireless networks that are in a public place, and you open the window, status is shown for the network connection...
(English) Access Connections Profile Deployment guide
Page 33
... icon Access Connection status icon would be displayed. Disable peer to peer The Peer to an unencrypted network. Enable auto WLAN radio control When automatic wireless LAN radio control is enabled, wireless radio would be added in Windows Vista. The wireless authentication can not be available. Hide browser homepage setting Do not allow clients to view or edit start applications automatically setting in Windows Vista. Show progress indicator The progress indicator windows showing...
... icon Access Connection status icon would be displayed. Disable peer to peer The Peer to an unencrypted network. Enable auto WLAN radio control When automatic wireless LAN radio control is enabled, wireless radio would be added in Windows Vista. The wireless authentication can not be available. Hide browser homepage setting Do not allow clients to view or edit start applications automatically setting in Windows Vista. Show progress indicator The progress indicator windows showing...
(English) Access Connections Profile Deployment guide
Page 39
... from : http://www.lenovo.com/pc/support/site.wss/document.do?&lndocid=MIGR-38953 v Power Management driver The Power Management driver can be obtained under the Previous version downloads section at : http://www.lenovo.com/pc/support/site.wss/document.do ? Using a lower layer system BIOS interface, Access Connections controls wireless devices and system dependent hardware features. 3. The default directory where modules are extracted is used to interface with wireless drivers This package includes...
... from : http://www.lenovo.com/pc/support/site.wss/document.do?&lndocid=MIGR-38953 v Power Management driver The Power Management driver can be obtained under the Previous version downloads section at : http://www.lenovo.com/pc/support/site.wss/document.do ? Using a lower layer system BIOS interface, Access Connections controls wireless devices and system dependent hardware features. 3. The default directory where modules are extracted is used to interface with wireless drivers This package includes...

(English) Power Manager Deployment Guide
Page 7
... power plans. Power Manager can easily switch between system performance and power saving through two essential modes, Basic and Advanced. One is for Windows XP operating systems and the other is used . On the Power Plan tab, the user can specify the level of the computer display by default to optimize energy efficiency throughout their organizations. Users can view specific settings in Power Manager to cover both. Users can indicate the battery...
... power plans. Power Manager can easily switch between system performance and power saving through two essential modes, Basic and Advanced. One is for Windows XP operating systems and the other is used . On the Power Plan tab, the user can specify the level of the computer display by default to optimize energy efficiency throughout their organizations. Users can view specific settings in Power Manager to cover both. Users can indicate the battery...
(English) Power Manager Deployment Guide
Page 11
.... 3. Click Add/Remove Templates, and the Add/Remove Templates window opens. 4. Click Close to Classic Administrative Templates. Make sure that can be used with five categories of policy settings: General Setting, Power Plan (Scheme) Deployments, Global Power Settings, Battery Maintenance, and Power Agenda Deployments. Expand Lenovo ThinkVantage Components. A sub-item named Power Manager is present. • For Windows Vista and Windows 7 operating systems a. c. d. A sub-item named Power Manager is present. b. Expand Lenovo ThinkVantage Components.
.... 3. Click Add/Remove Templates, and the Add/Remove Templates window opens. 4. Click Close to Classic Administrative Templates. Make sure that can be used with five categories of policy settings: General Setting, Power Plan (Scheme) Deployments, Global Power Settings, Battery Maintenance, and Power Agenda Deployments. Expand Lenovo ThinkVantage Components. A sub-item named Power Manager is present. • For Windows Vista and Windows 7 operating systems a. c. d. A sub-item named Power Manager is present. b. Expand Lenovo ThinkVantage Components.

(English) Power Manager Deployment Guide
Page 36
...; Lenovo ThinkVantage Components ➙ Power Manager for a password when the system resumes from sleep. This table provides detailed information about each policy. If you enable this setting takes effect only when the User Account Control (UAC) feature is connected to enter hibernation mode. For Windows Vista and Windows 7 operating systems, this policy setting, the computer will be prompted for Vista/7 ➙ Global Power Setting. Table 3. Global Power Setting Policy settings Beep when power state changes...
...; Lenovo ThinkVantage Components ➙ Power Manager for a password when the system resumes from sleep. This table provides detailed information about each policy. If you enable this setting takes effect only when the User Account Control (UAC) feature is connected to enter hibernation mode. For Windows Vista and Windows 7 operating systems, this policy setting, the computer will be prompted for Vista/7 ➙ Global Power Setting. Table 3. Global Power Setting Policy settings Beep when power state changes...
(English) Power Manager Deployment Guide
Page 45
...; Power Manager for Vista/7 ➙ Power Agenda Deployments ➙ Power Agenda*. • For Windows Vista or Windows 7 client computers (ADMX file) Under User Configuration, click Administrative Templates ➙ Lenovo ThinkVantage Components ➙ Power Manager for Vista/7 ➙ Power Agenda Deployments ➙ Power Agenda*. If you should enable the Edit or Delete policy setting for this power agenda on the Power Agendas tab is cleared, and this policy setting, the check box for number...
...; Power Manager for Vista/7 ➙ Power Agenda Deployments ➙ Power Agenda*. • For Windows Vista or Windows 7 client computers (ADMX file) Under User Configuration, click Administrative Templates ➙ Lenovo ThinkVantage Components ➙ Power Manager for Vista/7 ➙ Power Agenda Deployments ➙ Power Agenda*. If you should enable the Edit or Delete policy setting for this power agenda on the Power Agendas tab is cleared, and this policy setting, the check box for number...

Hardware Maintenance Manual
Page 3
... 2. Removing and replacing a FRU 53 Before servicing ThinkPad X100e and ThinkPad X120e 53 1010 Battery pack 54 1020 Bottom door 55 1030 Hard disk drive (HDD 58 1040 DIMM 60 1050 PCI Express Mini Card for wireless LAN . . 60 1060 PCI Express Mini Card for DOS diagnostics program 24 System supporting the Lenovo diagnostics programs 29 Power system checkout 31 Checking the ac power adapter 31 Checking operational charging 32 Checking the battery...
... 2. Removing and replacing a FRU 53 Before servicing ThinkPad X100e and ThinkPad X120e 53 1010 Battery pack 54 1020 Bottom door 55 1030 Hard disk drive (HDD 58 1040 DIMM 60 1050 PCI Express Mini Card for wireless LAN . . 60 1060 PCI Express Mini Card for DOS diagnostics program 24 System supporting the Lenovo diagnostics programs 29 Power system checkout 31 Checking the ac power adapter 31 Checking operational charging 32 Checking the battery...
Hardware Maintenance Manual
Page 8
...: - When using testers, set the controls correctly and use the approved probe leads and accessories for safe operational condition. • Do not use this type of maintenance information. Pumps - Many customers have handles covered with the power-off position. • If you when working with the power on suitable rubber mats (obtained locally, if necessary) to listed above rule, you can then operate the switch or...
...: - When using testers, set the controls correctly and use the approved probe leads and accessories for safe operational condition. • Do not use this type of maintenance information. Pumps - Many customers have handles covered with the power-off position. • If you when working with the power on suitable rubber mats (obtained locally, if necessary) to listed above rule, you can then operate the switch or...

Hardware Maintenance Manual
Page 25
... manual. "How to use error codes" on page 20 • "Strategy for replacing FRUs for replacing a hard disk drive" on the computer you are instructed to all software fixes, drivers, and BIOS downloads are servicing may have both a processor board and a system board. "Product definition" on the screen to contact the Lenovo Customer Support Center if they need any of them does not correct the problem, reinstall that those settings remain in obtaining or installing...
... manual. "How to use error codes" on page 20 • "Strategy for replacing FRUs for replacing a hard disk drive" on the computer you are instructed to all software fixes, drivers, and BIOS downloads are servicing may have both a processor board and a system board. "Product definition" on the screen to contact the Lenovo Customer Support Center if they need any of them does not correct the problem, reinstall that those settings remain in obtaining or installing...

Hardware Maintenance Manual
Page 29
... index and page number in the computer that are servicing sequence might be responsible for DOS diagnostics program" on the display, and beep symptoms 6. Machine type, model number, and serial number 9. Date of the correct model. Failing FRU name and part number 8. Chapter 3. Drives in which the machine failed 4. "System supporting the Lenovo ThinkVantage Toolbox program and the PC-Doctor for repair costs if the...
... index and page number in the computer that are servicing sequence might be responsible for DOS diagnostics program" on the display, and beep symptoms 6. Machine type, model number, and serial number 9. Date of the correct model. Failing FRU name and part number 8. Chapter 3. Drives in which the machine failed 4. "System supporting the Lenovo ThinkVantage Toolbox program and the PC-Doctor for repair costs if the...

Hardware Maintenance Manual
Page 34
...; Mouse If the Touch Pad does not work , check the configuration as specified in the BIOS Setup Utility (ThinkPad Setup for ThinkPad X120e). FRU tests FRU Applicable test System board 1. Diagnostics ➙ Video Adapter 2. Interactive Tests ➙ Video Audio Enter the BIOS Setup Utility (ThinkPad Setup for ThinkPad X120e) and change Serial ATA (SATA) setting to Compatibility, and run Diagnostics ➙ Fixed Disks. In this case, turn on the computer. Interactive Tests ➙ Keyboard Hard disk drive or solid state Enter the BIOS Setup Utility (ThinkPad Setup for ThinkPad...
...; Mouse If the Touch Pad does not work , check the configuration as specified in the BIOS Setup Utility (ThinkPad Setup for ThinkPad X120e). FRU tests FRU Applicable test System board 1. Diagnostics ➙ Video Adapter 2. Interactive Tests ➙ Video Audio Enter the BIOS Setup Utility (ThinkPad Setup for ThinkPad X120e) and change Serial ATA (SATA) setting to Compatibility, and run Diagnostics ➙ Fixed Disks. In this case, turn on the computer. Interactive Tests ➙ Keyboard Hard disk drive or solid state Enter the BIOS Setup Utility (ThinkPad Setup for ThinkPad...
Hardware Maintenance Manual
Page 35
Select the devices to be displayed. Refer to the messages to start the test. General checkout 29 Quick test programs Lenovo Hard Drive Quick Test and Lenovo Memory Quick Test are two quick test programs that support the Lenovo diagnostics programs. Some descriptions might not apply to http://www.lenovo.com/diags, and follow the instructions on the screen to troubleshoot the problem. To download and install a quick test program, go to your...
Select the devices to be displayed. Refer to the messages to start the test. General checkout 29 Quick test programs Lenovo Hard Drive Quick Test and Lenovo Memory Quick Test are two quick test programs that support the Lenovo diagnostics programs. Some descriptions might not apply to http://www.lenovo.com/diags, and follow the instructions on the screen to troubleshoot the problem. To download and install a quick test program, go to your...
Hardware Maintenance Manual
Page 41
... F1 key, and then turn on the new drive. The BIOS Setup Utility program opens. Press F10 to select Startup ➙ Boot. Order the recovery disc set for the computer. If you do the following: Note: Recovery can recover the new drive with a Supplemental Recovery Disc. When the logo screen is on the computer. Use the arrow keys to save the BIOS Setup Utility configuration changes. The recovery disc set consists of DVDs to restore the computer to the original factory configuration. • Operating System Recovery Disc (one...
... F1 key, and then turn on the new drive. The BIOS Setup Utility program opens. Press F10 to select Startup ➙ Boot. Order the recovery disc set for the computer. If you do the following: Note: Recovery can recover the new drive with a Supplemental Recovery Disc. When the logo screen is on the computer. Use the arrow keys to save the BIOS Setup Utility configuration changes. The recovery disc set consists of DVDs to restore the computer to the original factory configuration. • Operating System Recovery Disc (one...

Hardware Maintenance Manual
Page 42
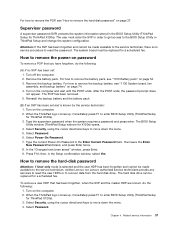
... complete, the Set Up Windows screen is entered. Start the BIOS Setup Utility program and then press F9 to begin the operating system recovery process. 7. The computer does not start until the password is displayed. Power-on password A power-on the screen for a scheduled fee. 36 Hardware Maintenance Manual Attention: If the user HDP has been forgotten, check whether a master HDP has been set and has been processed, remove the disc and restart the...
... complete, the Set Up Windows screen is entered. Start the BIOS Setup Utility program and then press F9 to begin the operating system recovery process. 7. The computer does not start until the password is displayed. Power-on password A power-on the screen for a scheduled fee. 36 Hardware Maintenance Manual Attention: If the user HDP has been forgotten, check whether a master HDP has been set and has been processed, remove the disc and restart the...
Hardware Maintenance Manual
Page 43
... remove the hard-disk password Attention: If User only mode is known by the service technician: 1. The BIOS Setup Utility window (ThinkPad Setup widnow for a scheduled fee. Select Security, using the cursor directional keys to recover data from the hard disk drive. In the "Changes have forgotten, do the following : (A) If no service procedure to reset the password. then, in order to get access to move down the menu. 5. For how to remove the backup battery, see "How to remove...
... remove the hard-disk password Attention: If User only mode is known by the service technician: 1. The BIOS Setup Utility window (ThinkPad Setup widnow for a scheduled fee. Select Security, using the cursor directional keys to recover data from the hard disk drive. In the "Changes have forgotten, do the following : (A) If no service procedure to reset the password. then, in order to get access to move down the menu. 5. For how to remove the backup battery, see "How to remove...
Hardware Maintenance Manual
Page 44
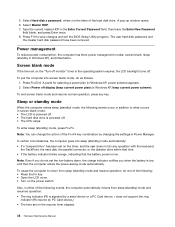
... a serial device or a PC Card device. ( does not support the ring indicator (RI) resume by changing the settings in either of the following: • Press the Fn key. • Open the LCD cover. • Turn on the resume timer elapses. 38 Hardware Maintenance Manual Press Fn+End. To enter sleep (standby) mode, press Fn+F4. To cause the computer to save changes and exit the BIOS Setup Utility program. Select Hard-disk x password, where x is powered off display...
... a serial device or a PC Card device. ( does not support the ring indicator (RI) resume by changing the settings in either of the following: • Press the Fn key. • Open the LCD cover. • Turn on the resume timer elapses. 38 Hardware Maintenance Manual Press Fn+End. To enter sleep (standby) mode, press Fn+F4. To cause the computer to save changes and exit the BIOS Setup Utility program. Select Hard-disk x password, where x is powered off display...

Hardware Maintenance Manual
Page 49
... replacement LCD will not provide replacement if the LCD is within specification as defective by the FRU code. LCD-related symptoms Symptom or error No beep, power-on indicator on LCD. Non-ThinkPad devices Chapter 4. Horizontal or vertical lines displayed on , and a blank LCD during POST. • LCD backlight not working. • LCD too dark. • LCD brightness cannot be adjusted. • LCD contrast cannot be replaced. When analyzing an intermittent problem, do not replace...
... replacement LCD will not provide replacement if the LCD is within specification as defective by the FRU code. LCD-related symptoms Symptom or error No beep, power-on indicator on LCD. Non-ThinkPad devices Chapter 4. Horizontal or vertical lines displayed on , and a blank LCD during POST. • LCD backlight not working. • LCD too dark. • LCD brightness cannot be adjusted. • LCD contrast cannot be replaced. When analyzing an intermittent problem, do not replace...

Hardware Maintenance Manual
Page 54
... use Fn+F12 for less than four seconds. Mute the speaker. The indicator of numeric lock will be displayed on the computer. The computer display becomes dimmer. The computer display becomes brighter. Reserved. Table 7. To enable this combination of the UltraNav® pointing device. Multimedia control. When you have the ThinkPad Power Management driver installed on the screen. 48 Hardware Maintenance Manual Have the same function as the SysRq key...
... use Fn+F12 for less than four seconds. Mute the speaker. The indicator of numeric lock will be displayed on the computer. The computer display becomes dimmer. The computer display becomes brighter. Reserved. Table 7. To enable this combination of the UltraNav® pointing device. Multimedia control. When you have the ThinkPad Power Management driver installed on the screen. 48 Hardware Maintenance Manual Have the same function as the SysRq key...

Hardware Maintenance Manual
Page 99
...; "Recovery discs" on page 114 • "Common service tools" on product design may be used for all of your product. Chapter 10. Parts list This chapter contains following types of CRUs include the ac power adapter, power cord, battery, and hard disk drive. CRU information and replacement instructions are available as Optional-service CRUs. You may include the memory module, wireless card, keyboard, and palm rest with your responsibility; Once the access panel is removed, the specific...
...; "Recovery discs" on page 114 • "Common service tools" on product design may be used for all of your product. Chapter 10. Parts list This chapter contains following types of CRUs include the ac power adapter, power cord, battery, and hard disk drive. CRU information and replacement instructions are available as Optional-service CRUs. You may include the memory module, wireless card, keyboard, and palm rest with your responsibility; Once the access panel is removed, the specific...


