
Hardware Maintenance Manual
Page 6
... features 493 Hardware controlled Passwords 493 Operating system password 493 Vital product data 493 BIOS levels 493 Updating (flashing) BIOS from a CD-ROM or diskette 494 Recovering from a POST/BIOS update failure . . 494 Power management 495 Automatic configuration and power interface (ACPI) BIOS 495 Automatic Power-On features 495 Appendix. Machine Type 6062 161 Machine Type...
... features 493 Hardware controlled Passwords 493 Operating system password 493 Vital product data 493 BIOS levels 493 Updating (flashing) BIOS from a CD-ROM or diskette 494 Recovering from a POST/BIOS update failure . . 494 Power management 495 Automatic configuration and power interface (ACPI) BIOS 495 Automatic Power-On features 495 Appendix. Machine Type 6062 161 Machine Type...

Hardware Maintenance Manual
Page 60
... tests" on page 494 2. System board 1. System board 1. Flash the system. System board 1. Flash the system. See "Updating (flashing) BIOS from a CD-ROM or diskette" on page 494 2. Run Setup 2. Flash the system. See "Updating (flashing) BIOS from a CD-ROM or diskette" on page 45 for the specific type for information about the Diagnostic...
... tests" on page 494 2. System board 1. System board 1. Flash the system. System board 1. Flash the system. See "Updating (flashing) BIOS from a CD-ROM or diskette" on page 494 2. Run Setup 2. Flash the system. See "Updating (flashing) BIOS from a CD-ROM or diskette" on page 45 for the specific type for information about the Diagnostic...

Hardware Maintenance Manual
Page 61
... Information only Re-start the test to "Undetermined problems" on page 80 2. See "Updating (flashing) BIOS from a CD-ROM or diskette" on page 80 1. Go to "Undetermined problems" on page 494 2. See "Updating (flashing) BIOS from a CD-ROM or diskette" on page 494 2. Make sure the component that ...System board System board Chapter 7. Adapter card 3. Flash the system. Re-start the test, if necessary 1. Flash the system. See "Updating (flashing) BIOS from a CD-ROM or diskette" on page 49 2. Flash the system and re-test 3. Flash the system. System board 1. See...
... Information only Re-start the test to "Undetermined problems" on page 80 2. See "Updating (flashing) BIOS from a CD-ROM or diskette" on page 80 1. Go to "Undetermined problems" on page 494 2. See "Updating (flashing) BIOS from a CD-ROM or diskette" on page 494 2. Make sure the component that ...System board System board Chapter 7. Adapter card 3. Flash the system. Re-start the test, if necessary 1. Flash the system. See "Updating (flashing) BIOS from a CD-ROM or diskette" on page 49 2. Flash the system and re-test 3. Flash the system. System board 1. See...

Hardware Maintenance Manual
Page 62
...Test aborted by user 001-196-XXX System test halt, error threshold exceeded FRU/Action System board 1. System board 1. See "Updating (flashing) BIOS from a CD-ROM or diskette" on system and re-test 2. Flash the system. System board 1. System board 1. Flash the system. See...F3 to reset the log file 56 Hardware Maintenance Manual Run Setup 2. Power-off /on page 494 2. See "Updating (flashing) BIOS from a CD-ROM or diskette" on page 494 3. See "Updating (flashing) BIOS from a CD-ROM or diskette" on system and re-test 2. System board System board System board 1. System ...
...Test aborted by user 001-196-XXX System test halt, error threshold exceeded FRU/Action System board 1. System board 1. See "Updating (flashing) BIOS from a CD-ROM or diskette" on system and re-test 2. Flash the system. System board 1. System board 1. Flash the system. See...F3 to reset the log file 56 Hardware Maintenance Manual Run Setup 2. Power-off /on page 494 2. See "Updating (flashing) BIOS from a CD-ROM or diskette" on page 494 3. See "Updating (flashing) BIOS from a CD-ROM or diskette" on system and re-test 2. System board System board System board 1. System ...

Hardware Maintenance Manual
Page 63
Replace the component that is called out in warning statement 4. Replace the component under function test System board System board System board 1. See "Updating (flashing) BIOS from a CD-ROM or diskette" on IRQ3 2. Device on page 494 3. Device on page 49 2. System board 1. Symptom-to "Undetermined problems" on page 80 2. See ...
Replace the component that is called out in warning statement 4. Replace the component under function test System board System board System board 1. See "Updating (flashing) BIOS from a CD-ROM or diskette" on IRQ3 2. Device on page 494 3. Device on page 49 2. System board 1. Symptom-to "Undetermined problems" on page 80 2. See ...

Hardware Maintenance Manual
Page 64
System board 1. Device on page 494 2. System board 1. System board 1. Hard disk drive 3. See "Updating (flashing) BIOS from a CD-ROM or diskette" on IRQ15 2. System board System board System board 1. Device on IRQ12 2. Device on IRQ8 2. ...System board 1. System board No action 1. Hard disk drive cable 2. CMOS Battery 2. Device on page 494 2. System board 1. Flash the system. See "Updating (flashing) BIOS from a CD-ROM or diskette" on IRQ9 2. Video card, if installed 2. System board 58 Hardware Maintenance Manual System board 1. Device on IRQ11 2. ...
System board 1. Device on page 494 2. System board 1. System board 1. Hard disk drive 3. See "Updating (flashing) BIOS from a CD-ROM or diskette" on IRQ15 2. System board System board System board 1. Device on IRQ12 2. Device on IRQ8 2. ...System board 1. System board No action 1. Hard disk drive cable 2. CMOS Battery 2. Device on page 494 2. System board 1. Flash the system. See "Updating (flashing) BIOS from a CD-ROM or diskette" on IRQ9 2. Video card, if installed 2. System board 58 Hardware Maintenance Manual System board 1. Device on IRQ11 2. ...

Hardware Maintenance Manual
Page 82
... the following actions in order. 1. Start the Setup Utility program and press F10 to the keyboard connector. 2. Replace the memory module(s). 3. See "Recovering from a POST/BIOS update failure" on page 494. 3. Perform the following actions in order. 1. See "Recovering from a POST/BIOS update failure" on page 494. Replace the system board.
... the following actions in order. 1. Start the Setup Utility program and press F10 to the keyboard connector. 2. Replace the memory module(s). 3. See "Recovering from a POST/BIOS update failure" on page 494. 3. Perform the following actions in order. 1. See "Recovering from a POST/BIOS update failure" on page 494. Replace the system board.

Hardware Maintenance Manual
Page 500
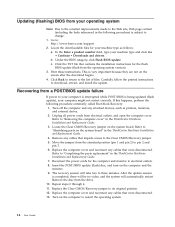
... Boot-block recovery). Remove the special recovery BIOS flash diskette from a POST/BIOS update failure Attention: If an interruption occurs during the recovery session. 4. Insert the system program update (flash) diskette and turn on the screen to complete the update. When prompted to change the serial number...the seven-character machine type/model of your computer has no video during a POST/BIOS update (flash update), the computer might not restart correctly. If this time you are available at http://www.lenovo.com/support on . 3. Note: If your computer and then press Enter. ...
... Boot-block recovery). Remove the special recovery BIOS flash diskette from a POST/BIOS update failure Attention: If an interruption occurs during the recovery session. 4. Insert the system program update (flash) diskette and turn on the screen to complete the update. When prompted to change the serial number...the seven-character machine type/model of your computer has no video during a POST/BIOS update (flash update), the computer might not restart correctly. If this time you are available at http://www.lenovo.com/support on . 3. Note: If your computer and then press Enter. ...

Hardware Maintenance Manual
Page 6
Notices 143 Television output notice 144 Trademarks 144 vi Hardware Maintenance Manual Updating (flashing) BIOS from a CD-ROM or diskette 139 Recovering from a POST/BIOS update failure . . 140 Power management 140 Automatic configuration and power interface (ACPI) BIOS 141 Automatic Power-On features 141 Appendix A.
Notices 143 Television output notice 144 Trademarks 144 vi Hardware Maintenance Manual Updating (flashing) BIOS from a CD-ROM or diskette 139 Recovering from a POST/BIOS update failure . . 140 Power management 140 Automatic configuration and power interface (ACPI) BIOS 141 Automatic Power-On features 141 Appendix A.

Hardware Maintenance Manual
Page 146
...When prompted to change the machine type/model, press Y. 6. Unplug all power cords from a POST/BIOS update failure Attention If an interruption occurs during a POST/BIOS update (flash update), the computer might not restart correctly. Remove any cables that were disconnected. 8. Reconnect the power cords ...your keyboard that impede access to three minutes. Insert the POST/BIOS update (flash) diskette in the diskette drive. 7. Insert the system program update (flash) CD-ROM into the optical drive. The update begins. 2. During this occurs, perform the following procedure commonly ...
...When prompted to change the machine type/model, press Y. 6. Unplug all power cords from a POST/BIOS update failure Attention If an interruption occurs during a POST/BIOS update (flash update), the computer might not restart correctly. Remove any cables that were disconnected. 8. Reconnect the power cords ...your keyboard that impede access to three minutes. Insert the POST/BIOS update (flash) diskette in the diskette drive. 7. Insert the system program update (flash) CD-ROM into the optical drive. The update begins. 2. During this occurs, perform the following procedure commonly ...

Hardware Maintenance Manual
Page 6
... features 441 Hardware controlled Passwords 441 Operating system password 441 Vital product data 441 BIOS levels 441 Updating (flashing) BIOS from a CD-ROM or diskette 442 Recovering from a POST/BIOS update failure . . 442 Power management 443 Automatic configuration and power interface (ACPI) BIOS 443 Automatic Power-On features 443 Appendix. FRU lists 149 Machine Type 6008...
... features 441 Hardware controlled Passwords 441 Operating system password 441 Vital product data 441 BIOS levels 441 Updating (flashing) BIOS from a CD-ROM or diskette 442 Recovering from a POST/BIOS update failure . . 442 Power management 443 Automatic configuration and power interface (ACPI) BIOS 443 Automatic Power-On features 443 Appendix. FRU lists 149 Machine Type 6008...

Hardware Maintenance Manual
Page 84
... 3. Start the Setup Utility program and press F7 to load defaults and then press F10 to the computer. 2. See "Recovering from a POST/BIOS update failure" on page 51. 2. Make sure the monitor is properly connected to the keyboard connector. 2. Perform the following actions in order. 1. See... "Recovering from a POST/BIOS update failure" on page 51. 2. Make sure the memory module(s) are tones or a series of tones separated by pauses (intervals without sound) during...
... 3. Start the Setup Utility program and press F7 to load defaults and then press F10 to the computer. 2. See "Recovering from a POST/BIOS update failure" on page 51. 2. Make sure the monitor is properly connected to the keyboard connector. 2. Perform the following actions in order. 1. See... "Recovering from a POST/BIOS update failure" on page 51. 2. Make sure the memory module(s) are tones or a series of tones separated by pauses (intervals without sound) during...

Hardware Maintenance Manual
Page 448
.... Close or install the cover and reconnect all external cables. 11. When you are available at http://www.lenovo.com/support on . When prompted to use the BIOS flash diskette. 1. Recovering from the system and open the cover. 8. Note: If your keyboard that the recovery... Y. 6. When prompted to three minutes and starts with two short beeps. Remove power from a POST/BIOS update failure Attention: If an interruption occurs during a POST/BIOS update (flash update), the computer might not restart correctly. Remove any parts necessary to gain access to an electrical outlet. ...
.... Close or install the cover and reconnect all external cables. 11. When you are available at http://www.lenovo.com/support on . When prompted to use the BIOS flash diskette. 1. Recovering from the system and open the cover. 8. Note: If your keyboard that the recovery... Y. 6. When prompted to three minutes and starts with two short beeps. Remove power from a POST/BIOS update failure Attention: If an interruption occurs during a POST/BIOS update (flash update), the computer might not restart correctly. Remove any parts necessary to gain access to an electrical outlet. ...

Arabic (User guide)
Page 22
Boot-block Recovery !C;K 1I=3 |f;>826' X6;86' &'(}m' 5IS98K !) 0'5@ -,P 'e' .RNINT R`^(_K 1=IyW/ .RI}f;B6 6' :;q;q$ R3;E_6' :',P$ D•+ 0R`#(+ %Œ"}H 4H$ ZC;N6' M=yK !) .V " ZC;N6' &;_y6' c8# "a6' k}f' .ZC;N6' &;_„ c8SK !)$ RIK("g6' 5#;926' *+ R);_6' -QCH D- DbSK !) .r E8C'$ ZI-(86 ThinkCentre DI6Ja# RP86' "a6' k}f' .A;O96' RP R>p;`+ !/ 'e' . {[ |F(#4 !"~B)#4 \F`; U% BIOS ('G'†a) SG'-a R92ƒ8+) •[(8[m' RNST :;^^ m ,) dK L;B6' ZC;N6' F;# 0(flash update) POST/BIOS D^,>/ &;9ŠH ZC;N6' &;K("-
Boot-block Recovery !C;K 1I=3 |f;>826' X6;86' &'(}m' 5IS98K !) 0'5@ -,P 'e' .RNINT R`^(_K 1=IyW/ .RI}f;B6 6' :;q;q$ R3;E_6' :',P$ D•+ 0R`#(+ %Œ"}H 4H$ ZC;N6' M=yK !) .V " ZC;N6' &;_y6' c8# "a6' k}f' .ZC;N6' &;_„ c8SK !)$ RIK("g6' 5#;926' *+ R);_6' -QCH D- DbSK !) .r E8C'$ ZI-(86 ThinkCentre DI6Ja# RP86' "a6' k}f' .A;O96' RP R>p;`+ !/ 'e' . {[ |F(#4 !"~B)#4 \F`; U% BIOS ('G'†a) SG'-a R92ƒ8+) •[(8[m' RNST :;^^ m ,) dK L;B6' ZC;N6' F;# 0(flash update) POST/BIOS D^,>/ &;9ŠH ZC;N6' &;K("-

English (User guide)
Page 5
... the mouse 19 Optical mouse 19 Non-optical mouse 19 Chapter 7. Updating system programs 13 Using system programs 13 Updating (flashing) BIOS from a disc 13 Updating (flashing) BIOS from a POST/BIOS update failure . . . 14 Chapter 6. Notices 41 Television output notice 42 Trademarks 42 Index 43 © Copyright Lenovo 2008 iii Important safety information 1 Chapter 2. Features and Specifications 3 Features...
... the mouse 19 Optical mouse 19 Non-optical mouse 19 Chapter 7. Updating system programs 13 Using system programs 13 Updating (flashing) BIOS from a disc 13 Updating (flashing) BIOS from a POST/BIOS update failure . . . 14 Chapter 6. Notices 41 Television output notice 42 Trademarks 42 Index 43 © Copyright Lenovo 2008 iii Important safety information 1 Chapter 2. Features and Specifications 3 Features...

English (User guide)
Page 7
... applications that might be preloaded on your computer. Introduction This ThinkCentre User Guide contains the following information: v Chapter 1, "Important safety information," on page 1 provides information about where to recover from Lenovo®. v Chapter 5, "Updating system programs," on page 13 provides information about updating POST/BIOS and how to find safety information for manually programming your...
... applications that might be preloaded on your computer. Introduction This ThinkCentre User Guide contains the following information: v Chapter 1, "Important safety information," on page 1 provides information about where to recover from Lenovo®. v Chapter 5, "Updating system programs," on page 13 provides information about updating POST/BIOS and how to find safety information for manually programming your...

English (User guide)
Page 21
... to change the machine type/model, press Y. 7. To update (flash) the BIOS from a disc, make changes and enhancements to update (flash) the BIOS using the POST/BIOS updates are the basic layer of the diagnostics program to support systems without a diskette drive from: http://www.lenovo.com Updating (flashing) BIOS from your computer. For most models, you turn on...
... to change the machine type/model, press Y. 7. To update (flash) the BIOS from a disc, make changes and enhancements to update (flash) the BIOS using the POST/BIOS updates are the basic layer of the diagnostics program to support systems without a diskette drive from: http://www.lenovo.com Updating (flashing) BIOS from your computer. For most models, you turn on...
English (User guide)
Page 22
... the ThinkCentre Hardware Installation and Replacement Guide. 7. Refer to three minutes. Replace the computer cover and reconnect any cables that were disconnected. Reconnect the power cords for the computer and monitor to : http://www.lenovo.com/support 2. The recovery session will automatically restart. Print these instructions. Move the jumper from a POST/BIOS update failure...
... the ThinkCentre Hardware Installation and Replacement Guide. 7. Refer to three minutes. Replace the computer cover and reconnect any cables that were disconnected. Reconnect the power cords for the computer and monitor to : http://www.lenovo.com/support 2. The recovery session will automatically restart. Print these instructions. Move the jumper from a POST/BIOS update failure...

English (User guide)
Page 51
...30 administration, password 10 AT commands basic 33 extended 35 audio subsystem 3 B backup and recovery operations 22 basic trouble shooting 15 BIOS, updating (flashing) 13, 14 books folder, online 29 boot device sequence, changing 11 boot-block recovery 14 C changing boot device ...programs 17 Rescue and Recovery workspace 18 running diskettes 18 running, CD/DVD image 18 diagnostics 15 diagnostics programs, using 31 © Copyright Lenovo 2008 disc, creating product recovery 21 diskette, creating and using a recovery repair 25 documentation, using 31 E environment, operating 5 Ethernet ...
...30 administration, password 10 AT commands basic 33 extended 35 audio subsystem 3 B backup and recovery operations 22 basic trouble shooting 15 BIOS, updating (flashing) 13, 14 books folder, online 29 boot device sequence, changing 11 boot-block recovery 14 C changing boot device ...programs 17 Rescue and Recovery workspace 18 running diskettes 18 running, CD/DVD image 18 diagnostics 15 diagnostics programs, using 31 © Copyright Lenovo 2008 disc, creating product recovery 21 diskette, creating and using a recovery repair 25 documentation, using 31 E environment, operating 5 Ethernet ...
English (User guide)
Page 52
...(POST) 13 product recovery disc, creating 21 productivity center, ThinkVantage 29 programs, updating system 13 purchasing additional services 32 R recovering device drivers 26 from a POST/BIOS update failure 14 software 21 recovery boot block 14 operations, backup and 22 problems, solving... temporary startup device 11 ThinkVantage productivity center 29 trademarks 42 troubleshooting 15 troubleshooting, basic 15 U updating (flashing) BIOS 13 system programs 13 updating (flashing) BIOS 14 user, password 10 using diagnostic programs 31 documentation 31 other services 32 passwords 9 recovery repair...
...(POST) 13 product recovery disc, creating 21 productivity center, ThinkVantage 29 programs, updating system 13 purchasing additional services 32 R recovering device drivers 26 from a POST/BIOS update failure 14 software 21 recovery boot block 14 operations, backup and 22 problems, solving... temporary startup device 11 ThinkVantage productivity center 29 trademarks 42 troubleshooting 15 troubleshooting, basic 15 U updating (flashing) BIOS 13 system programs 13 updating (flashing) BIOS 14 user, password 10 using diagnostic programs 31 documentation 31 other services 32 passwords 9 recovery repair...


