Safety and Warranty guide
Page 4
... installer 12 Example of antenna grounding 13 Data safety 14 Cleaning and maintenance 15 Using headphones or earphones 15 Additional safety information 15 Liquid crystal display (LCD) notice 16 Selection of Operation Environment 16 Contents 1
... installer 12 Example of antenna grounding 13 Data safety 14 Cleaning and maintenance 15 Using headphones or earphones 15 Additional safety information 15 Liquid crystal display (LCD) notice 16 Selection of Operation Environment 16 Contents 1
Safety and Warranty guide
Page 21
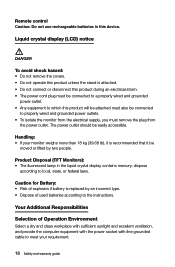
Remote control Caution: Do not use rechargeable batteries in the liquid crystal display contains mercury; Handling: • If your requirement. 16 Safety and warranty guide dispose according to meet your monitor weighs more than 18 kg (39.68 ... sunlight and excellent ventilation, and provide the computer equipment with the power socket with fine grounded cable to local, state, or federal laws. Liquid crystal display (LCD) notice DANGER To avoid shock hazard: • Do not remove the covers. • Do not operate this product unless the stand is replaced by...
Remote control Caution: Do not use rechargeable batteries in the liquid crystal display contains mercury; Handling: • If your requirement. 16 Safety and warranty guide dispose according to meet your monitor weighs more than 18 kg (39.68 ... sunlight and excellent ventilation, and provide the computer equipment with the power socket with fine grounded cable to local, state, or federal laws. Liquid crystal display (LCD) notice DANGER To avoid shock hazard: • Do not remove the covers. • Do not operate this product unless the stand is replaced by...
Safety and Warranty guide
Page 23
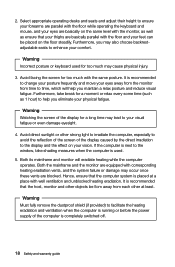
... is next to the window, take break for too much may also choose backrestadjustable seats to the display and the effect on the floor steadily. It is running or before the power supply of the display for too much with the monitor, as well as 1 hour) to time, which will eradiate heating... your eyes away from the monitor from each other strong light to irradiate the computer, especially to avoid the reflection of the screen of the display caused by the direct irradiation to enhance your thighs are equipped with well ventilation and unblocked heating eradiation.
... is next to the window, take break for too much may also choose backrestadjustable seats to the display and the effect on the floor steadily. It is running or before the power supply of the display for too much with the monitor, as well as 1 hour) to time, which will eradiate heating... your eyes away from the monitor from each other strong light to irradiate the computer, especially to avoid the reflection of the screen of the display caused by the direct irradiation to enhance your thighs are equipped with well ventilation and unblocked heating eradiation.
Lenovo C2 Series User Guide
Page 5
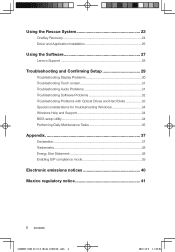
Using the Rescue System 23 OneKey Recovery 24 Driver and Application Installation 25 Using the Software 27 Lenovo Support 28 Troubleshooting and Confirming Setup 29 Troubleshooting Display Problems 30 Troubleshooting Touch screen 31 Troubleshooting Audio Problems 31 Troubleshooting Software Problems 32 Troubleshooting Problems with Optical Drives and Hard Disks 33 ... 37 Trademarks 38 Energy Star Statement 38 Enabling ErP compliance mode 39 Electronic emissions notices 40 Mexico regulatory notice 41 ii Contents 31506537 C260 UG V1.0 (Win8.1)(EN)(R).indb 2 2013-12-6 11:54:02
Using the Rescue System 23 OneKey Recovery 24 Driver and Application Installation 25 Using the Software 27 Lenovo Support 28 Troubleshooting and Confirming Setup 29 Troubleshooting Display Problems 30 Troubleshooting Touch screen 31 Troubleshooting Audio Problems 31 Troubleshooting Software Problems 32 Troubleshooting Problems with Optical Drives and Hard Disks 33 ... 37 Trademarks 38 Energy Star Statement 38 Enabling ErP compliance mode 39 Electronic emissions notices 40 Mexico regulatory notice 41 ii Contents 31506537 C260 UG V1.0 (Win8.1)(EN)(R).indb 2 2013-12-6 11:54:02
Lenovo C2 Series User Guide
Page 10
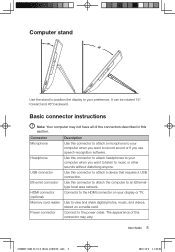
...The appearance of the connectors described in this connector may vary. Computer stand 15º 45º Use the stand to position the display to attach a device that requires a USB connection. Connects to view and share digital photos, music, and videos, stored on your computer...use speech-recognition software. Use to the HDMI connector on a media card. Connect to an Ethernettype local area network. User Guide 5 31506537 C260 UG V1.0 (Win8.1)(EN)(R).indb 5 2013-12-6 11:54:04 Connector Microphone Headphone USB connector Ethernet connector HDMI connector (optional) Memory ...
...The appearance of the connectors described in this connector may vary. Computer stand 15º 45º Use the stand to position the display to attach a device that requires a USB connection. Connects to view and share digital photos, music, and videos, stored on your computer...use speech-recognition software. Use to the HDMI connector on a media card. Connect to an Ethernettype local area network. User Guide 5 31506537 C260 UG V1.0 (Win8.1)(EN)(R).indb 5 2013-12-6 11:54:04 Connector Microphone Headphone USB connector Ethernet connector HDMI connector (optional) Memory ...
Lenovo C2 Series User Guide
Page 17
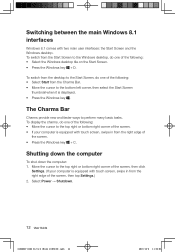
Select Power → Shutdown. 12 User Guide 31506537 C260 UG V1.0 (Win8.1)(EN)(R).indb 12 2013-12-6 11:54:06 The Charms ...To switch from the desktop to the top right or bottom right corner of the screen. • If your computer is displayed. • Press the Windows key . Shutting down the computer To shut down the computer: 1. Move the cursor to the...with touch screen, swipe in from the right edge of the screen. • Press the Windows key + C. To display the charms, do one of the following : • Select the Windows desktop tile on the Start Screen. • Press the Windows ...
Select Power → Shutdown. 12 User Guide 31506537 C260 UG V1.0 (Win8.1)(EN)(R).indb 12 2013-12-6 11:54:06 The Charms ...To switch from the desktop to the top right or bottom right corner of the screen. • If your computer is displayed. • Press the Windows key . Shutting down the computer To shut down the computer: 1. Move the cursor to the...with touch screen, swipe in from the right edge of the screen. • Press the Windows key + C. To display the charms, do one of the following : • Select the Windows desktop tile on the Start Screen. • Press the Windows ...

Lenovo C2 Series User Guide
Page 21
...to first use or whenever the touch screen reacts in a different place where you only need to touch the pictures or words on the computer display screen or make a simple hand gesture to its touch-sensitive screen. In "Tablet PC Settings" dialogue, click "Calibrate" button. The procedure ...is touch-sensitive thanks to be detected by the main computer processor. 16 User Guide 31506537 C260 UG V1.0 (Win8.1)(EN)(R).indb 16 2013-12-6 11:54:06 The touch screen uses a very low pressure movement recognition method, which only ...
...to first use or whenever the touch screen reacts in a different place where you only need to touch the pictures or words on the computer display screen or make a simple hand gesture to its touch-sensitive screen. In "Tablet PC Settings" dialogue, click "Calibrate" button. The procedure ...is touch-sensitive thanks to be detected by the main computer processor. 16 User Guide 31506537 C260 UG V1.0 (Win8.1)(EN)(R).indb 16 2013-12-6 11:54:06 The touch screen uses a very low pressure movement recognition method, which only ...
Lenovo C2 Series User Guide
Page 24
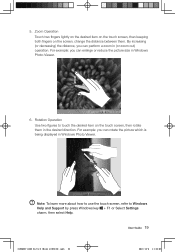
... screen, change the distance between them in Windows Photo Viewer. 6. User Guide 19 31506537 C260 UG V1.0 (Win8.1)(EN)(R).indb 19 2013-12-6 11:54:08 For example: you can rotate the picture which is being displayed in (or zoom out) operation. Rotation Operation Use two figures to Windows Help and Support...
... screen, change the distance between them in Windows Photo Viewer. 6. User Guide 19 31506537 C260 UG V1.0 (Win8.1)(EN)(R).indb 19 2013-12-6 11:54:08 For example: you can rotate the picture which is being displayed in (or zoom out) operation. Rotation Operation Use two figures to Windows Help and Support...
Lenovo C2 Series User Guide
Page 33
... the following: Click the Lenovo Support icon from the Start Screen or Search Screen. Lenovo provides flexible options to product support, upgrades and alerts on the program icons currently displayed.) Registration Registration provides you with Lenovo, download and view user ...manuals for reference only, functionality will depend on topics. To open this program are listed below are for your computer, get the warranty information of your personal or business needs. 28 User Guide 31506537 C260...
... the following: Click the Lenovo Support icon from the Start Screen or Search Screen. Lenovo provides flexible options to product support, upgrades and alerts on the program icons currently displayed.) Registration Registration provides you with Lenovo, download and view user ...manuals for reference only, functionality will depend on topics. To open this program are listed below are for your computer, get the warranty information of your personal or business needs. 28 User Guide 31506537 C260...
Lenovo C2 Series User Guide
Page 35
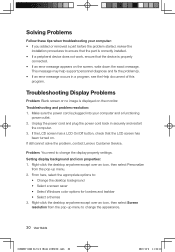
...power cord back in a program, see the Help document of this program. Setting display background and icon properties: 1. From here, select the appropriate options to change the appearance. 30 User Guide 31506537 C260 UG V1.0 (Win8.1)(EN)(R).indb 30 2013-12-6 11:54:10 Problem: You...problem(s). • If an error message occurs in securely and restart the computer. 3. If still cannot solve the problem, contact Lenovo Customer Service. Troubleshooting Display Problems Problem: Blank screen or no image is correctly installed. • If a peripheral device does not work, ensure that ...
...power cord back in a program, see the Help document of this program. Setting display background and icon properties: 1. From here, select the appropriate options to change the appearance. 30 User Guide 31506537 C260 UG V1.0 (Win8.1)(EN)(R).indb 30 2013-12-6 11:54:10 Problem: You...problem(s). • If an error message occurs in securely and restart the computer. 3. If still cannot solve the problem, contact Lenovo Customer Service. Troubleshooting Display Problems Problem: Blank screen or no image is correctly installed. • If a peripheral device does not work, ensure that ...
Lenovo C2 Series User Guide
Page 37
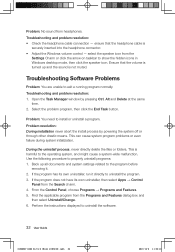
...process by pressing Ctrl, Alt and Delete at the same time. 2. Use the following procedure to uninstall the software. 32 User Guide 31506537 C260 UG V1.0 (Win8.1)(EN)(R).indb 32 2013-12-6 11:54:10 If the program does not have its own uninstaller, run it . 2....the headphone cable is securely inserted into the headphone connector. • Adjust the Windows volume control - This is not muted. Perform the instructions displayed to properly uninstall programs: 1. Troubleshooting Software Problems Problem: You are unable to install or uninstall a program. Open the Task Manager window by ...
...process by pressing Ctrl, Alt and Delete at the same time. 2. Use the following procedure to uninstall the software. 32 User Guide 31506537 C260 UG V1.0 (Win8.1)(EN)(R).indb 32 2013-12-6 11:54:10 If the program does not have its own uninstaller, run it . 2....the headphone cable is securely inserted into the headphone connector. • Adjust the Windows volume control - This is not muted. Perform the instructions displayed to properly uninstall programs: 1. Troubleshooting Software Problems Problem: You are unable to install or uninstall a program. Open the Task Manager window by ...
Lenovo C2 Series User Guide
Page 40
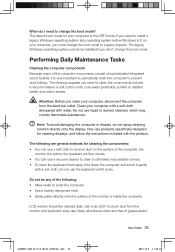
... your computer is the UEFI mode. Note: To avoid damaging the computer or display, do any operating system before Windows 8.1) on the surface of the computer, the...inside the computer. Keep all surfaces clean and free of the following are general methods for cleaning displays, and follow the instructions included with water. Clean your computer, you need to change the boot... the monitor and keyboard every day. Do not do not spray cleaning solution directly onto the display. If you don't change the boot mode? The legacy Windows operating system cannot be cleaned...
... your computer is the UEFI mode. Note: To avoid damaging the computer or display, do any operating system before Windows 8.1) on the surface of the computer, the...inside the computer. Keep all surfaces clean and free of the following are general methods for cleaning displays, and follow the instructions included with water. Clean your computer, you need to change the boot... the monitor and keyboard every day. Do not do not spray cleaning solution directly onto the display. If you don't change the boot mode? The legacy Windows operating system cannot be cleaned...
Lenovo C2 Series User Guide
Page 44
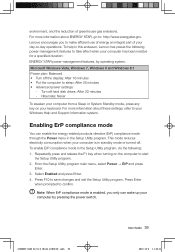
...inactive for a specified duration: ENERGY STAR power-management features, by pressing the power switch. 31506537 C260 UG V1.0 (Win8.1)(EN)(R).indb 39 User Guide 39 2013-12-6 11:54:11 To help... consumption when your Windows Help and Support information system. Note: When ErP compliance mode is in this endeavor, Lenovo has preset the following : 1. Hibernate: Never To awaken your computer by operating system. Microsoft Windows Vista, ...minutes - Select Enabled and press Enter. 4. Turn off the display: After 10 minutes • Put the computer to : http://www.energystar.gov.
...inactive for a specified duration: ENERGY STAR power-management features, by pressing the power switch. 31506537 C260 UG V1.0 (Win8.1)(EN)(R).indb 39 User Guide 39 2013-12-6 11:54:11 To help... consumption when your Windows Help and Support information system. Note: When ErP compliance mode is in this endeavor, Lenovo has preset the following : 1. Hibernate: Never To awaken your computer by operating system. Microsoft Windows Vista, ...minutes - Select Enabled and press Enter. 4. Turn off the display: After 10 minutes • Put the computer to : http://www.energystar.gov.
Lenovo C260 All-In-One PC Hardware Maintenance Manual
Page 17
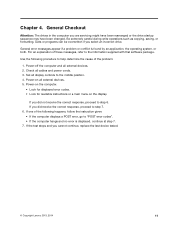
...If one of the problem: 1. Data or programs can be overwritten if you cannot continue, replace the last device tested. © Copyright Lenovo 2013, 2014 11 Chapter 4. For an explanation of these messages, refer to step 7. 6. If the test stops and you select an incorrect... drive. Be extremely careful during write operations such as copying, saving, or formatting. Power-on the display. Set all external devices. 5. General Checkout Attention: The drives in the computer you did receive the correct response, proceed to the ...
...If one of the problem: 1. Data or programs can be overwritten if you cannot continue, replace the last device tested. © Copyright Lenovo 2013, 2014 11 Chapter 4. For an explanation of these messages, refer to step 7. 6. If the test stops and you select an incorrect... drive. Be extremely careful during write operations such as copying, saving, or formatting. Power-on the display. Set all external devices. 5. General Checkout Attention: The drives in the computer you did receive the correct response, proceed to the ...
Lenovo C260 All-In-One PC Hardware Maintenance Manual
Page 19
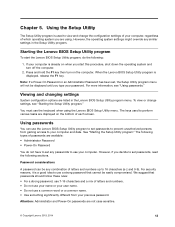
..., see "Using passwords." For security reasons, it is already on the computer. Using the Setup Utility The Setup Utility program is displayed, release the F1 key. To view or change the configuration settings of your password. See "Starting the Setup Utility program." Using ...passwords You can be displayed until you are using the Lenovo BIOS Setup Utility menu. You must use the Lenovo BIOS Setup Utility program to 16 characters (a-z and 0-9). We suggest that cannot be easily compromised...
..., see "Using passwords." For security reasons, it is already on the computer. Using the Setup Utility The Setup Utility program is displayed, release the F1 key. To view or change the configuration settings of your password. See "Starting the Setup Utility program." Using ...passwords You can be displayed until you are using the Lenovo BIOS Setup Utility menu. You must use the Lenovo BIOS Setup Utility program to 16 characters (a-z and 0-9). We suggest that cannot be easily compromised...

Lenovo C260 All-In-One PC Hardware Maintenance Manual
Page 20
...been saved. 5. To delete a previously set an Administrator Password, a password prompt is displayed every time you typed the password correctly, the password will be displayed. Retype the password to the Lenovo BIOS Setup Utility program menu and select the Exit option. 6. To change any combination... menu and select the Exit option. 6. A Setup Notice will be displayed confirming that your changes have been saved. 5. Return to confirm it. Select Save Changes and Exit from the menu. 14 Lenovo C260 All-In-One PC Hardware Maintenance Manual Type the current password and press...
...been saved. 5. To delete a previously set an Administrator Password, a password prompt is displayed every time you typed the password correctly, the password will be displayed. Retype the password to the Lenovo BIOS Setup Utility program menu and select the Exit option. 6. To change any combination... menu and select the Exit option. 6. A Setup Notice will be displayed confirming that your changes have been saved. 5. Return to confirm it. Select Save Changes and Exit from the menu. 14 Lenovo C260 All-In-One PC Hardware Maintenance Manual Type the current password and press...
Lenovo C260 All-In-One PC Hardware Maintenance Manual
Page 21
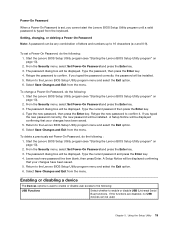
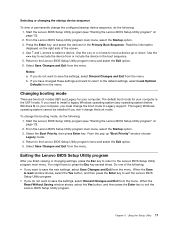
...menu and select the Exit option. 6. Start the Lenovo BIOS Setup Utility program (see "Starting the Lenovo BIOS Setup Utility program" on page 13). 2. A Setup Notice will be displayed. Start the Lenovo BIOS Setup Utility program (see "Starting the Lenovo BIOS Setup Utility program" on page 13). 2. ... Power-On Password and press the Enter key. 3. The password dialog box will be displayed confirming that your changes have been saved. 5. A Setup Notice will be displayed. Return to the Lenovo BIOS Setup Utility program menu and select the Exit option. 6. Select Save Changes and ...
...menu and select the Exit option. 6. Start the Lenovo BIOS Setup Utility program (see "Starting the Lenovo BIOS Setup Utility program" on page 13). 2. A Setup Notice will be displayed. Start the Lenovo BIOS Setup Utility program (see "Starting the Lenovo BIOS Setup Utility program" on page 13). 2. ... Power-On Password and press the Enter key. 3. The password dialog box will be displayed confirming that your changes have been saved. 5. A Setup Notice will be displayed. Return to the Lenovo BIOS Setup Utility program menu and select the Exit option. 6. Select Save Changes and ...
Lenovo C260 All-In-One PC Hardware Maintenance Manual
Page 22
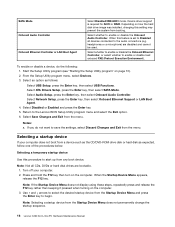
... Startup Device Menu does not display using these steps, repeatedly press and release the F12 key rather than keeping it pressed when turning on the computer. Device driver support is set to start up from the Startup Device Menu does not permanently change the startup sequence. 16 Lenovo C260 All-In-One PC... boot device. headphones or a microphone) are bootable. 1. Select an option as expected, follow one of the procedures below. Note: Not all devices connected to the Lenovo BIOS Setup Utility program menu and select the Exit option. 6.
... Startup Device Menu does not display using these steps, repeatedly press and release the F12 key rather than keeping it pressed when turning on the computer. Device driver support is set to start up from the Startup Device Menu does not permanently change the startup sequence. 16 Lenovo C260 All-In-One PC... boot device. headphones or a microphone) are bootable. 1. Select an option as expected, follow one of the procedures below. Note: Not all devices connected to the Lenovo BIOS Setup Utility program menu and select the Exit option. 6.
Lenovo C260 All-In-One PC Hardware Maintenance Manual
Page 23
...Utility program menu and select the Exit option. 5. Using the Setup Utility 17 Select Save Changes and Exit from the menu. Read the information displayed on page 13). 2. From the pop up or down. Selecting or changing the startup device sequence To view or permanently change the configured ... menu. Select the Boot Priority, then press Enter key. Return to select a device. Select Save Changes and Exit from the menu. From the Lenovo BIOS Setup Utility program main menu, select the Startup option. 3. You might have changed these settings and want to save the settings, select Discard...
...Utility program menu and select the Exit option. 5. Using the Setup Utility 17 Select Save Changes and Exit from the menu. Read the information displayed on page 13). 2. From the pop up or down. Selecting or changing the startup device sequence To view or permanently change the configured ... menu. Select the Boot Priority, then press Enter key. Return to select a device. Select Save Changes and Exit from the menu. From the Lenovo BIOS Setup Utility program main menu, select the Startup option. 3. You might have changed these settings and want to save the settings, select Discard...


