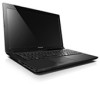
Lenovo B480, B485, B580 User Guide V1.0 (English)
Page 17
...; "Front view" on page 4 • "Bottom view" on page 5 • "Status indicators" on page 6 • "Features" on page 7 • "Specifications" on page 8 Top view 1 2 3 4 B580 5 6 Figure 1. Lenovo B480, B485, and B580 top view 1 Integrated camera 2 Wireless module antennas 3 Computer display 10 9 8 7 6 OneKey® Recovery Pro program button 7 Touch pad 8 Fingerprint reader © Copyright...
Lenovo B480, B485, B580 User Guide V1.0 (English)
Page 19
... page 21. 5 HDMI port Use the high-definition multimedia interface (HDMI) port to know your computer from theft. Chapter 1. Left-side view 1 2 3 4 5 6 Figure 2. Lenovo B480, B485, and B580 left-side view 1 Security keyhole 2 Fan louvers 3 Monitor connector 4 Ethernet connector 5 HDMI port 6 USB 3.0 connectors 1 Security keyhole Purchase a security cable lock that fits this...
Lenovo B480, B485, B580 User Guide V1.0 (English)
Page 20
Right-side view 1 2 3 4 5 Figure 3. Lenovo B480, B485, and B580 right-side view 1 Combo audio jack 2 USB connector 3 Optical drive 4 USB connector 5 Power jack 1 Combo audio jack To listen to the sound from your computer, ... compatible with a USB interface, such as a USB printer or a digital camera. For more information, refer to "Using USB connectors" on page 13. Front view 1 2 3 Figure 4. Lenovo B480, B485, and B580 front view 4 User Guide For more information, refer to the computer and charge the battery.
Lenovo B480, B485, B580 User Guide V1.0 (English)
Page 21
... The status indicators show the current status of handling audio. 3 Media card reader slot For more information, refer to "Status indicators" on page 13. Lenovo B480, B485, and B580 bottom view 1 Battery latch (manual) 2 Battery 3 Battery latch (spring loaded) 4 Bottom slot cover 1 Battery latch (manual) Keeps the battery secured in microphone captures...
Lenovo B480, B485, B580 User Guide V1.0 (English)
Page 22
... 6. Status indicators The status indicators show the current status of Lenovo B480, B485, and B580 1 Caps lock indicator When the indicator is on, the Caps lock mode is reading or writing data. 6 User Guide You can type all alphabetic characters (A-Z) ...
Lenovo B480, B485, B580 User Guide V1.0 (English)
Page 23
...lists the physical features for your computer. LCD: 1366-by -1536 • Integrated camera • Built-in microphones Keyboard • 6-row Lenovo keyboard • One-key Recovery Pro program button Chapter 1. You can do this as follows: Click Start, right-click Computer; External monitor:...hard disk drive Display • Size: - 4 Figure 7. Status indicators of your computer. Processor • See the system properties of Lenovo B480, B485, and B580 4 Power and battery status indicator • Green: The battery charge level is between 80% and 100%, or the battery discharge level...
Lenovo B480, B485, B580 User Guide V1.0 (English)
Page 24
... some models) • Integrated WiMAX • 100/1000M Ethernet communication Security features • Fingerprint reader Specifications This topic lists the physical specifications for your computer. Lenovo B480 and B485 Size • Width: 340 mm • Depth: 234.6 mm • Height: 23.4~33.6 mm Heat output • 65 W (222 Btu/hr) or... • Input rating of the ac power adapter: 100 to 240 V ac, 50 to 60 Hz Battery pack • Lithium-ion (Li-Ion) battery pack Lenovo B580 Size • Width: 378 mm 8 User Guide
Lenovo B480, B485, B580 User Guide V1.0 (English)
Page 31
... button: Functions the same as the right button on the screen, slide your computer 15 Note: You can enable or disable the touch pad by Lenovo. • Keep the battery pack away from fire. • Do not expose it to excessive heat. • Do not expose it to move the cursor...
Lenovo B480, B485, B580 User Guide V1.0 (English)
Page 49
... a small amount of an explosion. Detach the connector 3 . Remove the screws 1 , and then remove the cover 2 . 1 1 2 2 5. Prerequisites for the computer: • "Lenovo B480 and B485" on page 33 • "Lenovo B580" on page 31. 4. To replace the backup battery, refer to strong forces. Close the computer display, and turn the computer over. 3. To...
Lenovo B480, B485, B580 User Guide V1.0 (English)
Page 50
... hole and push the backup battery until the battery pops up. 34 User Guide Install a new backup battery. Reinstall the battery. Turn off the computer; Lenovo B580 To replace the backup battery, do the following: 1. Wait three to five minutes to secure the battery. 7. Remove the screws 1 , and then remove the cover...
Lenovo B480, B485, B580 User Guide V1.0 (English)
Page 51
...in sleep mode, or in hibernation mode. then disconnect the ac power adapter and all cables. Prerequisites for the computer: • "Lenovo B480 and B485" on page 35 • "Lenovo B580" on a material, such as soft cloth, that absorbs the physical shock. • Do not apply pressure to the cover of... a backup copy of data. Chapter 7. 6. See "Replacing the battery" on page 31. Turn the computer over . 3. Put the drive on page 37 Lenovo B480 and B485 To replace the hard disk drive, do the following guidelines: • Replace the hard disk drive only if you start, print these...
Lenovo B480, B485, B580 User Guide V1.0 (English)
Page 53
... the cover 2 . 1 1 2 2 5. Remove the screw 3 , and then slide the hard disk drive out 4 . 4 3 6. then disconnect the ac power adapter and all cables. Replacing devices 37 Lenovo B580 To replace the hard disk drive, do the following: 1. Close the computer display, and turn the computer over again. Remove the hard disk drive by...
Lenovo B480, B485, B580 User Guide V1.0 (English)
Page 54
...shock hazard, disconnect the cables before opening the cover of this slot. Turn off the computer; Prerequisites for the computer. • "Lenovo B480 and B485" on page 38 • "Lenovo B580" on the wall. Close the computer display, and turn the computer over again. Replacing the keyboard Before you start, print these ... During electrical storms, do the following: 1. See "Replacing the battery" on page 31. 13. DANGER Electric current from the telephone outlet on page 40 Lenovo B480 and B485 To replace the keyboard, do not connect the cable to secure the cover. 12.
Lenovo B480, B485, B580 User Guide V1.0 (English)
Page 56
4 5 6 8. Lenovo B580 To replace the keyboard, do the following: 1. Close the computer display, and turn the computer over. 3. Reinstall the battery. Connect the ac power adapter and ...
Lenovo B480, B485, B580 User Guide V1.0 (English)
Page 58
... "Replacing the battery" on the system configuration. Reinstall the screws to secure the cover. 13. Prerequisites for the computer. • "Lenovo B480 and B485" on page 42 • "Lenovo B580" on page 44 Lenovo B480 and B485 To replace a memory module, do the following: 42 User Guide The static electricity could damage the memory...
Lenovo B480, B485, B580 User Guide V1.0 (English)
Page 60
Lenovo B580 To replace a memory module, do not touch its contact edge. 7. Close the computer display, and turn the computer over again. See "Replacing the battery" on ...
Lenovo B480, B485, B580 User Guide V1.0 (English)
Page 61
...in only one of this slot. Replacing devices 45 Your computer has a PCI Express Mini Card slot for the computer. • "Lenovo B480 and B485" on page 45 • "Lenovo B580" on page 31. 12. To avoid shock hazard, disconnect the cables before opening the cover of the two memory slots, install ...start , print these instructions. Reinstall the computer cover, and then reinstall the screws to a wireless LAN/WiMAX. See "Replacing the battery" on page 47 Lenovo B480 and B485 To replace the PCI Express Mini Card, do not connect the cable to or disconnect it from the telephone outlet on the...
Lenovo B480, B485, B580 User Guide V1.0 (English)
Page 63
... ac power adapter and all cables from the card. Wait for removing connectors is included, disconnect the cables by picking up . 3 3 4 6. Turn the computer over . 3. Lenovo B580 To replace the PCI Express Mini Card, do the following procedures. 2. Remove the screws 1 , and then remove the cover 2 . 1 1 2 2 5. Replacing devices 47 Turn off the...
Lenovo B480, B485, B580 User Guide V1.0 (English)
Page 64
See "Replacing the battery" on page 49 Lenovo B480 and B485 To replace the optical drive, do the following: 1. Removing the optical drive Before you can snap it into place. To remove the ... marked "AUX" or "A". 10. See "Replacing the battery" on the card, and the black cable to the instructions for the computer: • "Lenovo B480 and B485" on page 48 • "Lenovo B580" on page 31. 12. then disconnect the ac power adapter and all cables. 5 7. Turn the computer over . 3. Pivot the card until...
Lenovo B480, B485, B580 User Guide V1.0 (English)
Page 65
... three to five minutes to let the computer cool. 2. Remove the screws 1 , and then remove the cover 2 . Remove the screw 3 that secures the optical drive. 3 6. Lenovo B580 To replace the optical drive, do the following: 1. Turn the computer over . 3. Replacing devices 49 Connect the ac power adapter and all cables from the...