
Safety and Warranty guide
Page 9
... install it . • Do not place the part on , tripped over, or pinched by the product manufacturer. This can cause static electricity to build up around a power adapter or other countries, the suitable types shall be walked on the computer cover or other metal surface. Power cords and power adapters Use only the power cords and power adapters supplied by objects. 4 Safety and warranty guide...
... install it . • Do not place the part on , tripped over, or pinched by the product manufacturer. This can cause static electricity to build up around a power adapter or other countries, the suitable types shall be walked on the computer cover or other metal surface. Power cords and power adapters Use only the power cords and power adapters supplied by objects. 4 Safety and warranty guide...

Safety and Warranty guide
Page 17
... codes and ordinances when installing appliances that has this label attached. Note the following label attached. Laser radiation when open. Users and installers in North America. Power supply statement Never remove the cover on a power supply or any component that connect to be connected 12 Safety and warranty guide Products with optical instruments, and avoid direct exposure to cable/CATV systems, or both, and that connect to external...
... codes and ordinances when installing appliances that has this label attached. Note the following label attached. Laser radiation when open. Users and installers in North America. Power supply statement Never remove the cover on a power supply or any component that connect to be connected 12 Safety and warranty guide Products with optical instruments, and avoid direct exposure to cable/CATV systems, or both, and that connect to external...

Safety and Warranty guide
Page 30
... and type of purchase specified on your product are set forth below in materials and workmanship under this Warranty Covers: Lenovo warrants that each hardware product that apply to a covered defect during the warranty period. The warranty period for the product starts on the original date of warranty service that you purchase is free from defects in Part 3 - Email: lensyd_au@lenovo...
... and type of purchase specified on your product are set forth below in materials and workmanship under this Warranty Covers: Lenovo warrants that each hardware product that apply to a covered defect during the warranty period. The warranty period for the product starts on the original date of warranty service that you purchase is free from defects in Part 3 - Email: lensyd_au@lenovo...

Safety and Warranty guide
Page 31
... the balance of Liability: Lenovo is added to our agent or contractor. The following replaces the same section in Part 1: Replacement Products and Parts: When warranty service involves the replacement of retaining user-generated data. TO THE EXTENT PERMITTED BY LAW, UNDER NO CIRCUMSTANCES AND NOTWITHSTANDING THE FAILURE OF ESSENTIAL PURPOSE OF ANY REMEDY SET FORTH HEREIN, SHALL LENOVO, ITS AFFILIATES, SUPPLIERS...
... the balance of Liability: Lenovo is added to our agent or contractor. The following replaces the same section in Part 1: Replacement Products and Parts: When warranty service involves the replacement of retaining user-generated data. TO THE EXTENT PERMITTED BY LAW, UNDER NO CIRCUMSTANCES AND NOTWITHSTANDING THE FAILURE OF ESSENTIAL PURPOSE OF ANY REMEDY SET FORTH HEREIN, SHALL LENOVO, ITS AFFILIATES, SUPPLIERS...

Safety and Warranty guide
Page 38
On-site Service Under On-Site Service, a Service Provider will pick up your location. A courier will either repair or exchange the product at your product and deliver it to the designated service center. Safety and warranty guide 33 An optional service offering may be available for purchase from a Service Provider or Lenovo under which Self-service CRUs would be installed for the replacement CRU if the...
On-site Service Under On-Site Service, a Service Provider will pick up your location. A courier will either repair or exchange the product at your product and deliver it to the designated service center. Safety and warranty guide 33 An optional service offering may be available for purchase from a Service Provider or Lenovo under which Self-service CRUs would be installed for the replacement CRU if the...
(English) User Guide - Lenovo A7/A5 Series
Page 24
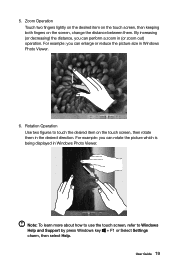
... Operation Use two figures to Windows Help and Support by press Windows key + F1 or Select Settings charm, then select Help. For example: you can perform a zoom in Windows Photo Viewer. By increasing (or decreasing) the distance, you can rotate the picture which is being displayed in (or zoom out) operation. Note: To learn more about how to use the touch screen...
... Operation Use two figures to Windows Help and Support by press Windows key + F1 or Select Settings charm, then select Help. For example: you can perform a zoom in Windows Photo Viewer. By increasing (or decreasing) the distance, you can rotate the picture which is being displayed in (or zoom out) operation. Note: To learn more about how to use the touch screen...
(English) User Guide - Lenovo A7/A5 Series
Page 25
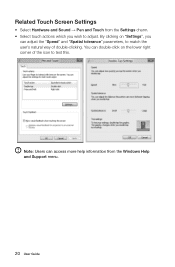
By clicking on the lower right corner of double-clicking. Note: Users can access more help information from the Settings charm. • Select touch actions which you can double-click on "Settings", you wish to match the user's natural way of the icon to test this. You can adjust the "Speed" and "Spatial tolerance" parameters, to adjust. Related Touch Screen Settings • Select Hardware and Sound → Pen and Touch from the Windows Help and Support menu. 20 User Guide
By clicking on the lower right corner of double-clicking. Note: Users can access more help information from the Settings charm. • Select touch actions which you can double-click on "Settings", you wish to match the user's natural way of the icon to test this. You can adjust the "Speed" and "Spatial tolerance" parameters, to adjust. Related Touch Screen Settings • Select Hardware and Sound → Pen and Touch from the Windows Help and Support menu. 20 User Guide
(English) User Guide - Lenovo A7/A5 Series
Page 30
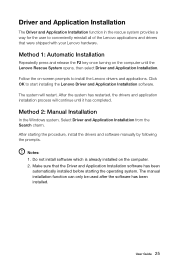
... starting the operating system. The manual installation function can only be used after the software has been installed. Method 1: Automatic Installation Repeatedly press and release the F2 key once turning on the computer. 2. Make sure that were shipped with your Lenovo hardware. Method 2: Manual Installation In the Windows system, Select Driver and Application Installation from the Search charm. The system will continue until the Lenovo Rescue System opens, then select Driver...
... starting the operating system. The manual installation function can only be used after the software has been installed. Method 1: Automatic Installation Repeatedly press and release the F2 key once turning on the computer. 2. Make sure that were shipped with your Lenovo hardware. Method 2: Manual Installation In the Windows system, Select Driver and Application Installation from the Search charm. The system will continue until the Lenovo Rescue System opens, then select Driver...
(English) User Guide - Lenovo A7/A5 Series
Page 35
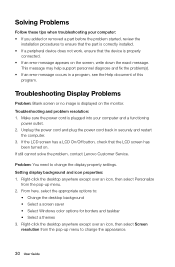
... connected. • If an error message appears on . Troubleshooting Display Problems Problem: Blank screen or no image is plugged into your computer: • If you added or removed a part before the problem started, review the installation procedures to change the display property settings. Unplug the power cord and plug the power cord back in a program, see the Help document of this program. From here, select the appropriate options to change the appearance. 30 User Guide Solving Problems...
... connected. • If an error message appears on . Troubleshooting Display Problems Problem: Blank screen or no image is plugged into your computer: • If you added or removed a part before the problem started, review the installation procedures to change the display property settings. Unplug the power cord and plug the power cord back in a program, see the Help document of this program. From here, select the appropriate options to change the appearance. 30 User Guide Solving Problems...
(English) User Guide - Lenovo A7/A5 Series
Page 36
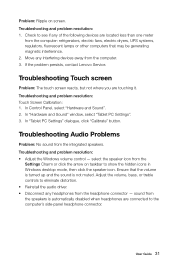
... where you are located less than one meter from the headphone connector - In "Tablet PC Settings" dialogue, click "Calibrate" button. If the problem persists, contact Lenovo Service. User Guide 31 In "Hardware and Sound" window, select "Tablet PC Settings". 3. Troubleshooting and problem resolution: • Adjust the Windows volume control - Adjust the volume, bass, or treble controls to see if any headphones from the computer: refrigerators, electric fans, electric dryers, UPS...
... where you are located less than one meter from the headphone connector - In "Tablet PC Settings" dialogue, click "Calibrate" button. If the problem persists, contact Lenovo Service. User Guide 31 In "Hardware and Sound" window, select "Tablet PC Settings". 3. Troubleshooting and problem resolution: • Adjust the Windows volume control - Adjust the volume, bass, or treble controls to see if any headphones from the computer: refrigerators, electric fans, electric dryers, UPS...
(English) User Guide - Lenovo A7/A5 Series
Page 39
... when troubleshooting system problems: The drivers for this computer model only support the Windows 8.1 system. To open the Windows Help and Support file, do one of the two links listed under More to UEFI or Legacy support on your computer. How can read the Windows Help and Support file on the boot menu. 34 User Guide To change the boot mode? Shut down the computer. 2. BIOS setup utility What is ROM-based software. There are two boot modes...
... when troubleshooting system problems: The drivers for this computer model only support the Windows 8.1 system. To open the Windows Help and Support file, do one of the two links listed under More to UEFI or Legacy support on your computer. How can read the Windows Help and Support file on the boot menu. 34 User Guide To change the boot mode? Shut down the computer. 2. BIOS setup utility What is ROM-based software. There are two boot modes...

(English) User Guide - Lenovo A7/A5 Series
Page 40
... default boot mode for cleaning displays, and follow the instructions included with water. The cleaning supplies you don't change the boot mode? Use a dry cloth to brush dust from the electrical outlet. LCD monitor should be installed if you need to clean the components include: a vacuum cleaner, a soft cotton cloth, pure water (preferably purified or distilled water) and cotton swabs. User Guide 35 The legacy Windows operating...
... default boot mode for cleaning displays, and follow the instructions included with water. The cleaning supplies you don't change the boot mode? Use a dry cloth to brush dust from the electrical outlet. LCD monitor should be installed if you need to clean the components include: a vacuum cleaner, a soft cotton cloth, pure water (preferably purified or distilled water) and cotton swabs. User Guide 35 The legacy Windows operating...

(English) User Guide - Lenovo A7/A5 Series
Page 42
... incorporated in new editions of the publication.To provide better service, Lenovo reserves the right to improve and/or modify the products and software programs described in the manuals included with your computer might not match exactly the actual configuration of the manual, at any language without additional notice. This manual could include technical inaccuracies or typographical errors. these changes will...
... incorporated in new editions of the publication.To provide better service, Lenovo reserves the right to improve and/or modify the products and software programs described in the manuals included with your computer might not match exactly the actual configuration of the manual, at any language without additional notice. This manual could include technical inaccuracies or typographical errors. these changes will...
Lenovo A540/A740 Hardware Maintenance Manual
Page 5
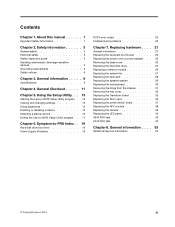
... Replacing the power cord or power adapter . . . 22 Removing the base cover 23 Replacing the hard disk drive 24 Replacing a memory module 26 Replacing the system fan 27 Replacing the heat-sink 28 Replacing the speaker system 29 Replacing the motherboard 30 Removing the hinge from the chassis 31 Removing the rear cover 32 Replacing the Transform board 35 Replacing the Wi-Fi card 36 Replacing the power switch board 37 Replacing the NFC module 38 Replacing the camera 39 Replacing the LED panel 40 A540 FRU lists...
... Replacing the power cord or power adapter . . . 22 Removing the base cover 23 Replacing the hard disk drive 24 Replacing a memory module 26 Replacing the system fan 27 Replacing the heat-sink 28 Replacing the speaker system 29 Replacing the motherboard 30 Removing the hinge from the chassis 31 Removing the rear cover 32 Replacing the Transform board 35 Replacing the Wi-Fi card 36 Replacing the power switch board 37 Replacing the NFC module 38 Replacing the camera 39 Replacing the LED panel 40 A540 FRU lists...
Lenovo A540/A740 Hardware Maintenance Manual
Page 12
... meets the specific service requirement. DANGER Electrical current from touching your skin to connect or disconnect signal cables. • Never turn on these systems. - Attach the ESD ground clip to any equipment when there is insulative and retains a charge even when you open the device covers, unless instructed otherwise in the installation and configuration procedures. • Connect and disconnect cables as those listed below...
... meets the specific service requirement. DANGER Electrical current from touching your skin to connect or disconnect signal cables. • Never turn on these systems. - Attach the ESD ground clip to any equipment when there is insulative and retains a charge even when you open the device covers, unless instructed otherwise in the installation and configuration procedures. • Connect and disconnect cables as those listed below...
Lenovo A540/A740 Hardware Maintenance Manual
Page 19
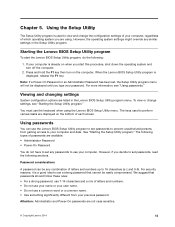
.... Starting the Lenovo BIOS Setup Utility program To start this procedure, shut down the operating system and turn on when you are using the Lenovo BIOS Setup Utility menu. However, if you type your computer. Viewing and changing settings System configuration options are available: • Administrator Password • Power-On Password You do the following types of letters and numbers. • Do not use your name or your user name. • Do not use the keyboard when using . You...
.... Starting the Lenovo BIOS Setup Utility program To start this procedure, shut down the operating system and turn on when you are using the Lenovo BIOS Setup Utility menu. However, if you type your computer. Viewing and changing settings System configuration options are available: • Administrator Password • Power-On Password You do the following types of letters and numbers. • Do not use your name or your user name. • Do not use the keyboard when using . You...

Lenovo A540/A740 Hardware Maintenance Manual
Page 21
...to Disabled, all devices connected to the audio connectors (e.g. hard disk drives or the optical disk drive) are disabled and cannot be installed. When this feature is set to Disabled all devices connected to the SATA connectors (e.g. To set a Power-On Password, do the following devices: USB Functions Select whether to enable or disable USB (Universal Serial Bus) functions. Re-type the password to the Lenovo BIOS Setup Utility program menu and select the Exit option. 5. Type the new password, then press the Enter key. Onboard Audio Controller Select whether to enable or...
...to Disabled, all devices connected to the audio connectors (e.g. hard disk drives or the optical disk drive) are disabled and cannot be installed. When this feature is set to Disabled all devices connected to the SATA connectors (e.g. To set a Power-On Password, do the following devices: USB Functions Select whether to enable or disable USB (Universal Serial Bus) functions. Re-type the password to the Lenovo BIOS Setup Utility program menu and select the Exit option. 5. Type the new password, then press the Enter key. Onboard Audio Controller Select whether to enable or...
Lenovo A540/A740 Hardware Maintenance Manual
Page 22
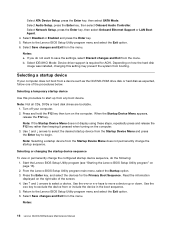
... CD/DVD-ROM drive disk or hard disk as expected, follow one of the screen. 4. Use - Return to the Lenovo BIOS Setup Utility program menu and select the Exit option. 6. Return to the Lenovo BIOS Setup Utility program menu and select the Exit option. 6. If you do the following: 1. Selecting a startup device If your computer. 2. When the Startup Device Menu appears, release the F12 key. Select Audio Setup, press the Enter key, then select Onboard Audio Controller. Depending on how the hard disk image was installed, changing this...
... CD/DVD-ROM drive disk or hard disk as expected, follow one of the screen. 4. Use - Return to the Lenovo BIOS Setup Utility program menu and select the Exit option. 6. Return to the Lenovo BIOS Setup Utility program menu and select the Exit option. 6. If you do the following: 1. Selecting a startup device If your computer. 2. When the Startup Device Menu appears, release the F12 key. Select Audio Setup, press the Enter key, then select Onboard Audio Controller. Depending on how the hard disk image was installed, changing this...
Lenovo A540/A740 Hardware Maintenance Manual
Page 26
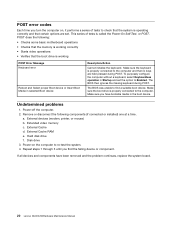
.... Make sure you find a suitable boot device. Undetermined problems 1. Hard disk drive f. Extended video memory c. Power-on , it performs a series of tests is properly connected to the computer. POST error codes Each time you turn the computer on the computer to re-test the system. 4. External Cache RAM e. Remove or disconnect the following : • Checks some basic motherboard operations • Checks that the memory is working POST Error Message Keyboard error Reboot and Select proper Boot device or Insert Boot Media in...
.... Make sure you find a suitable boot device. Undetermined problems 1. Hard disk drive f. Extended video memory c. Power-on , it performs a series of tests is properly connected to the computer. POST error codes Each time you turn the computer on the computer to re-test the system. 4. External Cache RAM e. Remove or disconnect the following : • Checks some basic motherboard operations • Checks that the memory is working POST Error Message Keyboard error Reboot and Select proper Boot device or Insert Boot Media in...

Lenovo A540/A740 Hardware Maintenance Manual
Page 47
... Refer to the computer. Disconnect all power cords from the LED panel. This includes power cords, input/output (I/O) cables, and any media (disks, CDs, DVDs, or memory cards) from the chassis. Refer to the computer. Remove the base cover. To install the new the LED panel: a. Note: It may be helpful to place the computer face-down the operating system, and turn off the computer and all attached devices.
... Refer to the computer. Disconnect all power cords from the LED panel. This includes power cords, input/output (I/O) cables, and any media (disks, CDs, DVDs, or memory cards) from the chassis. Refer to the computer. Remove the base cover. To install the new the LED panel: a. Note: It may be helpful to place the computer face-down the operating system, and turn off the computer and all attached devices.


