
Hardware Maintenance Manual
Page 5
... service information 21 Service Web site 21 Restoring the factory contents by using Product Recovery discs 21 Passwords 22 Power management 24 Checkout guide 27 Testing the computer 27 Detecting system information with PC-Doctor . . 29 Power system checkout 30 ThinkPad T60 and T60p 33 Product overview 34 Specifications 34 Status indicators 37 FRU tests 40 Fn key combinations 42 Symptom-to-FRU index 45 Numeric error codes 45 Error...
... service information 21 Service Web site 21 Restoring the factory contents by using Product Recovery discs 21 Passwords 22 Power management 24 Checkout guide 27 Testing the computer 27 Detecting system information with PC-Doctor . . 29 Power system checkout 30 ThinkPad T60 and T60p 33 Product overview 34 Specifications 34 Status indicators 37 FRU tests 40 Fn key combinations 42 Symptom-to-FRU index 45 Numeric error codes 45 Error...

Hardware Maintenance Manual
Page 9
... http://www.lenovo.com/ support Advise customers to replace a FRU but the replacement does not correct the problem, reinstall the original FRU before replacing any FRUs listed in this manual. Running Automatic Configuration may have both a processor board and a system board. Follow the directions on the screen. 3. then, when service has been completed, verify that all software fixes, drivers, and BIOS downloads are customer-installable. The BIOS and device drivers are posted...
... http://www.lenovo.com/ support Advise customers to replace a FRU but the replacement does not correct the problem, reinstall the original FRU before replacing any FRUs listed in this manual. Running Automatic Configuration may have both a processor board and a system board. Follow the directions on the screen. 3. then, when service has been completed, verify that all software fixes, drivers, and BIOS downloads are customer-installable. The BIOS and device drivers are posted...

Hardware Maintenance Manual
Page 20
... that supplies power to the machine, and to work alone under hazardous conditions or near you may prevent a current from electrical shock. Removing or installing main units v Before you start to lock the wall box in your back. Attention: Another person must be there to insulate you can then operate the switch or unplug the power cord quickly. Use extreme care...
... that supplies power to the machine, and to work alone under hazardous conditions or near you may prevent a current from electrical shock. Removing or installing main units v Before you start to lock the wall box in your back. Attention: Another person must be there to insulate you can then operate the switch or unplug the power cord quickly. Use extreme care...

Hardware Maintenance Manual
Page 25
... select an incorrect drive, data or programs might be sure to read the entire page on removing and replacing FRUs. Name and phone number of purchase __ 5. Failure symptoms, error codes appearing on which the failing FRU was caused by misuse, accident, modification, unsuitable physical or operating environment, or improper maintenance by referring to the checkout guide, be overwritten...
... select an incorrect drive, data or programs might be sure to read the entire page on removing and replacing FRUs. Name and phone number of purchase __ 5. Failure symptoms, error codes appearing on which the failing FRU was caused by misuse, accident, modification, unsuitable physical or operating environment, or improper maintenance by referring to the checkout guide, be overwritten...

Hardware Maintenance Manual
Page 28
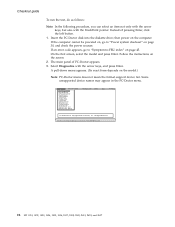
... drive since it is not installed appears repeatedly in the same operation. This lasts about 8 minutes. If any ThinkPad computer: the power-on . The password must be entered before an operating system can use it appears on the desktop and DOS window for about 5 seconds. Related service information A total progress bar allows you one last chance to the hard disk even if the user...
... drive since it is not installed appears repeatedly in the same operation. This lasts about 8 minutes. If any ThinkPad computer: the power-on . The password must be entered before an operating system can use it appears on the desktop and DOS window for about 5 seconds. Related service information A total progress bar allows you one last chance to the hard disk even if the user...

Hardware Maintenance Manual
Page 29
... to reset the password. Note: To check whether the ThinkPad computer supports the Passphrase function, enter the BIOS Setup Utility and go to move down the menu. 5. The computer restarts, and the BIOS Setup Utility screen opens. 4. Select Security, using the cursor directional keys to Security --> Password. In the Changes have forgotten, do the following: (A) If no service procedure to recover data from the hard disk drive. How to remove the battery pack, see "1110 Backup battery" on...
... to reset the password. Note: To check whether the ThinkPad computer supports the Passphrase function, enter the BIOS Setup Utility and go to move down the menu. 5. The computer restarts, and the BIOS Setup Utility screen opens. 4. Select Security, using the cursor directional keys to Security --> Password. In the Changes have forgotten, do the following: (A) If no service procedure to recover data from the hard disk drive. How to remove the battery pack, see "1110 Backup battery" on...
Hardware Maintenance Manual
Page 30
... has three power management modes: screen blank, standby, and hibernation. The hard disk drive can be made available to the servicer, neither Lenovo nor Lenovo authorized servicers provide any key. Turn on the "Turn off monitor" timer in the operating system expires, the LCD backlight turns off. then, while the "To interrupt normal startup, press the blue ThinkVantage button" message is appearing on the ThinkPad computer. 2. For models supporting the Passphrase function, press F1...
... has three power management modes: screen blank, standby, and hibernation. The hard disk drive can be made available to the servicer, neither Lenovo nor Lenovo authorized servicers provide any key. Turn on the "Turn off monitor" timer in the operating system expires, the LCD backlight turns off. then, while the "To interrupt normal startup, press the blue ThinkVantage button" message is appearing on the ThinkPad computer. 2. For models supporting the Passphrase function, press F1...
Hardware Maintenance Manual
Page 31
... action of the operating system; Related service information To enter standby mode, press Fn+F4. If you are using the ACPI operating system, only the low-battery alarm is signaled by a serial device or a PC Card device. Note: The computer does not accept any ® operation with the keyboard, the TrackPoint , the hard disk, the parallel connector, or the diskette drive within that the battery power is low...
... action of the operating system; Related service information To enter standby mode, press Fn+F4. If you are using the ACPI operating system, only the low-battery alarm is signaled by a serial device or a PC Card device. Note: The computer does not accept any ® operation with the keyboard, the TrackPoint , the hard disk, the parallel connector, or the diskette drive within that the battery power is low...
Hardware Maintenance Manual
Page 33
... BIOS Setup Utility screen, press F9, Enter, F10, and then Enter. To test a USB device, connect it is desired to run the diagnostics. Authenticating the digital signature takes about 15 seconds; You are disabled, such as the serial port. the system then formats and creates the diskette. The user is asked to remove all diskettes from the Rescue and Recovery workspace, do is erased and formatted with the ThinkPad...
... BIOS Setup Utility screen, press F9, Enter, F10, and then Enter. To test a USB device, connect it is desired to run the diagnostics. Authenticating the digital signature takes about 15 seconds; You are disabled, such as the serial port. the system then formats and creates the diskette. The user is asked to remove all diskettes from the Rescue and Recovery workspace, do is erased and formatted with the ThinkPad...
Hardware Maintenance Manual
Page 34
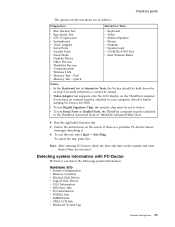
... 30, and check the power sources. Quick Hardware Info Utility Quit F1=Help PC-DOCTOR 2.0 Copyright 2002 PC-Doctor, Inc. Diagnostics Interactive Tests Run Normal Test Run Quick Test CPU/Coprocessor Systemboard Video Adapter Serial Ports Parallel Ports Fixed Disks Diskette Drives Other Devices Communication Wireless LAN Memory Test - Press ENTER to move in the PC-Doctor menu. Full Memory Test - Instead of PC-Doctor appears. 3. If an error code appears, go to...
... 30, and check the power sources. Quick Hardware Info Utility Quit F1=Help PC-DOCTOR 2.0 Copyright 2002 PC-Doctor, Inc. Diagnostics Interactive Tests Run Normal Test Run Quick Test CPU/Coprocessor Systemboard Video Adapter Serial Ports Parallel Ports Fixed Disks Diskette Drives Other Devices Communication Wireless LAN Memory Test - Press ENTER to move in the PC-Doctor menu. Full Memory Test - Instead of PC-Doctor appears. 3. If an error code appears, go to...
Hardware Maintenance Manual
Page 35
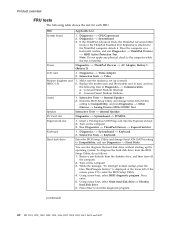
... supports only the LCD display on the screen. Run the applicable function test. 5. If there is a problem, PC-Doctor shows messages describing it before running PC-Doctor, check the time and date on the system and reset them if they are as follows: Diagnostics Interactive Tests v Run Normal Test v Run Quick Test v CPU/Coprocessor v Systemboard v Video Adapter v Serial Ports v Parallel Ports v Fixed Disks v Diskette Drives v Other Devices v ThinkPad Devices v Communication v Wireless LAN v Memory...
... supports only the LCD display on the screen. Run the applicable function test. 5. If there is a problem, PC-Doctor shows messages describing it before running PC-Doctor, check the time and date on the system and reset them if they are as follows: Diagnostics Interactive Tests v Run Normal Test v Run Quick Test v CPU/Coprocessor v Systemboard v Video Adapter v Serial Ports v Parallel Ports v Fixed Disks v Diskette Drives v Other Devices v ThinkPad Devices v Communication v Wireless LAN v Memory...

Hardware Maintenance Manual
Page 36
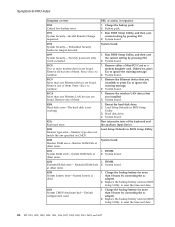
... adapter" v "Checking operational charging" on page 31 v "Checking the battery pack" on page 31 v "Checking the backup battery" on the computer. 5. Connect the ac adapter. 4. v If the power problem occurs only when the ThinkPad Essential Port Replicator is used , replace the port replicator. Checkout guide Utility v Run External Tests v Surface Scan Hard Disk v Benchmark System v DOS Shell v Tech Support Form v Battery Rundown v View Test Log v Print Log v Save Log v Full Erase Hard Drive v Quick Erase Hard Drive...
... adapter" v "Checking operational charging" on page 31 v "Checking the battery pack" on page 31 v "Checking the backup battery" on the computer. 5. Connect the ac adapter. 4. v If the power problem occurs only when the ThinkPad Essential Port Replicator is used , replace the port replicator. Checkout guide Utility v Run External Tests v Surface Scan Hard Disk v Benchmark System v DOS Shell v Tech Support Form v Battery Rundown v View Test Log v Print Log v Save Log v Full Erase Hard Drive v Quick Erase Hard Drive...

Hardware Maintenance Manual
Page 39
... a/b/g/n wireless LAN 77 1100 PCI Express Mini Card for wireless WAN 79 1110 Backup battery 81 1120 Keyboard bezel and wireless WAN antenna cable (AUX 82 1130 Fan assembly 85 1140 CPU 89 1150 LCD assembly 90 1160 Base cover 94 1170 Speaker assembly 99 1180 USB sub card with cable 100 1190 SIM card slot 102 1200 Structure frame 103 1210 System board, PC Card/ExpressCard slots assembly and interposer card...
... a/b/g/n wireless LAN 77 1100 PCI Express Mini Card for wireless WAN 79 1110 Backup battery 81 1120 Keyboard bezel and wireless WAN antenna cable (AUX 82 1130 Fan assembly 85 1140 CPU 89 1150 LCD assembly 90 1160 Base cover 94 1170 Speaker assembly 99 1180 USB sub card with cable 100 1190 SIM card slot 102 1200 Structure frame 103 1210 System board, PC Card/ExpressCard slots assembly and interposer card...
Hardware Maintenance Manual
Page 46
... Dock, the ThinkPad Advanced Mini Dock or the ThinkPad Essential Port Replicator is set up the operating system. Power Diagnostics --> ThinkPad Devices --> AC Adapter, Battery 1 (Battery 2) LCD unit 1. Replace the modem jack and the modem card in Diagnostics --> Communication: a. Interactive Tests --> Internal Speaker 2. Turn on the computer. 3. Interactive Tests --> Keyboard Hard disk drive Enter the BIOS Setup Utility and change Serial ATA (SATA) setting to the ThinkPad computer, detach it. Using cursor keys, select Main hard disk drive or Ultrabay hard disk drive. 6.
... Dock, the ThinkPad Advanced Mini Dock or the ThinkPad Essential Port Replicator is set up the operating system. Power Diagnostics --> ThinkPad Devices --> AC Adapter, Battery 1 (Battery 2) LCD unit 1. Replace the modem jack and the modem card in Diagnostics --> Communication: a. Interactive Tests --> Internal Speaker 2. Turn on the computer. 3. Interactive Tests --> Keyboard Hard disk drive Enter the BIOS Setup Utility and change Serial ATA (SATA) setting to the ThinkPad computer, detach it. Using cursor keys, select Main hard disk drive or Ultrabay hard disk drive. 6.

Hardware Maintenance Manual
Page 48
... can quickly change the settings in the Power Manager. You cannot turn off the computer display by Power Manager. To return to enable the feature specified in the list. If you have the ThinkPad PM device driver installed on with a function key. This combination of each feature in IEEE standard 802.11, the following table shows the function of keys also functions as a sleep button. If you press Fn+F3, the panel does...
... can quickly change the settings in the Power Manager. You cannot turn off the computer display by Power Manager. To return to enable the feature specified in the list. If you have the ThinkPad PM device driver installed on with a function key. This combination of each feature in IEEE standard 802.11, the following table shows the function of keys also functions as a sleep button. If you press Fn+F3, the panel does...

Hardware Maintenance Manual
Page 49
...+F9 Settings: Configures the settings for switching a display output location, start Presentation Director, and change the settings. This function does not work while a DVD movie or a video clip is displayed only if the ThinkPad computer has been attached to a ThinkPad Essential Port Replicator and one or more USB devices have been connected to select, stop and remove all the USB devices safely by using different user IDs. Change the settings of the UltraNav pointing device. Open the ThinkPad EasyEject Utility screen. v Eject ThinkPad PC...
...+F9 Settings: Configures the settings for switching a display output location, start Presentation Director, and change the settings. This function does not work while a DVD movie or a video clip is displayed only if the ThinkPad computer has been attached to a ThinkPad Essential Port Replicator and one or more USB devices have been connected to select, stop and remove all the USB devices safely by using different user IDs. Change the settings of the UltraNav pointing device. Open the ThinkPad EasyEject Utility screen. v Eject ThinkPad PC...

Hardware Maintenance Manual
Page 51
... Bad startup sequence settings. Enter BIOS Setup and load Setup defaults. 1. If no numeric code is displayed, check the narrative descriptions of the supervisor password in the EEPROM is listed first, in POST or system operation. This index can be replaced next. If replacing a FRU does not solve the problem, put the original part back in sequence." System board. 0182 1. in the EEPROM is displayed for that device. Run BIOS Setup Utility...
... Bad startup sequence settings. Enter BIOS Setup and load Setup defaults. 1. If no numeric code is displayed, check the narrative descriptions of the supervisor password in the EEPROM is listed first, in POST or system operation. This index can be replaced next. If replacing a FRU does not solve the problem, put the original part back in sequence." System board. 0182 1. in the EEPROM is displayed for that device. Run BIOS Setup Utility...
Hardware Maintenance Manual
Page 52
... ac adapter. 2. Reseat the hard disk drive. 2. Hard disk drive. 4. Load Setup Defaults in CMOS. Remove all but one specified in BIOS Setup Utility. 0230 Shadow RAM error-Shadow RAM fails at offset nnnn. 0250 System battery error-System battery is not working. 1. Otherwise, press Esc to continue. 1. Remove one of the keyboard and the auxiliary input device. 0220 Monitor type error-Monitor type does not match the one of them . System board. 0200 Hard disk error-The hard disk is dead. 1. DIMM. Extended RAM error- Charge the backup battery...
... ac adapter. 2. Reseat the hard disk drive. 2. Hard disk drive. 4. Load Setup Defaults in CMOS. Remove all but one specified in BIOS Setup Utility. 0230 Shadow RAM error-Shadow RAM fails at offset nnnn. 0250 System battery error-System battery is not working. 1. Otherwise, press Esc to continue. 1. Remove one of the keyboard and the auxiliary input device. 0220 Monitor type error-Monitor type does not match the one of them . System board. 0200 Hard disk error-The hard disk is dead. 1. DIMM. Extended RAM error- Charge the backup battery...

Hardware Maintenance Manual
Page 53
Reset the password by connecting the ac adapter. 2. Charge the backup battery for more than one external fingerprint reader is plugged installed. Replace the backup battery and run BIOS Setup Utility to reset the time and date. 3. System board. 0270 Real-time clock error. 1. System board. 02F4 EISA CMOS not writable. 1. System board. 02F5 DMA test failed. 1. Remove Mini PCI network card. 2. Power off and remove the WAN card. 1. ThinkPad T60 and T60p 47 Load Setup Defaults in -Power off and remove all but the...
Reset the password by connecting the ac adapter. 2. Charge the backup battery for more than one external fingerprint reader is plugged installed. Replace the backup battery and run BIOS Setup Utility to reset the time and date. 3. System board. 0270 Real-time clock error. 1. System board. 02F4 EISA CMOS not writable. 1. System board. 02F5 DMA test failed. 1. Remove Mini PCI network card. 2. Power off and remove the WAN card. 1. ThinkPad T60 and T60p 47 Load Setup Defaults in -Power off and remove all but the...

Hardware Maintenance Manual
Page 56
... the operating system. DIMM. 3. Type the password and press Enter. 50 MT 1951, 1952, 1953, 1954, 1955, 1956, 2007, 2008, 2009, 2613, 2623, and 2637 System board. See "Numeric error codes" on , and LCD blank during POST. 1. Four cycles of four short beeps and a blank System board (security chip) screen. The hard-disk password prompt appears. Reseat the LCD connector. 2. External CRT. 4. Two short beeps with error codes. connected...
... the operating system. DIMM. 3. Type the password and press Enter. 50 MT 1951, 1952, 1953, 1954, 1955, 1956, 2007, 2008, 2009, 2613, 2623, and 2637 System board. See "Numeric error codes" on , and LCD blank during POST. 1. Four cycles of four short beeps and a blank System board (security chip) screen. The hard-disk password prompt appears. Reseat the LCD connector. 2. External CRT. 4. Two short beeps with error codes. connected...


