Lantronix Spider / SpiderDuo - User Guide
Page 7
... Management 78 Group Management 79 User Permissions 79 Remote Authentication 80 LDAP 81 RADIUS 82 9: Services 83 Date/Time 83 Security 84 HTTP Encryption 85 Login Limitations 85 KVM Encryption 85 Group Based System Access Control 86 Authentication Limitation 86 Certificate 87 Event Log 89 Event Log Targets 89 Event Log... Drive 73 User Interface Settings 75 8: User Accounts 76 Local vs. Virtual Media Options 71 Image on Windows Share 71 Floppy Image 72 Connecting to Defaults, or Reset 95 Spider™ and SpiderDuo® KVM-over-IP Device User Guide 7
... Management 78 Group Management 79 User Permissions 79 Remote Authentication 80 LDAP 81 RADIUS 82 9: Services 83 Date/Time 83 Security 84 HTTP Encryption 85 Login Limitations 85 KVM Encryption 85 Group Based System Access Control 86 Authentication Limitation 86 Certificate 87 Event Log 89 Event Log Targets 89 Event Log... Drive 73 User Interface Settings 75 8: User Accounts 76 Local vs. Virtual Media Options 71 Image on Windows Share 71 Floppy Image 72 Connecting to Defaults, or Reset 95 Spider™ and SpiderDuo® KVM-over-IP Device User Guide 7

Lantronix Spider / SpiderDuo - User Guide
Page 10
... USB Cable Dimensions 22 Figure 2-8 Spider Family Product Information Label 24 Figure 3-1 Spider RS-232 Serial Port and Pinouts 26 Figure 3-3 Spider Login Window 27 Figure 3-4 Spider Prompts 27 Figure 3-5 Spider RJ45 Ethernet and Cascade Ports 28 Figure 3-6 Lantronix Detector Window 28 Figure 3-7 Detector Device... KVM, USB, Computer Input and Serial Ports 36 Figure 4-4 SpiderDuo Welcome Screen 36 Figure 4-5 SpiderDuo Default IP Configuration Screen 36 Figure 4-6 Lantronix Detector Window 38 Figure 4-7 Detector Device List Window 38 Figure 4-8 Network Settings Window 39 Figure 4-10...
... USB Cable Dimensions 22 Figure 2-8 Spider Family Product Information Label 24 Figure 3-1 Spider RS-232 Serial Port and Pinouts 26 Figure 3-3 Spider Login Window 27 Figure 3-4 Spider Prompts 27 Figure 3-5 Spider RJ45 Ethernet and Cascade Ports 28 Figure 3-6 Lantronix Detector Window 28 Figure 3-7 Detector Device... KVM, USB, Computer Input and Serial Ports 36 Figure 4-4 SpiderDuo Welcome Screen 36 Figure 4-5 SpiderDuo Default IP Configuration Screen 36 Figure 4-6 Lantronix Detector Window 38 Figure 4-7 Detector Device List Window 38 Figure 4-8 Network Settings Window 39 Figure 4-10...
Lantronix Spider / SpiderDuo - User Guide
Page 27
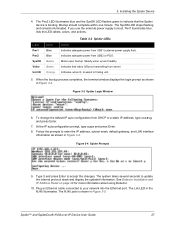
.... Steady when up and healthy. When the bootup process completes, the terminal window displays the login prompt as shown in the RJ45 illuminates. To change the default IP auto configuration from USB1 (external power supply first). Follow the prompts to indicate that video...Bootup should complete within one minute. lists the LED labels, colors, and actions. Indicates that the Spider device is shown in Figure 3-5. Figure 3-3 Spider Login Window 6. Figure 3-4 Spider Prompts 9. Spider™ and SpiderDuo® KVM-over-IP Device User Guide 27 If you use the external ...
.... Steady when up and healthy. When the bootup process completes, the terminal window displays the login prompt as shown in the RJ45 illuminates. To change the default IP auto configuration from USB1 (external power supply first). Follow the prompts to indicate that video...Bootup should complete within one minute. lists the LED labels, colors, and actions. Indicates that the Spider device is shown in Figure 3-5. Figure 3-3 Spider Login Window 6. Figure 3-4 Spider Prompts 9. Spider™ and SpiderDuo® KVM-over-IP Device User Guide 27 If you use the external ...

Lantronix Spider / SpiderDuo - User Guide
Page 45
Enter your user name (default is sysadmin) and password (default is PASS) at the prompt. You can also make changes to access and manage a target computer by using a web browser by using a Web browser or remote system. Spider™ and SpiderDuo® KVM-over -IP device to the ...home page contains the following steps to use the Lantronix Spider and SpiderDuo KVM-over -IP Device User Guide 45 Access the Spider or SpiderDuo device over the network by entering https:// (for a secure SSL connection) or http:// (for login. 2. From the home page the Remote Console or...
Enter your user name (default is sysadmin) and password (default is PASS) at the prompt. You can also make changes to access and manage a target computer by using a web browser by using a Web browser or remote system. Spider™ and SpiderDuo® KVM-over -IP device to the ...home page contains the following steps to use the Lantronix Spider and SpiderDuo KVM-over -IP Device User Guide 45 Access the Spider or SpiderDuo device over the network by entering https:// (for a secure SSL connection) or http:// (for login. 2. From the home page the Remote Console or...

Lantronix Spider / SpiderDuo - User Guide
Page 54
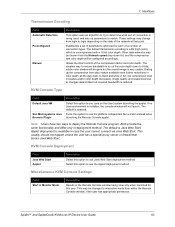
... will launch, and the Telnet Console window appears. The Spider device does not echo this data back to close the connection. Telnet Console and Remote KVM Console windows may be changed from their defaults. This may interact with an RS-232 port. 1. Enter logout or l to the client. 7....attached serial console. The JRE will present LOGIN and PASSWORD prompts. Use the SSH or Telnet ability to serial port mode Logout-Terminates the Telnet or SSH connection 4. Telnet Console Use When using Telnet/SSH in passthrough mode, the Spider device just acts as a conduit for the...
... will launch, and the Telnet Console window appears. The Spider device does not echo this data back to close the connection. Telnet Console and Remote KVM Console windows may be changed from their defaults. This may interact with an RS-232 port. 1. Enter logout or l to the client. 7....attached serial console. The JRE will present LOGIN and PASSWORD prompts. Use the SSH or Telnet ability to serial port mode Logout-Terminates the Telnet or SSH connection 4. Telnet Console Use When using Telnet/SSH in passthrough mode, the Spider device just acts as a conduit for the...
Lantronix Spider / SpiderDuo - User Guide
Page 63
...when launching the Remote Console applet. Other data networks may change from login to login depending on the client system launching the applet. KVM Console Deployment Field Java Web Start Applet Description Select this user. Spider™ and SpiderDuo® KVM-over-IP Device User Guide 63 ... changes deteriorates but the overall image is enabled. The simplest way to reduce bandwidth is uncompressed with a 16 bit color depth. The default is available in color depth, all the way down to 8 bits; These settings may be gone but required bandwidth is installed, the...
...when launching the Remote Console applet. Other data networks may change from login to login depending on the client system launching the applet. KVM Console Deployment Field Java Web Start Applet Description Select this user. Spider™ and SpiderDuo® KVM-over-IP Device User Guide 63 ... changes deteriorates but the overall image is enabled. The simplest way to reduce bandwidth is uncompressed with a 16 bit color depth. The default is available in color depth, all the way down to 8 bits; These settings may be gone but required bandwidth is installed, the...

Lantronix Spider / SpiderDuo - User Guide
Page 111
YY is 1-12 - User Commands set user Syntax set user add|edit [] Parameters [email ] [fullname ] [group ] [mobile ] Note: The group 'default' (Unknown) and 'Admin' and are built-in groups. The group 'None' indicates that user is created without defining a group, and permissions will be : - -11h, -10h, -..., -4h, -3h, -2h, -1h - +/-0h, +1h, +2h, +3h, +4h, +5h, +6h, +7h, +8h, +9h, +10h, +11h, +12h Note: Select only one offset as shown above. Spider™ and SpiderDuo® KVM-over-IP Device User Guide 111 MM is 00-99 - hh is 0-59 Offset string can be assigned specifically...
YY is 1-12 - User Commands set user Syntax set user add|edit [] Parameters [email ] [fullname ] [group ] [mobile ] Note: The group 'default' (Unknown) and 'Admin' and are built-in groups. The group 'None' indicates that user is created without defining a group, and permissions will be : - -11h, -10h, -..., -4h, -3h, -2h, -1h - +/-0h, +1h, +2h, +3h, +4h, +5h, +6h, +7h, +8h, +9h, +10h, +11h, +12h Note: Select only one offset as shown above. Spider™ and SpiderDuo® KVM-over-IP Device User Guide 111 MM is 00-99 - hh is 0-59 Offset string can be assigned specifically...
Lantronix Spider / SpiderDuo - User Guide
Page 120
... Special key combinations (e.g., ALT+F2, ALT+F3) are not synchronous anymore. Check your password. Spider™ and SpiderDuo® KVM-over-IP Device User Guide 120 By default, the user sysadmin has the password PASS. Ensure the web browser is a proxy server between ... Is there Activity? Establish a direct connection between the Spider device and your network. Check cabling. Are both your user login and your browser's cache settings. Send a ping request to the Spider device to the Spider device. Login on the Spider device fails. A Java Runtime Environment may not be...
... Special key combinations (e.g., ALT+F2, ALT+F3) are not synchronous anymore. Check your password. Spider™ and SpiderDuo® KVM-over-IP Device User Guide 120 By default, the user sysadmin has the password PASS. Ensure the web browser is a proxy server between ... Is there Activity? Establish a direct connection between the Spider device and your network. Check cabling. Are both your user login and your browser's cache settings. Send a ping request to the Spider device to the Spider device. Login on the Spider device fails. A Java Runtime Environment may not be...
Lantronix Spider - Quick Start Guide
Page 4
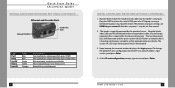
... Spider's serial port. Bootup is booting up ). WWW.LANTRONIX....COM 5 The two blue power LEDs will illuminate and the green system OK LED flashes to a static IP address, type config and press Enter. 4. The system OK LED stops flashing and remains illuminated. 3. At the IP autoconfiguration prompt, type none and press Enter. HyperTerminal). To change the default...default serial port settings are 9600 bits per second, 8 data bits, no parity, 1 stop bit, no flow control. 2. Quick Start Guide SecureLinx Spider... SETTINGS CONTINUED... 1. Plug the Spider video, USB, and PS/2 ...
... Spider's serial port. Bootup is booting up ). WWW.LANTRONIX....COM 5 The two blue power LEDs will illuminate and the green system OK LED flashes to a static IP address, type config and press Enter. 4. The system OK LED stops flashing and remains illuminated. 3. At the IP autoconfiguration prompt, type none and press Enter. HyperTerminal). To change the default...default serial port settings are 9600 bits per second, 8 data bits, no parity, 1 stop bit, no flow control. 2. Quick Start Guide SecureLinx Spider... SETTINGS CONTINUED... 1. Plug the Spider video, USB, and PS/2 ...
Lantronix Spider - Quick Start Guide
Page 5
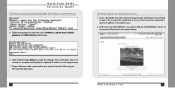
... complete and display the updated IP address on the login prompt. 7. The Spider home page displays. 6. Access the Spider over the network using a favorite web browser by Enter, to your user name (default is sysadmin) and password (default is PASS) at the prompt. Type Y, following... 10 seconds to enter the unit's IP address, subnet mask, default gateway, and LAN interface information. Plug an Ethernet cable connected to accept the changes. Quick Start Guide SecureLinx Spider INSTALLATION AND NETWORK SETTINGS CONTINUED 5. The Link LED illuminates. 6 WWW.LANTRONIX.COM 7
... complete and display the updated IP address on the login prompt. 7. The Spider home page displays. 6. Access the Spider over the network using a favorite web browser by Enter, to your user name (default is sysadmin) and password (default is PASS) at the prompt. Type Y, following... 10 seconds to enter the unit's IP address, subnet mask, default gateway, and LAN interface information. Plug an Ethernet cable connected to accept the changes. Quick Start Guide SecureLinx Spider INSTALLATION AND NETWORK SETTINGS CONTINUED 5. The Link LED illuminates. 6 WWW.LANTRONIX.COM 7


