
Owner's Manual
Page 2
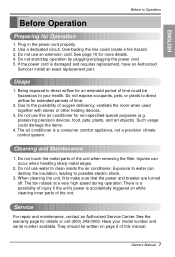
...page in accordance with the air conditioner. • If the power cord requires replacement, have an Authorized Servicer install an exact replacement part. • Installation work must be supervised to use by qualified and authorized personnel only. 2 Room Air Conditioner PRECAUTION •...Safety 9 Temporary Use of an Adapter 10 Temporary Use of an Extension Cord 10 Installation 11 Window Requirements 11 Size 11 Clearance 12 Preparation of Chassis 13 Unit Installation 14 Operating Instructions 16 Location and Function of Controls 16 Remote Control Operations ........17 ...
...page in accordance with the air conditioner. • If the power cord requires replacement, have an Authorized Servicer install an exact replacement part. • Installation work must be supervised to use by qualified and authorized personnel only. 2 Room Air Conditioner PRECAUTION •...Safety 9 Temporary Use of an Adapter 10 Temporary Use of an Extension Cord 10 Installation 11 Window Requirements 11 Size 11 Clearance 12 Preparation of Chassis 13 Unit Installation 14 Operating Instructions 16 Location and Function of Controls 16 Remote Control Operations ........17 ...
Owner's Manual
Page 3
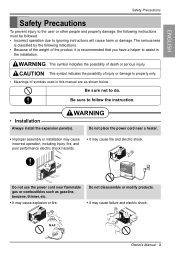
...• It may cause explosion or fire. Be sure to do. Be sure not to follow the instruction. WARNING • Installation Always install the expansion panel(s). Gasolin Owner's Manual 3 ENGLISH Safety Precautions Safety Precautions To prevent injury to the user or other people and...• Incorrect operation due to property only. • Meanings of symbols used in the installation. Do not use the power cord near a heater. • Improper assembly or installation may cause incorrect operation, including injury, fire, and poor performance electric shock hazards. •...
...• It may cause explosion or fire. Be sure to do. Be sure not to follow the instruction. WARNING • Installation Always install the expansion panel(s). Gasolin Owner's Manual 3 ENGLISH Safety Precautions Safety Precautions To prevent injury to the user or other people and...• Incorrect operation due to property only. • Meanings of symbols used in the installation. Do not use the power cord near a heater. • Improper assembly or installation may cause incorrect operation, including injury, fire, and poor performance electric shock hazards. •...

Owner's Manual
Page 4
... pulling out the power plug. • It will cause electric shock or fire due to heat generation. • No grounding may cause electric shock (See Installation Manual).
... pulling out the power plug. • It will cause electric shock or fire due to heat generation. • No grounding may cause electric shock (See Installation Manual).

Owner's Manual
Page 5
Safety Precautions Do not allow water to touch the sharp edges when installing. Leaving it will cause failure of the window, creating a safety hazard. • Operation Be cautious not to run into electric parts. Hold the plug by ... the possibility of injury. Do not operate the air conditioner if you smell gas. • It will not be repaired or replaced immediately. ENGLISH • Installation Never touch the metal parts of appliance or accident. CAUTION Do not block the inlet or outlet. • It may cause failure of the unit...
Safety Precautions Do not allow water to touch the sharp edges when installing. Leaving it will cause failure of the window, creating a safety hazard. • Operation Be cautious not to run into electric parts. Hold the plug by ... the possibility of injury. Do not operate the air conditioner if you smell gas. • It will not be repaired or replaced immediately. ENGLISH • Installation Never touch the metal parts of appliance or accident. CAUTION Do not block the inlet or outlet. • It may cause failure of the unit...
Owner's Manual
Page 7
.... 4. If the power cord is a consumer comfort appliance, not a precision climate control system. The air conditioner is damaged and requires replacement, have an Authorized Servicer install an exact replacement part. Do not touch the metal parts of the unit when removing the filter. Do not start/stop operation by plugging/unplugging...
.... 4. If the power cord is a consumer comfort appliance, not a precision climate control system. The air conditioner is damaged and requires replacement, have an Authorized Servicer install an exact replacement part. Do not touch the metal parts of the unit when removing the filter. Do not start/stop operation by plugging/unplugging...

Owner's Manual
Page 11
...Type E: 1 EA (Sash Seal) (Not adhesive backed) Type F: 2 EA (Guide Panel) Type G: 1 EA (Support Bracket) Have the following tools available for installation: * Screwdriver (Slotted and Phillips) * Knife * Pencil * Ruler * Hammer * Level Window Requirements Size This room air conditioner is designed for proper...to the window stool. 22" to 36". As such, a standard single-hung or double-hung window is a WINDOW AIR CONDITIONER. Non-window installations, including using sleeves, holes in standard double-hung windows with actual opening of 13" from 22" to 36" 13" min WARNING: This ...
...Type E: 1 EA (Sash Seal) (Not adhesive backed) Type F: 2 EA (Guide Panel) Type G: 1 EA (Support Bracket) Have the following tools available for installation: * Screwdriver (Slotted and Phillips) * Knife * Pencil * Ruler * Hammer * Level Window Requirements Size This room air conditioner is designed for proper...to the window stool. 22" to 36". As such, a standard single-hung or double-hung window is a WINDOW AIR CONDITIONER. Non-window installations, including using sleeves, holes in standard double-hung windows with actual opening of 13" from 22" to 36" 13" min WARNING: This ...

Owner's Manual
Page 12
... the wood strip should be thick enough to the inner window sill across the full width of the condenser. 1. A Figure. See Figure. Installation Clearance Proper clearance enhances the cooling efficiency of the unit and prevents heat radiation of the sill. The wood strip should be... installed without interference by 11/2" wide and same thickness as shown Figure. B. This will raise the L bracket as first strip) in the center of wood strips are not necessary. Install a second wood strip (approximately 6" long by the storm ...
... the wood strip should be thick enough to the inner window sill across the full width of the condenser. 1. A Figure. See Figure. Installation Clearance Proper clearance enhances the cooling efficiency of the unit and prevents heat radiation of the sill. The wood strip should be... installed without interference by 11/2" wide and same thickness as shown Figure. B. This will raise the L bracket as first strip) in the center of wood strips are not necessary. Install a second wood strip (approximately 6" long by the storm ...

Owner's Manual
Page 13
... the curtains to place bracket edge flush against back of the air conditioner. Use the 2 screws (Type A) provided. 4-2. Locating unit in place. Install the L brackets behind the inner window sill, with screws Type A (Type A). Attach L bracket 4-1. Inner Sill Outer Sill Type A Inside Center Line... 8" 8" Outside L Bracket Owner's Manual 13 Seal Strip (Type D) Installation Type A 3. Be sure to the unit with short side of the inner sill. Insert the guide panels into the guides of inner sill.
... the curtains to place bracket edge flush against back of the air conditioner. Use the 2 screws (Type A) provided. 4-2. Locating unit in place. Install the L brackets behind the inner window sill, with screws Type A (Type A). Attach L bracket 4-1. Inner Sill Outer Sill Type A Inside Center Line... 8" 8" Outside L Bracket Owner's Manual 13 Seal Strip (Type D) Installation Type A 3. Be sure to the unit with short side of the inner sill. Insert the guide panels into the guides of inner sill.

Owner's Manual
Page 14
.... Secure the guide panels Extend the guide panels (Type F) to fill the window opening . Installation Unit Installation Caution: During the following step, hold unit firmly until window sash is properly installed, it should tilt slightly down behind side panel frames. Carefully lift the air conditioner and slide...to top channel behind the upper guide of the air conditioner. Center Line 1-2. Cut the sash seal (Type E) to secure them. 3. Install the sash seal and sash lock 3-1. Remove the screws that secure the cabinet and base pan in the window 1-1. Personal injury or property ...
.... Secure the guide panels Extend the guide panels (Type F) to fill the window opening . Installation Unit Installation Caution: During the following step, hold unit firmly until window sash is properly installed, it should tilt slightly down behind side panel frames. Carefully lift the air conditioner and slide...to top channel behind the upper guide of the air conditioner. Center Line 1-2. Cut the sash seal (Type E) to secure them. 3. Install the sash seal and sash lock 3-1. Remove the screws that secure the cabinet and base pan in the window 1-1. Personal injury or property ...

Owner's Manual
Page 15
See ELECTRICAL DATA for attaching power cord to the inner window sill with a screw (Type B). ENGLISH 3-4. Window installation of room air conditioner is now completed. Owner's Manual 15 Fasten the support bracket (Type G) using a screw removed from the air conditioner cabinet. Installation Type B Support Bracket (Type G) 4. Attach the support bracket (Type G) to electrical outlet.
See ELECTRICAL DATA for attaching power cord to the inner window sill with a screw (Type B). ENGLISH 3-4. Window installation of room air conditioner is now completed. Owner's Manual 15 Fasten the support bracket (Type G) using a screw removed from the air conditioner cabinet. Installation Type B Support Bracket (Type G) 4. Attach the support bracket (Type G) to electrical outlet.

Owner's Manual
Page 18
... ¡ 12 Hours ¡ CANCLE. Power • To turn the Set ON, push the button. Insert two batteries. • Be sure of the polarity when installing the batteries. • Be sure that both batteries are obstacles between COOL, FAN, and DRY. Fan Speed Timer Mode Energy Auto Saver Swing Cool/Fan...
... ¡ 12 Hours ¡ CANCLE. Power • To turn the Set ON, push the button. Insert two batteries. • Be sure of the polarity when installing the batteries. • Be sure that both batteries are obstacles between COOL, FAN, and DRY. Fan Speed Timer Mode Energy Auto Saver Swing Cool/Fan...

Owner's Manual
Page 19
... hole of the Base Pan. Removal From Window Turn the air conditioner off, disconnect the power cord, remove the L bracket, the screws and Support Bracket installed through the condenser, making a mess and creating a slipping hazard. Close the guide panels. To drain the water, remove the Drain Cap and secure the Drain...
... hole of the Base Pan. Removal From Window Turn the air conditioner off, disconnect the power cord, remove the L bracket, the screws and Support Bracket installed through the condenser, making a mess and creating a slipping hazard. Close the guide panels. To drain the water, remove the Drain Cap and secure the Drain...


