

Owners Manual
Page 2
... first, you review our chart of Troubleshooting service at all. that • If the power cord requires replacement, have an Authorized Servicer install an exact replacement part. • Installation work must be supervised to this unit. If you may not need it to call for PRECAUTION • Contact an Authorized Service Center...
... first, you review our chart of Troubleshooting service at all. that • If the power cord requires replacement, have an Authorized Servicer install an exact replacement part. • Installation work must be supervised to this unit. If you may not need it to call for PRECAUTION • Contact an Authorized Service Center...

Owners Manual
Page 3
...the user or other people and property damage, the following indications. • Because of the weight of symbols used in the installation. only. / This symbol possibility of of injury or damage to property J • Meanings of the product, it is classified... by the following instructions must be followed. • Incorrect operation due to follow the instruction. , WARNING> • Installation • Improperassembly or installation may cause incorrect operation, including injury,fire, and electric shock hazards. • It may cause fire and electric shock. ®...
...the user or other people and property damage, the following indications. • Because of the weight of symbols used in the installation. only. / This symbol possibility of of injury or damage to property J • Meanings of the product, it is classified... by the following instructions must be followed. • Incorrect operation due to follow the instruction. , WARNING> • Installation • Improperassembly or installation may cause incorrect operation, including injury,fire, and electric shock hazards. • It may cause fire and electric shock. ®...

Owners Manual
Page 5
It may cause an electric shock. 0 ILCAUTION • Installation °They are sharp and may cause injury. ° It may enter the unit and degrade the insulation. Leaving it must be operated in the ...
It may cause an electric shock. 0 ILCAUTION • Installation °They are sharp and may cause injury. ° It may enter the unit and degrade the insulation. Leaving it must be operated in the ...
Owners Manual
Page 7
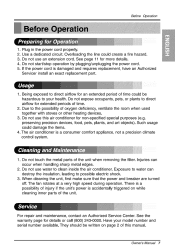
... non-specified special purposes (e.g. preserving precision devices, food, pets, plants, and art objects). The air conditioner is damaged and requires replacement, have an Authorized Servicer install an exact replacement part. 1. The fan rotates at a very high speed during operation. Do not start/stop operation by plugging/unplugging the power cord. Do...
... non-specified special purposes (e.g. preserving precision devices, food, pets, plants, and art objects). The air conditioner is damaged and requires replacement, have an Authorized Servicer install an exact replacement part. 1. The fan rotates at a very high speed during operation. Do not start/stop operation by plugging/unplugging the power cord. Do...

Owners Manual
Page 8
Upper Guide Horizontal Air Deflector (Horizontal Louver) Vertical Air Deflector (Vertical Louver) Cabinet -Front Grille Air Filter Air Intake (Inlet Grille) Air Discharge Brace Eva_ Control Board -Remote Controller _ _ Compressor Base Pan Power Cord 8 Room Air Conditioner This symbol alerts you to the air conditioner. This symbol indicates special notes. ,_ WARNING: This appliance should be installed in accordance with the National Electric Code. Introduction This symbol alerts you to hazards that could cause harm to the risk of electric shock.
Upper Guide Horizontal Air Deflector (Horizontal Louver) Vertical Air Deflector (Vertical Louver) Cabinet -Front Grille Air Filter Air Intake (Inlet Grille) Air Discharge Brace Eva_ Control Board -Remote Controller _ _ Compressor Base Pan Power Cord 8 Room Air Conditioner This symbol alerts you to the air conditioner. This symbol indicates special notes. ,_ WARNING: This appliance should be installed in accordance with the National Electric Code. Introduction This symbol alerts you to hazards that could cause harm to the risk of electric shock.

Owners Manual
Page 9
... extension cords Because of potential safety hazards, we strongly discourage the use of the air conditioner and contact a qualified service technician. The device should be installed by first pressing the TEST button and then the RESET button.
... extension cords Because of potential safety hazards, we strongly discourage the use of the air conditioner and contact a qualified service technician. The device should be installed by first pressing the TEST button and then the RESET button.

Owners Manual
Page 11
... can lead to avoid damaging the ground terminal. Owner's Manual 11 DO NOT USE AN EXTENSION CORD on the power supply cord, which must be installed by a qualified electrician in accordance with a broken adapter. 115VOLT UNiT We strongly discourage the use of an adapter due to potential safety hazards.For temporary...
... can lead to avoid damaging the ground terminal. Owner's Manual 11 DO NOT USE AN EXTENSION CORD on the power supply cord, which must be installed by a qualified electrician in accordance with a broken adapter. 115VOLT UNiT We strongly discourage the use of an adapter due to potential safety hazards.For temporary...

Owners Manual
Page 12
...-/ (Without frame curtain) / 12 Room Air Conditioner ° The outside of the cabinet must extend outward for installation in standard double hung windows with the bottom about 1/2"). Installation To prevent vibration and noise, make sure the unit Fence is slightly lower than the front (about 30"~60" ...cabinet must open sufficiently to 36"_ Inner sill _Window I _g Cooled air i__t _ _ _ _ _h _=_ radiation __j_ _ Heat \ \ _[ ,, _o L o/ 1. Install the unit with actual opening of 15" from 23" to 36". • The top and bottom window sash must remain exposed to the outside of...
...-/ (Without frame curtain) / 12 Room Air Conditioner ° The outside of the cabinet must extend outward for installation in standard double hung windows with the bottom about 1/2"). Installation To prevent vibration and noise, make sure the unit Fence is slightly lower than the front (about 30"~60" ...cabinet must open sufficiently to 36"_ Inner sill _Window I _g Cooled air i__t _ _ _ _ _h _=_ radiation __j_ _ Heat \ \ _[ ,, _o L o/ 1. Install the unit with actual opening of 15" from 23" to 36". • The top and bottom window sash must remain exposed to the outside of...

Owners Manual
Page 13
... gripping the base pan handle and pulling forward while bracing the cabinet. Peel off the backing and attach the Foam-PE @ to the proper length. Installation NO. 1 2 3 4 5 6 7 8 9 10 11 12 NAME OF PARTS FRAME CURTAIN SILL SUPPORT BOLT NUT SCREW (TYPE A) SCREW (TYPE B) SCREW (TYPE C) FOAM-STRIP DRAIN PIPE FRAME GUIDE...
... gripping the base pan handle and pulling forward while bracing the cabinet. Peel off the backing and attach the Foam-PE @ to the proper length. Installation NO. 1 2 3 4 5 6 7 8 9 10 11 12 NAME OF PARTS FRAME CURTAIN SILL SUPPORT BOLT NUT SCREW (TYPE A) SCREW (TYPE B) SCREW (TYPE C) FOAM-STRIP DRAIN PIPE FRAME GUIDE...

Owners Manual
Page 14
Installation Open the window. Screw(Type A) @ IL Frame Guide @ \ Attach the Sill Support @ to the cabinet track hole in relation to the selected position using the ... guide " stool Frame Curtain Q Loosely assemble the Sill Support ® using 2 Type A screws in the window stool. Mark a line on sill : Be careful when you install the cabinet (Frame Guides @ are broken easily).
Installation Open the window. Screw(Type A) @ IL Frame Guide @ \ Attach the Sill Support @ to the cabinet track hole in relation to the selected position using the ... guide " stool Frame Curtain Q Loosely assemble the Sill Support ® using 2 Type A screws in the window stool. Mark a line on sill : Be careful when you install the cabinet (Frame Guides @ are broken easily).

Owners Manual
Page 15
... B: Length 16ram (5/8 inch) and below.) through the front angle into the cabinet. _lb CAUTION: ForA) security purpose, reinstall screws (Type at cabinet's sides. Installation The cabinet should be installed with approximately 1/2" of Sill Support _'_for balancing the cabinet. Sill Support (_ Screw(Type B) Q Attach the cabinet to the proper length and insert between...
... B: Length 16ram (5/8 inch) and below.) through the front angle into the cabinet. _lb CAUTION: ForA) security purpose, reinstall screws (Type at cabinet's sides. Installation The cabinet should be installed with approximately 1/2" of Sill Support _'_for balancing the cabinet. Sill Support (_ Screw(Type B) Q Attach the cabinet to the proper length and insert between...

Owners Manual
Page 16
See ELECTRICAL DATA for attaching power cord to the cabinet by inserting the tabs on the grille into place. Pull down the inlet grille and secure it snaps into the tabs on the front of room air conditioner is now completed. Push the grille in until it with a Type C screw _>. Window installation of the cabinet. Window locking bracket @ Attach the front grille to electrical outlet. 16 Room Air Conditioner Installation Attach the Window Locking Bracket @ with a Type A screw _>through the front grille.
See ELECTRICAL DATA for attaching power cord to the cabinet by inserting the tabs on the grille into place. Pull down the inlet grille and secure it snaps into the tabs on the front of room air conditioner is now completed. Push the grille in until it with a Type C screw _>. Window installation of the cabinet. Window locking bracket @ Attach the front grille to electrical outlet. 16 Room Air Conditioner Installation Attach the Window Locking Bracket @ with a Type A screw _>through the front grille.

Owners Manual
Page 18
... button is pressed and stops when you sleep. Select fan mode for energy saving operation. Remove the cover from the back of the polarity when installing the batteries. The thermostat can be set , the temperature setting will raise 2°F after 30min and once again after another 30min. Fan Speed Fan Speed...
... button is pressed and stops when you sleep. Select fan mode for energy saving operation. Remove the cover from the back of the polarity when installing the batteries. The thermostat can be set , the temperature setting will raise 2°F after 30min and once again after another 30min. Fan Speed Fan Speed...

Owners Manual
Page 20
... the air conditioner more efficient. Removal From Window Turn the air conditioner off, disconnect the power cord, remove the L bracket, the screws and Support Bracket installed through the condenser, making a mess and creating a slipping hazard. This simple step will save for reinstallation later. Press the drain pipe into the hole by...
... the air conditioner more efficient. Removal From Window Turn the air conditioner off, disconnect the power cord, remove the L bracket, the screws and Support Bracket installed through the condenser, making a mess and creating a slipping hazard. This simple step will save for reinstallation later. Press the drain pipe into the hole by...

Owners Manual
Page 52
...your product ifitproves tobedefective in China submitted at http://www.lgappliances.com. Compressor: 5 Years from 7 days the per menu, week. install and the product, instruct, or replace house fuses or wiring, or correction of such a defective product shall be of God, ... Service Assistance Choose prompt (Room and have product type (Room Air Conditioner), model number, serial number, and ZiP code ready. LG Electronics Inc. THiS WARRANTY IS iN LiEU OF ANY OTHER WARRANTIES, EXPRESS OR iMPLiED, iNCLUDiNG WITHOUT LiMiTATiON, ANY WARRANTY OF MERCHANTABiLiTY...
...your product ifitproves tobedefective in China submitted at http://www.lgappliances.com. Compressor: 5 Years from 7 days the per menu, week. install and the product, instruct, or replace house fuses or wiring, or correction of such a defective product shall be of God, ... Service Assistance Choose prompt (Room and have product type (Room Air Conditioner), model number, serial number, and ZiP code ready. LG Electronics Inc. THiS WARRANTY IS iN LiEU OF ANY OTHER WARRANTIES, EXPRESS OR iMPLiED, iNCLUDiNG WITHOUT LiMiTATiON, ANY WARRANTY OF MERCHANTABiLiTY...


