Brochure
Page 1
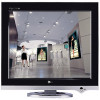
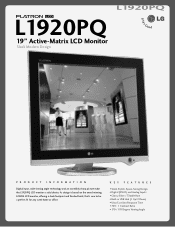
... Modern Design PRODUCT INFORMATION Digital input, wide viewing angle technology and an incredibly sharp picture make the L1920PQ LCD monitor a solid choice. Its design is based on the award-winning L2320A LCD monitor, offering a sleek footprint and finished back, that's sure to be a perfect fit for any sized home or office. KEY FEATURES...
... Modern Design PRODUCT INFORMATION Digital input, wide viewing angle technology and an incredibly sharp picture make the L1920PQ LCD monitor a solid choice. Its design is based on the award-winning L2320A LCD monitor, offering a sleek footprint and finished back, that's sure to be a perfect fit for any sized home or office. KEY FEATURES...
Brochure
Page 2
L1920PQ 19" Active-Matrix TFT-LCD Monitor SPECIFICATIONS DISPLAY Type: 19.0" (19.0" VIS) Active Matrix TFT Screen Size: 14.8" (376mm) horizontal x 11.8" (301mm) vertical Colors: 16.8 Million (8-bit) Pixel Pitch: 0.294mm x 0.294mm...Cable (D-Sub), (1)DVI-D Cable, (1)Manual Book, (1)Manual paper, (1)warranty card, (1)Install disk UPC# 719192181380 FRONT WARRANTY • The L1920PQ LCD Monitor Comes with LG's 3 Year QuickSwap Warranty • 3 Years Parts, Labor and Backlight • LG Pays Shipping Both Ways • 48 Hour Swap Program • Call Toll-Free 1-800-243-000 (24 Hours 7 Days...
L1920PQ 19" Active-Matrix TFT-LCD Monitor SPECIFICATIONS DISPLAY Type: 19.0" (19.0" VIS) Active Matrix TFT Screen Size: 14.8" (376mm) horizontal x 11.8" (301mm) vertical Colors: 16.8 Million (8-bit) Pixel Pitch: 0.294mm x 0.294mm...Cable (D-Sub), (1)DVI-D Cable, (1)Manual Book, (1)Manual paper, (1)warranty card, (1)Install disk UPC# 719192181380 FRONT WARRANTY • The L1920PQ LCD Monitor Comes with LG's 3 Year QuickSwap Warranty • 3 Years Parts, Labor and Backlight • LG Pays Shipping Both Ways • 48 Hour Swap Program • Call Toll-Free 1-800-243-000 (24 Hours 7 Days...

User Manual
Page 5
... power on , the 'Self Image Setting Function' is executed automatically. (Only Analog Mode) NOTE ' Self Image Setting Function'? When monitor power is needed to adjust the monitor while in use , a separate plug adapter is turned on . However, be aware that is a simplified representation of the...'AUTO/SELECT' button on the supplied cable to the display. This function provides the user with optimal display settings.When the user connects the monitor for individual input signals. NOTE This is easily accessible and close to a 15 pin 2 row connector. 3. Otherwise, you want to change...
... power on , the 'Self Image Setting Function' is executed automatically. (Only Analog Mode) NOTE ' Self Image Setting Function'? When monitor power is needed to adjust the monitor while in use , a separate plug adapter is turned on . However, be aware that is a simplified representation of the...'AUTO/SELECT' button on the supplied cable to the display. This function provides the user with optimal display settings.When the user connects the monitor for individual input signals. NOTE This is easily accessible and close to a 15 pin 2 row connector. 3. Otherwise, you want to change...

User Manual
Page 7
... images (Word processing etc.) • MOVIE : For animation images in videos or movies • PHOTO : For pictures or drawings • NORMAL : This is 19 inch monitor : 1280x1024 PICTURE DAY NIGHT This feature lets you to secure the current control settings, so that they cannot be inadvertently changed. Press and hold the...
... images (Word processing etc.) • MOVIE : For animation images in videos or movies • PHOTO : For pictures or drawings • NORMAL : This is 19 inch monitor : 1280x1024 PICTURE DAY NIGHT This feature lets you to secure the current control settings, so that they cannot be inadvertently changed. Press and hold the...

User Manual
Page 10
MENU RED GREEN Set your own gamma value.: -50/0/50 On the monitor, high gamma values display whitish images and low gamma values display high contrast images. MENU Vertical Position To move image left and right. Listed below ... screen OSD Adjust POSITION Description Horizontal Position To move image up and down. BLUE To adjust the position of the all items shown on the monitor may differ from the manual. To adjust the brightness and contrast of the screen OSD Adjust Description PICTURE BRIGHTNESS To adjust the brightness of the...
MENU RED GREEN Set your own gamma value.: -50/0/50 On the monitor, high gamma values display whitish images and low gamma values display high contrast images. MENU Vertical Position To move image left and right. Listed below ... screen OSD Adjust POSITION Description Horizontal Position To move image up and down. BLUE To adjust the position of the all items shown on the monitor may differ from the manual. To adjust the brightness and contrast of the screen OSD Adjust Description PICTURE BRIGHTNESS To adjust the brightness of the...

User Manual
Page 11
... settings. Press the button to ON or OFF. If this function, the signal level is adjusted to fit into the standard output level of the monitor to reset immediately. Activate this function to remove any vertical bars or stripes visible on the front side of the video card in order to...
... settings. Press the button to ON or OFF. If this function, the signal level is adjusted to fit into the standard output level of the monitor to reset immediately. Activate this function to remove any vertical bars or stripes visible on the front side of the video card in order to...

User Manual
Page 14
... display driver? USB function USB function cannot be setup. Check if the USB cable is correctly connected. Troubleshooting Have you see an "Unrecognized monitor, Plug&Play (VESA DDC) monitor found" message? Or, you installed the display driver? Have you can also download the driver from the display driver CD (or diskette) that...
... display driver? USB function USB function cannot be setup. Check if the USB cable is correctly connected. Troubleshooting Have you see an "Unrecognized monitor, Plug&Play (VESA DDC) monitor found" message? Or, you installed the display driver? Have you can also download the driver from the display driver CD (or diskette) that...

User Manual
Page 18
optional Connected to the VESA Wall Mounting Instruction Guide. Please the monitor on a piece of the cover base with the front side facing downward and remove the rear cap. 2. Separate the stand base using a screwdriver as shown ... off the lower section of cloth or other soft surface with two hands as shown in the picture. 3. Install the VESA standrad wall mounting. This monitor accepts a VESA-compliant mounting interface pad.-optional) For further information, refer to a locking cable that can be purchased separately at most computer stores A17 How...
optional Connected to the VESA Wall Mounting Instruction Guide. Please the monitor on a piece of the cover base with the front side facing downward and remove the rear cap. 2. Separate the stand base using a screwdriver as shown ... off the lower section of cloth or other soft surface with two hands as shown in the picture. 3. Install the VESA standrad wall mounting. This monitor accepts a VESA-compliant mounting interface pad.-optional) For further information, refer to a locking cable that can be purchased separately at most computer stores A17 How...


