
User Guide
Page 1
All rights reserved. Actual color of AT&T Intellectual Property and/or AT&T affiliated companies. © 2009 AT&T Intellectual Property. AT&T marks contained herein are trademarks of the phone may differ from your phone depending on the software of the phone or your service provider. User Guide Some of the contents in this manual may vary.
All rights reserved. Actual color of AT&T Intellectual Property and/or AT&T affiliated companies. © 2009 AT&T Intellectual Property. AT&T marks contained herein are trademarks of the phone may differ from your phone depending on the software of the phone or your service provider. User Guide Some of the contents in this manual may vary.

User Guide
Page 2
...for each location-based service to applications available outside of AT&T. In addition, your account. Your phone is designed to make it easy for you enable may involve the location of your phone being shared. AT&T provides tools for you decide how an application may use the location of your... phone and other phones on your AT&T phone may be available for certain devices which bypass AT&T controls. For applications ...
...for each location-based service to applications available outside of AT&T. In addition, your account. Your phone is designed to make it easy for you enable may involve the location of your phone being shared. AT&T provides tools for you decide how an application may use the location of your... phone and other phones on your AT&T phone may be available for certain devices which bypass AT&T controls. For applications ...
User Guide
Page 4
... the LG authorized service center nearest you back-up any units. Correspondence may also have added to : LG Electronics ... ADDRESS. Consumables (such as fuses). 3. LG INFOCOMM INC. WHAT LG WILL DO: LG will not re-install or back-up any...any such data or information prior to sending the unit to LG to state. 5. HOW TO GET WARRANTY SERVICE : To...800-448-4026 Or visit www.lgeservice.com. In addition, LG will , at its sole option, either repair, replace or...IS LIMITED TO THE DURATION OF THE EXPRESS WARRANTY HEREIN. LG may not apply to you have other express warranty is...
... the LG authorized service center nearest you back-up any units. Correspondence may also have added to : LG Electronics ... ADDRESS. Consumables (such as fuses). 3. LG INFOCOMM INC. WHAT LG WILL DO: LG will not re-install or back-up any...any such data or information prior to sending the unit to LG to state. 5. HOW TO GET WARRANTY SERVICE : To...800-448-4026 Or visit www.lgeservice.com. In addition, LG will , at its sole option, either repair, replace or...IS LIMITED TO THE DURATION OF THE EXPRESS WARRANTY HEREIN. LG may not apply to you have other express warranty is...

User Guide
Page 6
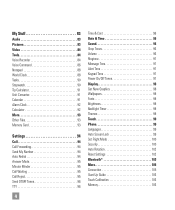
Table of Contents Your Phone 6 Phone Components 6 Rear View 7 Slide Open View 8 Getting Started 9 Installing the SIM Card and Battery 9 Installing a Memory Card 11 Touch Calibration 14 Start Up Guide 15 ...
Table of Contents Your Phone 6 Phone Components 6 Rear View 7 Slide Open View 8 Getting Started 9 Installing the SIM Card and Battery 9 Installing a Memory Card 11 Touch Calibration 14 Start Up Guide 15 ...
User Guide
Page 8
... 97 Display 98 Get New Graphics 98 Wallpapers 98 Fonts 98 Brightness 98 Backlight Timer 98 Themes 98 Touch 99 Phone 99 Languages 99 Auto Screen Lock 99 Set Flight Mode 100 Security 100 Auto Rotation 102 Reset Settings 102 Bluetooth 103 More 105 Connection 105 Start Up Guide 106 Touch Calibration 106...
... 97 Display 98 Get New Graphics 98 Wallpapers 98 Fonts 98 Brightness 98 Backlight Timer 98 Themes 98 Touch 99 Phone 99 Languages 99 Auto Screen Lock 99 Set Flight Mode 100 Security 100 Auto Rotation 102 Reset Settings 102 Bluetooth 103 More 105 Connection 105 Start Up Guide 106 Touch Calibration 106...
User Guide
Page 9
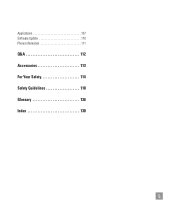
Applications 107 Software Update 110 Phone Information 111 Q&A 112 Accessories 113 For Your Safety 114 Safety Guidelines 118 Glossary 136 Index 138 5
Applications 107 Software Update 110 Phone Information 111 Q&A 112 Accessories 113 For Your Safety 114 Safety Guidelines 118 Glossary 136 Index 138 5
User Guide
Page 10
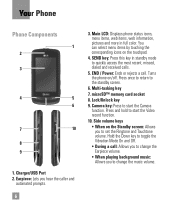
... pictures and more in standby mode to the standby screen. 6. Press and hold to start the Video record function. 10. Turns the phone on the touchpad. 4. Camera key: Press to start the Camera function. You can select menu items by touching the corresponding icons on... /off. microSD™ memory card socket 8. Press once to return to quickly access the most recent, missed, dialed and received calls. 5. Multi-tasking key 7. Your Phone Phone Components 1 2 3 4 5 6 7 10 8 9 1. SEND key: Press this key in full color. Earpiece: Lets you to change the music volume. END / ...
... pictures and more in standby mode to the standby screen. 6. Press and hold to start the Video record function. 10. Turns the phone on the touchpad. 4. Camera key: Press to start the Camera function. You can select menu items by touching the corresponding icons on... /off. microSD™ memory card socket 8. Press once to return to quickly access the most recent, missed, dialed and received calls. 5. Multi-tasking key 7. Your Phone Phone Components 1 2 3 4 5 6 7 10 8 9 1. SEND key: Press this key in full color. Earpiece: Lets you to change the music volume. END / ...

User Guide
Page 12
Fn Press to input ".com". Press to input symbols and numbers on Qwerty key pad. 8 Del Deletes digits and letters. Sym Press to create a space between Upper Case and Lower Case. Left Space Press to open the menu with Symbol entry options. Press to the next row. Right Up Down Press to move to input "@". Your Phone Slide Open View Text Msg Mobile Email IM Contact list Caps Press to change between words.
Fn Press to input ".com". Press to input symbols and numbers on Qwerty key pad. 8 Del Deletes digits and letters. Sym Press to create a space between Upper Case and Lower Case. Left Space Press to open the menu with Symbol entry options. Press to the next row. Right Up Down Press to move to input "@". Your Phone Slide Open View Text Msg Mobile Email IM Contact list Caps Press to change between words.

User Guide
Page 13
n Warning Do not remove the battery when the phone is switched on the notch at the bottom of the battery and using your fingernail, lift the battery from the battery compartment. The battery cover should slide and lift off easily. 2. Remove the battery cover Press down on , as this may damage the phone. 9 Getting Started Installing the SIM Card and Battery 1. Remove the battery Hold the top edge of the phone and slide the cover.
n Warning Do not remove the battery when the phone is switched on the notch at the bottom of the battery and using your fingernail, lift the battery from the battery compartment. The battery cover should slide and lift off easily. 2. Remove the battery cover Press down on , as this may damage the phone. 9 Getting Started Installing the SIM Card and Battery 1. Remove the battery Hold the top edge of the phone and slide the cover.
User Guide
Page 14
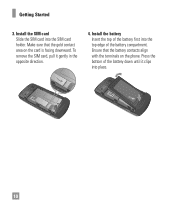
Make sure that the battery contacts align with the terminals on the card is facing downward. Install the battery Insert the top of the battery first into the top edge of the battery down until it gently in the opposite direction. 4. Getting Started 3. Install the SIM card Slide the SIM card into place. 10 Ensure that the gold contact area on the phone. Press the bottom of the battery compartment. To remove the SIM card, pull it clips into the SIM card holder.
Make sure that the battery contacts align with the terminals on the card is facing downward. Install the battery Insert the top of the battery first into the top edge of the battery down until it gently in the opposite direction. 4. Getting Started 3. Install the SIM card Slide the SIM card into place. 10 Ensure that the gold contact area on the phone. Press the bottom of the battery compartment. To remove the SIM card, pull it clips into the SIM card holder.
User Guide
Page 15
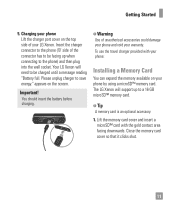
...Started 5. Your LG Xenon will support up when connecting to the phone) and then plug into the wall socket. You should insert the battery before charging. Charging your phone Lift the charger port cover on the top side of the connector has to the phone ('B' side of your phone: Installing a ...Memory Card You can expand the memory available on the screen. Please unplug charger to a 16 GB microSD™ memory card. Lift the memory card cover and insert a microSD™ card with your LG Xenon. Insert the charger...
...Started 5. Your LG Xenon will support up when connecting to the phone) and then plug into the wall socket. You should insert the battery before charging. Charging your phone Lift the charger port cover on the top side of the connector has to the phone ('B' side of your phone: Installing a ...Memory Card You can expand the memory available on the screen. Please unplug charger to a 16 GB microSD™ memory card. Lift the memory card cover and insert a microSD™ card with your LG Xenon. Insert the charger...
User Guide
Page 17
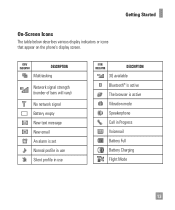
Getting Started On-Screen Icons The table below describes various display indicators or icons that appear on the phone's display screen. ICON/ INDICATOR DESCRIPTION Multitasking Network signal strength (number of bars will vary) No network signal Battery empty New text message New email An alarm is set Normal profile in use Silent profile in use ICON/ INDICATOR DESCRIPTION 3G available Bluetooth® is active The browser is active Vibration mode Speakerphone Call in Progress Voicemail Battery Full Battery Charging Flight Mode 13
Getting Started On-Screen Icons The table below describes various display indicators or icons that appear on the phone's display screen. ICON/ INDICATOR DESCRIPTION Multitasking Network signal strength (number of bars will vary) No network signal Battery empty New text message New email An alarm is set Normal profile in use Silent profile in use ICON/ INDICATOR DESCRIPTION 3G available Bluetooth® is active The browser is active Vibration mode Speakerphone Call in Progress Voicemail Battery Full Battery Charging Flight Mode 13

User Guide
Page 19
Start Up Guide After you install SIM card and battery, and turn on the LG Xenon, you will see Start Up Guide on the screen. ] How to Unlock Your Phone ] How to Open Menu and Select Item ] How to Scroll ] How to Navigate Between Items ] How to Rotate Screen Orientation ] How to Open Keypad and Enter Text ] How to Change Home Screen ] How to Add Shortcuts on Home Screen ] How to Add Contacts on to the next Guide. Available Guides include: 15 Or, touch to move on Home Screen Touch Start to play the animated Guide for that subject. Touch to begin the Start Up Guide feature.
Start Up Guide After you install SIM card and battery, and turn on the LG Xenon, you will see Start Up Guide on the screen. ] How to Unlock Your Phone ] How to Open Menu and Select Item ] How to Scroll ] How to Navigate Between Items ] How to Rotate Screen Orientation ] How to Open Keypad and Enter Text ] How to Change Home Screen ] How to Add Shortcuts on Home Screen ] How to Add Contacts on to the next Guide. Available Guides include: 15 Or, touch to move on Home Screen Touch Start to play the animated Guide for that subject. Touch to begin the Start Up Guide feature.
User Guide
Page 20
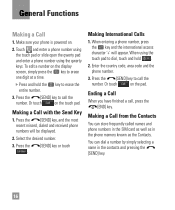
.... 3. General Functions Making a Call 1. When using the qwerty keys. Press the [SEND] key to erase the entire number. 3. When entering a phone number, press the key and the international access character '+' will be displayed. 2. Or touch on . 2. Select the desired number. 3. Press the . [SEND... digit at a time. ] Press and hold . 2. Making a Call from the Contacts You can dial a number by simply selecting a name in the phone memory known as the Contacts. To edit a number on the touch pad. Press the [SEND] key, and the most recent missed, dialed and received...
.... 3. General Functions Making a Call 1. When using the qwerty keys. Press the [SEND] key to erase the entire number. 3. When entering a phone number, press the key and the international access character '+' will be displayed. 2. Or touch on . 2. Select the desired number. 3. Press the . [SEND... digit at a time. ] Press and hold . 2. Making a Call from the Contacts You can dial a number by simply selecting a name in the phone memory known as the Contacts. To edit a number on the touch pad. Press the [SEND] key, and the most recent missed, dialed and received...
User Guide
Page 21
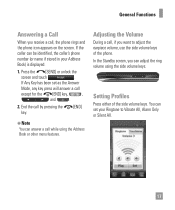
... All. 17 If Any Key has been set your Address Book) is displayed. 1. Setting Profiles Press either of the phone. You can be identified, the caller's phone number (or name if stored in your Ringtone to adjust the earpiece volume, use the side volume keys of the side volume... You can adjust the ring volume using the Address Book or other menu features. In the Standby screen, you can answer a call , the phone rings and the phone icon appears on the screen. Adjusting the Volume During a call, if you receive a call while using the side volume keys. End the call ...
... All. 17 If Any Key has been set your Address Book) is displayed. 1. Setting Profiles Press either of the phone. You can be identified, the caller's phone number (or name if stored in your Ringtone to adjust the earpiece volume, use the side volume keys of the side volume... You can adjust the ring volume using the Address Book or other menu features. In the Standby screen, you can answer a call , the phone rings and the phone icon appears on the screen. Adjusting the Volume During a call, if you receive a call while using the side volume keys. End the call ...
User Guide
Page 23
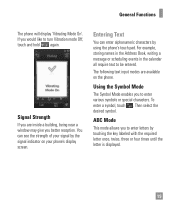
... to turn Vibration mode Off, touch and hold again. To enter a symbol, touch . You can enter alphanumeric characters by the signal indicator on the phone. The following text input modes are inside a building, being near a window may give you to enter various symbols or special characters. Using the Symbol... Mode The Symbol Mode enables you would like to be entered. Signal Strength If you are available on your phone's display screen. ABC Mode This mode allows you better reception. Entering Text You can see the strength of your signal by using the...
... to turn Vibration mode Off, touch and hold again. To enter a symbol, touch . You can enter alphanumeric characters by the signal indicator on the phone. The following text input modes are inside a building, being near a window may give you to enter various symbols or special characters. Using the Symbol... Mode The Symbol Mode enables you would like to be entered. Signal Strength If you are available on your phone's display screen. ABC Mode This mode allows you better reception. Entering Text You can see the strength of your signal by using the...
User Guide
Page 24
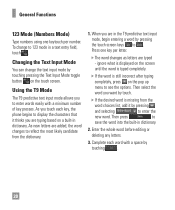
... word. As you want by touch. ] If the desired word is still incorrect after typing completely, press on the touch screen. Complete each key, the phone begins to save the word into the built-in dictionary. As new letters are typing based on a built-in dictionary. 2. Press one keytouch per letter...
... word. As you want by touch. ] If the desired word is still incorrect after typing completely, press on the touch screen. Complete each key, the phone begins to save the word into the built-in dictionary. As new letters are typing based on a built-in dictionary. 2. Press one keytouch per letter...

User Guide
Page 26
... Text Entry Settings by first pressing and then the number you require. To return to the appropriate text entry mode. The default setting on the phone is a feature that allows the user to add any unique or personal words to the T9 standard language database. General Functions Using the 123 (Numbers...
... Text Entry Settings by first pressing and then the number you require. To return to the appropriate text entry mode. The default setting on the phone is a feature that allows the user to add any unique or personal words to the T9 standard language database. General Functions Using the 123 (Numbers...
User Guide
Page 29
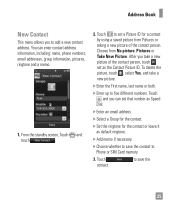
...] Select a Group for the contact. ] Set the ringtone for the contact or leave it as the Contact Picture ID. to save the contact to Phone or SIM Card memory. 3. From the standby screen, Touch and touch . 2. To delete the picture, touch , select Yes, and take a new...First name, last name or both. ] Enter up to add a new contact address. Touch and you can enter contact address information, including: name, phone numbers, email addresses, group information, pictures, ringtone and a memo. 1. Address Book New Contact This menu allows you to five different numbers. Touch to...
...] Select a Group for the contact. ] Set the ringtone for the contact or leave it as the Contact Picture ID. to save the contact to Phone or SIM Card memory. 3. From the standby screen, Touch and touch . 2. To delete the picture, touch , select Yes, and take a new...First name, last name or both. ] Enter up to add a new contact address. Touch and you can enter contact address information, including: name, phone numbers, email addresses, group information, pictures, ringtone and a memo. 1. Address Book New Contact This menu allows you to five different numbers. Touch to...
User Guide
Page 31
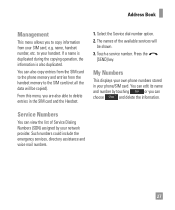
...during the copying operation, the information is also duplicated. Touch a service number. You can also copy entries from the SIM card to the phone memory and entries from your network provider. Address Book Management This menu allows you to copy information from the handset memory to the SIM ...will be copied). You can edit its name and number by your SIM card, e.g. Press the [SEND] key. My Numbers This displays your own phone numbers stored in the SIM card and the Handset. 1. Service Numbers You can choose and delete the information. name, handset number, etc. to ...
...during the copying operation, the information is also duplicated. Touch a service number. You can also copy entries from the SIM card to the phone memory and entries from your network provider. Address Book Management This menu allows you to copy information from the handset memory to the SIM ...will be copied). You can edit its name and number by your SIM card, e.g. Press the [SEND] key. My Numbers This displays your own phone numbers stored in the SIM card and the Handset. 1. Service Numbers You can choose and delete the information. name, handset number, etc. to ...


