KM-NET ADMIN Operation Guide for Ver 2.0
Page 50
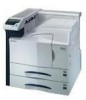
... Devices with hard disks. Hard Disk Devices with support for duplex printing. Event Log Click View to open the polling options. Troubleshooting When an error occurs in a printing device, the Troubleshooting tab displays the error and helps you manage a printing device by setting the polling schedule and configuring SNMP traps. You can...
... Devices with hard disks. Hard Disk Devices with support for duplex printing. Event Log Click View to open the polling options. Troubleshooting When an error occurs in a printing device, the Troubleshooting tab displays the error and helps you manage a printing device by setting the polling schedule and configuring SNMP traps. You can...
KM-NET Viewer Operation Guide Rev-5.2-2010.10
Page 21
..., Host name, Location, and Description of the currently selected device. Media Input This area shows the trays and cassettes that are currently occurring, and any troubleshooting measures that are currently installed, their capacity, and roughly how much paper they currently contain. Capabilities This area shows some of the key specifications of...
..., Host name, Location, and Description of the currently selected device. Media Input This area shows the trays and cassettes that are currently occurring, and any troubleshooting measures that are currently installed, their capacity, and roughly how much paper they currently contain. Capabilities This area shows some of the key specifications of...
Kyocera Command Center Operation Guide Rev 6.3
Page 4
...Summary/Secure Protocol Quick Summary 3-35 Advanced > Protocols > TCP/IP > General 3-35 Advanced > Protocols > TCP/IP > IP Filters 3-37 Advanced > Protocols > TCP/IP > Logical Printers 3-38 Advanced > Protocols > NetWare 3-39 Advanced > Protocols > IPP 3-40 Advanced > Protocols > ThinPrint 3-40 Advanced > Protocols > AppleTalk 3-40 Advanced > Protocols > NetBEUI 3-41 Advanced... 3-51 Advanced > Security > IEEE802.1x 3-51 Advanced > Security > IPSec > General 3-52 Advanced > Security > IPSec > Rule1 (to Rule3 3-53 Chapter 4 Troubleshooting Troubleshooting ...4-1 ii User Guide
...Summary/Secure Protocol Quick Summary 3-35 Advanced > Protocols > TCP/IP > General 3-35 Advanced > Protocols > TCP/IP > IP Filters 3-37 Advanced > Protocols > TCP/IP > Logical Printers 3-38 Advanced > Protocols > NetWare 3-39 Advanced > Protocols > IPP 3-40 Advanced > Protocols > ThinPrint 3-40 Advanced > Protocols > AppleTalk 3-40 Advanced > Protocols > NetBEUI 3-41 Advanced... 3-51 Advanced > Security > IEEE802.1x 3-51 Advanced > Security > IPSec > General 3-52 Advanced > Security > IPSec > Rule1 (to Rule3 3-53 Chapter 4 Troubleshooting Troubleshooting ...4-1 ii User Guide
Kyocera Command Center Operation Guide Rev 6.3
Page 62
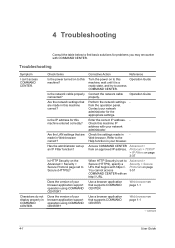
...COMMAND CENTER. Check Items Is the power turned on to access COMMAND CENTER. Check the settings made in Web browser correct? 4 Troubleshooting Consult the table below to find basic solutions for problems you may encounter with an http:// URL. Has the administrator set to ...Secure (HTTPS)? Operation Guide Connect the network cable properly. You cannot access COMMAND CENTER with COMMAND CENTER. Troubleshooting Symptom I can't access COMMAND CENTER. Does the version of your browser. Check this machine IP address with https://. Are the ...
...COMMAND CENTER. Check Items Is the power turned on to access COMMAND CENTER. Check the settings made in Web browser correct? 4 Troubleshooting Consult the table below to find basic solutions for problems you may encounter with an http:// URL. Has the administrator set to ...Secure (HTTPS)? Operation Guide Connect the network cable properly. You cannot access COMMAND CENTER with COMMAND CENTER. Troubleshooting Symptom I can't access COMMAND CENTER. Does the version of your browser. Check this machine IP address with https://. Are the ...
Kyocera Command Center Operation Guide Rev 6.3
Page 63
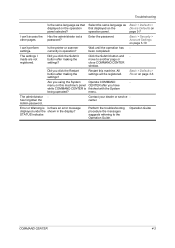
... machine's panel CENTER after you using the System Operate COMMAND - Perform the troubleshooting procedure the messages suggests referring to another page or close COMMAND CENTER window. Is the printer or scanner currently in the display? Did you click the Restart button after .... Basic > Security > Account Settings on panel selected? password? Enter the password. Wait until the operation has been completed. menu. Troubleshooting Is the same language as that Select the same language as Basic > Defaults > displayed on the operation that displayed on the Device Defaults...
... machine's panel CENTER after you using the System Operate COMMAND - Perform the troubleshooting procedure the messages suggests referring to another page or close COMMAND CENTER window. Is the printer or scanner currently in the display? Did you click the Restart button after .... Basic > Security > Account Settings on panel selected? password? Enter the password. Wait until the operation has been completed. menu. Troubleshooting Is the same language as that Select the same language as Basic > Defaults > displayed on the operation that displayed on the Device Defaults...
PRESCRIBE Commands Technical Reference Manual - Rev. 4.7
Page 155
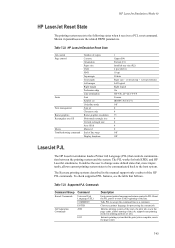
...Courier IBM PC-8 (U6/U7) Off 0 0 75 0 0 0 0 Off Off LaserJet PJL The HP LaserJet emulation loads a Printer Job Language (PJL) that follows. The Kyocera printing systems described in parentheses are the related FRPO parameters. Reset the PJL parser to PJL. To check supported PJL features, see...and the system. HP LaserJet Emulation Reset State Job control Page control Fonts Font management Raster graphics Rectangular area fill Macro Troubleshooting command Number of copies Cassette Orientation Paper size VMI HMI Top margin Text length Left margin Right margin Perforation skip Line ...
...Courier IBM PC-8 (U6/U7) Off 0 0 75 0 0 0 0 Off Off LaserJet PJL The HP LaserJet emulation loads a Printer Job Language (PJL) that follows. The Kyocera printing systems described in parentheses are the related FRPO parameters. Reset the PJL parser to PJL. To check supported PJL features, see...and the system. HP LaserJet Emulation Reset State Job control Page control Fonts Font management Raster graphics Rectangular area fill Macro Troubleshooting command Number of copies Cassette Orientation Paper size VMI HMI Top margin Text length Left margin Right margin Perforation skip Line ...
KM-NET for Accounting Operation Guide Rev-1.4
Page 4
... Counter Menu 24 4.7. Help Menu ...26 5. Table of Contents 1. Basic Flow ...4 2.2. Assigning the Account ID 7 2.6. Enabling the Accounting Function 8 2.7. Troubleshooting 27 2 KM-NET for Accounting 5 2.3. Accounting System Configuration 4 2.1. Account Menu 23 4.6. Account View 11 4. Edit Menu ...19 4.3. Menu 14 4.1. ... the KM-NET for Accounting 3 1.2. What is KM-NET for Accounting 3 1.1. Configuring the Kyocera Extended Driver 8 3. Registering the Printing System 6 2.5. Printing System View 10 3.2. What is KM-NET for Accounting 5 2.4.
... Counter Menu 24 4.7. Help Menu ...26 5. Table of Contents 1. Basic Flow ...4 2.2. Assigning the Account ID 7 2.6. Enabling the Accounting Function 8 2.7. Troubleshooting 27 2 KM-NET for Accounting 5 2.3. Accounting System Configuration 4 2.1. Account Menu 23 4.6. Account View 11 4. Edit Menu ...19 4.3. Menu 14 4.1. ... the KM-NET for Accounting 3 1.2. What is KM-NET for Accounting 3 1.1. Configuring the Kyocera Extended Driver 8 3. Registering the Printing System 6 2.5. Printing System View 10 3.2. What is KM-NET for Accounting 5 2.4.

KM-NET for Accounting Operation Guide Rev-1.4
Page 29
... printing system has been removed from detecting the printing systems. Try to the network. The printing system has been Turn the printing system on . network. Troubleshooting If trouble occurs when using Network Tool for the printing system again after the printing turned off . Your PC does not meet the system requirements...
... printing system has been removed from detecting the printing systems. Try to the network. The printing system has been Turn the printing system on . network. Troubleshooting If trouble occurs when using Network Tool for the printing system again after the printing turned off . Your PC does not meet the system requirements...
KM-NET for Clients Operation Guide Rev-3.7
Page 3
...5.11. Edit Address Dialog Box 35 6.4. Adding Members 42 7. What is Job Viewer 46 8.2. Support Language 2 2. Status Tab...16 5.3. Printer Tab ...19 5.7. Job Manager ...44 7.1. Document Box Window 50 10.2. Features ...1 1.1. Address Book Window 32 6.2. Edit Group Dialog Box ... 14 5. Accessing the Properties Dialog Box 15 5.2. Using the Job Viewer 46 9. Creating or Deleting a Document Box 53 10.3. Troubleshooting 56 Resources Tab 27 5.12. Search and Filtering Functions 34 6.3. Main Screen ...4 3.1. Settings ...8 4. Scan Tab...21 5.9. Editing...
...5.11. Edit Address Dialog Box 35 6.4. Adding Members 42 7. What is Job Viewer 46 8.2. Support Language 2 2. Status Tab...16 5.3. Printer Tab ...19 5.7. Job Manager ...44 7.1. Document Box Window 50 10.2. Features ...1 1.1. Address Book Window 32 6.2. Edit Group Dialog Box ... 14 5. Accessing the Properties Dialog Box 15 5.2. Using the Job Viewer 46 9. Creating or Deleting a Document Box 53 10.3. Troubleshooting 56 Resources Tab 27 5.12. Search and Filtering Functions 34 6.3. Main Screen ...4 3.1. Settings ...8 4. Scan Tab...21 5.9. Editing...
KM-NET for Clients Operation Guide Rev-3.7
Page 60
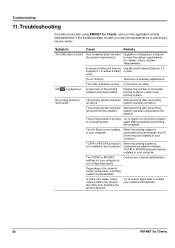
... this utility from the network. The printing system has been Start searching after processing and printing are complete. again after the printing turned off. Troubleshooting 11.Troubleshooting If trouble occurs with using KM-NET for the printing system or processing data. The printing system is already running. If the trouble persists, contact...
... this utility from the network. The printing system has been Start searching after processing and printing are complete. again after the printing turned off. Troubleshooting 11.Troubleshooting If trouble occurs with using KM-NET for the printing system or processing data. The printing system is already running. If the trouble persists, contact...
KM-NET for Clients Operation Guide Rev-3.7
Page 61
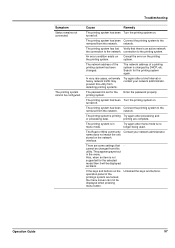
... pressing menu button. The printing system is set for the printing system. The Read or Write community name does not match the one stored on . Troubleshooting Symptom Status remains not connected. The printing system has been Connect the printing system to the printing system. The printing system has lost Verify that...
... pressing menu button. The printing system is set for the printing system. The Read or Write community name does not match the one stored on . Troubleshooting Symptom Status remains not connected. The printing system has been Connect the printing system to the printing system. The printing system has lost Verify that...
IC Link User's Manual ver. 2.8
Page 28
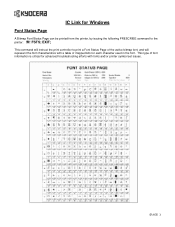
This type of mapped bits for each character used in the font. EXIT; FSTS; IC Link for advanced troubleshooting efforts with a table of font information is critical for Windows Font Status Page A Bitmap Font Status Page can be printed from the printer, by issuing the following PRESCRIBE command to print a Font Status Page of the active bitmap font, and will represent the font characteristics with fonts and/or printer symbol set issues. {PAGE } This command will instruct the print controller to the printer: !R!
This type of mapped bits for each character used in the font. EXIT; FSTS; IC Link for advanced troubleshooting efforts with a table of font information is critical for Windows Font Status Page A Bitmap Font Status Page can be printed from the printer, by issuing the following PRESCRIBE command to print a Font Status Page of the active bitmap font, and will represent the font characteristics with fonts and/or printer symbol set issues. {PAGE } This command will instruct the print controller to the printer: !R!

IB-23 User's Manual in PDF Format
Page 3
IB-23 Configuration Guide IB-23 User's Manual GETTING STARTED Preface Product Specifications INSTALLATION IB-23 Network Card IP Address Configuration Utilities Printer Drivers PRINTING SETUP Windows - NetBEUI Windows Printing via E-mail NetWare Macintosh Unix MANAGEMENT Security Using a Web Browser E-mail Reports via SMTP SNMP Configuration Using ftp Troubleshooting About 1/1 ページ file://F:\USERMAN\EXPORT\Option\IB-23\P6 English\contents.htm 2006/05/26 TCP/IP Windows -
IB-23 Configuration Guide IB-23 User's Manual GETTING STARTED Preface Product Specifications INSTALLATION IB-23 Network Card IP Address Configuration Utilities Printer Drivers PRINTING SETUP Windows - NetBEUI Windows Printing via E-mail NetWare Macintosh Unix MANAGEMENT Security Using a Web Browser E-mail Reports via SMTP SNMP Configuration Using ftp Troubleshooting About 1/1 ページ file://F:\USERMAN\EXPORT\Option\IB-23\P6 English\contents.htm 2006/05/26 TCP/IP Windows -

IB-23 User's Manual in PDF Format
Page 67
... the address bar, enter the IP address assigned to manage the IB-23 using a web browser. 1.COMMAND CENTER Overview 2.Start Page 3.Basic Page 4.Printer Page 5.Advanced Page 6.Troubleshooting 1. Note: Confirm the following web browsers have been verified for managing the IB-23 from the navigation bar on the Basic Page of the...
... the address bar, enter the IP address assigned to manage the IB-23 using a web browser. 1.COMMAND CENTER Overview 2.Start Page 3.Basic Page 4.Printer Page 5.Advanced Page 6.Troubleshooting 1. Note: Confirm the following web browsers have been verified for managing the IB-23 from the navigation bar on the Basic Page of the...
IB-23 User's Manual in PDF Format
Page 84
... 31 single-byte characters. Enter up to which the user belongs. Example: Sales-PRINTER E-mail Address Enter the e-mail address. Title 2: Supplies; Sets the URL. Issue Date Displays... the date that the IB-23 is applied. Example: Kyocera Mita Corporation Organization Unit Enter the unit within the organization to 15 single-byte ... address. Enter up to 31 single-byte characters. Enter up to 31 single-byte characters. Troubleshooting If problems occur when using the COMMAND CENTER, investigate the following items and take the appropriate ...
... 31 single-byte characters. Enter up to which the user belongs. Example: Sales-PRINTER E-mail Address Enter the e-mail address. Title 2: Supplies; Sets the URL. Issue Date Displays... the date that the IB-23 is applied. Example: Kyocera Mita Corporation Organization Unit Enter the unit within the organization to 15 single-byte ... address. Enter up to 31 single-byte characters. Enter up to 31 single-byte characters. Troubleshooting If problems occur when using the COMMAND CENTER, investigate the following items and take the appropriate ...
IB-23 User's Manual in PDF Format
Page 100
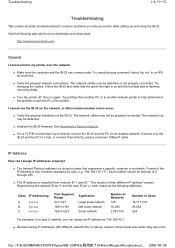
Troubleshooting 1/4 ページ Troubleshooting This section provides troubleshooting for more information and downloads. Try changing the cables. Try printing from another PC or to another network printer to help determine if the problem is compiled from 'network ID + user ID.' The ....kyoceramita.com/ General I assign IP addresses properly? „ The Internet Protocol address is flashing (receiving data). „ Turn the printer off, then on an isolated network. In an IPX environment. „ Verify the physical network connections. See Resetting to directly connect...
Troubleshooting 1/4 ページ Troubleshooting This section provides troubleshooting for more information and downloads. Try changing the cables. Try printing from another PC or to another network printer to help determine if the problem is compiled from 'network ID + user ID.' The ....kyoceramita.com/ General I assign IP addresses properly? „ The Internet Protocol address is flashing (receiving data). „ Turn the printer off, then on an isolated network. In an IPX environment. „ Verify the physical network connections. See Resetting to directly connect...
IB-23 User's Manual in PDF Format
Page 101
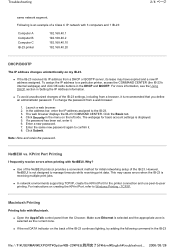
... supporting TCP/IP, create the KPrint Port for basic account settings is displayed. 5. Enter a new password. 7. Enter the same new password again to a particular printer, access the COMMAND CENTER (the IB-23's internal webpage) and click Off-radio buttons in Setting the IP Address Information. „ To avoid unauthorized changes... in the menu on the back of the IB-23. Click Security in the IB-23 file://F:\USERMAN\EXPORT\Option\IB-23\P6 English\troubleshoot.... 2006/05/26 Troubleshooting same network segment. Following is recommended that you define an administrator password.
... supporting TCP/IP, create the KPrint Port for basic account settings is displayed. 5. Enter a new password. 7. Enter the same new password again to a particular printer, access the COMMAND CENTER (the IB-23's internal webpage) and click Off-radio buttons in Setting the IP Address Information. „ To avoid unauthorized changes... in the menu on the back of the IB-23. Click Security in the IB-23 file://F:\USERMAN\EXPORT\Option\IB-23\P6 English\troubleshoot.... 2006/05/26 Troubleshooting same network segment. Following is recommended that you define an administrator password.
IB-23 User's Manual in PDF Format
Page 102
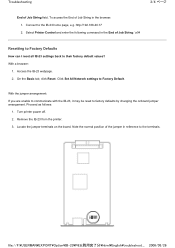
On the Basic tab, click Reset. Turn printer power off. 2. file://F:\USERMAN\EXPORT\Option\IB-23\P6 English\troubleshoot.... 2006/05/26 With a browser: 1. Click Set All Network settings to the terminals. Proceed as follows: 1. Locate the jumper terminals on the... IB-23, it may be reset to their factory default values? Remove the IB-23 from the printer. 3. Access the IB-23 webpage. 2. Select Printer Control and enter the following command in the browser: 1. Troubleshooting 3/4 ページ End of Job String: \x04 Resetting to Factory Defaults How can I ...
On the Basic tab, click Reset. Turn printer power off. 2. file://F:\USERMAN\EXPORT\Option\IB-23\P6 English\troubleshoot.... 2006/05/26 With a browser: 1. Click Set All Network settings to the terminals. Proceed as follows: 1. Locate the jumper terminals on the... IB-23, it may be reset to their factory default values? Remove the IB-23 from the printer. 3. Access the IB-23 webpage. 2. Select Printer Control and enter the following command in the browser: 1. Troubleshooting 3/4 ページ End of Job String: \x04 Resetting to Factory Defaults How can I ...
IB-23 User's Manual in PDF Format
Page 103
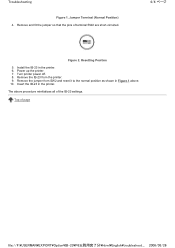
Resetting Position 5. Turn printer power off. 8. Troubleshooting Figure 1. Install the IB-23 in the printer. Remove the IB-23 from SW2 and reset it to the normal position as shown in Figure 1 above procedure reinitializes all of the IB-23 ... short-circuited. 4/4 ページ Figure 2. Remove and fit the jumper so that the pins of page file://F:\USERMAN\EXPORT\Option\IB-23\P6 English\troubleshoot.... 2006/05/26 Power up the printer. 7. Insert the IB-23 in the printer. 6. Jumper Terminal (Normal Position) 4. Remove the jumper from the...
Resetting Position 5. Turn printer power off. 8. Troubleshooting Figure 1. Install the IB-23 in the printer. Remove the IB-23 from SW2 and reset it to the normal position as shown in Figure 1 above procedure reinitializes all of the IB-23 ... short-circuited. 4/4 ページ Figure 2. Remove and fit the jumper so that the pins of page file://F:\USERMAN\EXPORT\Option\IB-23\P6 English\troubleshoot.... 2006/05/26 Power up the printer. 7. Insert the IB-23 in the printer. 6. Jumper Terminal (Normal Position) 4. Remove the jumper from the...
KX Driver Operation Guide Rev. 1.3.1
Page 10
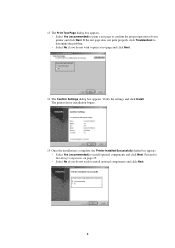
...if you do not wish to print a test page and click Next. 14 The Confirm Settings dialog box appears. The printer driver installation begins. 15 Once the installation is complete, the Printer Installed Successfully dialog box appears. • Select Yes (recommended) to confirm the proper operation of your... printer and click Next. Verify the settings and click Install. 13 The Print Test Page dialog box appears. • Select Yes (recommended) to print a test page to install optional components and click Next. If the test page does not print properly, click Troubleshoot to ...
...if you do not wish to print a test page and click Next. 14 The Confirm Settings dialog box appears. The printer driver installation begins. 15 Once the installation is complete, the Printer Installed Successfully dialog box appears. • Select Yes (recommended) to confirm the proper operation of your... printer and click Next. Verify the settings and click Install. 13 The Print Test Page dialog box appears. • Select Yes (recommended) to print a test page to install optional components and click Next. If the test page does not print properly, click Troubleshoot to ...