User Manual
Page 1
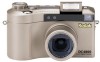
.... KODAK DC4800 Zoom Digital Camera User's Guide Congratulations on the World Wide Web at home using KODAK Inkjet Photo Paper, or take your KODAK Picture Card to a computer for instant editing, enhancement, m or placement into a document. Visit Kodak on your camera: Get the images you can do with your purchase of the new KODAK DC4800 Zoom Digital Camera-the camera that takes pictures digitally...
.... KODAK DC4800 Zoom Digital Camera User's Guide Congratulations on the World Wide Web at home using KODAK Inkjet Photo Paper, or take your KODAK Picture Card to a computer for instant editing, enhancement, m or placement into a document. Visit Kodak on your camera: Get the images you can do with your purchase of the new KODAK DC4800 Zoom Digital Camera-the camera that takes pictures digitally...
User Manual
Page 5
Setting Picture Sharpness 38 Adjusting the ISO Sensitivity 39 Setting the Shutter Speed 40 Placing the Date on Pictures 40 4 Reviewing Your Pictures 41 Viewing Pictures 42 Magnifying Pictures 43 Deleting Pictures 44 Protecting Pictures 45 Running a Slide Show 46 Selecting Pictures for Automatic Printing 47 Viewing Picture Information 49 5 Personalizing Your Camera 51 Selecting a Power Save Setting 52 Setting Digital Zoom Behavior 54 Adjusting the Camera Sounds 56 Setting Video Out 57 Selecting a Language 58 Formatting a Picture Card 59 iii
Setting Picture Sharpness 38 Adjusting the ISO Sensitivity 39 Setting the Shutter Speed 40 Placing the Date on Pictures 40 4 Reviewing Your Pictures 41 Viewing Pictures 42 Magnifying Pictures 43 Deleting Pictures 44 Protecting Pictures 45 Running a Slide Show 46 Selecting Pictures for Automatic Printing 47 Viewing Picture Information 49 5 Personalizing Your Camera 51 Selecting a Power Save Setting 52 Setting Digital Zoom Behavior 54 Adjusting the Camera Sounds 56 Setting Video Out 57 Selecting a Language 58 Formatting a Picture Card 59 iii

User Manual
Page 6
... 63 WINDOWS-Based System Requirements 64 MACINTOSH System Requirements 64 KODAK Software 65 Installing the Software 66 7 Transferring Pictures To Your Computer 67 Using a USB Cable Connection 68 Starting KODAK Digital Camera Software 69 WINDOWS-based computers 69 MACINTOSH computers 69 Locating ...Your Pictures on the Picture Card 70 Picture Naming Conventions 71 8 Tips and Troubleshooting 73 Connecting Your Camera 73 Adjusting Your Monitor for Better...
... 63 WINDOWS-Based System Requirements 64 MACINTOSH System Requirements 64 KODAK Software 65 Installing the Software 66 7 Transferring Pictures To Your Computer 67 Using a USB Cable Connection 68 Starting KODAK Digital Camera Software 69 WINDOWS-based computers 69 MACINTOSH computers 69 Locating ...Your Pictures on the Picture Card 70 Picture Naming Conventions 71 8 Tips and Troubleshooting 73 Connecting Your Camera 73 Adjusting Your Monitor for Better...
User Manual
Page 18
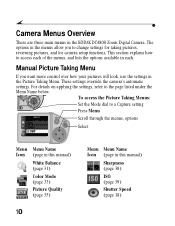
...(page 18) Manual Picture Taking Menu If you to the page listed under the Menu Name below. These settings override the camera's automatic settings. Camera Menus Overview There are three main menus in the Picture Taking Menu. For details on applying the settings, refer to change settings... for taking pictures, reviewing pictures, and for camera setup functions. The options in the menus allow you want more control over how your pictures will look, use the settings in the KODAK DC4800 Zoom Digital Camera.
...(page 18) Manual Picture Taking Menu If you to the page listed under the Menu Name below. These settings override the camera's automatic settings. Camera Menus Overview There are three main menus in the Picture Taking Menu. For details on applying the settings, refer to change settings... for taking pictures, reviewing pictures, and for camera setup functions. The options in the menus allow you want more control over how your pictures will look, use the settings in the KODAK DC4800 Zoom Digital Camera.

User Manual
Page 20
...Turn the Mode Dial to Setup Scroll through the menus, options Select Menu Icon Menu Name (page in this manual) Power Save (page 52) Digital Zoom (page 54) Camera Sounds (page 56) Date and Time (page 8) Video Out (page 57) 12 Menu Icon Menu Name (page in the Setup Menu to customize... your camera according to the page listed under the Menu Name below. For details on applying the options, refer to your personal preferences. 56 28 8 P REVIEW Camera Setup Menu Use the options in this manual) Language (page 58) Format ...
...Turn the Mode Dial to Setup Scroll through the menus, options Select Menu Icon Menu Name (page in this manual) Power Save (page 52) Digital Zoom (page 54) Camera Sounds (page 56) Date and Time (page 8) Video Out (page 57) 12 Menu Icon Menu Name (page in the Setup Menu to customize... your camera according to the page listed under the Menu Name below. For details on applying the options, refer to your personal preferences. 56 28 8 P REVIEW Camera Setup Menu Use the options in this manual) Language (page 58) Format ...
User Manual
Page 21
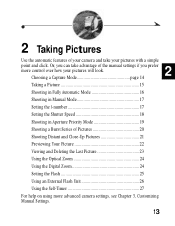
.... 13 2 Taking Pictures Use the automatic features of your camera and take advantage of Pictures 20 Shooting Distant and Close-Up Pictures 21 Previewing Your Picture 22 Viewing and Deleting the Last Picture 23 Using the Optical Zoom 24 Using the Digital Zoom 24 Setting the Flash 25 Using an External Flash...
.... 13 2 Taking Pictures Use the automatic features of your camera and take advantage of Pictures 20 Shooting Distant and Close-Up Pictures 21 Previewing Your Picture 22 Viewing and Deleting the Last Picture 23 Using the Optical Zoom 24 Using the Digital Zoom 24 Setting the Flash 25 Using an External Flash...

User Manual
Page 30
...frame your picture. Preview is not required but is required when you use the LCD instead of the viewfinder to charge when you are using digital zooming (page 24), or when performing manual White Balance (page 38). To view the last picture taken, press the button. 3 f-number shutter ...on the LCD. The LCD displays the live image. 2 To take the picture. 22 The LCD displays a live image, the activated icons, and the activated camera settings. NOTE: Preview is ideal for shooting Close-Ups (page 21). 1 Press the OK button. Press the Shutter button completely down to lock the focus...
...frame your picture. Preview is not required but is required when you use the LCD instead of the viewfinder to charge when you are using digital zooming (page 24), or when performing manual White Balance (page 38). To view the last picture taken, press the button. 3 f-number shutter ...on the LCD. The LCD displays the live image. 2 To take the picture. 22 The LCD displays a live image, the activated icons, and the activated camera settings. NOTE: Preview is ideal for shooting Close-Ups (page 21). 1 Press the OK button. Press the Shutter button completely down to lock the focus...

User Manual
Page 32
... display to frame your subject. 2 Move the Zoom button to its farthest T position. If your picture, or zoom in image quality when using digital zoom. . TW 1 Set the camera to its farthest T Telephoto position. 3 Release the Zoom button, then immediately move it changes. You may notice a decrease in with Telephoto (84 mm...
... display to frame your subject. 2 Move the Zoom button to its farthest T position. If your picture, or zoom in image quality when using digital zoom. . TW 1 Set the camera to its farthest T Telephoto position. 3 Release the Zoom button, then immediately move it changes. You may notice a decrease in with Telephoto (84 mm...

User Manual
Page 54
... using battery power, with Power Save on the camera. NOTE: The Slide Show feature is ideal for details on video-in port on any video device that is equipped with your external device (television, VCR, computer m monitor, digital projector). Refer to your televsion or other end... with a video input, such as a television, computer monitor, or digital projector. Plug the other device user's guide for sharing pictures at a social function or at a selectable interval rate. You can also run a slide show on your camera) into the video-in setup. 1 Turn the Mode Dial to Review...
... using battery power, with Power Save on the camera. NOTE: The Slide Show feature is ideal for details on video-in port on any video device that is equipped with your external device (television, VCR, computer m monitor, digital projector). Refer to your televsion or other end... with a video input, such as a television, computer monitor, or digital projector. Plug the other device user's guide for sharing pictures at a social function or at a selectable interval rate. You can also run a slide show on your camera) into the video-in setup. 1 Turn the Mode Dial to Review...

User Manual
Page 73
... connected to the computer m Format the Picture Card NOTE: Picture Card readers do not allow direct access to your pictures. 6 65 KODAK Software The KODAK DC4800 Digital Camera Software disc includes: KODAK Digital Camera Software shows the camera as a removable storage m device on your desktop and lets you download your pictures using a card reader, use a third-party application to...
... connected to the computer m Format the Picture Card NOTE: Picture Card readers do not allow direct access to your pictures. 6 65 KODAK Software The KODAK DC4800 Digital Camera Software disc includes: KODAK Digital Camera Software shows the camera as a removable storage m device on your desktop and lets you download your pictures using a card reader, use a third-party application to...

User Manual
Page 74
...Run from the Start menu. For more detailed information, refer to use Digital Camera software. On a WINDOWS-based computer-if Auto Play is automatically loading your software, take a few minutes to fill out and send in the camera product registration card. In the Run dialog box, type the drive letter ... icon. 4 Follow the on-screen instructions to receive information regarding software updates and registers some of the products included with the camera. 1 Close all other software programs before starting the Installer. 2 Place the Installer CD into the CD-ROM drive. 3 Load the software.
...Run from the Start menu. For more detailed information, refer to use Digital Camera software. On a WINDOWS-based computer-if Auto Play is automatically loading your software, take a few minutes to fill out and send in the camera product registration card. In the Run dialog box, type the drive letter ... icon. 4 Follow the on-screen instructions to receive information regarding software updates and registers some of the products included with the camera. 1 Close all other software programs before starting the Installer. 2 Place the Installer CD into the CD-ROM drive. 3 Load the software.
User Manual
Page 75
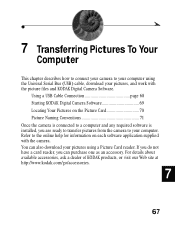
...70 Picture Naming Conventions 71 Once the camera is connected to a computer and any required software is installed, you can also download your pictures, and work with the camera. Using a USB Cable Connection page 68 Starting KODAK Digital Camera Software 69 Locating Your Pictures on ...each software application supplied with the picture files and KODAK Digital Camera Software. If you do not have a card reader, you...
...70 Picture Naming Conventions 71 Once the camera is connected to a computer and any required software is installed, you can also download your pictures, and work with the camera. Using a USB Cable Connection page 68 Starting KODAK Digital Camera Software 69 Locating Your Pictures on ...each software application supplied with the picture files and KODAK Digital Camera Software. If you do not have a card reader, you...

User Manual
Page 76
If the port is not labeled, see "Starting KODAK Digital Camera Software" on the camera. To access the pictures on your computer marked with the USB symbol. On a WINDOWS-based computer, a window appears showing the contents of the Picture Card. ... MACINTOSH) using the USB cable provided with your computer stating that illustrates all of the external ports. 2 Open the door on the side of the camera. 3 Plug the other end of the USB cable into the port on your Picture Card, see your computer User's Guide for a diagram that you are...
If the port is not labeled, see "Starting KODAK Digital Camera Software" on the camera. To access the pictures on your computer marked with the USB symbol. On a WINDOWS-based computer, a window appears showing the contents of the Picture Card. ... MACINTOSH) using the USB cable provided with your computer stating that illustrates all of the external ports. 2 Open the door on the side of the camera. 3 Plug the other end of the USB cable into the port on your Picture Card, see your computer User's Guide for a diagram that you are...
User Manual
Page 77
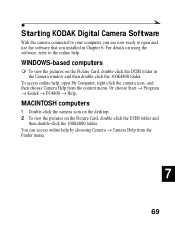
...refer to the online help by choosing Camera → Camera Help from the context menu. Starting KODAK Digital Camera Software With the camera connected to your computer, you installed in the Camera window and then double-click the ...100K4800 folder. WINDOWS-based computers m To view the pictures on the Picture Card, double-click the DCIM folder and then double-click the 100K4800 folder. Or choose Start → Program → Kodak → DC4800...
...refer to the online help by choosing Camera → Camera Help from the context menu. Starting KODAK Digital Camera Software With the camera connected to your computer, you installed in the Camera window and then double-click the ...100K4800 folder. WINDOWS-based computers m To view the pictures on the Picture Card, double-click the DCIM folder and then double-click the 100K4800 folder. Or choose Start → Program → Kodak → DC4800...
User Manual
Page 78
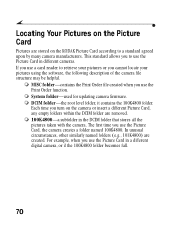
...cannot locate your pictures or you use the Print Order function. m System folder-used for updating camera firmware. Locating Your Pictures on the Picture Card Pictures are stored on the camera or insert a different Picture Card, m any empty folders within the DCIM folder are created. Each...you use the Picture Card in different cameras. MISC folder-contains the Print Order file created when you use the Picture Card in a different digital camera, or if the 100K4800 folder becomes full. 70 This standard allows you turn on the KODAK Picture Card according to use the ...
...cannot locate your pictures or you use the Print Order function. m System folder-used for updating camera firmware. Locating Your Pictures on the Picture Card Pictures are stored on the camera or insert a different Picture Card, m any empty folders within the DCIM folder are created. Each...you use the Picture Card in different cameras. MISC folder-contains the Print Order file created when you use the Picture Card in a different digital camera, or if the 100K4800 folder becomes full. 70 This standard allows you turn on the KODAK Picture Card according to use the ...
User Manual
Page 83
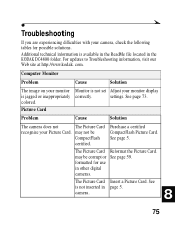
... in the ReadMe file located in other digital cameras. For updates to Troubleshooting information, visit our Web site at http://www.kodak. Purchase a certified CompactFlash Picture Card. Problem Cause Solution The camera does not The Picture Card recognize your camera, check the following tables for use in the KODAK DC4800 folder. may be CompactFlash certified. See page...
... in the ReadMe file located in other digital cameras. For updates to Troubleshooting information, visit our Web site at http://www.kodak. Purchase a certified CompactFlash Picture Card. Problem Cause Solution The camera does not The Picture Card recognize your camera, check the following tables for use in the KODAK DC4800 folder. may be CompactFlash certified. See page...
User Manual
Page 97
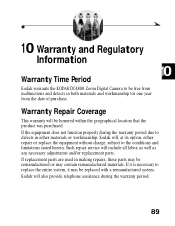
... are used in both materials and workmanship for one year from the date of purchase. 10 Warranty and Regulatory Information 10 Warranty Time Period Kodak warrants the KODAK DC4800 Zoom Digital Camera to the conditions and limitations stated herein. Such repair service will be replaced with a remanufactured system. If it is necessary to replace the...
... are used in both materials and workmanship for one year from the date of purchase. 10 Warranty and Regulatory Information 10 Warranty Time Period Kodak warrants the KODAK DC4800 Zoom Digital Camera to the conditions and limitations stated herein. Such repair service will be replaced with a remanufactured system. If it is necessary to replace the...
User Manual
Page 108
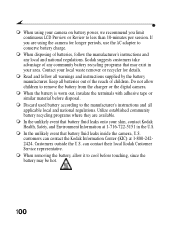
... charge. Discard used battery according to remove the battery from the charger or the digital camera. customers can contact their local Kodak Customer m Service representative. Customers outside the U.S. can contact the Kodak Information Center (KIC) at 1-716-722-5151 in m your camera on battery power, we recommend you are available. When removing the battery, allow...
... charge. Discard used battery according to remove the battery from the charger or the digital camera. customers can contact their local Kodak Customer m Service representative. Customers outside the U.S. can contact the Kodak Information Center (KIC) at 1-716-722-5151 in m your camera on battery power, we recommend you are available. When removing the battery, allow...
User Manual
Page 111
... 8 DCIM folder, Picture Card 70 defaults original settings 94 resetting 60 deleting last picture 23 pictures from Picture Card 44 protecting pictures from 45 Digital Camera Software 65 digital zoom setting 54 using 24 diopter dial, adjusting 9 displaying slide show 46 distant scenes 21 downloading pictures 67 E error messages, LCD 83 exposure adjusting...
... 8 DCIM folder, Picture Card 70 defaults original settings 94 resetting 60 deleting last picture 23 pictures from Picture Card 44 protecting pictures from 45 Digital Camera Software 65 digital zoom setting 54 using 24 diopter dial, adjusting 9 displaying slide show 46 distant scenes 21 downloading pictures 67 E error messages, LCD 83 exposure adjusting...
User Manual
Page 115
... resolution, compression 35 shutter speed 18 video out signal 57 setup, camera menus 12 sharpness, setting 38 shutter self-timer delay 27 speed, setting 18 slide show, running 46 slow shutter speeds 18 software getting help 85 installing 63, 66 KODAK Digital Camera 65 specifications camera 95 MACINTOSH system 64 WINDOWS-based system 64 starting...
... resolution, compression 35 shutter speed 18 video out signal 57 setup, camera menus 12 sharpness, setting 38 shutter self-timer delay 27 speed, setting 18 slide show, running 46 slow shutter speeds 18 software getting help 85 installing 63, 66 KODAK Digital Camera 65 specifications camera 95 MACINTOSH system 64 WINDOWS-based system 64 starting...


