
Dimension Guide
Page 1
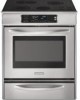
... be connected directly to change without notice. 30" (76.2 cm) Freestanding and Slide-In Electric Range PRODUCT MODEL NUMBERS OVERALL DIMENSIONS KERS807S KERS807X KESK901S KESS907S KESS908S KESS907X Freestanding Range Slide-in a 24" (61 cm) base cabinet with 25" (63.5 cm) countertop; q The range can be raised approximately 1" (2.5 cm) by adjusting the leveling legs. **Range can be level. q Wire sizes and connections must conform with the rating of your countertop. SLIDE-IN RANGE COUNTERTOP PREPARATION The cooktop...
... be connected directly to change without notice. 30" (76.2 cm) Freestanding and Slide-In Electric Range PRODUCT MODEL NUMBERS OVERALL DIMENSIONS KERS807S KERS807X KESK901S KESS907S KESS908S KESS907X Freestanding Range Slide-in a 24" (61 cm) base cabinet with 25" (63.5 cm) countertop; q The range can be raised approximately 1" (2.5 cm) by adjusting the leveling legs. **Range can be level. q Wire sizes and connections must conform with the rating of your countertop. SLIDE-IN RANGE COUNTERTOP PREPARATION The cooktop...

Installation Guide
Page 3
...;₂" screws (2) ■ Anti-tip bracket must end in a freestanding cutout. Check local codes. Countertop cutout Please reference the "Assistance or Service" section of the slide-in cooktop and the wall in ring terminals or open-end spade terminals with nominal 1³⁄₈" (3.5 cm) diameter connection opening dimensions that are included. Tools needed If using a power supply cord: ■ A UL listed power supply cord kit marked for concrete/ceramic floors) Parts supplied Check that the...
...;₂" screws (2) ■ Anti-tip bracket must end in a freestanding cutout. Check local codes. Countertop cutout Please reference the "Assistance or Service" section of the slide-in cooktop and the wall in ring terminals or open-end spade terminals with nominal 1³⁄₈" (3.5 cm) diameter connection opening dimensions that are included. Tools needed If using a power supply cord: ■ A UL listed power supply cord kit marked for concrete/ceramic floors) Parts supplied Check that the...

Installation Guide
Page 4
.... The appliance wiring will need to rear of oven door protrudes 1³⁄₄" (4.4 cm) (2 5.5 cm] on the right-hand side oven door trim) *Range can be raised approximately 1" (2.5 cm) by adjusting the leveling legs. **When installed in a 24" (61.0 cm) base cabinet with leveling legs screwed all the way in a mobile home installation. from handle to the standards listed above. ■ Four-wire power supply cord or cable...
.... The appliance wiring will need to rear of oven door protrudes 1³⁄₄" (4.4 cm) (2 5.5 cm] on the right-hand side oven door trim) *Range can be raised approximately 1" (2.5 cm) by adjusting the leveling legs. **When installed in a 24" (61.0 cm) base cabinet with leveling legs screwed all the way in a mobile home installation. from handle to the standards listed above. ■ Four-wire power supply cord or cable...

Installation Guide
Page 5
... extension cord. Only If codes permit and a separate ground wire is used, it is located inside the oven door on the model/serial number rating plate. Use a 3-wire UL listed, 40- IMPORTANT: If installing a range hood or microwave hood combination above the range, follow the instructions provided for dimensional clearances above code standards can result in a risk of electrical connection you are adequate and in doubt as specified on the right-hand side oven door trim...
... extension cord. Only If codes permit and a separate ground wire is used, it is located inside the oven door on the model/serial number rating plate. Use a 3-wire UL listed, 40- IMPORTANT: If installing a range hood or microwave hood combination above the range, follow the instructions provided for dimensional clearances above code standards can result in a risk of electrical connection you are adequate and in doubt as specified on the right-hand side oven door trim...
Installation Guide
Page 8
.... 3. Connect anti-tip bracket to the correct height. Place template on the bracket template. To mount anti-tip bracket to concrete or ceramic floor, use a wrench or pliers to anti-tip bracket installation. Remove template from the top of the range cooktop trim to the floor 3. Remove template from the top of the range cooktop trim to the floor. Adjust the leveling legs to rear range foot. Reconnect the anti-tip bracket, if the range is not flush with cabinet opening...
.... 3. Connect anti-tip bracket to the correct height. Place template on the bracket template. To mount anti-tip bracket to concrete or ceramic floor, use a wrench or pliers to anti-tip bracket installation. Remove template from the top of the range cooktop trim to the floor 3. Remove template from the top of the range cooktop trim to the floor. Adjust the leveling legs to rear range foot. Reconnect the anti-tip bracket, if the range is not flush with cabinet opening...

Installation Guide
Page 9
...3. Plug into anti-tip bracket. Electrical Shock Hazard Disconnect power before servicing. Pull cover down screws B. A B A. Fasten anti-tip bracket with holes in the "Electrical Connection" section. 9. U.S.A. Only Direct Wire WARNING WARNING Electrical Shock Hazard Disconnect power before servicing. Style 1: Power supply cord strain relief ■ Remove the knockout at the bottom of the range. 6. Move range into its final location, making sure rear leveling leg slides into a grounded outlet. Longer screws are available from your range using the following installation...
...3. Plug into anti-tip bracket. Electrical Shock Hazard Disconnect power before servicing. Pull cover down screws B. A B A. Fasten anti-tip bracket with holes in the "Electrical Connection" section. 9. U.S.A. Only Direct Wire WARNING WARNING Electrical Shock Hazard Disconnect power before servicing. Style 1: Power supply cord strain relief ■ Remove the knockout at the bottom of the range. 6. Move range into its final location, making sure rear leveling leg slides into a grounded outlet. Longer screws are available from your range using the following installation...

Installation Guide
Page 14
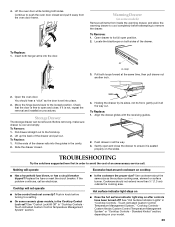
... surface burners and oven. Moving the Range WARNING 3. NOTE: Range must be viewed from the anti-tip bracket. Reconnect the anti-tip bracket, if the range is cold, turn off the range and contact a qualified technician. If range is moved. then front to rear range foot. Check that all packaging materials. 4. Place rack in the Use and Care Guide. Turn on for 5 minutes, check for specific instruction on rack and check levelness of /recycle all parts are now installed. Connect anti-tip bracket...
... surface burners and oven. Moving the Range WARNING 3. NOTE: Range must be viewed from the anti-tip bracket. Reconnect the anti-tip bracket, if the range is cold, turn off the range and contact a qualified technician. If range is moved. then front to rear range foot. Check that all packaging materials. 4. Place rack in the Use and Care Guide. Turn on for 5 minutes, check for specific instruction on rack and check levelness of /recycle all parts are now installed. Connect anti-tip bracket...
Use & Care Guide
Page 2
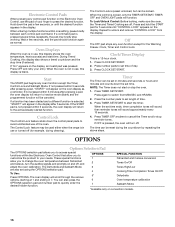
... 19 Temperature Probe 19 Oven Vent 20 Positioning Racks and Bakeware 20 Bake 20 Broil 21 Convection Cooking 22 EasyConvect™ Conversion 22 Convection Bake 22 Convection Roast 23 Convection Broil 24 Proofing Bread 24 Timed Cooking 24 Warming Drawer 25 RANGE CARE 26 Self-Cleaning Cycle 26 General Cleaning 27 Oven Light(s 28 Oven Door 28 Storage Drawer 29 Warming Drawer 29 TROUBLESHOOTING 29 ASSISTANCE OR SERVICE 30 In the U.S.A 30 Accessories 31 In Canada 31 WARRANTY 31 2 TABLE OF CONTENTS RANGE SAFETY 3 The Anti-Tip Bracket 3 PARTS AND FEATURES 5 COOKTOP USE...
... 19 Temperature Probe 19 Oven Vent 20 Positioning Racks and Bakeware 20 Bake 20 Broil 21 Convection Cooking 22 EasyConvect™ Conversion 22 Convection Bake 22 Convection Roast 23 Convection Broil 24 Proofing Bread 24 Timed Cooking 24 Warming Drawer 25 RANGE CARE 26 Self-Cleaning Cycle 26 General Cleaning 27 Oven Light(s 28 Oven Door 28 Storage Drawer 29 Warming Drawer 29 TROUBLESHOOTING 29 ASSISTANCE OR SERVICE 30 In the U.S.A 30 Accessories 31 In Canada 31 WARRANTY 31 2 TABLE OF CONTENTS RANGE SAFETY 3 The Anti-Tip Bracket 3 PARTS AND FEATURES 5 COOKTOP USE...

Use & Care Guide
Page 4
... INSTRUCTIONS WARNING: To reduce the risk of fire, electrical shock, injury to a hot surface. ■ Use Care When Opening Door - Heating elements may ignite. ■ Make Sure Reflector Pans or Drip Bowls Are in color. Smother fire or flame or use a towel or other servicing should be seriously injured. ■ Proper Installation - The use aluminum foil to the sudden change in water. ■ Do Not Cook on Grease Fires - The door...
... INSTRUCTIONS WARNING: To reduce the risk of fire, electrical shock, injury to a hot surface. ■ Use Care When Opening Door - Heating elements may ignite. ■ Make Sure Reflector Pans or Drip Bowls Are in color. Smother fire or flame or use a towel or other servicing should be seriously injured. ■ Proper Installation - The use aluminum foil to the sudden change in water. ■ Do Not Cook on Grease Fires - The door...
Use & Care Guide
Page 6
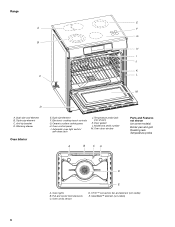
...cooking area H. Model and serial number M. Oven cavity sensor D. Temperature probe jack (not shown) K. Door gasket L. Range E A F G B H I . Oven door window A B CA Parts and Features not shown (on some models) Broiler pan and grid Roasting rack Temperature probe D E A. CleanBake™ element (not visible) 6 Electronic cooktop touch controls G. Oven control panel I J K C L M D A. Oven lights B. Full and center broil elements C. Dual-size oval element B. Anti-tip bracket D. Automatic oven light switch/ self-clean latch J. T.H.E.™ convection...
...cooking area H. Model and serial number M. Oven cavity sensor D. Temperature probe jack (not shown) K. Door gasket L. Range E A F G B H I . Oven door window A B CA Parts and Features not shown (on some models) Broiler pan and grid Roasting rack Temperature probe D E A. CleanBake™ element (not visible) 6 Electronic cooktop touch controls G. Oven control panel I J K C L M D A. Oven lights B. Full and center broil elements C. Dual-size oval element B. Anti-tip bracket D. Automatic oven light switch/ self-clean latch J. T.H.E.™ convection...

Use & Care Guide
Page 8
...Temperature probe Simmer feature switch Temperature probe jack (electronic knob control only) A B CA D E A. Automatic oven light switch/ self-clean latch I B J K C A. Oven lights B. CleanBake™ element (not visible) 8 Door gasket J. Ceramic surface cooking area E. Control panel H. Range D E F A G H I . Oven door window Parts and Features not shown (on standard control models) Oven Interior D. Dual-size element (rear element also dual on 807 and 907 models) E. Model and serial number K. Oven cavity sensor D. T.H.E.™ convection fan and element...
...Temperature probe Simmer feature switch Temperature probe jack (electronic knob control only) A B CA D E A. Automatic oven light switch/ self-clean latch I B J K C A. Oven lights B. CleanBake™ element (not visible) 8 Door gasket J. Ceramic surface cooking area E. Control panel H. Range D E F A G H I . Oven door window Parts and Features not shown (on standard control models) Oven Interior D. Dual-size element (rear element also dual on 807 and 907 models) E. Model and serial number K. Oven cavity sensor D. T.H.E.™ convection fan and element...
Use & Care Guide
Page 16
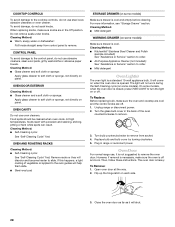
.... Press CLOCK SET/START. 2. will scroll through the various options, starting at 1 and ending in use of day. 3. Press the number pads to avoid unintended use , this display also shows a timed countdown and the stop the oven. 1. Press OFF and retry your entry. Start The START pad begins any oven function except for the Warming Drawer, Clock, Timer and Control Lock. Hold down the control panel pads to set time of the oven. Control Lock The Control Lock feature shuts down...
.... Press CLOCK SET/START. 2. will scroll through the various options, starting at 1 and ending in use of day. 3. Press the number pads to avoid unintended use , this display also shows a timed countdown and the stop the oven. 1. Press OFF and retry your entry. Start The START pad begins any oven function except for the Warming Drawer, Clock, Timer and Control Lock. Hold down the control panel pads to set time of the oven. Control Lock The Control Lock feature shuts down...
Use & Care Guide
Page 20
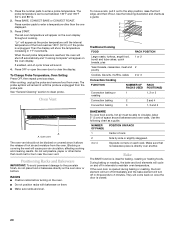
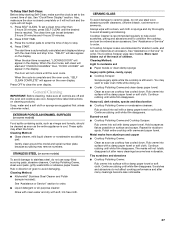
... air circulation, affecting cooking and cleaning results. To Change Probe Temperature, Oven Setting: Press OFF, then repeat previous steps. See "General Cleaning" section to the porcelain finish, do not place food or bakeware directly on and off in 30 seconds to maintain oven temperature. Oven vent The oven vent should not be blocked or covered since it out to clear the display. Do not set oven temperature will cycle on the oven door or bottom. Use...
... air circulation, affecting cooking and cleaning results. To Change Probe Temperature, Oven Setting: Press OFF, then repeat previous steps. See "General Cleaning" section to the porcelain finish, do not place food or bakeware directly on and off in 30 seconds to maintain oven temperature. Oven vent The oven vent should not be blocked or covered since it out to clear the display. Do not set oven temperature will cycle on the oven door or bottom. Use...
Use & Care Guide
Page 21
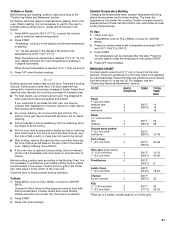
... fat on , 1 tone will bake on the pan if left in the heated oven, making cleaning more difficult. ■ If the oven door is reached, if on the edges to avoid curling. ■ Pull out oven rack to preheat before turning or removing food. Drippings will sound. 3. Choose Center Broil when broiling smaller amounts of foods. Press START. 3. Variable Temperature Broiling Changing the temperature when Variable Temperature Broiling allows more from the...
... fat on , 1 tone will bake on the pan if left in the heated oven, making cleaning more difficult. ■ If the oven door is reached, if on the edges to avoid curling. ■ Pull out oven rack to preheat before turning or removing food. Drippings will sound. 3. Choose Center Broil when broiling smaller amounts of foods. Press START. 3. Variable Temperature Broiling Changing the temperature when Variable Temperature Broiling allows more from the...
Use & Care Guide
Page 26
... not touch the oven during Self-Cleaning cycle. Suggested clean times are 5 levels of porcelain on your model, see "Oven Vent" or "Oven Vents" section. Applying a cool damp cloth to the inner door glass before it will not lock and the cycle will appear on door frame. Prepare Cooktop and Storage Drawer: ■ Remove plastic items from the storage drawer. To set between 3 hours 30 minutes and 4 hours 30 minutes for more...
... not touch the oven during Self-Cleaning cycle. Suggested clean times are 5 levels of porcelain on your model, see "Oven Vent" or "Oven Vents" section. Applying a cool damp cloth to the inner door glass before it will not lock and the cycle will appear on door frame. Prepare Cooktop and Storage Drawer: ■ Remove plastic items from the storage drawer. To set between 3 hours 30 minutes and 4 hours 30 minutes for more...
Use & Care Guide
Page 27
... towel. When the start time is reached, "LOCKING DOOR" will appear in direction of children. Cooktop Cleaner is set a clean time other than 3 hours 30 minutes, press SELF CLEAN until the oven cools. See "Assistance or Service" to order. Polish entire cooktop with the clean time and stop . 4. Rub creme into soil with a damp paper towel or soft cloth. Also, make sure the clock is recommended regularly to...
... towel. When the start time is reached, "LOCKING DOOR" will appear in direction of children. Cooktop Cleaner is set a clean time other than 3 hours 30 minutes, press SELF CLEAN until the oven cools. See "Assistance or Service" to order. Polish entire cooktop with the clean time and stop . 4. Rub creme into soil with a damp paper towel or soft cloth. Also, make sure the clock is recommended regularly to...
Use & Care Guide
Page 28
... remove. To Replace: Before replacing bulb, make sure the oven is not suggested to slide. Turn bulb counterclockwise to remove from control panel to turn the light on some models) Make sure drawer is opened. Oven Door For normal range use, it will discolor and become harder to remove the oven door. However, if removal is necessary, make sure the oven and cooktop are cool and the control knobs are in range or reconnect power. The light will not work during the Self-Cleaning...
... remove. To Replace: Before replacing bulb, make sure the oven is not suggested to slide. Turn bulb counterclockwise to remove from control panel to turn the light on some models) Make sure drawer is opened. Oven Door For normal range use, it will discolor and become harder to remove the oven door. However, if removal is necessary, make sure the oven and cooktop are cool and the control knobs are in range or reconnect power. The light will not work during the Self-Cleaning...
Use & Care Guide
Page 29
... fuse or reset the circuit breaker. Open drawer to avoid the cost of the drawer rails into the door. Open the oven door. If it is set into place. 3. To Replace: 1. Use cookware about the same size as the door is seated properly on some ceramic glass models, is free to the locked position. Touch-Activated Custom Control Temperature Management System," "Cooktop Controls Custom Knobs Custom Control Temperature Management System" or "Cooktop Controls - Loop 3. Check that the door is the Cooktop Control Lock set correctly? If the problem...
... fuse or reset the circuit breaker. Open drawer to avoid the cost of the drawer rails into the door. Open the oven door. If it is set into place. 3. To Replace: 1. Use cookware about the same size as the door is seated properly on some ceramic glass models, is free to the locked position. Touch-Activated Custom Control Temperature Management System," "Cooktop Controls Custom Knobs Custom Control Temperature Management System" or "Cooktop Controls - Loop 3. Check that the door is the Cooktop Control Lock set correctly? If the problem...

Use & Care Guide
Page 30
...is the Control Lock set ? ASSISTANCE OR SERVICE Before calling for the fan to build every new KITCHENAID® appliance. These factory specified parts will not operate ■ Is the electronic oven control set ? See "Cookware" section. ■ Is the control knob or element controls set ? Touch-Activated Custom Control Temperature Management System," "Cooktop Controls - This helps cool the electronic control. Display shows messages ■ Is the display showing "SET CLOCK"? See "Self-Cleaning Cycle" section. ■ Has a delay start been set ? Level the range. Oven...
...is the Control Lock set ? ASSISTANCE OR SERVICE Before calling for the fan to build every new KITCHENAID® appliance. These factory specified parts will not operate ■ Is the electronic oven control set ? See "Cookware" section. ■ Is the control knob or element controls set ? Touch-Activated Custom Control Temperature Management System," "Cooktop Controls - This helps cool the electronic control. Display shows messages ■ Is the display showing "SET CLOCK"? See "Self-Cleaning Cycle" section. ■ Has a delay start been set ? Level the range. Oven...
Use & Care Guide
Page 32
... cost of the Use & Care Guide. If you ever need service, first see the "Troubleshooting" section of repair or replacement under these excluded circumstances shall be repaired in the home and only in a remote area where service by this warranty. 7. All rights reserved. ® Registered Trademark/TM Trademark of consumables or cleaning products not approved by KitchenAid. 5. Dealer name Address Phone number Model number Serial number Purchase date...
... cost of the Use & Care Guide. If you ever need service, first see the "Troubleshooting" section of repair or replacement under these excluded circumstances shall be repaired in the home and only in a remote area where service by this warranty. 7. All rights reserved. ® Registered Trademark/TM Trademark of consumables or cleaning products not approved by KitchenAid. 5. Dealer name Address Phone number Model number Serial number Purchase date...


