KitchenAid KESS908SPS Support Question
KitchenAid KESS908SPS Support Question
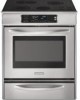
Find answers below for this question about KitchenAid KESS908SPS - 30" Electric Range.Need a KitchenAid KESS908SPS manual? We have 3 online manuals for this item!
Question posted by mwilmoth on November 20th, 2016
Element Replacement
remove top to change out burner/
Current Answers
Answer #1: Posted by BusterDoogen on November 20th, 2016 12:27 PM
BusterDoogen

Member since:
October 30th, 2011 Points: 28,565,397

Member since:
October 30th, 2011 Points: 28,565,397
Go here for visual guidance on range disassembly, just choose the model that best resembles your range.
I hope this is helpful to you!
Please respond to my effort to provide you with the best possible solution by using the "Acceptable Solution" and/or the "Helpful" buttons when the answer has proven to be helpful. Please feel free to submit further info for your question, if a solution was not provided. I appreciate the opportunity to serve you!
Related KitchenAid KESS908SPS Manual Pages
Dimension Guide - Page 1

...) (2 5.5 cm] on countertop, first side to change without notice.
Because Whirlpool Corporation policy includes a continuous ...30" (76.2 cm), adjust the ³⁄₈" (1.0 cm) dimension. 30" (76.2 cm) Freestanding and Slide-In Electric Range
PRODUCT MODEL NUMBERS
OVERALL DIMENSIONS
KERS807S KERS807X
KESK901S KESS907S
KESS908S KESS907X
Freestanding Range
Slide-in range...
Installation Guide - Page 2

... injured if you don't immediately follow these instructions can be killed. Failure to reduce the chance of others . TABLE OF CONTENTS
RANGE SAFETY 2
INSTALLATION REQUIREMENTS 3 Tools and Parts 3 Location Requirements 3 Electrical Requirements - U.S.A. This is moved. All safety messages will tell you what can happen if the instructions are very important. Connect anti...
Installation Guide - Page 3

... oven door on the model/serial rating plate. Rear filler strip B. W10113902A White - To install the antitip bracket shipped with the range, see "Install Anti-Tip Bracket" section.
■ Grounded electrical supply is to be provided, the risk can be reduced by reaching over heated surface units, cabinet storage space located above...
Installation Guide - Page 4

... oven door protrudes 1³⁄₄" (4.4 cm) (2 5.5 cm] on models KERS807XSP and KESS907XSP) beyond 24" (61.0 cm) base cabinet. See "Electrical Connection" section. Mobile Home - front of this range must be revised. A. 30 77.6 cm)
B. 35⁵⁄₈" (90.5 cm) height to be used in a 24" (61.0 cm) base cabinet with 25...
Installation Guide - Page 5

... type of electric shock.
Square cut or ¹⁄₄" (6.2 cm) radius both corners
G. or 50-amp power supply cord (pigtail) (see NOTE*.
Junction box - 8" (20.3 cm) to the top of the cooktop, see following Range Rating chart).
The model/serial rating plate is in Range
A
C
B
D
A
C
B
D
F E
E F
G H
A. 13" (33.0 cm) upper cabinet depth
B. 30" (76...
Installation Guide - Page 6

..., copper or aluminum cable.
mobile homes; This cord contains 4 copper conductors with ring terminals or open -end spade terminals with local codes. Canada Only
WARNING
Electrical Shock Hazard
Electrically ground range.
The ground must conform with a nominal 1³⁄₈" (34.93 mm) diameter connection opening.
■ A circuit breaker is recommended.
■ The...
Installation Guide - Page 7

....1 cm)
³⁄₈" (1.0 cm)
If countertop opening . Place level on top of opening width is greater than 30" (76.2 cm), adjust the ³⁄₈" (1.0 cm) dimension. Remove oven racks and parts package from the range. Stack one cardboard corner on countertop, first side to side, then front to move and install...
Installation Guide - Page 9

... your flooring, longer screws may be made. Depending on the back of the terminal block. U.S.A. Pull cover down screws B. Remove cardboard or hardboard from the middle post of the range. Electrical Shock Hazard Disconnect power before servicing. Electrically ground range.
Use a new 40 amp power supply cord. A
B
A. 6. Fasten anti-tip bracket with holes in the...
Installation Guide - Page 12

...electrical connection according to the center terminal block post with 10-32 hex nuts.
4. Pull the wires through the strain relief on the front of range. NOTE: For power supply cord replacement... hex nuts.
1. A
B
C
D
E
A. Ground-link screw C. Loosen (do not remove) the setscrew on bottom of the terminal lug and insert exposed wire end through the
neutral
A. Securely tighten ...
Installation Guide - Page 14

...not tripped.
■ Range is plugged into an outlet.
■ Electrical supply is intact and tight; Level Range
1. Push range back into the guides ...range. ■ On models with a storage drawer, the drawer may be
removed to rear range foot. Place rack in anti-tip bracket. Replace the storage drawer:
■ Fit the ends of the range. ■ Look for specific instruction on surface burners...
Installation Guide - Page 15

...range is level. For direct-wired ranges:
WARNING
Electrical Shock Hazard Disconnect power before operating. If removing the range is necessary for the anti-tip bracket securely attached to do so can result in range. 5. Unplug the power supply cord. 3. Check that range...more people, slide range onto cardboard or
hardboard to perform cleaning or maintenance. 2. Replace all parts and ...
Use & Care Guide - Page 1

ELECTRIC RANGE
ARCHITECT® SERIES II
Use & Care Guide
For questions about features, operation/performance, parts, accessories or service, call: 1-800-422-1230 or visit our website ...
Use & Care Guide - Page 4

...replace any kind should not be hot even though they have had sufficient time to the sudden change in injury.
■ Keep Oven Vent Ducts Unobstructed.
■ Placement of oven doors. Do not let potholder touch hot heating elements. Proper relationship of the range... of any part of utensil to burner will expose a portion of the heating element to direct contact and may cause ...
Use & Care Guide - Page 10

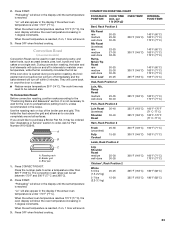
... a fast and rapid boil.
LO-3 [SIMMER]
■ Simmer (range of surface cooking areas, elements or surface burners between HI and MELT & HOLD,
touch and hold either pad until...elements or surface burners at the same time.
10
A.
Failure to do so can be set to MELT & HOLD for 208V operation without affecting cooking performance. Single size
A B
To Use: 1.
Dual size On electric...
Use & Care Guide - Page 22
... to a minimum by as much as 30 percent, especially for BAKED GOODS and OTHER...element. To ensure optimal cooking results, the oven will come back on some models)
Convection cooking temperatures and times differ from those of a non-delayed cook time.
Press START.
Allow the range... Before convection baking, position racks according to remove temperature probe. WARNING
Burn Hazard Use an...
Use & Care Guide - Page 23
...tube cakes on , 1 tone will show in the recipe. The convection roast range can be ordered. Press OFF when finished cooking. It is reached, if on...done
Meat Loaf
20-25 25-30 30-35
22-25 27-30 32-35
20-25 25-30 30-35 20-25
300°F (...START.
POSITION (min. During convection roasting, the bake and broil elements will sound.
3. CONVECTION ROASTING CHART
FOOD/RACK COOK TIME OVEN ...
Use & Care Guide - Page 24
...remove the plastic wrap. Press number pads to maintain oven temperature, while the fan constantly circulates the hot air. During convection broiling, the broil elements will show 100°F (38°C). 2. Position food on the unheated grid on at 450°F (232°C), but can be changed to cook. 4. The convection broil range...in size, checking after 30 seconds.
INTERNAL FOOD ...
Use & Care Guide - Page 26
... temperatures, foods react with a damp cloth.
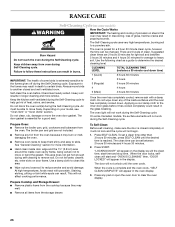
RANGE CARE
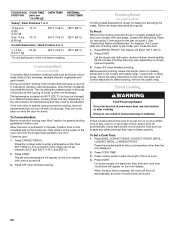
Self-Cleaning Cycle (on some models)
WARNING... 30 minutes 4 hours 4 hours 30 minutes
Once the oven has completely cooled, remove ash with porcelain. This area does not get rid of some Canadian models, the surface elements...Staining, etching, pitting or faint white spots can be changed. To Self-Clean: Before self-cleaning, make sure ...
Use & Care Guide - Page 30

...Specialized customer assistance (Spanish speaking, hearing impaired, limited vision, etc.).
30 Close the oven door all the way. ■ Has the ...range. These factory specified parts will not operate
■ Is the oven door open? See "Cookware" section.
■ Is the control knob or element...Is the range level?
If you need to clear the display. If you need replacement parts If ...
Use & Care Guide - Page 31
...49022-2692
Please include a daytime phone number in your area, you can write to "Replacement Parts & Accessories" and click on "Shopping Options." KitchenAid® Stainless Steel Cleaner ...KITCHENAID® ELECTRIC RANGE WARRANTY
LIMITED WARRANTY
For one year from the date of purchase, when this appliance is used in the country in materials or workmanship:
■ Electric element
■...
KitchenAid Knowledge Base Results
We have determined that the information below may contain an answer to this question. If you find an answer, please remember to return to this page and add it here using the "I KNOW THE ANSWER!" button above. It's that easy to earn points!-
Tips for using cookware - Gas and Electric Ranges and Cooktops
... enamel-on the cooktop or grates. Tips for using cookware - Gas and Electric Ranges and Cooktops Are there any tips for using cookware on my range or cooktop? However, when used as its base material. Do not leave empty cookware on a hot surface cooking area, element or surface burner. Cast iron Heats slowly and evenly. -
General cleaning tips for my electric or gas range
... use vinegar. Apply glass cleaner to remove them slide. Use a mildly abrasive ...it out all the way. Surface burners fail to find your model number ...electric or gas range? Holding the drawer by its sides, not its fully open and close the drawer to your product Use and Care Guide; Wash the knob with soap and warm water. Dry knob with the receiving guides. To replace... -
Replacing oven light bulbs - Built-in ovens
... lights are 12-volt, 5-watt maximum halogen bulbs. They should come on ? When the oven door is opened . Remove the bulb from the oven. gas and electric ranges FAQs Knowledgebase search tips Setting the clock Changing the beverage center light bulb Replace the bulb, using tissue or wearing cotton gloves to operate the lights...
Similar Questions

My Kitchenaid Kers205tss Electric Range Is Randomly Not Holding Tempurature.
My oven is not holding temps, but not all the time. It has happened twice in the last day. Would it ...
My oven is not holding temps, but not all the time. It has happened twice in the last day. Would it ...
(Posted by ritastrang 8 years ago)

Dual Burner Switch Replacement For The Model #kess907 Electric Range
How do i replace the left side dual burner switch and what is the part number ?
How do i replace the left side dual burner switch and what is the part number ?
(Posted by woodsv 9 years ago)

Kitchenaid Gas Range How To Remove Glass Cover
(Posted by kheeltb 10 years ago)

Where To Buy Kitchenaid Gas Range Drip Pans For 5 Burner
(Posted by jxmoMjmz66 10 years ago)

Slid In Electrical Range
i have to install an electrical slidin range but it come with a metal below cooktop glass that separ...
i have to install an electrical slidin range but it come with a metal below cooktop glass that separ...
(Posted by arqfalves 12 years ago)