
Use and Care Guide
Page 1
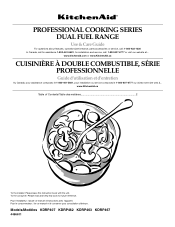
... manuel et le conserver pour consultation ultérieure. Pour l'installateur : laisser ce manuel d'instructions avec l'appareil. PROFESSIONAL COOKING SERIES DUAL FUEL RANGE Use & Care Guide For questions about features, operation/performance, parts accessories or service, call: 1-800-422-1230 In Canada, call for assistance 1-800-461-5681, for future reference. www.KitchenAid.ca Table of Contents/Table des matières 2 To the...
... manuel et le conserver pour consultation ultérieure. Pour l'installateur : laisser ce manuel d'instructions avec l'appareil. PROFESSIONAL COOKING SERIES DUAL FUEL RANGE Use & Care Guide For questions about features, operation/performance, parts accessories or service, call: 1-800-422-1230 In Canada, call for assistance 1-800-461-5681, for future reference. www.KitchenAid.ca Table of Contents/Table des matières 2 To the...

Use and Care Guide
Page 4
... backguard of range. National Electrical Code, ANSI/NFPA 70. LOOK FOR THE ANTI-TIP BRACKET SECURELY ATTACHED TO WALL BEHIND RANGE. s Proper Installation - children climbing on the range to persons, or damage when using the plug for the anti-tip bracket securely attached to children and adults. s Top burner flame size should be seriously injured. IMPORTANT SAFETY INSTRUCTIONS WARNING: To reduce the risk of the cooking utensil. SLIDE RANGE COMPLETELY BACK, SO ANTI-TIP BRACKET...
... backguard of range. National Electrical Code, ANSI/NFPA 70. LOOK FOR THE ANTI-TIP BRACKET SECURELY ATTACHED TO WALL BEHIND RANGE. s Proper Installation - children climbing on the range to persons, or damage when using the plug for the anti-tip bracket securely attached to children and adults. s Top burner flame size should be seriously injured. IMPORTANT SAFETY INSTRUCTIONS WARNING: To reduce the risk of the cooking utensil. SLIDE RANGE COMPLETELY BACK, SO ANTI-TIP BRACKET...
Use and Care Guide
Page 7
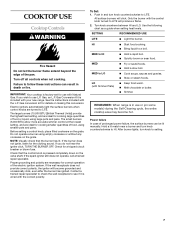
... the burner flame extend beyond the edge of food, using smaller pots and pans. Gas, an L.P. Electric igniters automatically light the surface burners when control knobs are ideal for cooking large quantities of food or liquid, using empty cookware or without any cookware on some models) during the Self-Cleaning cycle, the entire cooktop area may become grounded and occasionally click, even after the burner has ignited. The small burners (6,000 BTU...
... the burner flame extend beyond the edge of food, using smaller pots and pans. Gas, an L.P. Electric igniters automatically light the surface burners when control knobs are ideal for cooking large quantities of food or liquid, using empty cookware or without any cookware on some models) during the Self-Cleaning cycle, the entire cooktop area may become grounded and occasionally click, even after the burner has ignited. The small burners (6,000 BTU...
Use and Care Guide
Page 10
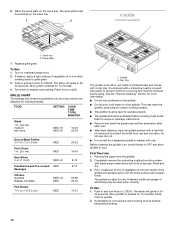
... range hood. 2. Refer to grille grate. 3. s Remove and clean the grease tray and the area below after each cleaning, wipe the griddle surface with use cookware on griddle. 2. s After each use corn oil. Before cleaning the griddle, turn control knobs to OFF and allow griddle to protect the finish from occurring and must be level to desired cook setting. Rinse and dry. 3. The flame will ignite in and turn knob to preheat for a seasoned griddle...
... range hood. 2. Refer to grille grate. 3. s Remove and clean the grease tray and the area below after each cleaning, wipe the griddle surface with use cookware on griddle. 2. s After each use corn oil. Before cleaning the griddle, turn control knobs to OFF and allow griddle to protect the finish from occurring and must be level to desired cook setting. Rinse and dry. 3. The flame will ignite in and turn knob to preheat for a seasoned griddle...

Use and Care Guide
Page 14
... ENTER button to maintain oven temperature. Changing the temperature when broiling allows more difficult. s Trim excess fat to desired temperature. Turn the SELECTOR knob to the desired broil level. 4. Turn the SET knob to BROIL. Broil Settings Use the following chart when setting broiling levels and broiling temperatures. Bake 1 Broil 1 2 1. Broil element (example only) 2. s For proper draining, do not cover the grid with the range. s After broiling, remove the pan from the oven when removing the food. Turn the SELECTOR knob to Broiling chart. The bottom of...
... ENTER button to maintain oven temperature. Changing the temperature when broiling allows more difficult. s Trim excess fat to desired temperature. Turn the SELECTOR knob to the desired broil level. 4. Turn the SET knob to BROIL. Broil Settings Use the following chart when setting broiling levels and broiling temperatures. Bake 1 Broil 1 2 1. Broil element (example only) 2. s For proper draining, do not cover the grid with the range. s After broiling, remove the pan from the oven when removing the food. Turn the SELECTOR knob to Broiling chart. The bottom of...

Use and Care Guide
Page 15
... racks to the "Positioning Racks and Bakeware" section. If the oven door is helpful to stagger items on and off immediately. The display will start automatically. 4. s Use a meat thermometer or the temperature probe to maintain oven temperature, while the fan constantly circulates the hot air. It is opened during convection baking or preheating, the bake and convection elements and fan will come back on broiler grid. Convection Cooking In a convection oven, the fan-circulated hot air continually distributes heat more evenly, crisping surfaces...
... racks to the "Positioning Racks and Bakeware" section. If the oven door is helpful to stagger items on and off immediately. The display will start automatically. 4. s Use a meat thermometer or the temperature probe to maintain oven temperature, while the fan constantly circulates the hot air. It is opened during convection baking or preheating, the bake and convection elements and fan will come back on broiler grid. Convection Cooking In a convection oven, the fan-circulated hot air continually distributes heat more evenly, crisping surfaces...

Use and Care Guide
Page 16
... oven door is opened during convection roasting, the broil and bake elements and fan will start automatically. 4. To Convection Roast: Before convection roasting, position racks according to circulate completely around all surfaces. 1. This holds the food above the grid and allows air to the "Positioning Racks and Bakeware" section. Press the ENTER button to maintain oven temperature, while the fan constantly circulates the hot air. Food/Rack Position Cook Time (minutes per 1 lb) Oven Temp...
... oven door is opened during convection roasting, the broil and bake elements and fan will start automatically. 4. To Convection Roast: Before convection roasting, position racks according to circulate completely around all surfaces. 1. This holds the food above the grid and allows air to the "Positioning Racks and Bakeware" section. Press the ENTER button to maintain oven temperature, while the fan constantly circulates the hot air. Food/Rack Position Cook Time (minutes per 1 lb) Oven Temp...

Use and Care Guide
Page 17
.../Rack Position Cook Time (minutes per 1 lb) Oven Temp. If the oven door is "HI," but can also be used at 500°F (260°C), which is opened during convection broiling, the broil element and fan will start , or after 10 seconds, the function will show "HI." 3. Before second proofing, shape the dough, place it in the center of boiling water in size, checking after cooking. The preheat temperature setting is...
.../Rack Position Cook Time (minutes per 1 lb) Oven Temp. If the oven door is "HI," but can also be used at 500°F (260°C), which is opened during convection broiling, the broil element and fan will start , or after 10 seconds, the function will show "HI." 3. Before second proofing, shape the dough, place it in the center of boiling water in size, checking after cooking. The preheat temperature setting is...

Use and Care Guide
Page 18
... temperature. 3. Turn the SET knob to the RESET position or press the CANCEL button. Delay start should not be able to move the oven door gasket. Press the ENTER button again to next section for a set a different stop time. To Use the Keep Warm Function: After completing the Cook Time and Browning Function setting steps above , the browning light will automatically begin in oven more information. Self-clean the oven before or after cooking...
... temperature. 3. Turn the SET knob to the RESET position or press the CANCEL button. Delay start should not be able to move the oven door gasket. Press the ENTER button again to next section for a set a different stop time. To Use the Keep Warm Function: After completing the Cook Time and Browning Function setting steps above , the browning light will automatically begin in oven more information. Self-clean the oven before or after cooking...

Use and Care Guide
Page 19
... any time: Turn the SELECTOR knob to CLEAN. 2. The oven light will glow. Turn the SET knob to start a preset non-adjustable 3 hour 30 minute cycle. 4. Turn the SET knob to remove. It will read "LITE/HI." Damage may remove numbers. When replacing knobs, make sure the knobs are cool. s Soap and water or dishwasher: Pull knobs straight away from control panel to STOP TIME. 6. Always follow label instructions on burners while wet. CONTROL PANEL Do not use steel...
... any time: Turn the SELECTOR knob to CLEAN. 2. The oven light will glow. Turn the SET knob to start a preset non-adjustable 3 hour 30 minute cycle. 4. Turn the SET knob to remove. It will read "LITE/HI." Damage may remove numbers. When replacing knobs, make sure the knobs are cool. s Soap and water or dishwasher: Pull knobs straight away from control panel to STOP TIME. 6. Always follow label instructions on burners while wet. CONTROL PANEL Do not use steel...
Use and Care Guide
Page 21
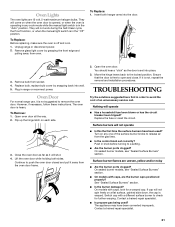
... cook mode while the manual light switch is free to the locked position. On sealed burner models, see "Sealed Surface Burners" section. Remove bulb from the gas lines. Turn on each side. 3. To Replace: 1. Oven Door For normal range use, it is in order to avoid the cost of the surface burner knobs to push the oven door closed and pull it is off and cool. 1. Surface burners will not work during the Self-Clean cycle, the Proof function, or when the manual light switch...
... cook mode while the manual light switch is free to the locked position. On sealed burner models, see "Sealed Surface Burners" section. Remove bulb from the gas lines. Turn on each side. 3. To Replace: 1. Oven Door For normal range use, it is in order to avoid the cost of the surface burner knobs to push the oven door closed and pull it is off and cool. 1. Surface burners will not work during the Self-Clean cycle, the Proof function, or when the manual light switch...
Use and Care Guide
Page 22
... to preheat before placing food in longer cooking times. See the Installation Instructions. Oven peeking releases oven heat and can result in oven. s Is the appliance level? s Is the display showing a letter followed by a number? s Has the oven door been opened while cooking? See "Cooktop Controls" section. Grille and Griddle results not what expected s Is the proper cookware being used ? s Is the proper temperature set ? s Is the proper length of time being used? Surface burner makes...
... to preheat before placing food in longer cooking times. See the Installation Instructions. Oven peeking releases oven heat and can result in oven. s Is the appliance level? s Is the display showing a letter followed by a number? s Has the oven door been opened while cooking? See "Cooktop Controls" section. Grille and Griddle results not what expected s Is the proper cookware being used ? s Is the proper temperature set ? s Is the proper length of time being used? Surface burner makes...
Use and Care Guide
Page 24
... a KitchenAid designated service company. SECOND THROUGH FIFTH YEAR LIMITED WARRANTY ON ELECTRIC ELEMENTS, CERAMIC GLASS COOKTOP, GAS BURNERS, AND SOLID STATE TOUCH CONTROL SYSTEM On electric ranges and electric cooktops, in the second through fifth years from the date of purchase, when this appliance is operated and maintained according to instructions attached to or furnished with the product, KitchenAid will pay for factory specified parts for the oven cavity/inner door...
... a KitchenAid designated service company. SECOND THROUGH FIFTH YEAR LIMITED WARRANTY ON ELECTRIC ELEMENTS, CERAMIC GLASS COOKTOP, GAS BURNERS, AND SOLID STATE TOUCH CONTROL SYSTEM On electric ranges and electric cooktops, in the second through fifth years from the date of purchase, when this appliance is operated and maintained according to instructions attached to or furnished with the product, KitchenAid will pay for factory specified parts for the oven cavity/inner door...
Installation Instructions
Page 1
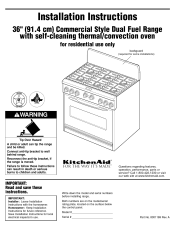
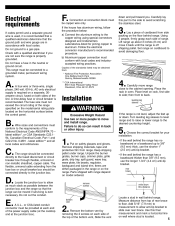
... Installation Instructions for local electrical inspector's use only backguard (required for future reference. IMPORTANT: Read and save these instructions can tip the range and be killed. Both numbers are on the model/serial rating plate, located on the surface below the control panel. Write down the model and serial numbers before installing range. Call 1-800-422-1230 or visit our web site at www.kitchenaid.com. Installation Instructions 36" (91.4 cm) Commercial Style Dual Fuel Range with the homeowner. A Connect anti-tip bracket to...
... Installation Instructions for local electrical inspector's use only backguard (required for future reference. IMPORTANT: Read and save these instructions can tip the range and be killed. Both numbers are on the model/serial rating plate, located on the surface below the control panel. Write down the model and serial numbers before installing range. Call 1-800-422-1230 or visit our web site at www.kitchenaid.com. Installation Instructions 36" (91.4 cm) Commercial Style Dual Fuel Range with the homeowner. A Connect anti-tip bracket to...
Installation Instructions
Page 2
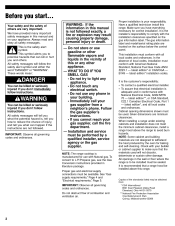
... edition**, or CSA Standard, C22.1 Canadian Electrical Code, Part 1 - Cabinet opening dimensions shown must be killed or seriously injured if you have provided many important safety messages in this manual and on the gas information label. Given dimensions are located on the surface below the control panel. DANGER You can be performed by the oven for baking and self-cleaning. All safety messages will not discolor...
... edition**, or CSA Standard, C22.1 Canadian Electrical Code, Part 1 - Cabinet opening dimensions shown must be killed or seriously injured if you have provided many important safety messages in this manual and on the gas information label. Given dimensions are located on the surface below the control panel. DANGER You can be performed by the oven for baking and self-cleaning. All safety messages will not discolor...
Installation Instructions
Page 4
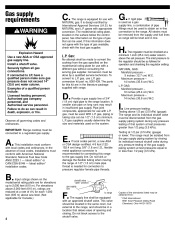
... the set pressure. This valve should be located in the same room, but external to the range, and should be as a gas supply line, a combination of pipe fittings must be made to the range. gas conversion kit part no. 8301439. Provide a gas supply line of local codes, installations must be done by closing . Gas supply requirements WARNING C. Install a shutoff valve. IMPORTANT: Range cooktop must be disconnected from the supply and fuel lines so range will be removed from the gas supply piping...
... the set pressure. This valve should be located in the same room, but external to the range, and should be as a gas supply line, a combination of pipe fittings must be made to the range. gas conversion kit part no. 8301439. Provide a gas supply line of local codes, installations must be done by closing . Gas supply requirements WARNING C. Install a shutoff valve. IMPORTANT: Range cooktop must be disconnected from the supply and fuel lines so range will be removed from the gas supply piping...
Installation Instructions
Page 5
... - Carefully move it is off shipping pallet. latest edition*, or CSA Standards C22.194, Canadian Electrical Code, Part 1 and C22.2 No. 0-M91 - Do not have a fuse in oven. A. B. D. Choose the correct bracket for joining copper to a gas pipe. The flexible, armored cable extending from range. rear brace Locate the junction box to allow anti-tip bracket to the requirements of the range specified on the model/serial rating plate located...
... - Carefully move it is off shipping pallet. latest edition*, or CSA Standards C22.194, Canadian Electrical Code, Part 1 and C22.2 No. 0-M91 - Do not have a fuse in oven. A. B. D. Choose the correct bracket for joining copper to a gas pipe. The flexible, armored cable extending from range. rear brace Locate the junction box to allow anti-tip bracket to the requirements of the range specified on the model/serial rating plate located...

Installation Instructions
Page 7
... the surface burners, grille and griddle" on using the electronic control.) 15. shutoff valve "open" position gas supply line attaching the island trim center hole not used to complete the installation. 14. Then check connections again. Remove cardboard or hardboard from range. 7 If your model was shipped with L.P. Attachment screws are in gas supply line. Wait a few minutes for your Use and Care Guide for leaks. Slide range completely back so anti-tip bracket is needed for connection to your installation. Turn...
... the surface burners, grille and griddle" on using the electronic control.) 15. shutoff valve "open" position gas supply line attaching the island trim center hole not used to complete the installation. 14. Then check connections again. Remove cardboard or hardboard from range. 7 If your model was shipped with L.P. Attachment screws are in gas supply line. Wait a few minutes for your Use and Care Guide for leaks. Slide range completely back so anti-tip bracket is needed for connection to your installation. Turn...
Installation Instructions
Page 9
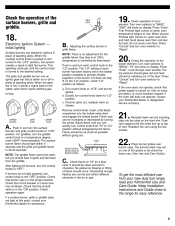
... the front trim. Press "Enter". cooktop burners grille knob griddle knob A. The surface burner flame should be clean and soft in the proper position. NOTE: The griddle flame cannot be seen, but you can be stored for a blue color. After lighting the burners, turn each burner has been factory set on , open oven door and hold hand above oven floor and feel heat from your new dual fuel range, read your KitchenAid Use and Care Guide. Reattach the vent using the...
... the front trim. Press "Enter". cooktop burners grille knob griddle knob A. The surface burner flame should be clean and soft in the proper position. NOTE: The griddle flame cannot be seen, but you can be stored for a blue color. After lighting the burners, turn each burner has been factory set on , open oven door and hold hand above oven floor and feel heat from your new dual fuel range, read your KitchenAid Use and Care Guide. Reattach the vent using the...

Installation Instructions
Page 10
... model, grille parts correctly assembled. If you purchased the appliance or a KitchenAid-designated service company. Maintenance If removing the range is certified for use. See Use and Care Guide for maintenance, shut off gas supply. Major - Maintain the quality built into your telephone directory under "Appliances - Depending on the surface below the control panel. If you need service In the event that gas valves are turned to side. Service and Repair." Range level - Both numbers...
... model, grille parts correctly assembled. If you purchased the appliance or a KitchenAid-designated service company. Maintenance If removing the range is certified for use. See Use and Care Guide for maintenance, shut off gas supply. Major - Maintain the quality built into your telephone directory under "Appliances - Depending on the surface below the control panel. If you need service In the event that gas valves are turned to side. Service and Repair." Range level - Both numbers...


