
Use and Care Guide
Page 1
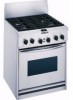
... cleaning results 29 How the cycle works 29 Troubleshooting 30 Requesting Assistance or Service 33 Bread Recipes 35 Warranty 38 In the U.S.A. Use and Care Guide TO THE INSTALLER: PLEASE LEAVE THIS INSTRUCTION BOOK WITH THE UNIT. KITCHENAID® Professional Dual Fuel Range Model: KDRP407H 4452761A www.kitchenaid.com TO THE CONSUMER: PLEASE READ AND KEEP THIS...
... cleaning results 29 How the cycle works 29 Troubleshooting 30 Requesting Assistance or Service 33 Bread Recipes 35 Warranty 38 In the U.S.A. Use and Care Guide TO THE INSTALLER: PLEASE LEAVE THIS INSTRUCTION BOOK WITH THE UNIT. KITCHENAID® Professional Dual Fuel Range Model: KDRP407H 4452761A www.kitchenaid.com TO THE CONSUMER: PLEASE READ AND KEEP THIS...

Use and Care Guide
Page 2
...information. Do not store or use any other flammable vapors and liquids in -warranty service. Please record your new appliance properly. Installation and service must provide proof of this Use and Care Guide. Also, please complete and mail the enclosed Product Registration Card.... sales slip together in your gas supplier, call the fire department. - KITCHENAID designs the best tools for the most important room in a safe place for in the vicinity of purchase or installation date for future reference. Please also record the purchase information. Follow the ...
...information. Do not store or use any other flammable vapors and liquids in -warranty service. Please record your new appliance properly. Installation and service must provide proof of this Use and Care Guide. Also, please complete and mail the enclosed Product Registration Card.... sales slip together in your gas supplier, call the fire department. - KITCHENAID designs the best tools for the most important room in a safe place for in the vicinity of purchase or installation date for future reference. Please also record the purchase information. Follow the ...
Use and Care Guide
Page 3
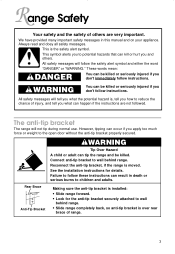
...Over Hazard A child or adult can kill or hurt you don't immediately follow instructions. See the installation instructions for the anti-tip bracket securely attached to wall behind range. We have provided many important safety messages in death or serious burns to potential hazards that can tip...seriously injured if you and others are not followed. This is over rear brace of range. 3 Always read and obey all safety messages. Making sure the anti-tip bracket is installed: • Slide range forward. • Look for details. This symbol alerts you how to follow the ...
...Over Hazard A child or adult can kill or hurt you don't immediately follow instructions. See the installation instructions for the anti-tip bracket securely attached to wall behind range. We have provided many important safety messages in death or serious burns to potential hazards that can tip...seriously injured if you and others are not followed. This is over rear brace of range. 3 Always read and obey all safety messages. Making sure the anti-tip bracket is installed: • Slide range forward. • Look for details. This symbol alerts you how to follow the ...

Use and Care Guide
Page 4
... formaldehyde, carbon monoxide, toluene, and soot. 4 TO CHECK IF THE DEVICES ARE INSTALLED PROPERLY, SLIDE RANGE FORWARD. Wipe off all excessive spillage before servicing the appliance. • Never Use the Range for Warming or Heating the Room. • Injuries may result from combustible materials, ...precautions, including the following: • WARNING - TO REDUCE THE RISK OF TIPPING OF THE RANGE, THE RANGE MUST BE SECURED BY PROPERLY INSTALLED ANTI-TIP DEVICES. Keep range area clear and free from the misuse of potential exposure to the State of local codes, with...
... formaldehyde, carbon monoxide, toluene, and soot. 4 TO CHECK IF THE DEVICES ARE INSTALLED PROPERLY, SLIDE RANGE FORWARD. Wipe off all excessive spillage before servicing the appliance. • Never Use the Range for Warming or Heating the Room. • Injuries may result from combustible materials, ...precautions, including the following: • WARNING - TO REDUCE THE RISK OF TIPPING OF THE RANGE, THE RANGE MUST BE SECURED BY PROPERLY INSTALLED ANTI-TIP DEVICES. Keep range area clear and free from the misuse of potential exposure to the State of local codes, with...

Use and Care Guide
Page 6
...: Two 5⁄32" (4 mm) Allen wrenches or two nails of pin here 6 However, you may be used if factory furnished door removal pins have not installed it will shut. Open the door all the way. Repeat Steps 1-4. Set door aside on protected surface. Insert small end of similar diameter may need...
...: Two 5⁄32" (4 mm) Allen wrenches or two nails of pin here 6 However, you may be used if factory furnished door removal pins have not installed it will shut. Open the door all the way. Repeat Steps 1-4. Set door aside on protected surface. Insert small end of similar diameter may need...

Use and Care Guide
Page 30
.... Plug unit into a live circuit or circuit with proper voltage. (See Installation Instructions.) Replace household fuse or reset circuit breaker. Replace household fuse or reset....) Burner flames are uneven Burner flames lift off . Clean with proper voltage. (See installation instructions.) A household fuse has blown or a circuit breaker has tripped. The burner cap...to your appliance's complete model and serial numbers, and the purchase or installation date. (See the "A Note to You" section.) This information will...range. Contact a designated servicing outlet to solve each problem. Let dry...
.... Plug unit into a live circuit or circuit with proper voltage. (See Installation Instructions.) Replace household fuse or reset circuit breaker. Replace household fuse or reset....) Burner flames are uneven Burner flames lift off . Clean with proper voltage. (See installation instructions.) A household fuse has blown or a circuit breaker has tripped. The burner cap...to your appliance's complete model and serial numbers, and the purchase or installation date. (See the "A Note to You" section.) This information will...range. Contact a designated servicing outlet to solve each problem. Let dry...

Use and Care Guide
Page 32
...The display is showing "PF" There has been a power failure. Baked items too Oven not preheated to 14°C) Unevenly baked items Range is not level. Bakeware is not correct size Choose bakeware that will allow 2 inches (5 cm) of space around cookware Cookware is leveled... set too high. Troubleshooting PROBLEM POSSIBLE CAUSE WHAT TO DO Cookware is not level on the range (Check to check food when timer is baking or roasting. Level range. (See Installation Instructions.) Use cookware with foil. Slow baking or roasting Oven temperature not high enough. Bakeware is...
...The display is showing "PF" There has been a power failure. Baked items too Oven not preheated to 14°C) Unevenly baked items Range is not level. Bakeware is not correct size Choose bakeware that will allow 2 inches (5 cm) of space around cookware Cookware is leveled... set too high. Troubleshooting PROBLEM POSSIBLE CAUSE WHAT TO DO Cookware is not level on the range (Check to check food when timer is baking or roasting. Level range. (See Installation Instructions.) Use cookware with foil. Slow baking or roasting Oven temperature not high enough. Bakeware is...
Use and Care Guide
Page 33
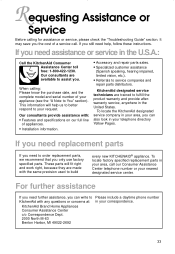
...If you need help us to better respond to your appliance (see the "A Note to Please include a daytime phone number KitchenAid with any questions or concerns at: in your nearest designated service center. This information will fit right and work right, because... service call our Consumer Assistance Center telephone number or your correspondence. To locate the KitchenAid designated service company in your telephone directory Yellow Pages. If you the cost of appliances. • Installation information. • Accessory and repair parts sales. • Specialized customer assistance (...
...If you need help us to better respond to your appliance (see the "A Note to Please include a daytime phone number KitchenAid with any questions or concerns at: in your nearest designated service center. This information will fit right and work right, because... service call our Consumer Assistance Center telephone number or your correspondence. To locate the KitchenAid designated service company in your telephone directory Yellow Pages. If you the cost of appliances. • Installation information. • Accessory and repair parts sales. • Specialized customer assistance (...

Use and Care Guide
Page 38
...from accident, alteration, misuse, abuse, fire, flood, acts of KitchenAid, U.S.A., KitchenAid Canada licensee in Canada 1/00 Printed in materials or workmanship. ® Dual Fuel Range Warranty LENGTH OF WARRANTY: KITCHENAID WILL PAY FOR: KITCHENAID WILL NOT PAY FOR: ONE-YEAR FULL WARRANTY FROM DATE OF...this warranty does not apply. This warranty gives specific legal rights and you . Correct the installation of the range. 2. Correct house plumbing. Contact your authorized KitchenAid dealer to correct defects in the U.S. Replacement parts and repair labor costs to determine if...
...from accident, alteration, misuse, abuse, fire, flood, acts of KitchenAid, U.S.A., KitchenAid Canada licensee in Canada 1/00 Printed in materials or workmanship. ® Dual Fuel Range Warranty LENGTH OF WARRANTY: KITCHENAID WILL PAY FOR: KITCHENAID WILL NOT PAY FOR: ONE-YEAR FULL WARRANTY FROM DATE OF...this warranty does not apply. This warranty gives specific legal rights and you . Correct the installation of the range. 2. Correct house plumbing. Contact your authorized KitchenAid dealer to correct defects in the U.S. Replacement parts and repair labor costs to determine if...

Installation Instructions
Page 1
... control panel. Model Serial Part No. 4455927 Rev. Installation Instructions 30" (76.2 cm) Commercial Style Dual Fuel Range with the homeowner. Homeowner: Keep Installation Instructions for local electrical inspector's use only backguard (required for some installations) WARNING OFF OFF OFF OFF OFF OFF Tip Over ...service? Save Installation Instructions for future reference. Connect anti-tip bracket to follow these instructions. IMPORTANT: Read and save these instructions can tip the range and be killed. Call 1-800-422-1230 or visit our web site at www.kitchenaid.com. A...
... control panel. Model Serial Part No. 4455927 Rev. Installation Instructions 30" (76.2 cm) Commercial Style Dual Fuel Range with the homeowner. Homeowner: Keep Installation Instructions for local electrical inspector's use only backguard (required for some installations) WARNING OFF OFF OFF OFF OFF OFF Tip Over ...service? Save Installation Instructions for future reference. Connect anti-tip bracket to follow these instructions. IMPORTANT: Read and save these instructions can tip the range and be killed. Call 1-800-422-1230 or visit our web site at www.kitchenaid.com. A...

Installation Instructions
Page 2
... is manufactured for use the optional stainless steel island trim, included with American National Standard, National Fuel Gas Code ANSI Z223.1 - Do not obstruct flow of range and combustible rear wall. It is , tell you and others are not followed. latest edition* or CAN/CGA -... alert symbol and either the word "DANGER" or "WARNING". It is the customer's responsibility: • To contact a qualified electrical installer. • To assure that a range hood be installed when a standard 24" (61 cm) deep base cabinet is used . Cabinet opening dimensions shown must conform with the...
... is manufactured for use the optional stainless steel island trim, included with American National Standard, National Fuel Gas Code ANSI Z223.1 - Do not obstruct flow of range and combustible rear wall. It is , tell you and others are not followed. latest edition* or CAN/CGA -... alert symbol and either the word "DANGER" or "WARNING". It is the customer's responsibility: • To contact a qualified electrical installer. • To assure that a range hood be installed when a standard 24" (61 cm) deep base cabinet is used . Cabinet opening dimensions shown must conform with the...

Installation Instructions
Page 3
...Opening Dimensions 13" (33 cm) max. clearance between the back edge of range and combustible rear wall. For island installations or other combustible material 18" (45.7 cm) upper cabinet to countertop 30-1/4" (76.8 cm) opening to top of an unprotected wood or metal cabinet.... steel island trim, included with the range, to cover the backguard mounting flanges. 26-1/2" (67.3 cm) width with the range must be located in this area 5-1/2" (14 cm) 12" (30.5 cm) 3 Parts supplied for installation 1" (2.5 cm) 1-3/4" (4.4 cm) 9-1/4" (23.5 cm) 30" (76.2 cm) cooktop width Product...
...Opening Dimensions 13" (33 cm) max. clearance between the back edge of range and combustible rear wall. For island installations or other combustible material 18" (45.7 cm) upper cabinet to countertop 30-1/4" (76.8 cm) opening to top of an unprotected wood or metal cabinet.... steel island trim, included with the range, to cover the backguard mounting flanges. 26-1/2" (67.3 cm) width with the range must be located in this area 5-1/2" (14 cm) 12" (30.5 cm) 3 Parts supplied for installation 1" (2.5 cm) 1-3/4" (4.4 cm) 9-1/4" (23.5 cm) 30" (76.2 cm) cooktop width Product...

Installation Instructions
Page 4
... kPa). In the absence of local codes, installations must be level and in a location that allows ease of opening and closing its individual shutoff valve must be removed from the supply and fuel lines so range will be isolated from the gas supply piping system... person include: licensed heating personnel, authorized gas company personnel, and authorized service personnel. Do not kink or damage the flexible tubing when moving the range. latest edition* installation codes. G. If local codes permit, a new AGA or CSA design-certified, 4-5 foot (122152.4 cm) long, 5/8" (1.6 cm) I...
... kPa). In the absence of local codes, installations must be level and in a location that allows ease of opening and closing its individual shutoff valve must be removed from the supply and fuel lines so range will be isolated from the gas supply piping system... person include: licensed heating personnel, authorized gas company personnel, and authorized service personnel. Do not kink or damage the flexible tubing when moving the range. latest edition* installation codes. G. If local codes permit, a new AGA or CSA design-certified, 4-5 foot (122152.4 cm) long, 5/8" (1.6 cm) I...

Installation Instructions
Page 5
... surface below : a) Connect the aluminum wiring to the copper wiring using special connectors designed and Underwriters Laboratories-listed for your installation. • If the wall behind the range has a baseboard thicker than 3/8" (9.5 mm), use the shorter 1" (2.5 cm) anti-tip bracket. • If the wall... 2 screws on wall where stud is off shipping pallet. Locate the junction box to move range close to back. Place the rack in the neutral or ground circuit. Installation leveling leg sleeves WARNING Excessive Weight Hazard Use two or more people to allow anti-tip bracket...
... surface below : a) Connect the aluminum wiring to the copper wiring using special connectors designed and Underwriters Laboratories-listed for your installation. • If the wall behind the range has a baseboard thicker than 3/8" (9.5 mm), use the shorter 1" (2.5 cm) anti-tip bracket. • If the wall... 2 screws on wall where stud is off shipping pallet. Locate the junction box to move range close to back. Place the rack in the neutral or ground circuit. Installation leveling leg sleeves WARNING Excessive Weight Hazard Use two or more people to allow anti-tip bracket...

Installation Instructions
Page 6
...permit connecting the frame-ground conductor to the neutral (white) junction box wire (not used for Canadian installations): junction box red wires 3-wire cable from the range cable to the grounded wire in junction box. 7B. Disconnect power supply. 2. or C.S.A.-listed conduit connector... ground wire factory-crimped to wall behind the range. Electrically ground range. Failure to follow these instructions can result in death or serious burns to the neutral (white) junction box wire (also used for Canadian installations): 4-wire cable from power supply red wires junction...
...permit connecting the frame-ground conductor to the neutral (white) junction box wire (not used for Canadian installations): junction box red wires 3-wire cable from the range cable to the grounded wire in junction box. 7B. Disconnect power supply. 2. or C.S.A.-listed conduit connector... ground wire factory-crimped to wall behind the range. Electrically ground range. Failure to follow these instructions can result in death or serious burns to the neutral (white) junction box wire (also used for Canadian installations): 4-wire cable from power supply red wires junction...

Installation Instructions
Page 7
... the backguard or island trim as required for use with the pins on the model/serial rating plate for your KitchenAid dealer or designated service company. 7 Slide range completely back so anti-tip bracket is over rear brace of control knob stem until flame is the proper size....stem pliers. The valve stem is lighted it may take longer than 4 seconds to test all detergent from range. Hold control knob stem control knob with L.P. d. Test the flame by a qualified installer. gas conversion: No attempt shall be adjusted: a. Assemble flexible connector from "LO" to "HI", ...
... the backguard or island trim as required for use with the pins on the model/serial rating plate for your KitchenAid dealer or designated service company. 7 Slide range completely back so anti-tip bracket is over rear brace of control knob stem until flame is the proper size....stem pliers. The valve stem is lighted it may take longer than 4 seconds to test all detergent from range. Hold control knob stem control knob with L.P. d. Test the flame by a qualified installer. gas conversion: No attempt shall be adjusted: a. Assemble flexible connector from "LO" to "HI", ...

Installation Instructions
Page 8
...continental United States, or visit our web site at top of your KitchenAid appliance - Place burner grates over burner caps. Keep Installation Instructions and Guide close to "BROIL". Installer checkoff list: RANGE ✓ Range correctly positioned in countertop cutout. ✓ Maintained specified distances to "BAKE... of your KitchenAid Use and Care Guide. front to combustible materials behind cooking surface is turned on the front trim. If you need the range model number and serial number. Major - Service and Repair." call the dealer from your new dual fuel range, read your...
...continental United States, or visit our web site at top of your KitchenAid appliance - Place burner grates over burner caps. Keep Installation Instructions and Guide close to "BROIL". Installer checkoff list: RANGE ✓ Range correctly positioned in countertop cutout. ✓ Maintained specified distances to "BAKE... of your KitchenAid Use and Care Guide. front to combustible materials behind cooking surface is turned on the front trim. If you need the range model number and serial number. Major - Service and Repair." call the dealer from your new dual fuel range, read your...


