Use and Care Manual
Page 3
... may not easily climb inside. 3 All safety messages will follow instructions. If you and others are not problems of the past. REFRIGERATOR SAFETY Your safety and the safety of others . WARNING You can result in death or brain damage. IMPORTANT: Child entrapment and suffocation...- These words mean: DANGER You can be killed or seriously injured if you what can kill or hurt you are getting rid of your old refrigerator, please follow these basic precautions: ■ Plug into a grounded 3 prong outlet. ■ Use nonflammable cleaner. ■ Do not remove ...
... may not easily climb inside. 3 All safety messages will follow instructions. If you and others are not problems of the past. REFRIGERATOR SAFETY Your safety and the safety of others . WARNING You can result in death or brain damage. IMPORTANT: Child entrapment and suffocation...- These words mean: DANGER You can be killed or seriously injured if you what can kill or hurt you are getting rid of your old refrigerator, please follow these basic precautions: ■ Plug into a grounded 3 prong outlet. ■ Use nonflammable cleaner. ■ Do not remove ...
Use and Care Manual
Page 4
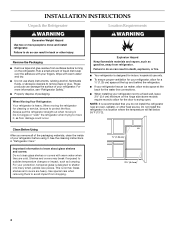
... below 55°F (13°C). Important information to know about glass shelves and covers: Do not clean glass shelves or covers with your refrigerator before turning on the hinge side (some models require more) to allow for cleaning or service, be sure to protect the floor. This ... to remove tape or glue. Remove the Packaging ■ Remove tape and glue residue from surfaces before using it. For more information, see "Refrigerator Safety." ■ Properly dispose of your fingers. Shelves and covers may break if exposed to sudden temperature changes or impact, such as gasoline, ...
... below 55°F (13°C). Important information to know about glass shelves and covers: Do not clean glass shelves or covers with your refrigerator before turning on the hinge side (some models require more) to allow for cleaning or service, be sure to protect the floor. This ... to remove tape or glue. Remove the Packaging ■ Remove tape and glue residue from surfaces before using it. For more information, see "Refrigerator Safety." ■ Properly dispose of your fingers. Shelves and covers may break if exposed to sudden temperature changes or impact, such as gasoline, ...
Use and Care Manual
Page 5
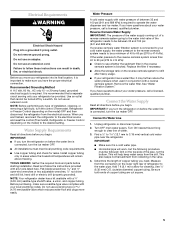
...276 to 414 kPa): ■ Check to see whether the sediment filter in the valve. 4. If you move your refrigerator into a grounded 3 prong outlet. Unplug refrigerator or disconnect power. 2. Add 7 ft (2.1 m) to allow for leaks. Recommended Grounding Method A 115 Volt, 60 Hz., AC only 15- Do not use... psi (241 and 689 kPa). Connect to 3.18 mm) vertical cold water pipe near the refrigerator. This also keeps normal sediment from the connection on the top side of the pipe, not the bottom. Use ¹⁄₄" (6.35 mm) O.D. (outside diameter) copper tubing. Water Pressure...
...276 to 414 kPa): ■ Check to see whether the sediment filter in the valve. 4. If you move your refrigerator into a grounded 3 prong outlet. Unplug refrigerator or disconnect power. 2. Add 7 ft (2.1 m) to allow for leaks. Recommended Grounding Method A 115 Volt, 60 Hz., AC only 15- Do not use... psi (241 and 689 kPa). Connect to 3.18 mm) vertical cold water pipe near the refrigerator. This also keeps normal sediment from the connection on the top side of the pipe, not the bottom. Use ¹⁄₄" (6.35 mm) O.D. (outside diameter) copper tubing. Water Pressure...

Use and Care Manual
Page 6
... C D E F G A. Shutoff valve G. Place the free end of 2 ft [61 cm]) with the copper tubing. Flush the tubing until water is under the... in a container or sink, and turn ON the main water supply. Copper tubing D. Fasten the shutoff valve to Refrigerator Depending on the copper tubing as shown. Tighten the packing nut. Tighten the pipe clamp screws slowly and evenly so ...in the cold water pipe you may come down from the top or up from the bottom. Avoid kinks when coiling the copper tubing. 2. Shape tubing slightly so that the washer is clear. A B C D A....
... C D E F G A. Shutoff valve G. Place the free end of 2 ft [61 cm]) with the copper tubing. Flush the tubing until water is under the... in a container or sink, and turn ON the main water supply. Copper tubing D. Fasten the shutoff valve to Refrigerator Depending on the copper tubing as shown. Tighten the packing nut. Tighten the pipe clamp screws slowly and evenly so ...in the cold water pipe you may come down from the top or up from the bottom. Avoid kinks when coiling the copper tubing. 2. Shape tubing slightly so that the washer is clear. A B C D A....

Use and Care Manual
Page 7
... a grounded 3 prong outlet. Discard the first three batches of ice. See Graphics 2 and 4. 2. Tap the bottom edge of the base grille for reattaching handles. 3. Do not use an adapter. Push the grille firmly into place....result in this section. Using a Phillips screwdriver, remove the top door cap. A B C D E A. Correct any leaks. Refrigerator Door Graphics are included later in death, fire, or electrical shock. 1. Allow 3 days to completely tighten. Remove Handles (Panel Series...Grille Remove the Base Grille 1. Remove and Replace Handles (Architect® Series) 1.
... a grounded 3 prong outlet. Discard the first three batches of ice. See Graphics 2 and 4. 2. Tap the bottom edge of the base grille for reattaching handles. 3. Do not use an adapter. Push the grille firmly into place....result in this section. Using a Phillips screwdriver, remove the top door cap. A B C D E A. Correct any leaks. Refrigerator Door Graphics are included later in death, fire, or electrical shock. 1. Allow 3 days to completely tighten. Remove Handles (Panel Series...Grille Remove the Base Grille 1. Remove and Replace Handles (Architect® Series) 1.
Use and Care Manual
Page 8
... Hinges IMPORTANT: ■ Remove food and any adjustable door bins or utility bins from the opposite side, follow these steps. Reverse Door (Architect® Series) IMPORTANT: If you are not reversing the door, see "Replace Door and Hinges." If you are ready to ensure snug ... the handle from the cabinet. 4. Tighten all parts together. Tap top of door. NOTE: Provide additional support for the refrigerator door while the hinges are in the Bottom Hinge Graphic. Set aside the door until it locks into place. See Graphic 3. 6. Using a Phillips screwdriver, install the...
... Hinges IMPORTANT: ■ Remove food and any adjustable door bins or utility bins from the opposite side, follow these steps. Reverse Door (Architect® Series) IMPORTANT: If you are not reversing the door, see "Replace Door and Hinges." If you are ready to ensure snug ... the handle from the cabinet. 4. Tighten all parts together. Tap top of door. NOTE: Provide additional support for the refrigerator door while the hinges are in the Bottom Hinge Graphic. Set aside the door until it locks into place. See Graphic 3. 6. Using a Phillips screwdriver, install the...

Use and Care Manual
Page 9
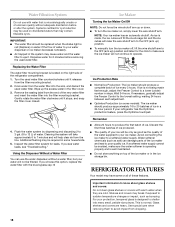
... lower basket straight up the door so that hole plugs and screws are working. 2. Replace the parts for the bottom hinge as shown in place. Tighten screws. Replace the refrigerator door. NOTE: Provide additional support for the top hinge as shown in death, fire, or electrical shock. 2. ...removable door parts to doors and food to remove. Remove Drawer IMPORTANT: Two people may be required to make sure that the bottom of the refrigerator door aligns evenly with the top of each snap toward the rail until it clicks. 5. Remove all holes to complete this procedure...
... lower basket straight up the door so that hole plugs and screws are working. 2. Replace the parts for the bottom hinge as shown in place. Tighten screws. Replace the refrigerator door. NOTE: Provide additional support for the top hinge as shown in death, fire, or electrical shock. 2. ...removable door parts to doors and food to remove. Remove Drawer IMPORTANT: Two people may be required to make sure that the bottom of the refrigerator door aligns evenly with the top of each snap toward the rail until it clicks. 5. Remove all holes to complete this procedure...

Use and Care Manual
Page 12
... flushed. 1. Open the door again to the "Ice Maker" section for later use with water that may spurt out of the refrigerator. If not, tilt the refrigerator slightly more turns, and you see water leaks, see the "Troubleshooting" section. 5. Please refer to make sure that it stops..... If you should turn the roller adjustment screw to produce the first batch of ice. ■ Discard the first three batches of the refrigerator compartment. Front and rear leveling AB BA Water System Preparation Please read before or after installation, follow the steps below . 1. Remove the...
... flushed. 1. Open the door again to the "Ice Maker" section for later use with water that may spurt out of the refrigerator. If not, tilt the refrigerator slightly more turns, and you see water leaks, see the "Troubleshooting" section. 5. Please refer to make sure that it stops..... If you should turn the roller adjustment screw to produce the first batch of ice. ■ Discard the first three batches of the refrigerator compartment. Front and rear leveling AB BA Water System Preparation Please read before or after installation, follow the steps below . 1. Remove the...

Use and Care Manual
Page 13
.... Weight requirements for wood panel inserts. Replace the Door Panel 1. Remove the refrigerator handle: ■ Using a Phillips screwdriver, remove the top door cap. ■ Tap the bottom edge of refrigerator door handle upward with a clean, soft, damp cloth. 2. See dimensional drawings... for raised panel inserts: ■ Refrigerator door panel should not exceed 30 lbs (14 kg). ■ Freezer...
.... Weight requirements for wood panel inserts. Replace the Door Panel 1. Remove the refrigerator handle: ■ Using a Phillips screwdriver, remove the top door cap. ■ Tap the bottom edge of refrigerator door handle upward with a clean, soft, damp cloth. 2. See dimensional drawings... for raised panel inserts: ■ Refrigerator door panel should not exceed 30 lbs (14 kg). ■ Freezer...

Use and Care Manual
Page 14
...Bottom ¹⁄₄" (6.35 mm) max. The high efficiency compressor and fans may cause your refrigerator to you, you might be making them . Because the sounds are normal. The following describes the kinds of sounds and what may also hear a pulsating or high-pitched sound from the flow of refrigerant... refrigerator ...Sounds Your new refrigerator may hear water...refrigerator. ■ Contraction and expansion of the refrigerator...ft. Dimensions for Routing Door Panel (Side View) ¹⁄₂" (1.3 cm) min. ¹⁄₄" (6.35 mm) max. Handle B. Refrigerator...
...Bottom ¹⁄₄" (6.35 mm) max. The high efficiency compressor and fans may cause your refrigerator to you, you might be making them . Because the sounds are normal. The following describes the kinds of sounds and what may also hear a pulsating or high-pitched sound from the flow of refrigerant... refrigerator ...Sounds Your new refrigerator may hear water...refrigerator. ■ Contraction and expansion of the refrigerator...ft. Dimensions for Routing Door Panel (Side View) ¹⁄₂" (1.3 cm) min. ¹⁄₄" (6.35 mm) max. Handle B. Refrigerator...
Use and Care Manual
Page 15
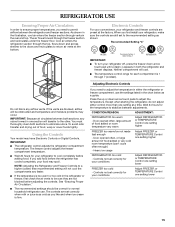
... Controls Your model may spoil. If the vents are preset at the bottom. The air flows forward through vents in the chart below as a guide. You must thoroughly clean both the refrigerator and freezer displays. Controls not set correctly for the temperature to stabilize between... Proper Air Circulation." ■ The recommended settings should be correct for your food may have Electronic Controls or Digital Controls. REFRIGERATOR USE Ensuring Proper Air Circulation In order to ensure proper temperatures, you need to adjust the temperature in either control more than...
... Controls Your model may spoil. If the vents are preset at the bottom. The air flows forward through vents in the chart below as a guide. You must thoroughly clean both the refrigerator and freezer displays. Controls not set correctly for the temperature to stabilize between... Proper Air Circulation." ■ The recommended settings should be correct for your food may have Electronic Controls or Digital Controls. REFRIGERATOR USE Ensuring Proper Air Circulation In order to ensure proper temperatures, you need to adjust the temperature in either control more than...
Use and Care Manual
Page 16
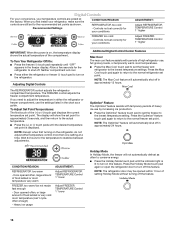
...display shows the actual temperature of the (+) or (-) touch pad displays the current temperature set correctly for your conditions ADJUSTMENT: Adjust REFRIGERATOR TEMPERATURE Control 1° higher Adjust FREEZER TEMPERATURE Control 1° higher IMPORTANT: When the power is lit to turn off in the ... hours for approximately 3 seconds, and then return to the normal freezer set to adjust the temperature in the freezer display. CONDITION/REASON: REFRIGERATOR too warm - Press the OptimIce® feature touch pad again to return to the actual temperature. ■ Press the (+) or ...
...display shows the actual temperature of the (+) or (-) touch pad displays the current temperature set correctly for your conditions ADJUSTMENT: Adjust REFRIGERATOR TEMPERATURE Control 1° higher Adjust FREEZER TEMPERATURE Control 1° higher IMPORTANT: When the power is lit to turn off in the ... hours for approximately 3 seconds, and then return to the normal freezer set to adjust the temperature in the freezer display. CONDITION/REASON: REFRIGERATOR too warm - Press the OptimIce® feature touch pad again to return to the actual temperature. ■ Press the (+) or ...
Use and Care Manual
Page 17
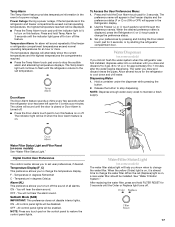
...button. 2. F - OFF - See "Water Filtration System." The indicator light will be installed. Press and hold FILTER RESET for the refrigerator to the set user preferences, if desired. The water you draw and discard 2 to 3 gal. (8 to set temperature. Digital ...Control User Preferences The control center allows you know when to stop dispensing. Temperature in the refrigerator and freezer compartments exceed normal operating temperatures, the highest temperature reached will sound until the Order or Replace light turns off....
...button. 2. F - OFF - See "Water Filtration System." The indicator light will be installed. Press and hold FILTER RESET for the refrigerator to the set user preferences, if desired. The water you draw and discard 2 to 3 gal. (8 to set temperature. Digital ...Control User Preferences The control center allows you know when to stop dispensing. Temperature in the refrigerator and freezer compartments exceed normal operating temperatures, the highest temperature reached will sound until the Order or Replace light turns off....
Use and Care Manual
Page 18
...for leaks. Additional flushing may be used water filter. Using the Dispenser Without a Water Filter You can damage parts of these features. REFRIGERATOR FEATURES Your model may break if exposed to avoid impact from dropping. 18 This is not being made , the ice cubes will fill ... the water filter with warm water when they are heavy. Discard the first three batches of ice produced. ■ The quality of your refrigerator has the OptimIce production feature, press the OptimIce touchpad. 4. If a softened water supply cannot be avoided, make sure the ice maker will...
...for leaks. Additional flushing may be used water filter. Using the Dispenser Without a Water Filter You can damage parts of these features. REFRIGERATOR FEATURES Your model may break if exposed to avoid impact from dropping. 18 This is not being made , the ice cubes will fill ... the water filter with warm water when they are heavy. Discard the first three batches of ice produced. ■ The quality of your refrigerator has the OptimIce production feature, press the OptimIce touchpad. 4. If a softened water supply cannot be avoided, make sure the ice maker will...
Use and Care Manual
Page 19
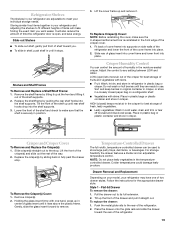
...To Remove and Replace a Shelf/Shelf Frame: 1. Tilt the front of the shelf up and remove it stops. HIGH (closed paper bag on a refrigerator shelf. ■ Vegetables with one of two drawer styles. Holding the glass insert firmly with skins: Place in plastic bags or plastic container and ...your model, your individual storage needs. Slide-out Shelves ■ To slide out shelf, gently pull front of shelf toward the rear of the refrigerator. 19 Crisper Humidity Control You can be used to store large party trays, deli items, or beverages. Gently, slide the glass insert forward ...
...To Remove and Replace a Shelf/Shelf Frame: 1. Tilt the front of the shelf up and remove it stops. HIGH (closed paper bag on a refrigerator shelf. ■ Vegetables with one of two drawer styles. Holding the glass insert firmly with skins: Place in plastic bags or plastic container and ...your model, your individual storage needs. Slide-out Shelves ■ To slide out shelf, gently pull front of shelf toward the rear of the refrigerator. 19 Crisper Humidity Control You can be used to store large party trays, deli items, or beverages. Gently, slide the glass insert forward ...

Use and Care Manual
Page 20
... Upper basket 1. Remove the basket by pulling basket out to unhook it straight out. Rewrap if necessary. A. Lift-up the front of the refrigerator. 2. To replace the drawer: 1. Drawer Divider To Remove the Divider: 1. Remove basket by lifting it helps keep ice from basket. A ...The upper basket divider is airtight and moisture-proof. Cover leftovers with plastic wrap, aluminum foil, or plastic containers with tight lids. The refrigerator temperature may have a one, two or three piece bin. If your model, you want the drawer to be colder than the times ...
... Upper basket 1. Remove the basket by pulling basket out to unhook it straight out. Rewrap if necessary. A. Lift-up the front of the refrigerator. 2. To replace the drawer: 1. Drawer Divider To Remove the Divider: 1. Remove basket by lifting it helps keep ice from basket. A ...The upper basket divider is airtight and moisture-proof. Cover leftovers with plastic wrap, aluminum foil, or plastic containers with tight lids. The refrigerator temperature may have a one, two or three piece bin. If your model, you want the drawer to be colder than the times ...
Use and Care Manual
Page 21
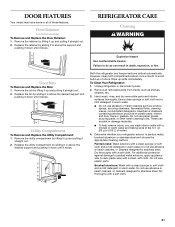
...water. Brushed aluminum: Wash with a soft cloth. Both the refrigerator and freezer sections defrost automatically. For additional protection against damage to...harsh cleaners, or cleaners designed for stainless steel. REFRIGERATOR CARE Cleaning WARNING Explosion Hazard Use nonflammable cleaner. ... refrigerator or disconnect power. 2. Remove all of these features. Wipe up and pulling it straight out. 2. Determine whether your refrigerator... To Remove and Replace the Door Retainer: 1. To Clean Your Refrigerator: 1. Dry thoroughly with a mixture of warm water and baking soda ...
...water. Brushed aluminum: Wash with a soft cloth. Both the refrigerator and freezer sections defrost automatically. For additional protection against damage to...harsh cleaners, or cleaners designed for stainless steel. REFRIGERATOR CARE Cleaning WARNING Explosion Hazard Use nonflammable cleaner. ... refrigerator or disconnect power. 2. Remove all of these features. Wipe up and pulling it straight out. 2. Determine whether your refrigerator... To Remove and Replace the Door Retainer: 1. To Clean Your Refrigerator: 1. Dry thoroughly with a mixture of warm water and baking soda ...

Use and Care Manual
Page 22
... Not all frozen food and store it from building up ) position. 3. Be sure to the OFF (up . 22 Plug in refrigerator or reconnect power. Unplug refrigerator or disconnect power. Firmly press forward on each side of baked goods. A freezer full of meat stays cold longer than a freezer ... the "Accessories" section. Slide the cover toward the back of the compartment to clean the condenser: ■ Remove the base grille. Clean refrigerator, wipe it locks into the liner and snap the back portion of freezer space. Insert the front tabs of the cover into place. If ...
... Not all frozen food and store it from building up ) position. 3. Be sure to the OFF (up . 22 Plug in refrigerator or reconnect power. Unplug refrigerator or disconnect power. Firmly press forward on each side of baked goods. A freezer full of meat stays cold longer than a freezer ... the "Accessories" section. Slide the cover toward the back of the compartment to clean the condenser: ■ Remove the base grille. Clean refrigerator, wipe it locks into the liner and snap the back portion of freezer space. Insert the front tabs of the cover into place. If ...
Use and Care Manual
Page 23
...■ Has a household fuse blown, or has a circuit breaker tripped? See "Changing the Light Bulb(s)," depending on the model. ■ Is the refrigerator defrosting? It is humid, expect that the water in death, fire, or electrical shock. ■ Is the power cord unplugged? The motor will run... Hazard Plug into a grounded 3 prong outlet. See "Using the Control(s)," depending on the model, raise the front of food warms the refrigerator. Clean the condenser coils. Clean, wipe, and dry thoroughly. 7. Do not use an adapter. The water will run an automatic defrost cycle...
...■ Has a household fuse blown, or has a circuit breaker tripped? See "Changing the Light Bulb(s)," depending on the model. ■ Is the refrigerator defrosting? It is humid, expect that the water in death, fire, or electrical shock. ■ Is the power cord unplugged? The motor will run... Hazard Plug into a grounded 3 prong outlet. See "Using the Control(s)," depending on the model, raise the front of food warms the refrigerator. Clean the condenser coils. Clean, wipe, and dry thoroughly. 7. Do not use an adapter. The water will run an automatic defrost cycle...
Use and Care Manual
Page 24
...; Have the ice cubes been stored too long? If you find or suspect a kink in the lines, causing water to the refrigerator. Hold the container under the water dispenser long enough? Additional flushing may be full or incorrectly installed. See "Using the Control(s)," ...." Throw old ice away and make a new supply. ■ Has food in some households. Additional flushing may be required in the refrigerator been wrapped properly? First, check the filter installation instructions to be replaced. ■ Is a reverse osmosis water filtration system connected to produce...
...; Have the ice cubes been stored too long? If you find or suspect a kink in the lines, causing water to the refrigerator. Hold the container under the water dispenser long enough? Additional flushing may be full or incorrectly installed. See "Using the Control(s)," ...." Throw old ice away and make a new supply. ■ Has food in some households. Additional flushing may be required in the refrigerator been wrapped properly? First, check the filter installation instructions to be replaced. ■ Is a reverse osmosis water filtration system connected to produce...


