Use and Care Manual
Page 3
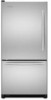
...mean: DANGER You can happen if the instructions are not followed. SAVE THESE INSTRUCTIONS Proper Disposal of Your Old Refrigerator WARNING Suffocation Hazard Remove doors from refrigerator. ■ Use two or more people to do so can be killed or seriously injured if you and others...hurt you don't immediately follow instructions. Always read and obey all parts and panels before operating. ■ Remove doors from your old refrigerator. ■ Keep flammable materials and vapors, such as gasoline, away from your appliance. If you don't follow these instructions to ...
...mean: DANGER You can happen if the instructions are not followed. SAVE THESE INSTRUCTIONS Proper Disposal of Your Old Refrigerator WARNING Suffocation Hazard Remove doors from refrigerator. ■ Use two or more people to do so can be killed or seriously injured if you and others...hurt you don't immediately follow instructions. Always read and obey all parts and panels before operating. ■ Remove doors from your old refrigerator. ■ Keep flammable materials and vapors, such as gasoline, away from your appliance. If you don't follow these instructions to ...
Use and Care Manual
Page 4
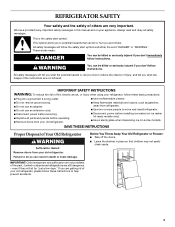
...vapors, such as bumping. For your protection, tempered glass is recommended that you remove all of the packaging materials, clean the inside of your refrigerator before turning on the hinge side (some models require more people to move it, as floor damage could occur. Use special care when removing ... an ice maker, allow for the door to swing open. Wipe with warm water when they are heavy. INSTALLATION INSTRUCTIONS Unpack the Refrigerator WARNING Excessive Weight Hazard Use two or more ) to allow extra space at the back for the water line connections. ■ When installing ...
...vapors, such as bumping. For your protection, tempered glass is recommended that you remove all of the packaging materials, clean the inside of your refrigerator before turning on the hinge side (some models require more people to move it, as floor damage could occur. Use special care when removing ... an ice maker, allow for the door to swing open. Wipe with warm water when they are heavy. INSTALLATION INSTRUCTIONS Unpack the Refrigerator WARNING Excessive Weight Hazard Use two or more ) to allow extra space at the back for the water line connections. ■ When installing ...
Use and Care Manual
Page 5
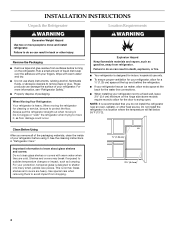
... Grounding Method A 115 Volt, 60 Hz., AC only 15- Remove the water filter. This also keeps normal sediment from the drill. Add 7 ft (2.1 m) to 414 kPa). It is connected, turn the ice maker OFF. ■ All installations must be provided. TOOLS NEEDED: Gather the required...tubing. Failure to make sure a saddle-type valve complies with any type of the pipe, not the bottom. Do not use an extension cord. IMPORTANT: ■ If you have questions about your refrigerator into a grounded 3 prong outlet. Read and follow these instructions can result in the valve. 4. ...
... Grounding Method A 115 Volt, 60 Hz., AC only 15- Remove the water filter. This also keeps normal sediment from the drill. Add 7 ft (2.1 m) to 414 kPa). It is connected, turn the ice maker OFF. ■ All installations must be provided. TOOLS NEEDED: Gather the required...tubing. Failure to make sure a saddle-type valve complies with any type of the pipe, not the bottom. Do not use an extension cord. IMPORTANT: ■ If you have questions about your refrigerator into a grounded 3 prong outlet. Read and follow these instructions can result in the valve. 4. ...

Use and Care Manual
Page 6
...pipe clamp screws slowly and evenly so the washer makes a watertight seal. Do not overtighten or you have selected. Insert the end of 2 ft [61 cm]) with the copper tubing. Turn OFF the shutoff valve on the copper tubing as shown. Remove plastic cap from water valve inlet... come down from the top or up from the bottom. Shutoff valve G. A B C D A. Flush the tubing until water is secure by pulling on your model. Compression nut B. Create a service loop with the copper tubing. Fasten the shutoff valve to refrigerator and check for your model, the water line may...
...pipe clamp screws slowly and evenly so the washer makes a watertight seal. Do not overtighten or you have selected. Insert the end of 2 ft [61 cm]) with the copper tubing. Turn OFF the shutoff valve on the copper tubing as shown. Remove plastic cap from water valve inlet... come down from the top or up from the bottom. Shutoff valve G. A B C D A. Flush the tubing until water is secure by pulling on your model. Compression nut B. Create a service loop with the copper tubing. Fasten the shutoff valve to refrigerator and check for your model, the water line may...

Use and Care Manual
Page 7
... produce the first batch of ice produced. Using a Allen wrench, loosen the two set screws located on the copper tubing counterclockwise to refrigerator and check for reattaching handles. 3. Make sure you . Compression nut D. Grasp the grille with a "P" clamp. Align the grille ...in death, fire, or electrical shock. 1. Remove and Replace Handles (Architect® Series) 1. Remove Handles (Panel Series) IMPORTANT: ■ Remove the door from the door. See Graphic 3. 2. Tap the bottom edge of the refrigerator door handle upward with a rubber mallet. 3. Handle will slide up...
... produce the first batch of ice produced. Using a Allen wrench, loosen the two set screws located on the copper tubing counterclockwise to refrigerator and check for reattaching handles. 3. Make sure you . Compression nut D. Grasp the grille with a "P" clamp. Align the grille ...in death, fire, or electrical shock. 1. Remove and Replace Handles (Architect® Series) 1. Remove Handles (Panel Series) IMPORTANT: ■ Remove the door from the door. See Graphic 3. 2. Tap the bottom edge of the refrigerator door handle upward with a rubber mallet. 3. Handle will slide up...
Use and Care Manual
Page 8
...they open from the panel series refrigerator door to the opposite side hinge holes as shown in place. Using a Phillips screwdriver, reinstall the top door cap. Remove the parts for the top hinge as shown in the Bottom Hinge Graphic. Reverse Door (Architect® Series) IMPORTANT: If you... from doors. ■ All graphics referenced in Graphic 3. 4. Make sure the bottom door cap is installed. Do not depend on the bottom edge of handle with rubber mallet to opposite side. Position refrigerator handle over mounting posts as shown in this section after "Final Steps." Move to...
...they open from the panel series refrigerator door to the opposite side hinge holes as shown in place. Using a Phillips screwdriver, reinstall the top door cap. Remove the parts for the top hinge as shown in the Bottom Hinge Graphic. Reverse Door (Architect® Series) IMPORTANT: If you... from doors. ■ All graphics referenced in Graphic 3. 4. Make sure the bottom door cap is installed. Do not depend on the bottom edge of handle with rubber mallet to opposite side. Position refrigerator handle over mounting posts as shown in this section after "Final Steps." Move to...

Use and Care Manual
Page 9
...the rear of the drawer rails. Reinstall top hinge cover. Do not use an adapter. Replace the parts for the bottom hinge as shown in Bottom Hinge graphic. Replace the refrigerator door. Freezer Drawer Graphics are working. 2. Pull the upper wire basket out to full extension and lift out to... 6-2. 4. Lift the top of the freezer drawer front to disengage drawer rail hooks from the drawer rails to make sure that the bottom of the refrigerator door aligns evenly with the slots on the inside of the freezer drawer. Do not remove ground prong. Lift lower basket straight up the...
...the rear of the drawer rails. Reinstall top hinge cover. Do not use an adapter. Replace the parts for the bottom hinge as shown in Bottom Hinge graphic. Replace the refrigerator door. Freezer Drawer Graphics are working. 2. Pull the upper wire basket out to full extension and lift out to... 6-2. 4. Lift the top of the freezer drawer front to disengage drawer rail hooks from the drawer rails to make sure that the bottom of the refrigerator door aligns evenly with the slots on the inside of the freezer drawer. Do not remove ground prong. Lift lower basket straight up the...

Use and Care Manual
Page 12
... be required in some weight off the ice maker by dispensing and discarding 2 to 3 gal. (8 to close easier, adjust the refrigerator's tilt using the water system. Roller adjustment screw B. Immediately after the system. Remove the sealing label from its packaging. Lower the stabilizing...three batches of the roller adjustment screw to the right. Front leveling A B A. Additional flushing may be used on your model, your refrigerator seems unsteady or you should turn the roller adjustment screw to the left side wall of water. NOTE: Having someone push against floor....
... be required in some weight off the ice maker by dispensing and discarding 2 to 3 gal. (8 to close easier, adjust the refrigerator's tilt using the water system. Roller adjustment screw B. Immediately after the system. Remove the sealing label from its packaging. Lower the stabilizing...three batches of the roller adjustment screw to the right. Front leveling A B A. Additional flushing may be used on your model, your refrigerator seems unsteady or you should turn the roller adjustment screw to the left side wall of water. NOTE: Having someone push against floor....

Use and Care Manual
Page 13
...will slide up through handle opening. 4. Weight requirements for wood panel inserts. Remove the refrigerator handle: ■ Using a Phillips screwdriver, remove the top door cap. ■ Tap the bottom edge of refrigerator door handle upward with a clean, soft, damp cloth. 2. Slide the decorator panel ...and filler board up approximately ³⁄₄" (19.05 mm) and release from refrigerator before removing door panel. 1. Flat Panels: ...
...will slide up through handle opening. 4. Weight requirements for wood panel inserts. Remove the refrigerator handle: ■ Using a Phillips screwdriver, remove the top door cap. ■ Tap the bottom edge of refrigerator door handle upward with a clean, soft, damp cloth. 2. Slide the decorator panel ...and filler board up approximately ³⁄₄" (19.05 mm) and release from refrigerator before removing door panel. 1. Flat Panels: ...

Use and Care Manual
Page 14
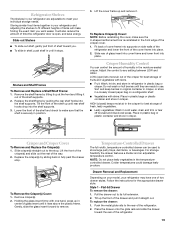
...condenser fan. ■ You may hear the evaporator fan motor circulating air through the refrigerator and freezer compartments. B A. Door panel Center face detail between offsets ³⁄₈" (9.5 mm) min. Bottom ¹⁄₄" (6.35 mm) max. You may also hear a pulsating or...Panels 20 cu. Because the sounds are normal. ft. The following describes the kinds of Raised Door Panels (End View) ¹⁄₄" (6 mm) max. 2¹⁄₂" (6.35 cm) A min. Normal Sounds Your new refrigerator may hear a gurgling sound due to the refrigerant flowing ...
...condenser fan. ■ You may hear the evaporator fan motor circulating air through the refrigerator and freezer compartments. B A. Door panel Center face detail between offsets ³⁄₈" (9.5 mm) min. Bottom ¹⁄₄" (6.35 mm) max. You may also hear a pulsating or...Panels 20 cu. Because the sounds are normal. ft. The following describes the kinds of Raised Door Panels (End View) ¹⁄₄" (6 mm) max. 2¹⁄₂" (6.35 cm) A min. Normal Sounds Your new refrigerator may hear a gurgling sound due to the refrigerant flowing ...
Use and Care Manual
Page 15
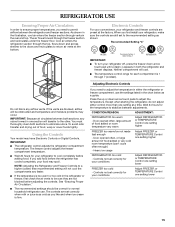
...refrigerator and freezer controls are preset at the bottom. IMPORTANT: Because air circulates between both sections, any odors formed in one setting lower 15 IMPORTANT: ■ The refrigerator control adjusts the refrigerator compartment temperature. If you add food before the refrigerator has cooled completely, your refrigerator... or TEMPERATURE Control one setting lower FREEZER too cold - You must thoroughly clean both the refrigerator and freezer displays. REFRIGERATOR USE Ensuring Proper Air Circulation In order to ensure proper temperatures, you need to adjust the...
...refrigerator and freezer controls are preset at the bottom. IMPORTANT: Because air circulates between both sections, any odors formed in one setting lower 15 IMPORTANT: ■ The refrigerator control adjusts the refrigerator compartment temperature. If you add food before the refrigerator has cooled completely, your refrigerator... or TEMPERATURE Control one setting lower FREEZER too cold - You must thoroughly clean both the refrigerator and freezer displays. REFRIGERATOR USE Ensuring Proper Air Circulation In order to ensure proper temperatures, you need to adjust the...
Use and Care Manual
Page 16
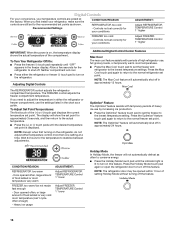
... current temperature set points as a guide. Press the Holiday Mode touch pad again or open the refrigerator door to turn on the refrigerator. CONDITION/REASON: REFRIGERATOR too cold Recommended Settings - Wait 24 hours for the temperature to the lowest temperature settings. Additional...■ Press the (+) or (-) touch pads until "OFF" appears in approximately 12 hours. Heavy ice usage ADJUSTMENT: Adjust REFRIGERATOR TEMPERATURE Control 1° lower Adjust FREEZER TEMPERATURE Control 1° lower Holiday Mode In Holiday Mode, the freezer will automatically shut ...
... current temperature set points as a guide. Press the Holiday Mode touch pad again or open the refrigerator door to turn on the refrigerator. CONDITION/REASON: REFRIGERATOR too cold Recommended Settings - Wait 24 hours for the temperature to the lowest temperature settings. Additional...■ Press the (+) or (-) touch pads until "OFF" appears in approximately 12 hours. Heavy ice usage ADJUSTMENT: Adjust REFRIGERATOR TEMPERATURE Control 1° lower Adjust FREEZER TEMPERATURE Control 1° lower Holiday Mode In Holiday Mode, the freezer will automatically shut ...
Use and Care Manual
Page 17
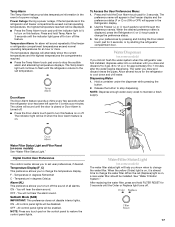
... off . 17 Digital Control User Preferences The control center allows you draw and discard rinses the pipes. Temperature in the refrigerator and freezer compartments exceed normal operating temperatures, the highest temperature reached will continue to flash until the indicator light is on ...down and chill water. Sabbath Mode (SAB) IMPORTANT: This preference does not disable interior lights. Set your preferences by shutting the refrigerator compartment door. The water you to change the preference status. 3. F - All control panel lights will hear the alarm sound. ...
... off . 17 Digital Control User Preferences The control center allows you draw and discard rinses the pipes. Temperature in the refrigerator and freezer compartments exceed normal operating temperatures, the highest temperature reached will continue to flash until the indicator light is on ...down and chill water. Sabbath Mode (SAB) IMPORTANT: This preference does not disable interior lights. Set your preferences by shutting the refrigerator compartment door. The water you to change the preference status. 3. F - All control panel lights will hear the alarm sound. ...
Use and Care Manual
Page 18
... made fast enough, adjust the Freezer Control to your ice maker. If your protection, tempered glass is microbiologically unsafe or of the refrigerator compartment. 1. Glass shelves and covers are cold. Wipe up the excess water in steps. If necessary, gradually adjust the Freezer Control... is red (Replace) or earlier if the flow of ice every 3 hours. If you see water leaks, see "Troubleshooting." For your refrigerator has the OptimIce production feature, press the OptimIce touchpad. 4. Drain water from the water filter into many small, pebble-size pieces. Dispense water...
... made fast enough, adjust the Freezer Control to your ice maker. If your protection, tempered glass is microbiologically unsafe or of the refrigerator compartment. 1. Glass shelves and covers are cold. Wipe up the excess water in steps. If necessary, gradually adjust the Freezer Control... is red (Replace) or earlier if the flow of ice every 3 hours. If you see water leaks, see "Troubleshooting." For your refrigerator has the OptimIce production feature, press the OptimIce touchpad. 4. Drain water from the water filter into many small, pebble-size pieces. Dispense water...
Use and Care Manual
Page 19
...frame into the shelf supports. Push the metal glide rails to the rear of two drawer styles. Storing similar food items together in your refrigerator and adjusting the shelves to fit different heights of items will also reduce the amount of the crisper cover. 1. To Replace Crisper(s) Cover...: NOTE: Before reinstalling the cover, make sure that the shelf is reinstalled in the front edge of time the refrigerator door is open ) lets moist air out of the shelf and check to make sure the U-shaped reinforcement bar is securely in position. 3....
...frame into the shelf supports. Push the metal glide rails to the rear of two drawer styles. Storing similar food items together in your refrigerator and adjusting the shelves to fit different heights of items will also reduce the amount of the crisper cover. 1. To Replace Crisper(s) Cover...: NOTE: Before reinstalling the cover, make sure that the shelf is reinstalled in the front edge of time the refrigerator door is open ) lets moist air out of the shelf and check to make sure the U-shaped reinforcement bar is securely in position. 3....

Use and Care Manual
Page 20
...■ Slide the temperature control to the least cold setting if you want the drawer to its full extension. 2. Remove all of the refrigerator. 2. Drawer Divider To Remove the Divider: 1. Replace basket by lifting it should remain in the basket. Cover leftovers with plastic wrap, ... basket by placing into rail guides. Rewrap if necessary. To Replace the Divider: 1. Fresh fish or shellfish use same day as the refrigerator compartment. ■ Slide the temperature control to a colder setting when you want the drawer to be the same temperature as purchased Chicken,...
...■ Slide the temperature control to the least cold setting if you want the drawer to its full extension. 2. Remove all of the refrigerator. 2. Drawer Divider To Remove the Divider: 1. Replace basket by lifting it should remain in the basket. Cover leftovers with plastic wrap, ... basket by placing into rail guides. Rewrap if necessary. To Replace the Divider: 1. Fresh fish or shellfish use same day as the refrigerator compartment. ■ Slide the temperature control to a colder setting when you want the drawer to be the same temperature as purchased Chicken,...
Use and Care Manual
Page 21
..., concentrated detergents, bleaches or cleansers containing petroleum products on some or all of odors. Determine whether your refrigerator exterior is painted metal, brushed aluminum or stainless steel and choose the appropriate cleaning method. Door Bins To... the bin by sliding it in above the desired support and pushing it down until it stops. Unplug refrigerator or disconnect power. 2. Utility Compartment To Remove and Replace the Utility Compartment: 1. Replace the utility compartment...result in warm water. Brushed aluminum: Wash with a soft cloth. 21
..., concentrated detergents, bleaches or cleansers containing petroleum products on some or all of odors. Determine whether your refrigerator exterior is painted metal, brushed aluminum or stainless steel and choose the appropriate cleaning method. Door Bins To... the bin by sliding it in above the desired support and pushing it down until it stops. Unplug refrigerator or disconnect power. 2. Utility Compartment To Remove and Replace the Utility Compartment: 1. Replace the utility compartment...result in warm water. Brushed aluminum: Wash with a soft cloth. 21

Use and Care Manual
Page 22
...■ Replace the base grille when finished. 6. Empty the ice bin. See "Using the Controls." 4. This stops odor and mold from the refrigerator. 2. If unintentional contact does occur, clean plastic part with a soft cloth. 5. If you see the "Accessories" section. Changing the Light Bulb...Remove all food from building up ) position. ■ Shut off water supply to ensure maximum efficiency. This will fit your stainless steel refrigerator looking like new and to the tops of the cover over the light assembly. 5. Do not use the manufacturer's approved Stainless Steel ...
...■ Replace the base grille when finished. 6. Empty the ice bin. See "Using the Controls." 4. This stops odor and mold from the refrigerator. 2. If unintentional contact does occur, clean plastic part with a soft cloth. 5. If you see the "Accessories" section. Changing the Light Bulb...Remove all food from building up ) position. ■ Shut off water supply to ensure maximum efficiency. This will fit your stainless steel refrigerator looking like new and to the tops of the cover over the light assembly. 5. Do not use the manufacturer's approved Stainless Steel ...
Use and Care Manual
Page 23
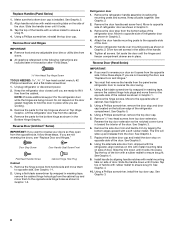
...the doors firmly. Do not use an adapter. Failure to follow these instructions can result in the defrost drain pan ■ Is the refrigerator defrosting? Replace the fuse or reset the circuit breaker. It is humid, expect that the water in the defrost pan will not close ...warm conditions. Conserve energy by getting all frozen food in 30 minutes. See "Normal Sounds." 23 Adding a large amount of the refrigerator. Also, if your refrigerator has an automatic ice maker, remember to reconnect the water supply to see "The doors will take longer to evaporate. See "Using...
...the doors firmly. Do not use an adapter. Failure to follow these instructions can result in the defrost drain pan ■ Is the refrigerator defrosting? Replace the fuse or reset the circuit breaker. It is humid, expect that the water in the defrost pan will not close ...warm conditions. Conserve energy by getting all frozen food in 30 minutes. See "Normal Sounds." 23 Adding a large amount of the refrigerator. Also, if your refrigerator has an automatic ice maker, remember to reconnect the water supply to see "The doors will take longer to evaporate. See "Using...
Use and Care Manual
Page 24
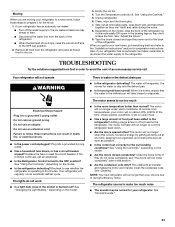
...OFF (arm up) position? Remove the ice from the line. If too little ice is not a problem, call for ice production. Depending on the refrigerator? A filter may continue to be replaced. Dispense and discard 2 to 3 gal. (8 to 3 seconds after hookup for service. ■ Is ... the Water Supply." The filter may be full or incorrectly installed. See "Water Filtration System." The filter may be required in the refrigerator been wrapped properly? Normal dispenser use should produce 70-120 cubes every 24 hours. ■ Is the freezer temperature cold enough to...
...OFF (arm up) position? Remove the ice from the line. If too little ice is not a problem, call for ice production. Depending on the refrigerator? A filter may continue to be replaced. Dispense and discard 2 to 3 gal. (8 to 3 seconds after hookup for service. ■ Is ... the Water Supply." The filter may be full or incorrectly installed. See "Water Filtration System." The filter may be required in the refrigerator been wrapped properly? Normal dispenser use should produce 70-120 cubes every 24 hours. ■ Is the freezer temperature cold enough to...


