
Instruction Manual
Page 2
... Safety precautions 3 Notes 4 General features 7 Power Selecting the Source Volume Attenuator Audio Control Audio Setup Bass Boost Speaker Setting Switching Display Subwoofer Output Theft Deterrent Faceplate TEL Mute Tuner features 11 Tuning Tuning Mode Station Preset Memory Auto Memory Entry Preset Tuning CD/Audio file/External disc control features 13 Playing...
... Safety precautions 3 Notes 4 General features 7 Power Selecting the Source Volume Attenuator Audio Control Audio Setup Bass Boost Speaker Setting Switching Display Subwoofer Output Theft Deterrent Faceplate TEL Mute Tuner features 11 Tuning Tuning Mode Station Preset Memory Auto Memory Entry Preset Tuning CD/Audio file/External disc control features 13 Playing...

Instruction Manual
Page 3
...Safety precautions 2WARNING To prevent injury or fire, take the following precautions: • To prevent a short circuit, never put or leave any Kenwood disc changers/ CD players released in . Use only the screws provided. Connecting unsupported disc changers/CD players to direct sunlight or excessive heat or... that any metallic objects (such as it is a piece of water splashing. • Do not place the faceplate (and the faceplate case) in 1998 or later can use your Kenwood dealer. Lens Fogging When you turn on the models being connected. ¤ • You can damage both ...
...Safety precautions 2WARNING To prevent injury or fire, take the following precautions: • To prevent a short circuit, never put or leave any Kenwood disc changers/ CD players released in . Use only the screws provided. Connecting unsupported disc changers/CD players to direct sunlight or excessive heat or... that any metallic objects (such as it is a piece of water splashing. • Do not place the faceplate (and the faceplate case) in 1998 or later can use your Kenwood dealer. Lens Fogging When you turn on the models being connected. ¤ • You can damage both ...
Instruction Manual
Page 4
...is stained badly, wipe the stain off with a cloth moistened with neutral cleaner, then wipe it with a clean soft dry cloth. If the faceplate is initially set on the Demonstration mode. When using this unit for the first time, cancel the (page 22). Notes • If you ...experience problems during installation, consult your Kenwood dealer. • When you purchase optional accessories, check with your Kenwood dealer to make sure that they work with your model and in your unit • If the unit fails...
...is stained badly, wipe the stain off with a cloth moistened with neutral cleaner, then wipe it with a clean soft dry cloth. If the faceplate is initially set on the Demonstration mode. When using this unit for the first time, cancel the (page 22). Notes • If you ...experience problems during installation, consult your Kenwood dealer. • When you purchase optional accessories, check with your Kenwood dealer to make sure that they work with your model and in your unit • If the unit fails...
Instruction Manual
Page 10
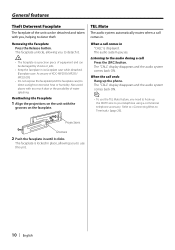
.... When a call Press the [SRC] button. When the call comes in its faceplate case while detached. (Faceplate case: Accessory of KDC-MP2035/MP235/ MP235CR) • Do not expose the faceplate (and the faceplate case) to direct sunlight or excessive heat or humidity. Removing the Faceplate Press the Release button. TEL Mute The audio system automatically mutes when...
.... When a call Press the [SRC] button. When the call comes in its faceplate case while detached. (Faceplate case: Accessory of KDC-MP2035/MP235/ MP235CR) • Do not expose the faceplate (and the faceplate case) to direct sunlight or excessive heat or humidity. Removing the Faceplate Press the Release button. TEL Mute The audio system automatically mutes when...
Instruction Manual
Page 20
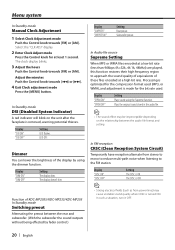
... between the rear and subwoofer. (With the subwoofer the sound outputs without being effected by using the Supreme function. Function of KDC-MP2035/KDC-MP235/KDC-MP205 In Standby mode Switching preout Alternating the preout between the audio file format and setting. Display "SPRM ON" "SPRM OFF...FM reception CRSC (Clean Reception System Circuit) Temporarily have reception alternate from power lines) may be imperceptible depending on the unit after the faceplate is ON. The CRSC is OFF. ⁄ • Strong electrical fields (such as from stereo to mono to reduce multi-path...
... between the rear and subwoofer. (With the subwoofer the sound outputs without being effected by using the Supreme function. Function of KDC-MP2035/KDC-MP235/KDC-MP205 In Standby mode Switching preout Alternating the preout between the audio file format and setting. Display "SPRM ON" "SPRM OFF...FM reception CRSC (Clean Reception System Circuit) Temporarily have reception alternate from power lines) may be imperceptible depending on the unit after the faceplate is ON. The CRSC is OFF. ⁄ • Strong electrical fields (such as from stereo to mono to reduce multi-path...
Instruction Manual
Page 25
...) and the battery wire (yellow) to the car chassis (ground), you may have an ACC position, connect the ignition wires to a power source that the faceplate will be damaged or fail to both the rear output terminals (do not connect the - The unit may be OFF immediately), the speaker wire may...
...) and the battery wire (yellow) to the car chassis (ground), you may have an ACC position, connect the ignition wires to a power source that the faceplate will be damaged or fail to both the rear output terminals (do not connect the - The unit may be OFF immediately), the speaker wire may...
Instruction Manual
Page 28
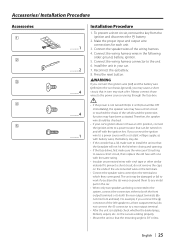
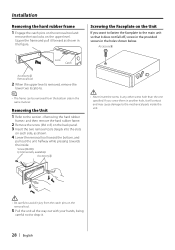
... (M4X8) (commercially available) Accessory2 ¤ • Never insert the screw in any other screw hole than the one specified. If you want to fasten the faceplate to the main unit so that it does not fall off, screw in the provided screws in the holes shown below. Removing the Unit 1 Refer... (M4 × 8) on the back panel. 3 Insert the two removal tools deeply into the slots on each side, as shown in the figure. Screwing the Faceplate on the upper level. Installation Removing the hard rubber frame 1 Engage the catch pins on the removal tool and remove the two locks on the...
... (M4X8) (commercially available) Accessory2 ¤ • Never insert the screw in any other screw hole than the one specified. If you want to fasten the faceplate to the main unit so that it does not fall off, screw in the provided screws in the holes shown below. Removing the Unit 1 Refer... (M4 × 8) on the back panel. 3 Insert the two removal tools deeply into the slots on each side, as shown in the figure. Screwing the Faceplate on the upper level. Installation Removing the hard rubber frame 1 Engage the catch pins on the removal tool and remove the two locks on the...
Instruction Manual
Page 30
... loaded in the unit. If the "E-99" code does not disappear, consult your nearest service center. E-05: The disc is scratched a lot. NO PANEL: The faceplate of the vehicle, and then the protection function is ON. The disc magazine is upsidedown. The CD is not completely loaded. • No CD in...
... loaded in the unit. If the "E-99" code does not disappear, consult your nearest service center. E-05: The disc is scratched a lot. NO PANEL: The faceplate of the vehicle, and then the protection function is ON. The disc magazine is upsidedown. The CD is not completely loaded. • No CD in...

