
Instruction Manual
Page 1
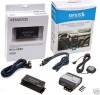
... with installation and operation procedures will help you call upon your Kenwood dealer for information or service on the back of Sirius Satellite Radio Inc. For your new SIRIUS interface box. Refer to read through this instruction manual. KCA-SR50 SIRIUS INTERFACE BOX FOR CONNECTING KENWOOD HEAD UNITS TO SIRIUS RECEIVERS INSTRUCTION MANUAL BOITIER D'INTERFACE SIRIUS POUR BRANCHEMENT D'UNITES PRINCIPALES KENWOOD AU RECEPTEURS SIRIUS MODE D'EMPLOI CAJA DE INTERFACE SIRIUS PARA CONECTAR UNIDADES KENWOOD A RECEPTORES SIRIUS MANUAL DE INSTRUCCIONES Kenwood Corporation SIRIUS" c0l...
... with installation and operation procedures will help you call upon your Kenwood dealer for information or service on the back of Sirius Satellite Radio Inc. For your new SIRIUS interface box. Refer to read through this instruction manual. KCA-SR50 SIRIUS INTERFACE BOX FOR CONNECTING KENWOOD HEAD UNITS TO SIRIUS RECEIVERS INSTRUCTION MANUAL BOITIER D'INTERFACE SIRIUS POUR BRANCHEMENT D'UNITES PRINCIPALES KENWOOD AU RECEPTEURS SIRIUS MODE D'EMPLOI CAJA DE INTERFACE SIRIUS PARA CONECTAR UNIDADES KENWOOD A RECEPTORES SIRIUS MANUAL DE INSTRUCCIONES Kenwood Corporation SIRIUS" c0l...
Instruction Manual
Page 2
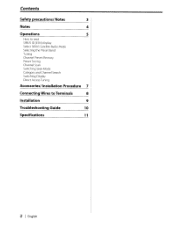
Contents Safety precautions/ Notes 3 Notes 4 Operations 5 How to read SIRIUS ID [ESN] display Select SIRIUS Satellite Rddio Mode Selecting the Preset Band Tuning Channel Preset Memory Preset Tuning Channel Scan Switching Seek Mode Category and Channel Search Switching Display Direct Access Tuning Accessories/Installation Procedure 7 Connecting Wires to Terminals 8 Installation 9 Troubleshooting Guide 10 Specifications 11 2 I English
Contents Safety precautions/ Notes 3 Notes 4 Operations 5 How to read SIRIUS ID [ESN] display Select SIRIUS Satellite Rddio Mode Selecting the Preset Band Tuning Channel Preset Memory Preset Tuning Channel Scan Switching Seek Mode Category and Channel Search Switching Display Direct Access Tuning Accessories/Installation Procedure 7 Connecting Wires to Terminals 8 Installation 9 Troubleshooting Guide 10 Specifications 11 2 I English

Instruction Manual
Page 3
... to be working right, try pressing the reset button on the other side. If that does not solve the problem, consult your Kenwood dealer. • If the unit does not seem to direct sunlight or excessive heat or humidity. If you use wrong screws, you experience problems during installation, consult your Kenwood dealer. • When the reset button is pressed, the SIRIUS satellite radio becomes ready...
... to be working right, try pressing the reset button on the other side. If that does not solve the problem, consult your Kenwood dealer. • If the unit does not seem to direct sunlight or excessive heat or humidity. If you use wrong screws, you experience problems during installation, consult your Kenwood dealer. • When the reset button is pressed, the SIRIUS satellite radio becomes ready...

Instruction Manual
Page 4
... channel setting. Changes or modifications to operate this time, audio reception may generate or use radio frequency energy. For the models marked with Canadian ICES-003. Refer to the Instruction Manual that discussed in the instruction manual. At this equipment if an unauthorized change or modification is made. 2005 models *XXV-01D, *KDC-X889, *KDC-X789, *KDC-MP928, *KDC-MP828, *KDC-MP7028, *KDC-MP728, *KDCMP628 KDC-XS89, KDC-MP5028, KDC-MP528, KDC-MP4028, KDC-MP428, KDC-MP2028, KDC-MP228, KDC...
... channel setting. Changes or modifications to operate this time, audio reception may generate or use radio frequency energy. For the models marked with Canadian ICES-003. Refer to the Instruction Manual that discussed in the instruction manual. At this equipment if an unauthorized change or modification is made. 2005 models *XXV-01D, *KDC-X889, *KDC-X789, *KDC-MP928, *KDC-MP828, *KDC-MP7028, *KDC-MP728, *KDCMP628 KDC-XS89, KDC-MP5028, KDC-MP528, KDC-MP4028, KDC-MP428, KDC-MP2028, KDC-MP228, KDC...

Instruction Manual
Page 5
... . Each time you selected the SIRIUS source. II Press the [~] or [~] button. The preset number display blinks 1 time. Select SIRIUS Satellite Radio Mode Listening to receive the service by SIRIUS Satellite Radio. E1 Push the Control knob towards right or left . On each band, 1 station can be displayed. II Press the [FM] button. 2 Call up . Select the ISIRIUSII"SAT" display. 2 Check the SIRIUS 10 [ESN] of this unit See the page of the instruction manual of the control unit. II Press...
... . Each time you selected the SIRIUS source. II Press the [~] or [~] button. The preset number display blinks 1 time. Select SIRIUS Satellite Radio Mode Listening to receive the service by SIRIUS Satellite Radio. E1 Push the Control knob towards right or left . On each band, 1 station can be displayed. II Press the [FM] button. 2 Call up . Select the ISIRIUSII"SAT" display. 2 Check the SIRIUS 10 [ESN] of this unit See the page of the instruction manual of the control unit. II Press...

Instruction Manual
Page 6
... function cannot be connected. Function ofremote control Direct Access Tuning Entering the channel and tuning. 1 Enter Direct Access Tuning mode Press the [DIRECT] button on the remote control. 2 Enter the channel Press the number buttons. 3 Do Channel Search Press the [~] or [~] button. Cllnceling Direct Access Tuning Press the [DIRECT] button on the remote control. ~ ~ If you make no button operation for 10 seconds, the Direct Access Tuning mode is checked for 10 seconds. 1 Start Channel Scan Press the [AUTO] button for at least 2 seconds. Switching Seek Mode Sets...
... function cannot be connected. Function ofremote control Direct Access Tuning Entering the channel and tuning. 1 Enter Direct Access Tuning mode Press the [DIRECT] button on the remote control. 2 Enter the channel Press the number buttons. 3 Do Channel Search Press the [~] or [~] button. Cllnceling Direct Access Tuning Press the [DIRECT] button on the remote control. ~ ~ If you make no button operation for 10 seconds, the Direct Access Tuning mode is checked for 10 seconds. 1 Start Channel Scan Press the [AUTO] button for at least 2 seconds. Switching Seek Mode Sets...

Instruction Manual
Page 7
Make the proper input and output wire connections for this special connectionsystem, consult your Kenwood dealer. Install the unit in your car is not prepared for each unit. 4. Do not let unconnected wires or terminals touch metal on the ends of the unconnected wires or the terminals. Otherwise wire disconnecticn or other trouble may result. Press the reset button. ~ Do not connect the SIRIUS connection wire while the control unit is installed, check whether...
Make the proper input and output wire connections for this special connectionsystem, consult your Kenwood dealer. Install the unit in your car is not prepared for each unit. 4. Do not let unconnected wires or terminals touch metal on the ends of the unconnected wires or the terminals. Otherwise wire disconnecticn or other trouble may result. Press the reset button. ~ Do not connect the SIRIUS connection wire while the control unit is installed, check whether...

Instruction Manual
Page 8
... function properly. 8 I -no, Disc changer ~ ~ • Connect the KCA-SRSO to the terminal labelled TO CHANGER 2 ~ • Please keep the total extension of the control cable from the control unit to the disc changer to 13 m or less. Connecting Wires to Terminals Control unit SIRIUS connection wire (AccessoryG) ) ~ KCA-SRSO To Kenwood disc changer/ SIRIUS control input ~ ~ • When using with the KCA-BTl 00 or KTC-HR1 OOTR, connect to it • Do not connect any unit other than the SIRIUS tuner...
... function properly. 8 I -no, Disc changer ~ ~ • Connect the KCA-SRSO to the terminal labelled TO CHANGER 2 ~ • Please keep the total extension of the control cable from the control unit to the disc changer to 13 m or less. Connecting Wires to Terminals Control unit SIRIUS connection wire (AccessoryG) ) ~ KCA-SRSO To Kenwood disc changer/ SIRIUS control input ~ ~ • When using with the KCA-BTl 00 or KTC-HR1 OOTR, connect to it • Do not connect any unit other than the SIRIUS tuner...

Instruction Manual
Page 9
.... When making a hole in a well-ventilated location and do not install the unit near the dashboard, the rear tray, or other side, and be careful not to the car, the unit should be used for mounting. (Attachment with velcro strips, although easy, can come off with driving. Doing... 9 Installation & Install the unit in the chassis, check that will not interfere with a shock) Board etc. Tapping screws should the unit come off due to injury or accident should be securely fastened at a location that the gas tank, break pipe, wire harness, or other part is not located on...
.... When making a hole in a well-ventilated location and do not install the unit near the dashboard, the rear tray, or other side, and be careful not to the car, the unit should be used for mounting. (Attachment with velcro strips, although easy, can come off with driving. Doing... 9 Installation & Install the unit in the chassis, check that will not interfere with a shock) Board etc. Tapping screws should the unit come off due to injury or accident should be securely fastened at a location that the gas tank, break pipe, wire harness, or other part is not located on...

Instruction Manual
Page 10
... may just be received . ..... Troubleshooting Guide If you use this for the first time, it OFF and ON. What might appear to the SIRIUS tuner. 10 I ANT ERROR: Antenna is not connected correctly. ¢ Make sure the antenna is connected . ¢ Check the connection to be selected. ..... The computer chip in this unit. ¢ Turn OFF ION of the SIRIUS source or Control unit, or press the reset button of Control unit. fJ No broadcast...
... may just be received . ..... Troubleshooting Guide If you use this for the first time, it OFF and ON. What might appear to the SIRIUS tuner. 10 I ANT ERROR: Antenna is not connected correctly. ¢ Make sure the antenna is connected . ¢ Check the connection to be selected. ..... The computer chip in this unit. ¢ Turn OFF ION of the SIRIUS source or Control unit, or press the reset button of Control unit. fJ No broadcast...

Instruction Manual
Page 11
General Operating voltage (11 - 16V allowable) : 14.4 V Current consumption : 420 mA Installation Size (W x H x D) : 127 x 35 x 52 mm 5 x 1-3/8 x 2-1/16 inch Weight : 0.17 kg (0.37 Ibs) English I 11 Specifications Specifications subject to change without notice.
General Operating voltage (11 - 16V allowable) : 14.4 V Current consumption : 420 mA Installation Size (W x H x D) : 127 x 35 x 52 mm 5 x 1-3/8 x 2-1/16 inch Weight : 0.17 kg (0.37 Ibs) English I 11 Specifications Specifications subject to change without notice.


