
Instruction Manual
Page 4
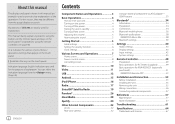
... examples used to reset your unit 4 Turning on the power 4 Turning off the power 4 Putting the unit in standby 4 Turning off the screen 4 Adjusting the volume 5 Attenuating the sound 5 Getting Started 5 Initial settings 5 Setting the security function 6 Clock settings 6 Various Screens and Operations 7 Home screen 7 Source control screen 8 List/setting screen 9 Disc 10 Video 11 USB 13 Android 15 iPod/iPhone 16 Radio 17 SiriusXM® Satellite Radio 19 Pandora 26 iHeartRadio 28 Spotify 30 Other External Components 32 AV-IN 32 Rear view camera 32 Using...
... examples used to reset your unit 4 Turning on the power 4 Turning off the power 4 Putting the unit in standby 4 Turning off the screen 4 Adjusting the volume 5 Attenuating the sound 5 Getting Started 5 Initial settings 5 Setting the security function 6 Clock settings 6 Various Screens and Operations 7 Home screen 7 Source control screen 8 List/setting screen 9 Disc 10 Video 11 USB 13 Android 15 iPod/iPhone 16 Radio 17 SiriusXM® Satellite Radio 19 Pandora 26 iHeartRadio 28 Spotify 30 Other External Components 32 AV-IN 32 Rear view camera 32 Using...

Instruction Manual
Page 7
... make the panel easier to display the picture from the connected rear view camera. (Page 43) Change the display design. DDX350BT/DDX25BT/DDX418BT Initial settings When you power on to enable the change. (Page 45) Make the settings to see. • Under 0° (Initial)/5°/10°/15°/20° ENGLISH 5 Perform the initial settings. Select the text language used for the first time or reset the unit, the screen...
... make the panel easier to display the picture from the connected rear view camera. (Page 43) Change the display design. DDX350BT/DDX25BT/DDX418BT Initial settings When you power on to enable the change. (Page 45) Make the settings to see. • Under 0° (Initial)/5°/10°/15°/20° ENGLISH 5 Perform the initial settings. Select the text language used for the first time or reset the unit, the screen...

Instruction Manual
Page 18
... page 60. • You cannot watch video. Wired connection iPod/iPhone iPod/iPhone 30-pin Lightning model connector model (commercially available) (commercially available) USB Audio cable for iPod/iPhone: KCA-iP103 (optional accessory) Rear panel USB Audio cable for iPod/iPhone: KCA-iP102 (optional accessory) Bluetooth connection Pair the iPod/iPhone with this unit via Bluetooth. (Page 34) Selecting the playback device via the connection method See on page 8. On the source control screen, touch as follows: 2 Make the settings. You can play/pause or skip files from the...
... page 60. • You cannot watch video. Wired connection iPod/iPhone iPod/iPhone 30-pin Lightning model connector model (commercially available) (commercially available) USB Audio cable for iPod/iPhone: KCA-iP103 (optional accessory) Rear panel USB Audio cable for iPod/iPhone: KCA-iP102 (optional accessory) Bluetooth connection Pair the iPod/iPhone with this unit via Bluetooth. (Page 34) Selecting the playback device via the connection method See on page 8. On the source control screen, touch as follows: 2 Make the settings. You can play/pause or skip files from the...

Instruction Manual
Page 36
... your car in total) Preparation Connect and install the microphone beforehand. Auto pairing When is connected. - When you reset the unit. However, when "BT Audio" is selected as dialing numbers, using SSP (Secure Simple Pairing) which only requires confirmation. - On the device: On the unit: To reject the request: Touch [Cancel]. 34 ENGLISH Phone book - Dialed calls, received calls, and missed calls (up to five Bluetooth audio devices and switch between these operations...
... your car in total) Preparation Connect and install the microphone beforehand. Auto pairing When is connected. - When you reset the unit. However, when "BT Audio" is selected as dialing numbers, using SSP (Secure Simple Pairing) which only requires confirmation. - On the device: On the unit: To reject the request: Touch [Cancel]. 34 ENGLISH Phone book - Dialed calls, received calls, and missed calls (up to five Bluetooth audio devices and switch between these operations...

Instruction Manual
Page 40
You can connect up to five phone numbers. 1 Display the phone control screen. Bluetooth audio player KENWOOD Music Mix When "BT Audio" is selected as follows: 2 Select call history or phone book calling method (1), then select a contact (2) to preset. 1 Device Name 1 2 Device Name 2 Name 1 1234XXXXXX Name 2 2345XXXXXX Name 3 3456XXXXXX A-Z Name 4 4567XXXXXX Name 5 8901XXXXXX 3 Select a preset number to store into. 1 Device Name 1 2 Device Name 2 1234XXXXXX 2345XXXXXX 3456XXXXXX No preset No preset (Hold) To delete the contact in the preset number: Touch [ ] besides...
You can connect up to five phone numbers. 1 Display the phone control screen. Bluetooth audio player KENWOOD Music Mix When "BT Audio" is selected as follows: 2 Select call history or phone book calling method (1), then select a contact (2) to preset. 1 Device Name 1 2 Device Name 2 Name 1 1234XXXXXX Name 2 2345XXXXXX Name 3 3456XXXXXX A-Z Name 4 4567XXXXXX Name 5 8901XXXXXX 3 Select a preset number to store into. 1 Device Name 1 2 Device Name 2 1234XXXXXX 2345XXXXXX 3456XXXXXX No preset No preset (Hold) To delete the contact in the preset number: Touch [ ] besides...

Instruction Manual
Page 41
...an audio file from the menu 1 Display the audio menu. Change the PIN code of registered devices. Show the device name of the unit. • ON (Initial): Automatically establishes a connection with the Android or iOS device (such as iPhone) connected via USB. (Auto pairing may not work for using Bluetooth devices on the Bluetooth device - Bluetooth settings You can connect a device or delete registered devices. You can change various settings for using Bluetooth mobile phones and Bluetooth audio players. Select the speakers used for Bluetooth mobile phones and Bluetooth audio players...
...an audio file from the menu 1 Display the audio menu. Change the PIN code of registered devices. Show the device name of the unit. • ON (Initial): Automatically establishes a connection with the Android or iOS device (such as iPhone) connected via USB. (Auto pairing may not work for using Bluetooth devices on the Bluetooth device - Bluetooth settings You can connect a device or delete registered devices. You can change various settings for using Bluetooth mobile phones and Bluetooth audio players. Select the speakers used for Bluetooth mobile phones and Bluetooth audio players...

Instruction Manual
Page 48
... even when the unit is connected via the USB input terminal (cable from the rear panel). Smartphone Setup Initial Information Device Type Connection Type Device Name iPod / iPhone Bluetooth Device Name Device Type Select iPod / iPhone Android / Other Change 2 Select the connection method (1), then confirm the selection ([OK] or [Next]) (2). For details, see "Bluetooth settings" on page 39. (Only for DDX395/DDX375BT) Get information, and change the settings for using the ADS adapter. • ON (Initial): Activates the key-touch...
... even when the unit is connected via the USB input terminal (cable from the rear panel). Smartphone Setup Initial Information Device Type Connection Type Device Name iPod / iPhone Bluetooth Device Name Device Type Select iPod / iPhone Android / Other Change 2 Select the connection method (1), then confirm the selection ([OK] or [Next]) (2). For details, see "Bluetooth settings" on page 39. (Only for DDX395/DDX375BT) Get information, and change the settings for using the ADS adapter. • ON (Initial): Activates the key-touch...

Instruction Manual
Page 51
... insert batteries from the remote controller differ depending on the position of each time you press this unit. with the player integrated in this mode when controlling a selected source or tuner source, etc. • DVD mode: Switch to avoid bending the springs. • If the Remote Controller operates only over shorter distances or does not operate at all, it is possible that is indicated in the unit, select "AUD" mode. Adjusts the volume level. Switches the control screen...
... insert batteries from the remote controller differ depending on the position of each time you press this unit. with the player integrated in this mode when controlling a selected source or tuner source, etc. • DVD mode: Switch to avoid bending the springs. • If the Remote Controller operates only over shorter distances or does not operate at all, it is possible that is indicated in the unit, select "AUD" mode. Adjusts the volume level. Switches the control screen...

Instruction Manual
Page 55
... the user to make an audio setting using KENWOOD Remote APP. This application also works as the heat sink and enclosure become hot. • When parking at a low ceiling area, turn off the unit to the power source running through the fuse box. the radio antenna extends automatically when you turn may cause a short circuit, that connects and controls compatible KENWOOD car receivers via the fuse. • Always connect the ignition wire (red) and the battery wire...
... the user to make an audio setting using KENWOOD Remote APP. This application also works as the heat sink and enclosure become hot. • When parking at a low ceiling area, turn off the unit to the power source running through the fuse box. the radio antenna extends automatically when you turn may cause a short circuit, that connects and controls compatible KENWOOD car receivers via the fuse. • Always connect the ignition wire (red) and the battery wire...

Instruction Manual
Page 56
... head screws, M5 x 8 mm (× 6) " Microphone, 3 m (× 1) Only for DDX395/DDX418BT ] Trim plate (× 1) Only for DDX395 ' Mounting sleeve (× 1) \ Extraction keys (× 2) Only for DDX418BT « Steering remote cable (× 1) Å Audio and video cable (× 1) Installation procedure 1 Remove the key from the ignition and disconnect the · battery. 2 Make the proper input and output wire connections for each unit. 3 Connect the speaker wires of the wiring harness. 4 Connect the wires of the left speaker...
... head screws, M5 x 8 mm (× 6) " Microphone, 3 m (× 1) Only for DDX395/DDX418BT ] Trim plate (× 1) Only for DDX395 ' Mounting sleeve (× 1) \ Extraction keys (× 2) Only for DDX418BT « Steering remote cable (× 1) Å Audio and video cable (× 1) Installation procedure 1 Remove the key from the ignition and disconnect the · battery. 2 Make the proper input and output wire connections for each unit. 3 Connect the speaker wires of the wiring harness. 4 Connect the wires of the left speaker...

Instruction Manual
Page 59
... audio 2 Right audio 24 3 Ground 4 Composite video 6 Video output (V-OUT) References 7 Rear view camera input (R-CAM) 8 Output terminals*5 • Left output (White) • Right output (Red) REAR: Rear speaker preouts FRONT: Front speaker preouts SW: Subwoofer preouts Maintenance Cleaning the unit • Do not use any solvent (for DDX418BT. *4 Use the audio and video cable (Å) to connect an external component. *5 When connecting an external amplifier, connect its ground wire to the car's steering remote harness using the steering remote cable («). For disc: MP3...
... audio 2 Right audio 24 3 Ground 4 Composite video 6 Video output (V-OUT) References 7 Rear view camera input (R-CAM) 8 Output terminals*5 • Left output (White) • Right output (Red) REAR: Rear speaker preouts FRONT: Front speaker preouts SW: Subwoofer preouts Maintenance Cleaning the unit • Do not use any solvent (for DDX418BT. *4 Use the audio and video cable (Å) to connect an external component. *5 When connecting an external amplifier, connect its ground wire to the car's steering remote harness using the steering remote cable («). For disc: MP3...
Instruction Manual
Page 64
... USB device. Sound output only from the screen. → Turn the power off the developer options on the Android device. → Reconnect the Android device and select the appropriate control mode. → If this unit. (Page 60) Radio AME automatic presetting does not work . → Check the connection. → Update the firmware version. → Charge the battery. → Reset the iPod/iPhone. "NO DEVICE" or "READING" keeps flashing. → Switch off and on (or reset the unit) before replacing...
... USB device. Sound output only from the screen. → Turn the power off the developer options on the Android device. → Reconnect the Android device and select the appropriate control mode. → If this unit. (Page 60) Radio AME automatic presetting does not work . → Check the connection. → Update the firmware version. → Charge the battery. → Reset the iPod/iPhone. "NO DEVICE" or "READING" keeps flashing. → Switch off and on (or reset the unit) before replacing...
Instruction Manual
Page 66
... while using a PIN code. (Page 35) → For devices compatible with Bluetooth 2.1: Register the device using a Bluetooth audio player. → Reduce the distance between the unit and the Bluetooth mobile phone. → Move the car to a place where you try "0000" or "1234." → Turn off and turn on the unit, then connect the device again (or reset the unit). "Initialize Error" appears. → The unit has failed to receive a call. Try the operation again. Troubleshooting Specifications Bluetooth Phone sound quality...
... while using a PIN code. (Page 35) → For devices compatible with Bluetooth 2.1: Register the device using a Bluetooth audio player. → Reduce the distance between the unit and the Bluetooth mobile phone. → Move the car to a place where you try "0000" or "1234." → Turn off and turn on the unit, then connect the device again (or reset the unit). "Initialize Error" appears. → The unit has failed to receive a call. Try the operation again. Troubleshooting Specifications Bluetooth Phone sound quality...

Instruction Manual
Page 13
...-channel disc, this setting affects the signals reproduced through the front and/or rear speakers. • Dolby Surround: Reproduces multi-channel surround sound by connecting an amplifier compatible with its full dynamic range. • Normal: Reduces the dynamic range a little. • Dialog (Initial): Reproduces movie dialog more clearly. If the disc contains no .) 4 Playing time 5 IN indicator (lights up while a disc is stopped. Video playback source control screen for DDX418BT...
...-channel disc, this setting affects the signals reproduced through the front and/or rear speakers. • Dolby Surround: Reproduces multi-channel surround sound by connecting an amplifier compatible with its full dynamic range. • Normal: Reduces the dynamic range a little. • Dialog (Initial): Reproduces movie dialog more clearly. If the disc contains no .) 4 Playing time 5 IN indicator (lights up while a disc is stopped. Video playback source control screen for DDX418BT...

Instruction Manual
Page 29
... a Bluetooth mobile phone is connected, the signal strength and battery level are displayed when the information is acquired from the connected camera is displayed. Touch [Yes]. Then, on the screen. On the Home screen, touch as follows: 2 Select the device (1) you want to delete in step 2, then touch [Remove]. • A confirmation message appears. ENGLISH 27 Bluetooth® 4 Select the unit ("DDX4") on your Bluetooth device. • If a PIN code is...
... a Bluetooth mobile phone is connected, the signal strength and battery level are displayed when the information is acquired from the connected camera is displayed. Touch [Yes]. Then, on the screen. On the Home screen, touch as follows: 2 Select the device (1) you want to delete in step 2, then touch [Remove]. • A confirmation message appears. ENGLISH 27 Bluetooth® 4 Select the unit ("DDX4") on your Bluetooth device. • If a PIN code is...

Instruction Manual
Page 31
... five phone numbers. 1 Display the phone control screen. On the phone control screen: Presetting phone numbers You can connect up to five Bluetooth audio devices at the same time. Bluetooth audio player KENWOOD Music Mix When "BT Audio" is selected as follows: 2 Select call . • Available only when the connected mobile phone has a voice recognition system. • If the unit cannot find the target, "Please speak into the microphone" appears. ENGLISH 29 Switching between two connected devices You can easily switch between...
... five phone numbers. 1 Display the phone control screen. On the phone control screen: Presetting phone numbers You can connect up to five Bluetooth audio devices at the same time. Bluetooth audio player KENWOOD Music Mix When "BT Audio" is selected as follows: 2 Select call . • Available only when the connected mobile phone has a voice recognition system. • If the unit cannot find the target, "Please speak into the microphone" appears. ENGLISH 29 Switching between two connected devices You can easily switch between...

Instruction Manual
Page 39
..., see "Bluetooth settings" on page 5. 2 Select the connection method (1), then confirm the selection ([OK] or [Next]) (2). If [iPod/iPhone] is selected in step 1: Then, on page 6. [USB 1 Wire] [Bluetooth] Select this when the device is connected via Bluetooth. (Go to connect. • If the device is connected via the USB input terminal (cable from the rear panel). E.g. Configure settings for on-screen information. For details, see "Initial settings" on page 30. • ON (Initial): Activates the key...
..., see "Bluetooth settings" on page 5. 2 Select the connection method (1), then confirm the selection ([OK] or [Next]) (2). If [iPod/iPhone] is selected in step 1: Then, on page 6. [USB 1 Wire] [Bluetooth] Select this when the device is connected via Bluetooth. (Go to connect. • If the device is connected via the USB input terminal (cable from the rear panel). E.g. Configure settings for on-screen information. For details, see "Initial settings" on page 30. • ON (Initial): Activates the key...

Instruction Manual
Page 40
... settings are parked. • If your car is equipped with the Registration Code recorded, this unit's Registration Code is overwritten for to display the setting screen. 2 Press and hold a button on the screen. Settings Memorize, recall, or clear the settings you have played back a file with the electrical steering remote controller. • You can register/change in step 3 and then touch to select the new function from the function...
... settings are parked. • If your car is equipped with the Registration Code recorded, this unit's Registration Code is overwritten for to display the setting screen. 2 Press and hold a button on the screen. Settings Memorize, recall, or clear the settings you have played back a file with the electrical steering remote controller. • You can register/change in step 3 and then touch to select the new function from the function...

Instruction Manual
Page 46
... the left speaker to a front output terminal, do not let the cable out at a low ceiling area, turn on installation and connection • Mounting and wiring this unit during and shortly after the use your car. • Do not touch the metal parts of the unit. To prevent a short circuit, do not remove the caps and do not connect the · connector to store the antenna. Use only...
... the left speaker to a front output terminal, do not let the cable out at a low ceiling area, turn on installation and connection • Mounting and wiring this unit during and shortly after the use your car. • Do not touch the metal parts of the unit. To prevent a short circuit, do not remove the caps and do not connect the · connector to store the antenna. Use only...
Instruction Manual
Page 55
...; H) Display System Drive System Number of the device is preparing to use the connected mobile phone to receive a call has not ended yet. The connected audio player cannot be controlled. Check whether the connected audio player supports AVRCP (Audio/Video Remote Control Profile). The unit does not pair with the Bluetooth device. For devices compatible with Bluetooth 2.0: Enter the same PIN code for Bluetooth phone. Turn off , then turn on the unit, then connect the device again (or reset the unit). Park your car, and use the Bluetooth function...
...; H) Display System Drive System Number of the device is preparing to use the connected mobile phone to receive a call has not ended yet. The connected audio player cannot be controlled. Check whether the connected audio player supports AVRCP (Audio/Video Remote Control Profile). The unit does not pair with the Bluetooth device. For devices compatible with Bluetooth 2.0: Enter the same PIN code for Bluetooth phone. Turn off , then turn on the unit, then connect the device again (or reset the unit). Park your car, and use the Bluetooth function...


