Use and Care Guide
Page 4
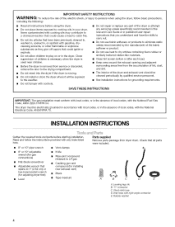
..., ANSI Z223.1/NFPA 54. INSTALLATION INSTRUCTIONS Gather the required tools and parts before using the dryer. • Do not place items exposed to LP gas • Caulking gun and compound (for grounding requirements. Leveling legs (4) B. Rubber washer connector 4 Check that • Vent clamps • Knife • Pipe-joint compound resistant to cooking oils...
..., ANSI Z223.1/NFPA 54. INSTALLATION INSTRUCTIONS Gather the required tools and parts before using the dryer. • Do not place items exposed to LP gas • Caulking gun and compound (for grounding requirements. Leveling legs (4) B. Rubber washer connector 4 Check that • Vent clamps • Knife • Pipe-joint compound resistant to cooking oils...
Use and Care Guide
Page 5
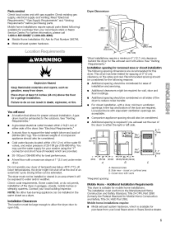
... should be considered for ease of 20-100 psi (138-690 kPa). Louvered doors with a maximum slope of the dryer. You may use the water supply for your washer using the "Y" connector and short hose (if needed Check local codes and with a door, minimum ventilation openings in the...• Cold water faucets located within 2 ft (61 cm) of either the right or left side. 3.* m ¢6cm) 18,,.3C (45.c7m) Z 14m,, a_, 4_in2_j 1"_ _ 2m'__fl _1 _ ÷11"_12__'__ s_' (25cm) (73.7cm) (2.5crn) (2.5cm) (7&3cm)(12.7crn) A B C A. A gas dryer must conform to the outdoors. Contact your...
... should be considered for ease of 20-100 psi (138-690 kPa). Louvered doors with a maximum slope of the dryer. You may use the water supply for your washer using the "Y" connector and short hose (if needed Check local codes and with a door, minimum ventilation openings in the...• Cold water faucets located within 2 ft (61 cm) of either the right or left side. 3.* m ¢6cm) 18,,.3C (45.c7m) Z 14m,, a_, 4_in2_j 1"_ _ 2m'__fl _1 _ ÷11"_12__'__ s_' (25cm) (73.7cm) (2.5crn) (2.5cm) (7&3cm)(12.7crn) A B C A. A gas dryer must conform to the outdoors. Contact your...

Use and Care Guide
Page 11
... directly to cold water faucet, go to cold water NOTE: Do not overtighten. Using pliers, tighten the couplings with new rubber washer provided. If the dryer is not level, prop up or down and check again for leaks around "Y" connector, faucet and hoses. Inlet to Step 6.... top screw from inlet hose and replace with an additional twothirds turn. Turn cold water faucet off and remove washer inlet hose. 2. Attach washer cold inlet hose to the front panel of the dryer. 3. A Check the levelness of "Y" connector. Remove the bottom screw from a right-side opening to "Y"...
... directly to cold water faucet, go to cold water NOTE: Do not overtighten. Using pliers, tighten the couplings with new rubber washer provided. If the dryer is not level, prop up or down and check again for leaks around "Y" connector, faucet and hoses. Inlet to Step 6.... top screw from inlet hose and replace with an additional twothirds turn. Turn cold water faucet off and remove washer inlet hose. 2. Attach washer cold inlet hose to the front panel of the dryer. 3. A Check the levelness of "Y" connector. Remove the bottom screw from a right-side opening to "Y"...
Use and Care Guide
Page 14
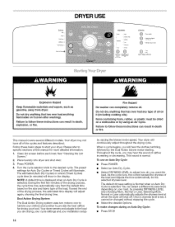
...8226; Press POWER. • Select an Auto Dry Cycle. To make changes during an Auto Dry Cycle: • Press STOR Fire Hazard No washer can result in death, explosion, or fire. Please refer to the load you will continuously adjust throughout the drying cycle. See "Cleaning the Lint ...from the default time based on the size and fabric type of airflow increasing or decreasing. Clean lint screen before each load. Place laundry into dryer and shut door. 3. The preset settings for drying your load, by using an Air Cycle. Failure to follow these instructions can select a...
...8226; Press POWER. • Select an Auto Dry Cycle. To make changes during an Auto Dry Cycle: • Press STOR Fire Hazard No washer can result in death, explosion, or fire. Please refer to the load you will continuously adjust throughout the drying cycle. See "Cleaning the Lint ...from the default time based on the size and fabric type of airflow increasing or decreasing. Clean lint screen before each load. Place laundry into dryer and shut door. 3. The preset settings for drying your load, by using an Air Cycle. Failure to follow these instructions can select a...