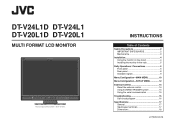
Operator manual for DT-V24L1/D, DT-V20L1/D (20 pages)
Page 1
INSTRUCTIONS Table of DT-V24L1D. DT-V24L1D DT-V24L1 DT-V20L1D DT-V20L1 MULTI FORMAT LCD MONITOR The illustration of the monitor is of Contents Safety Precautions 2 IMPORTANT SAFEGUARDS 2 Maintenance 3 Installation 4 Using the monitor on the stand 4 Installing the monitor in the rack 5 Daily Operations / Connections 6 Front panel 6 Rear panel 8 Available signals 9 Menu Configuration-MAIN MENU 10 Menu...
Operator manual for DT-V24L1/D, DT-V20L1/D (20 pages)
Page 4
...Attachment screws Screw holes for stand attachment (on the stand) Guides Stand Guidelines The illustration of the monitor is of DT-V24L1D. Then fix the stand firmly with the LCD panel facing down to 0°, then attach the removed screws. Make sure of attaching the removed ...°. Installation 4 CAUTION • Do not rest your arm on the monitor or lean against the monitor. • Do not hold the LCD panel when installing the monitor. • Make sure to install the monitor securely to prevent the monitor from about 6° upward to about 6° downward. • When...
Operator manual for DT-V24L1/D, DT-V20L1/D (20 pages)
Page 5
...page 18 for the specifications of the screw holes.) 5 Screw holes (See page 18 for the specifications of the screw holes.) The illustration of the monitor is of the table or floor. CAUTION • Detach the stand first. • Ask your dealer to the thickness of DT-V24L1D. To adjust... table or floor with M5 screws (not supplied). • Choose the screws of the stand plate as illustrated below after detaching the stand from the monitor. • For detaching the stand, see "To detach the stand" on page 4. Screw holes for higher position Screw holes for lower position 7 Installing...
Operator manual for DT-V24L1/D, DT-V20L1/D (20 pages)
Page 6
...MARKER SELECT" and "R-ASPECT SELECT" in "AREA MARKER" (☞ 10 page). NOTE Memorized for the selected input lights. o Power lamp Unlit : The monitor is completely off (standby). e SAFETY MARKER button/lamp Activates/deactivates the settings of the video signal. • Each time you press a button which ...is not available for the current input or signal format (the lamp lights even when the function does not actually work). u T.C. (time code) button/lamp Displays the time data (time code...
Operator manual for DT-V24L1/D, DT-V20L1/D (20 pages)
Page 7
...• You have to finish the audio channel selection. When "COLOR SYSTEM" is set to "OFF" (☞ "AUDIO SETTING" on page 11). 2 Signal format • "NO SYNC" is displayed when no time code, "TC is displayed. 7 CRC error indication* ☞ "CRC ERROR" in the cases below (... display this screen when displaying a menu screen. To display the main menu \ Press MENU button. NOTE • You can select channels from the speakers (L/R) and MONITOR OUT (L/R) terminals. 1 Press or button to "OFF" or "AUTO" (☞ "INFORMATION" on page 13). 6 Time code* ☞ "u T.C. (time code) button...
Operator manual for DT-V24L1/D, DT-V20L1/D (20 pages)
Page 8
...(IN) and output (OUT) terminals for the external composite sync (Cs) signals. • To use the power cord holder when installing the monitor in "AUDIO1 ASSIGN." CAUTION A different plug shape will not be Tab pulled out after the cover is not changed automatically. or "AUDIO2 ASSIGN...is input, external synchronization has priority over the audio signal input to a different position. is recommended not to assign the audio signal in a monitor rack etc. CAUTION It is memorized for each input. 7 AUDIO ASSIGN (IN 1, IN 2) terminals (pin jack) Input terminals for the ...
Operator manual for DT-V24L1/D, DT-V20L1/D (20 pages)
Page 9
..., and "1080/60i" is displayed in the status display (☞ page 7). *3 "1080/60i" is compatible with G on sync, Y on this monitor. Computer signals (preset) DVI-D (HDCP) terminals No. Note for connections • Before making any connections, turn off all connections are available for computer signals... pull it to grasp its frequency is within the acceptable range. • When a preset signal is input, the signal format is displayed on the screen. Note for analog component/analog RGB signals The monitor is displayed in the status display (☞ page 7). Video signals No.
Operator manual for DT-V24L1/D, DT-V20L1/D (20 pages)
Page 10
..." R-ASPECT Select the aspect ratio of AREA MARKER whose aspect ratio is compatible with AREA MARKER. NOTE • DVI-D input of the monitor is selected in "APERTURE LEVEL." AREA MARKER*2 Setting for AREA MARKER functions Item To do Setting value MARKER SELECT Select the style of AREA...9758; page 14). 4:3, 14:9, 13:9, 2.35:1, 1.85:1, 1.66:1 R-SAFETY Adjust the size of moving pictures which enables you want to LCD. DVI INPUT SEL. An external control system should not be operated at this AREA MARKER with AREA MARKER button on the front panel (☞ page...
Operator manual for DT-V24L1/D, DT-V20L1/D (20 pages)
Page 13
... terminal (1 to reverse the order. You can reset this HOUR METER. MODEL Display the model name of the monitor. VERSION Display the version of the monitor. Operating the monitor by an external control If you press button, the character changes as follows. appears on page 7). Press button to... LOCK Setting value: OFF, ON Turns on the front panel. Space 3 Press button to move the arrow to disable the buttons on (or off the monitor - NAME, MUTING, MARK.SEL, L.METER*1, STATUS, - - - (no function) INFORMATION Setting for the information display of use (unit: hour). AUTO,...
Operator manual for DT-V24L1/D, DT-V20L1/D (20 pages)
Page 14
...assign the same function to assign. • For selectable functions, see the right. *2 The controller is a female terminal. On the other monitors, select "RS485." To assign the functions to the pin terminals For the operation procedure, see page 7. 1 Select "REMOTE SETTING" on page... "y I /P MODE*5 SDI 1*4 SDI 2*4 DVI COMP./RGB Changes the input to "VIDEO 2." RS485*1 RS232C*1 TRIGGER - - *1 On the monitor connected to the personal computer etc, select the terminal the equipment actually connected to "COMPO./ RGB." NOTE • Control priority is configured as follows...
Operator manual for DT-V24L1/D, DT-V20L1/D (20 pages)
Page 15
... you can operate only one . 7 Using the serial communication You can control the monitor from a personal computer etc. Pin No. 1 2 3 4 5 6 7... "!" Pin No. 1 2 3 4 5 6 7 8 9 Signal NC RXD TXD NC GND NC RTS CTS NC • The 7th terminal and the 8th terminal are status returns from the monitor. Commands 1*1 ! * * B C N 1 Cr 2*1 ! * * B C N 0 Cr 3 ! * * B I D S E T x x Cr 4 ! * * B I D R E T Cr 5 ! * * B I D D S P x x Cr 6 ! * * B I D C H K x x Cr Basic commands 7 ! * * B M E N U Cr 8 ! * * B U P Cr 9 ! * * B D O W N Cr 10 ! * * B A D J R Cr 11 ! * * B A D J L Cr ...
Operator manual for DT-V24L1/D, DT-V20L1/D (20 pages)
Page 16
...symptoms are problems only when pictures or sounds are a normal characteristic of range" appears. • Check if the input signal format is acceptable to the monitor. The remaining picture will flash. The top and/or rear panel of the solutions presented here solves the problem, unplug the...Set "CONTROL LOCK" in the effective screen area. The LCD display is built with INPUT SELECT buttons. • Check if the input signal format is displayed for the current input or the current input signal are flashing. This monitor has a self-check function, which are described here. ...
Operator manual for DT-V24L1/D, DT-V20L1/D (20 pages)
Page 17
... company names and product names mentioned herein are shown by being emphasized, omitted or composed, and may be slightly different from sources other than JVC or JVC-authorized dealers. DVI-D (HDCP) DVI-D signal input (compatible with HDCP) : DVI-D connector x 1 (compatible with EMBEDDED AUDIO) : ... termination). Specifications 7 General Model name DT-V24L1D/DT-V24L1 DT-V20L1D/DT-V20L1 Type Multi format LCD monitor Screen size Type 24 wide format Type 20 wide format Aspect ratio 16:10 LCD panel 24˝ wide, active matrix TFT 20˝ wide, active matrix TFT Effective...
Operator manual for DT-V24L1/D, DT-V20L1/D (20 pages)
Page 18
... 20 (7/8) 145.7 (5 3/4) 300 (11 7/8) DT-V20L1D/DT-V20L1 477 (18 7/8) 260 (10 1/4) 51 (2 1/8) 243 (9 5/8) 160 (6 3/8) 4-ø8 (4-ø5/16) 99 (4) 52.7 (2 1/8) 1.5 (1/16) The illustrations of the monitor are of DT-V24L1D. 100 VESA mounting holes (Size: M4, depth: 10 mm) 100 117 20 (7/8) 145.7 (5 3/4) 394.6 (15 5/8)*/359.6 (14 1/4)** 354 (14) 300 (11...