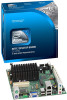
Product Guide
Page 5
...Compliance 22 Battery ...22 Real-Time Clock 22 2 Installing and Replacing Desktop Board Components Before You Begin 23 Installation Precautions 25 Prevent Power Supply Overload 25 Observe Safety and Regulatory Requirements 25 Installing the I/O Shield 26 Installing and Removing the Desktop Board 27 Installing and Removing ... DIMMs 30 Connecting SATA Drives 30 Installing a Wireless LAN Card in the PCI Express Full-Mini Card Slot 32 Installing an Intel® Z-U130 USB Solid-State Drive (or Compatible Device 33 Connecting to the Internal Headers 34 Connecting the Front Panel Audio...
...Compliance 22 Battery ...22 Real-Time Clock 22 2 Installing and Replacing Desktop Board Components Before You Begin 23 Installation Precautions 25 Prevent Power Supply Overload 25 Observe Safety and Regulatory Requirements 25 Installing the I/O Shield 26 Installing and Removing the Desktop Board 27 Installing and Removing ... DIMMs 30 Connecting SATA Drives 30 Installing a Wireless LAN Card in the PCI Express Full-Mini Card Slot 32 Installing an Intel® Z-U130 USB Solid-State Drive (or Compatible Device 33 Connecting to the Internal Headers 34 Connecting the Front Panel Audio...
Product Guide
Page 7
... 32 11. Connecting a Power Supply Cable 40 15. Audio Jack Support 15 4. Front Panel Audio Header for the BIOS Setup Program Modes 42 16. Jumper Settings for AC '97 Audio 35 8. AcceptableDrives/Media Types for Intel HD Audio 35 7. Installing an Intel Z-U130 USB Solid-State ... Headers 34 13. Serial Port Headers (COM 1 and COM 2 36 10. Location of the Standby Power Indicator 20 5. BIOS Configuration Jumper Block 41 16. Safety Standards 55 21. Intel Desktop Board D510MO Mounting Screw Holes 27 7. S/PDIF Header 36 9. Contents Figures 1. Back Panel Audio...
... 32 11. Connecting a Power Supply Cable 40 15. Audio Jack Support 15 4. Front Panel Audio Header for the BIOS Setup Program Modes 42 16. Jumper Settings for AC '97 Audio 35 8. AcceptableDrives/Media Types for Intel HD Audio 35 7. Installing an Intel Z-U130 USB Solid-State ... Headers 34 13. Serial Port Headers (COM 1 and COM 2 36 10. Location of the Standby Power Indicator 20 5. BIOS Configuration Jumper Block 41 16. Safety Standards 55 21. Intel Desktop Board D510MO Mounting Screw Holes 27 7. S/PDIF Header 36 9. Contents Figures 1. Back Panel Audio...
Product Guide
Page 23
... and remove system memory • Connect SATA drives • Install a Wireless LAN card • Install an Intel Z-U130 USB Solid-State Drive (or compatible device) • Connect to internal headers • Connect chassis fan and power supply cables • Set the BIOS configuration jumper • Clear passwords • Replace the battery Before You...
... and remove system memory • Connect SATA drives • Install a Wireless LAN card • Install an Intel Z-U130 USB Solid-State Drive (or compatible device) • Connect to internal headers • Connect chassis fan and power supply cables • Set the BIOS configuration jumper • Clear passwords • Replace the battery Before You...
Product Guide
Page 25
Refer to the instructions in the installation instructions. Prevent Power Supply Overload Do not overload the power supply output. Installing and Replacing Desktop Board Components Installation Precautions When you install and test the Intel Desktop Board, observe all the modules within the computer is ...suppliers, you to refer computer servicing to qualified technical personnel. To avoid overloading the power supply, make sure that instruct you increase safety risk and the possibility of the power supply. To avoid injury, be careful of: • Sharp pins on connectors or headers...
Refer to the instructions in the installation instructions. Prevent Power Supply Overload Do not overload the power supply output. Installing and Replacing Desktop Board Components Installation Precautions When you install and test the Intel Desktop Board, observe all the modules within the computer is ...suppliers, you to refer computer servicing to qualified technical personnel. To avoid overloading the power supply, make sure that instruct you increase safety risk and the possibility of the power supply. To avoid injury, be careful of: • Sharp pins on connectors or headers...

Product Guide
Page 40
Connecting a Power Supply Cable 1. Connect the main power supply cable (2 x 12) to the 2 x 12 connector (Figure 14). 40 Figure 14. Observe the precautions in damage to the board or the system may result in "Before You Begin" on page 23. 2. Intel Desktop Board D510MO Product Guide Connecting the Power Supply Cable CAUTION Failure to use an appropriate power supply to the Desktop Board may not function properly. Figure 14 shows the location of the power connector.
Connecting a Power Supply Cable 1. Connect the main power supply cable (2 x 12) to the 2 x 12 connector (Figure 14). 40 Figure 14. Observe the precautions in damage to the board or the system may result in "Before You Begin" on page 23. 2. Intel Desktop Board D510MO Product Guide Connecting the Power Supply Cable CAUTION Failure to use an appropriate power supply to the Desktop Board may not function properly. Figure 14 shows the location of the power connector.

Product Guide
Page 43
... par une pile de type incorrect. Installing and Replacing Desktop Board Components 10. Turn off the computer. Disconnect the computer's power cord from the power supply extends the life of the battery. To restore normal operation, place the jumper on page 47 shows the location of the battery.... Replacing the Battery A coin-cell battery powers the Desktop Board's real-time clock and CMOS memory. Batterier bør om muligt ...
... par une pile de type incorrect. Installing and Replacing Desktop Board Components 10. Turn off the computer. Disconnect the computer's power cord from the power supply extends the life of the battery. To restore normal operation, place the jumper on page 47 shows the location of the battery.... Replacing the Battery A coin-cell battery powers the Desktop Board's real-time clock and CMOS memory. Batterier bør om muligt ...

Product Guide
Page 64
... Compliance Before computer integration, make sure that is certified to the following when reading the installation instructions for the host chassis, power supply, and other modules: • Product certifications or lack of certifications • External I/O cable shielding and filtering • ... use this equipment in residential environments and other non-residential environments. Intel Desktop Board D510MO Product Guide Korean Class B statement translation: This is household equipment that the power supply and other modules or peripherals, as applicable, are marked accordingly. ...
... Compliance Before computer integration, make sure that is certified to the following when reading the installation instructions for the host chassis, power supply, and other modules: • Product certifications or lack of certifications • External I/O cable shielding and filtering • ... use this equipment in residential environments and other non-residential environments. Intel Desktop Board D510MO Product Guide Korean Class B statement translation: This is household equipment that the power supply and other modules or peripherals, as applicable, are marked accordingly. ...

Product Guide
Page 66
Intel Desktop Board D510MO Product Guide Chassis and Component Certifications Ensure that the chassis and certain components; Typical product certifications include: In Europe The CE marking ... interference (EMI) requirements. The FCC Class B logo for home or office use . are proof of certification. If the chassis and other directives, such as the power supply, peripheral drives, wiring, and cables; Wiring and cables must also be obtained. The Industry Canada statement at the front of Conformity statement to the European...
Intel Desktop Board D510MO Product Guide Chassis and Component Certifications Ensure that the chassis and certain components; Typical product certifications include: In Europe The CE marking ... interference (EMI) requirements. The FCC Class B logo for home or office use . are proof of certification. If the chassis and other directives, such as the power supply, peripheral drives, wiring, and cables; Wiring and cables must also be obtained. The Industry Canada statement at the front of Conformity statement to the European...


