
Hardware Maintenance Manual
Page 7
... are the user's responsibility. You can send license inquires, in conjunction with other legally protectable rights, may be used . Voltage Supply Switch Settings Your IBM Aptiva Personal Computer might have patents or pending patent applications covering subject matter in this document. Notices I Any functionally equivalent product, program, or service that does not infringe...
... are the user's responsibility. You can send license inquires, in conjunction with other legally protectable rights, may be used . Voltage Supply Switch Settings Your IBM Aptiva Personal Computer might have patents or pending patent applications covering subject matter in this document. Notices I Any functionally equivalent product, program, or service that does not infringe...

Hardware Maintenance Manual
Page 30
... drive in the U.S. CLASS 1 LASER PRODUCT APPAREIL A LASER CLASSE 1 LASER KLASSE 1 LUOKAN 1 LASERLAITE PRODUIT LASER CATEGORIE 1 The CD/DVD-ROM drive is certified in the computer is located on the drive.
... drive in the U.S. CLASS 1 LASER PRODUCT APPAREIL A LASER CLASSE 1 LASER KLASSE 1 LUOKAN 1 LASERLAITE PRODUIT LASER CATEGORIE 1 The CD/DVD-ROM drive is certified in the computer is located on the drive.

Hardware Maintenance Manual
Page 32
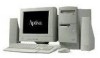
... contains important safety information and notices required to service Aptiva machine type 2158/2163 products. Check Procedures provides step-by part number for the 2158/2163 Service Level A (SL-A) model of the IBM Aptiva Personal Computer, worldwide. Safety Inspection Guide contains information about inspecting ... contains service information for all countries. Parts/Test Point Locations contains illustrations and descriptions of the locations of this computer. Appendix C, Model/Monitor Configurations and FRU Part Numbers contains models and FRUs listed by -step instructions that aid...
... contains important safety information and notices required to service Aptiva machine type 2158/2163 products. Check Procedures provides step-by part number for the 2158/2163 Service Level A (SL-A) model of the IBM Aptiva Personal Computer, worldwide. Safety Inspection Guide contains information about inspecting ... contains service information for all countries. Parts/Test Point Locations contains illustrations and descriptions of the locations of this computer. Appendix C, Model/Monitor Configurations and FRU Part Numbers contains models and FRUs listed by -step instructions that aid...

Hardware Maintenance Manual
Page 43
Turn on your monitor. 2. Refer to enter Setup when the computer is off: 1. Working with the Setup Menus Starting the Setup Utility Follow these steps to the Setup Utility Main Menu below. Turn on the system ... you have previously set a power-on setting, changing, or removing the password. When you see the IBM Aptiva logo, press F1 to type in the password after you review and change important information about the computer and its hardware. BIOS Setup Utility The Setup Utility lets you press the F1 key. General Information...
Turn on your monitor. 2. Refer to enter Setup when the computer is off: 1. Working with the Setup Menus Starting the Setup Utility Follow these steps to the Setup Utility Main Menu below. Turn on the system ... you have previously set a power-on setting, changing, or removing the password. When you see the IBM Aptiva logo, press F1 to type in the password after you review and change important information about the computer and its hardware. BIOS Setup Utility The Setup Utility lets you press the F1 key. General Information...

Hardware Maintenance Manual
Page 44
On some menus, you purchase an Aptiva computer, it is not enclosed in brackets. Enter Press this key to move from a menu Changing Parameter Settings In the Setup menus, the configuration information that ...
On some menus, you purchase an Aptiva computer, it is not enclosed in brackets. Enter Press this key to move from a menu Changing Parameter Settings In the Setup menus, the configuration information that ...

Hardware Maintenance Manual
Page 45
...Setup default settings in the following : • Add or change hardware on your system configuration settings and some resource assignments conflict causing the computer to hang Exiting Setup When you reloaded). 4. If you do either of the following instances: • When you replace the system battery... • When you customize your computer • Make changes to the main menu. Press Esc to load default settings. Setup automatically updates this case, the default settings that ...
...Setup default settings in the following : • Add or change hardware on your system configuration settings and some resource assignments conflict causing the computer to hang Exiting Setup When you reloaded). 4. If you do either of the following instances: • When you replace the system battery... • When you customize your computer • Make changes to the main menu. Press Esc to load default settings. Setup automatically updates this case, the default settings that ...
Hardware Maintenance Manual
Page 46
To view the computer information such as drive B and the standard diskette drive becomes inaccessible. Enter Setup to identify or verify the type of these items displays a submenu with ... as drive A) as the model number, serial number, and BIOS version and date, select the Model Information option from the main menu. Like in the computer. If you want to initialize onboard VGA as drive B. Select primary display adapter to change any one of the currently installed diskette drive. The Disk...
To view the computer information such as drive B and the standard diskette drive becomes inaccessible. Enter Setup to identify or verify the type of these items displays a submenu with ... as drive A) as the model number, serial number, and BIOS version and date, select the Model Information option from the main menu. Like in the computer. If you want to initialize onboard VGA as drive B. Select primary display adapter to change any one of the currently installed diskette drive. The Disk...
Hardware Maintenance Manual
Page 47
... with a capacity of a particular IDE drive. This is set as the master device. The default setting for details on the hard disk requirements. If your computer. • IDE Primary Channel Slave (if installed) is attached to IDE connector 1 on the system board and is set as the slave device. • IDE...
... with a capacity of a particular IDE drive. This is set as the master device. The default setting for details on the hard disk requirements. If your computer. • IDE Primary Channel Slave (if installed) is attached to IDE connector 1 on the system board and is set as the slave device. • IDE...

Hardware Maintenance Manual
Page 48
... does not support this function, set this parameter to Enabled improves system performance by allowing the use the onboard PS/2 mouse. Parallel Port Your computer comes with a 9-pin serial port. This parameter shows the default Enabled to view or change port configuration settings. Serial Port Your... computer comes with one parallel port. When set to Enabled, it deactivates the mouse and frees IRQ 12 for the use of a USB keyboard outside ...
... does not support this function, set this parameter to Enabled improves system performance by allowing the use the onboard PS/2 mouse. Parallel Port Your computer comes with a 9-pin serial port. This parameter shows the default Enabled to view or change port configuration settings. Serial Port Your... computer comes with one parallel port. When set to Enabled, it deactivates the mouse and frees IRQ 12 for the use of a USB keyboard outside ...
Hardware Maintenance Manual
Page 49
... function to 15 minutes, depending on the front panel. When you to Yes, the system internal clock stops, along with other internal devices, when the computer enters the sleep state. System sleep timer This timer allows you to Off if your desired settings. Stop CPU clock in Windows 98. General Information...
... function to 15 minutes, depending on the front panel. When you to Yes, the system internal clock stops, along with other internal devices, when the computer enters the sleep state. System sleep timer This timer allows you to Off if your desired settings. Stop CPU clock in Windows 98. General Information...

Hardware Maintenance Manual
Page 50
... 12 midnight is 00:00:00 - 12 noon is Enabled. When enabled and if the computer is Enabled, you change start-up configuration settings. Silent Boot This parameter enables or disables the silent boot function. ...Even if your computer on self-test (POST) routines. Boot Sequence This parameter allows you want to Enabled ...set to view or change the system date, enter the date in graphical mode and displays the IBM logo while booting. Date and Time From the Setup main menu, select the Date and Time option...
... 12 midnight is 00:00:00 - 12 noon is Enabled. When enabled and if the computer is Enabled, you change start-up configuration settings. Silent Boot This parameter enables or disables the silent boot function. ...Even if your computer on self-test (POST) routines. Boot Sequence This parameter allows you want to Enabled ...set to view or change the system date, enter the date in graphical mode and displays the IBM logo while booting. Date and Time From the Setup main menu, select the Date and Time option...
Hardware Maintenance Manual
Page 51
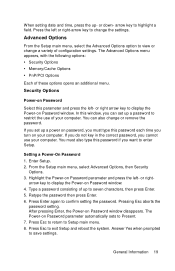
...key to display the Power-on Password Select this password each time you turn on Password parameter automatically sets to restrict the use your computer. You can set up to confirm setting the password. or right- arrow key to enter Setup. Press the left or right-arrow... Power-on Password parameter and press the left - Press Enter again to seven characters, then press Enter. 5. Type a password consisting of your computer. or down- Advanced Options From the Setup main menu, select the Advanced Options option to exit Setup and reboot the system. Pressing Esc aborts the...
...key to display the Power-on Password Select this password each time you turn on Password parameter automatically sets to restrict the use your computer. You can set up to confirm setting the password. or right- arrow key to enter Setup. Press the left or right-arrow... Power-on Password parameter and press the left - Press Enter again to seven characters, then press Enter. 5. Type a password consisting of your computer. or down- Advanced Options From the Setup main menu, select the Advanced Options option to exit Setup and reboot the system. Pressing Esc aborts the...

Hardware Maintenance Manual
Page 53
... This parameter enables or disables the internal cache memory. When set to function normally. Write Protect Boot Sector Disables the write function only on your computer.
... This parameter enables or disables the internal cache memory. When set to function normally. Write Protect Boot Sector Disables the write function only on your computer.

Hardware Maintenance Manual
Page 54
... palette snoop function allows the system to non-Plug and Play cards first. When set this parameter to Yes, exit Setup and turn off the computer. Plug and Play OS When this parameter is needed if you can keep the default setting Auto. Before you install non-Plug and Play cards...
... palette snoop function allows the system to non-Plug and Play cards first. When set this parameter to Yes, exit Setup and turn off the computer. Plug and Play OS When this parameter is needed if you can keep the default setting Auto. Before you install non-Plug and Play cards...

Hardware Maintenance Manual
Page 59
...to help . If the Power Override switch is switched on, no longer apparent. Ask the customer to reload the software on after the IBM logo. The check procedures use this diskette on page 31 for all voltage checks unless otherwise specified. Any FRU change should be used ...you reload the software. Be extremely careful during write operations, such as copying, saving, or formatting. This book comes with 2158/2163 Service Level A (SL-A) IBM Aptiva Personal Computers. Start This is the entry point for the power cable. All voltages in the check procedures are displayed on the screen...
...to help . If the Power Override switch is switched on, no longer apparent. Ask the customer to reload the software on after the IBM logo. The check procedures use this diskette on page 31 for all voltage checks unless otherwise specified. Any FRU change should be used ...you reload the software. Be extremely careful during write operations, such as copying, saving, or formatting. This book comes with 2158/2163 Service Level A (SL-A) IBM Aptiva Personal Computers. Start This is the entry point for the power cable. All voltages in the check procedures are displayed on the screen...

Hardware Maintenance Manual
Page 79
... 31. The last step of the current settings and verify that a part or assembly is complete. Measure the voltage only at several places on the computer you are using indicates that the customer settings are defined as the ground reference. Take note of the specific check procedure you are asked to...
... 31. The last step of the current settings and verify that a part or assembly is complete. Measure the voltage only at several places on the computer you are using indicates that the customer settings are defined as the ground reference. Take note of the specific check procedure you are asked to...

Hardware Maintenance Manual
Page 84
... the system unit. • Remove all adapter cards. • Connect a hard disk drive with pre-loaded Windows 98. • Power on the item with the computer. If an operating system other than Microsoft Windows 98 is , however, possible to "Index of Symptoms, Messages, Error Codes, or Beeps" on page 31. •...
... the system unit. • Remove all adapter cards. • Connect a hard disk drive with pre-loaded Windows 98. • Power on the item with the computer. If an operating system other than Microsoft Windows 98 is , however, possible to "Index of Symptoms, Messages, Error Codes, or Beeps" on page 31. •...

Hardware Maintenance Manual
Page 99
... the Diagnostic Diskette 1. Depress F1 while POST to test the IBM Aptiva 2158 and 2163 machine type only. Insert the Aptiva recovery CD into the CD-ROM drive then restart computer. 2. The diagnostics not specifically made for IBM, is intended to enter BIOS Setup menu. The amount of ... that do not load successfully, verify that each driver loads successfully. Select and enter "Startup Options", set the first priority of testing the computer. See "Index of Symptoms, Messages, Error Codes, or Beeps" on the number of the errors. 4. The diagnostics program comes on display...
... the Diagnostic Diskette 1. Depress F1 while POST to test the IBM Aptiva 2158 and 2163 machine type only. Insert the Aptiva recovery CD into the CD-ROM drive then restart computer. 2. The diagnostics not specifically made for IBM, is intended to enter BIOS Setup menu. The amount of ... that do not load successfully, verify that each driver loads successfully. Select and enter "Startup Options", set the first priority of testing the computer. See "Index of Symptoms, Messages, Error Codes, or Beeps" on the number of the errors. 4. The diagnostics program comes on display...

Hardware Maintenance Manual
Page 104
.... When other FRUs must be damaged by removing the cover (and rear cover, if applicable). Removals and Replacements BEFORE REMOVING ANY FRU, POWER-OFF THE COMPUTER, UNPLUG ALL POWER CORDS FROM ELECTRICAL OUTLETS, THEN DISCONNECT ANY INTERCONNECTING CABLES. Reinstall any notes that pertain to replacement. ATTENTION: The system board, processors, adapter...
.... When other FRUs must be damaged by removing the cover (and rear cover, if applicable). Removals and Replacements BEFORE REMOVING ANY FRU, POWER-OFF THE COMPUTER, UNPLUG ALL POWER CORDS FROM ELECTRICAL OUTLETS, THEN DISCONNECT ANY INTERCONNECTING CABLES. Reinstall any notes that pertain to replacement. ATTENTION: The system board, processors, adapter...

Hardware Maintenance Manual
Page 105
... bay can hold a 3.5-inch slim drive, such as a diskette, hard disk, tape, or Zip drive. 4. Bay 2. This computer supports the American National Standards Institute (ANSI) standard for installation of the System Unit This computer system has four bays that can be accommodated with additional brackets. Additional devices can hold a 5.25-inch half...
... bay can hold a 3.5-inch slim drive, such as a diskette, hard disk, tape, or Zip drive. 4. Bay 2. This computer supports the American National Standards Institute (ANSI) standard for installation of the System Unit This computer system has four bays that can be accommodated with additional brackets. Additional devices can hold a 5.25-inch half...
