User Guide
Page 2
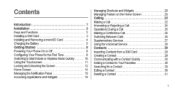
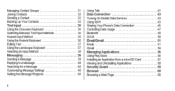
... 26 Installing and Removing a microSD Card 4 Supplementary Services 27 Charging the Battery 5 Using the Voicemail Service 28 Getting Started 8 Contacts 29 Powering Your Phone On or Off 8 Importing Contacts from a SIM Card 29 Configuring Your Phone for the First Time 8 Creating a Contact 29 Switching to Silent Mode or Airplane Mode Quickly 10 Communicating with a Contact Quickly 30 Using the Touchscreen 11 Adding a Contact to Your Favorites 30 Locking aid Unlocking the Screen 12 Searching fora Contact 30 Home Screen 14 Editing a Contact 30 Managing the Notification...
... 26 Installing and Removing a microSD Card 4 Supplementary Services 27 Charging the Battery 5 Using the Voicemail Service 28 Getting Started 8 Contacts 29 Powering Your Phone On or Off 8 Importing Contacts from a SIM Card 29 Configuring Your Phone for the First Time 8 Creating a Contact 29 Switching to Silent Mode or Airplane Mode Quickly 10 Communicating with a Contact Quickly 30 Using the Touchscreen 11 Adding a Contact to Your Favorites 30 Locking aid Unlocking the Screen 12 Searching fora Contact 30 Home Screen 14 Editing a Contact 30 Managing the Notification...
User Guide
Page 3
... Contacts Text Input Using the Onscreen Keyboard Switching Between Text Input Methods Huawei Input Method Using the Android Keyboard Editing Text Using the Landscape Keyboard Selecting an Input Method Massaging Sending a Message Replying to a Message Searching for a Message Customizing Message Settings Setting the Message Ringtone ii 31 Using Talk 41 32 Data Connection 43 32 Turning On Mobile Data Services 43 33 Using VVI-Fi 43 34 Sharing Your Phone's Data Connection 45 34 Controlling Data Usage 47 34 Bluetooth 49 35 DLNA 50 36 Email...
... Contacts Text Input Using the Onscreen Keyboard Switching Between Text Input Methods Huawei Input Method Using the Android Keyboard Editing Text Using the Landscape Keyboard Selecting an Input Method Massaging Sending a Message Replying to a Message Searching for a Message Customizing Message Settings Setting the Message Ringtone ii 31 Using Talk 41 32 Data Connection 43 32 Turning On Mobile Data Services 43 33 Using VVI-Fi 43 34 Sharing Your Phone's Data Connection 45 34 Controlling Data Usage 47 34 Bluetooth 49 35 DLNA 50 36 Email...

User Guide
Page 9
OntheHome screen,touch (ID > Settings. 2. To remove the microSD card: 1. When installing the microSD card, push the card into the slot until it clicks into place. Installing and Removing a microSD Card Your phonesmemory capacitycanbe expandedbyinstallinga microSD card.Forinstallation instructions, refer to the following diagram. TouchStorage>UnmountSD card. 3.Remove themicroSD card by gentling pushingit inwards then releasing:the card will automatically pop out from the slot. 4
OntheHome screen,touch (ID > Settings. 2. To remove the microSD card: 1. When installing the microSD card, push the card into the slot until it clicks into place. Installing and Removing a microSD Card Your phonesmemory capacitycanbe expandedbyinstallinga microSD card.Forinstallation instructions, refer to the following diagram. TouchStorage>UnmountSD card. 3.Remove themicroSD card by gentling pushingit inwards then releasing:the card will automatically pop out from the slot. 4
User Guide
Page 11
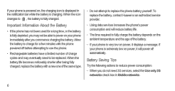
... fully charge the battery depends on , the charging icon is displayed it displays a message. When the icon changes to use the phone. • Rechargeable batteries have a limited number of the battery. • If your phone is fully charged. To replace the battery, contact Huawei or an authorized service provider. • Using data services increases the phone's power consumption and will power off before attempting to • the battery is very low on power. it the notification bar while the battery is charging. Important...
... fully charge the battery depends on , the charging icon is displayed it displays a message. When the icon changes to use the phone. • Rechargeable batteries have a limited number of the battery. • If your phone is fully charged. To replace the battery, contact Huawei or an authorized service provider. • Using data services increases the phone's power consumption and will power off before attempting to • the battery is very low on power. it the notification bar while the battery is charging. Important...
User Guide
Page 20
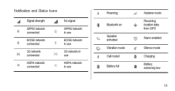
Notification and Status Icons A Signal strength A No signal GPRS network connected EDGE network E connected 3G network 3G connected HSPA network H connected GPRS network in use EDGE network in use 3G network in use HSPA network in use R Roaming * Bluetooth on Speaker activated Vibration mode Call muted a Battery full .71" Airplane mode Receiving location data from GPS Alarm enabled 4," Silence mode 11 Charging Battery I extremely low 15
Notification and Status Icons A Signal strength A No signal GPRS network connected EDGE network E connected 3G network 3G connected HSPA network H connected GPRS network in use EDGE network in use 3G network in use HSPA network in use R Roaming * Bluetooth on Speaker activated Vibration mode Call muted a Battery full .71" Airplane mode Receiving location data from GPS Alarm enabled 4," Silence mode 11 Charging Battery I extremely low 15
User Guide
Page 21
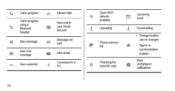
Phone memory fun Preparing the microSD card Upcoming event 1 Downloading • Storage location can be changed A • Sign-in m your Gmail account Message not to sent im New email Connected to a PC Open lM-Fi network available t Uploading .0. t. Call in progress Call in progress using a Bluetooth headset New message tak New chat message 0.0 New voicemail Wissed calls New mail in or synchronization problem More a undisplayed notifications 16
Phone memory fun Preparing the microSD card Upcoming event 1 Downloading • Storage location can be changed A • Sign-in m your Gmail account Message not to sent im New email Connected to a PC Open lM-Fi network available t Uploading .0. t. Call in progress Call in progress using a Bluetooth headset New message tak New chat message 0.0 New voicemail Wissed calls New mail in or synchronization problem More a undisplayed notifications 16
User Guide
Page 27
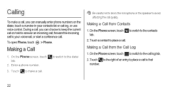
..., touch a number in your contacts list or call log, or use voice control.During a call, you can choose to keep the current call on hold to answer an incoming call, forward the incoming call to the dialer tab. 2 Enter a phone number, 3 Touch ra! OnthePhone screen,touch to avoid affecting the call quality. OnthePhonescreen,touch El to place a call. Making a Call from Contacts 1. Touch a contact to switchtothe cat logtab. 2. Calling To make a call 17) Be careful not to block the microphone or the speaker to...
..., touch a number in your contacts list or call log, or use voice control.During a call, you can choose to keep the current call on hold to answer an incoming call, forward the incoming call to the dialer tab. 2 Enter a phone number, 3 Touch ra! OnthePhone screen,touch to avoid affecting the call quality. OnthePhonescreen,touch El to place a call. Making a Call from Contacts 1. Touch a contact to switchtothe cat logtab. 2. Calling To make a call 17) Be careful not to block the microphone or the speaker to...
User Guide
Page 32
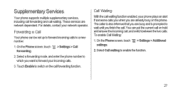
... answer the incoming call, and switch between the two calls. touch = > Settings > Call forwarding. 2. and enter the phone number to which you want to wait until you are network dependent. To enable Call Waling: 1. Supplementary Services Your phone supports multiple supplementary services. On the Phone screen. Select Call wailing to a new number. 1. The caller is prompted to forward your phone plays an alert if someone calls you when you are already busy on the call waiting. including call forwarding and call forwarding functicn. Touch Enableto switch...
... answer the incoming call, and switch between the two calls. touch = > Settings > Call forwarding. 2. and enter the phone number to which you want to wait until you are network dependent. To enable Call Waling: 1. Supplementary Services Your phone supports multiple supplementary services. On the Phone screen. Select Call wailing to a new number. 1. The caller is prompted to forward your phone plays an alert if someone calls you when you are already busy on the call waiting. including call forwarding and call forwarding functicn. Touch Enableto switch...
User Guide
Page 33
.... Using the Voicemail Service The voicemail function enables your phone to forward unanswered calls to your voicemail inbox, including unanswered calls when you are busy on other calls and calls received when your voicemail number, and then touch OK. If required, enable the call forwarding function and set all incoming calls to be forwarded to the voicemail function and obtain your voicemail number. To listento your voicemail number: 1. fT) Contact your network operator to subscribe to your voicemail inbox To set your voicemail messages...
.... Using the Voicemail Service The voicemail function enables your phone to forward unanswered calls to your voicemail inbox, including unanswered calls when you are busy on other calls and calls received when your voicemail number, and then touch OK. If required, enable the call forwarding function and set all incoming calls to be forwarded to the voicemail function and obtain your voicemail number. To listento your voicemail number: 1. fT) Contact your network operator to subscribe to your voicemail inbox To set your voicemail messages...

User Guide
Page 35
... right of the screen. Editing a Contact 1.Inthe contacts Est,touchthe contact youwant to save the changes. The available icons depend on the information you type. Searching for example, placing a call, or sending a text message or an email. To search for a contact quickly, use to communicate with a Contact Quickly Inthe contacts list,touchthe contacts picture orpictureframe(if no picture is saved to use the scroll bar on your phone, and your favorites 1st. After changing contact information, touch DONE to edit,then ®...
... right of the screen. Editing a Contact 1.Inthe contacts Est,touchthe contact youwant to save the changes. The available icons depend on the information you type. Searching for example, placing a call, or sending a text message or an email. To search for a contact quickly, use to communicate with a Contact Quickly Inthe contacts list,touchthe contacts picture orpictureframe(if no picture is saved to use the scroll bar on your phone, and your favorites 1st. After changing contact information, touch DONE to edit,then ®...
User Guide
Page 49
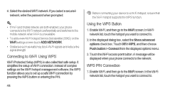
... a secured network, enterthe password when prompted. gtib • If Wi-Fi and mobile network are both enabled, your device to the network. Using the WPS Button 1.Enable W-Fl. Before connecting your phone connectstothe Wi-Fi network preferentially and switches tothe mobile network when Wi-Fi is unavailable. • To add anew Wi-FihotspotService SetIdentifier (SSID), on the IM-Fisettings screen touch ADDNETWORK. • Obstacles such as walls may block Wi-Fi signals...
... a secured network, enterthe password when prompted. gtib • If Wi-Fi and mobile network are both enabled, your device to the network. Using the WPS Button 1.Enable W-Fl. Before connecting your phone connectstothe Wi-Fi network preferentially and switches tothe mobile network when Wi-Fi is unavailable. • To add anew Wi-FihotspotService SetIdentifier (SSID), on the IM-Fisettings screen touch ADDNETWORK. • Obstacles such as walls may block Wi-Fi signals...

User Guide
Page 56
access the website of your email service provider. OntheHome screen,touch ::: >EMall. 51 TouchNext, andtheInbox ofthe newly configured email account will be displayed. 41% After creating your iota' email account, touch = > Settings > ADD ANCOUNT on the instructions provided by your email service provider 4. For specific settings. Adcing an Email Account When using the Email application for the first time, set up an email account as follows: (Note that a data connection is required to send and receive emails). 1.OntheHome screen,touch C) >Email. 2.TouchOthersto enter an emaladdress ...
access the website of your email service provider. OntheHome screen,touch ::: >EMall. 51 TouchNext, andtheInbox ofthe newly configured email account will be displayed. 41% After creating your iota' email account, touch = > Settings > ADD ANCOUNT on the instructions provided by your email service provider 4. For specific settings. Adcing an Email Account When using the Email application for the first time, set up an email account as follows: (Note that a data connection is required to send and receive emails). 1.OntheHome screen,touch C) >Email. 2.TouchOthersto enter an emaladdress ...

User Guide
Page 57
... an email account from the displayed email account list. touch irk . 2. When the email is then displayed by default. contact the server administrator. 4. touch the email address bar at the top of the screen. Creating and Sending an Email 1. Enter the email subject, and then compose your Inbox. 2.Ifyou have not set up an email account, touch = > Settings > ADD ACCOUNT > Exchange to display the Account setup screen. Configure the synchronization settings for this account. 5. The selected accounts Inbox is ready to and Forwarding an Email 1.In your email...
... an email account from the displayed email account list. touch irk . 2. When the email is then displayed by default. contact the server administrator. 4. touch the email address bar at the top of the screen. Creating and Sending an Email 1. Enter the email subject, and then compose your Inbox. 2.Ifyou have not set up an email account, touch = > Settings > ADD ACCOUNT > Exchange to display the Account setup screen. Configure the synchronization settings for this account. 5. The selected accounts Inbox is ready to and Forwarding an Email 1.In your email...

User Guide
Page 80
... manage and synchronize data on USB storage. 3. Openthenotificationpanel,touchUSB connectedto display the USB Mass Storage screen, and then touch Turn on your phone. 1.Use a USB cableto connect your phoneto thePC. 2. Copying Audio Files to USB Mass Storage Devices Before using this function, ensure that a microSD card is correctly installed. 1.Use a USB cable to connect your phone to the PC. 2. Copy audio filesfromthePCtothe folder youhave just created. 75 Open the notification panel, touch Connected as a removable storage device in the phone memory and onthemicroSD cardfrom thePC...
... manage and synchronize data on USB storage. 3. Openthenotificationpanel,touchUSB connectedto display the USB Mass Storage screen, and then touch Turn on your phone. 1.Use a USB cableto connect your phoneto thePC. 2. Copying Audio Files to USB Mass Storage Devices Before using this function, ensure that a microSD card is correctly installed. 1.Use a USB cable to connect your phone to the PC. 2. Copy audio filesfromthePCtothe folder youhave just created. 75 Open the notification panel, touch Connected as a removable storage device in the phone memory and onthemicroSD cardfrom thePC...
User Guide
Page 82
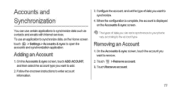
... set to synchronize to your phone vary according to synchronize. 4. touch the account you want to synchronize data such as contacts and emails with Internet services. Followthe onscreen instructions to add. 2. On the Accounts & sync screen. Configure the account. Removing an Account 1. On the Accounts & sync screen, touch ADD ACOUNT, and then select the account type you want to enter account information. 3. Touch = >Removeaccount. 3. Touch Remove account. 77 on the Accounts & sync screen. (1) The types of data you can use an application to open the accounts...
... set to synchronize to your phone vary according to synchronize. 4. touch the account you want to synchronize data such as contacts and emails with Internet services. Followthe onscreen instructions to add. 2. On the Accounts & sync screen. Configure the account. Removing an Account 1. On the Accounts & sync screen, touch ADD ACOUNT, and then select the account type you want to enter account information. 3. Touch = >Removeaccount. 3. Touch Remove account. 77 on the Accounts & sync screen. (1) The types of data you can use an application to open the accounts...

User Guide
Page 93
... or clear the Use 24-hour format check box to configure the following: • Brightness Adjust the brightness. Configuring the Display Settings On the Settings screen, touch Display to switch between 12-hour and 24-hourtime formats. 7.TouchSelectdateformatto select howyouwant the dateto be displayed. Configuring Phone Settings On the Home screen, touch ::: > Settings to configure your phone is using date and time settings automaticaly provided by the network, you cannot set the date, time, and time zone manually 1. Setting...
... or clear the Use 24-hour format check box to configure the following: • Brightness Adjust the brightness. Configuring the Display Settings On the Settings screen, touch Display to switch between 12-hour and 24-hourtime formats. 7.TouchSelectdateformatto select howyouwant the dateto be displayed. Configuring Phone Settings On the Home screen, touch ::: > Settings to configure your phone is using date and time settings automaticaly provided by the network, you cannot set the date, time, and time zone manually 1. Setting...
User Guide
Page 97
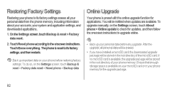
... reset > Reset phone > Backup data Online Upgrade Your phone is available on the Settings screen, touch About phone> Onlineupdateto check for the upgrade package. 92 Restoring Factory Settings Restoring your phone to its factory settings, andthenrestarts. on your phone before any upgrade. if no microSD cardis available,the upgrade package will be stored in your phone memory. Touch Erase everything. Ensure that enough storage space is preset with the online upgrade function for applications.Youwillbenotifiedwhenupdatesare available.To upgrade manualty, on your microSD card...
... reset > Reset phone > Backup data Online Upgrade Your phone is available on the Settings screen, touch About phone> Onlineupdateto check for the upgrade package. 92 Restoring Factory Settings Restoring your phone to its factory settings, andthenrestarts. on your phone before any upgrade. if no microSD cardis available,the upgrade package will be stored in your phone memory. Touch Erase everything. Ensure that enough storage space is preset with the online upgrade function for applications.Youwillbenotifiedwhenupdatesare available.To upgrade manualty, on your microSD card...
User Guide
Page 98
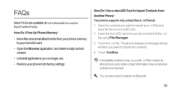
Touch the .vcf file. Your phone supports only contact files in .vcfformat. 1 Save the contacts you want to import as a .vcf file and save the file to a microSD card 2 Insert the microSD card into your phone to its factory settings. You can also import contacts via Bluetooth. 93 and certain contact information may occur with .vcf files created by other phones. The phone displays a message asking whether you want to import the contacts. 4 Touch Confirm fi) Compatibility problems may...
Touch the .vcf file. Your phone supports only contact files in .vcfformat. 1 Save the contacts you want to import as a .vcf file and save the file to a microSD card 2 Insert the microSD card into your phone to its factory settings. You can also import contacts via Bluetooth. 93 and certain contact information may occur with .vcf files created by other phones. The phone displays a message asking whether you want to import the contacts. 4 Touch Confirm fi) Compatibility problems may...

User Guide
Page 99
... screen Function? On the Home screen, touch C) > Settings > Display, and then clear the Auto-rotate screen check box. Disconnect your phone to the PC. 4 Visit install HiSuite on the PC to download and 5 Open HiSuite and follow the instructions to set as the ringtone, andthen choose Set as a CallRingtone? HowDo I UseHiSuite to set a screen unlock pattern. 94 Your phone supports only contact files in .vcfformat. 1 Save a vcf file to a PC 2 Touch so > Settings >Developer options >USB debugging. 3 Use a USB cable to connect your phone...
... screen Function? On the Home screen, touch C) > Settings > Display, and then clear the Auto-rotate screen check box. Disconnect your phone to the PC. 4 Visit install HiSuite on the PC to download and 5 Open HiSuite and follow the instructions to set as the ringtone, andthen choose Set as a CallRingtone? HowDo I UseHiSuite to set a screen unlock pattern. 94 Your phone supports only contact files in .vcfformat. 1 Save a vcf file to a PC 2 Touch so > Settings >Developer options >USB debugging. 3 Use a USB cable to connect your phone...
User Guide
Page 116
... an Email 55 Switching Between Text Input Methods 34 Searching for Places of Interest 62 Switching to the Advanced Panel 83 Security Guard 59 Taking a Photo 65 Sending a Message 39 third-party software statement 100 Sending an Email 54 Touchscreen Actions 11 Setting a Home Page 61 trademarks 100 Setting a Screen Unlock Pattern 90 Transferring a File via Bluetooth 50 Setting an Event Reminder 80 Turning On Bluetooth 49 Setting Notifications for New Instant Messages 42 Turning On Mobile Data Services 43
... an Email 55 Switching Between Text Input Methods 34 Searching for Places of Interest 62 Switching to the Advanced Panel 83 Security Guard 59 Taking a Photo 65 Sending a Message 39 third-party software statement 100 Sending an Email 54 Touchscreen Actions 11 Setting a Home Page 61 trademarks 100 Setting a Screen Unlock Pattern 90 Transferring a File via Bluetooth 50 Setting an Event Reminder 80 Turning On Bluetooth 49 Setting Notifications for New Instant Messages 42 Turning On Mobile Data Services 43


